In this age of digital photography where literally everything is automated, analog and alternative processes are making a strong come back. The skill it takes to make the “perfect” print and the random unpredictable beauty they can render has become an obsession for many artists, including myself.
After shooting and developing film for years I needed a new challenge and started experimenting with in-camera cyanotypes getting great and surreal results, but the 20 minute to an hour exposures plus being only sensitive to ultraviolet light was too limiting for me. Looking for another light sensitive material to try in camera I stumbled on others experimenting with darkroom paper. I was intrigued because it was much faster than cyanotype at 6 ISO. Don’t laugh, 6 is extra slow but outdoors in bright sun it can be handheld at 1/60 sec f5.6. I dove in feet first and bought a ten pack of 8×10 Ilford Multigrade pearl from my local photo shop which all the images in this review were shot on.
This leads to the first advantage of shooting paper in camera, the price. That ten pack was $9.00 USD. I cut each sheet into 12 sections, nine 6.5×6.5 squares for my Rollei and four 6.5x5mm rectangles for my Mamiya M645, that totals 120 images in all for not much more than the price of one roll of medium format film! Sounds perfect doesn’t it? Why shoot film at all? Hold that thought as we will compare the benefits and shortcomings of paper later in this article.
What is darkroom paper?
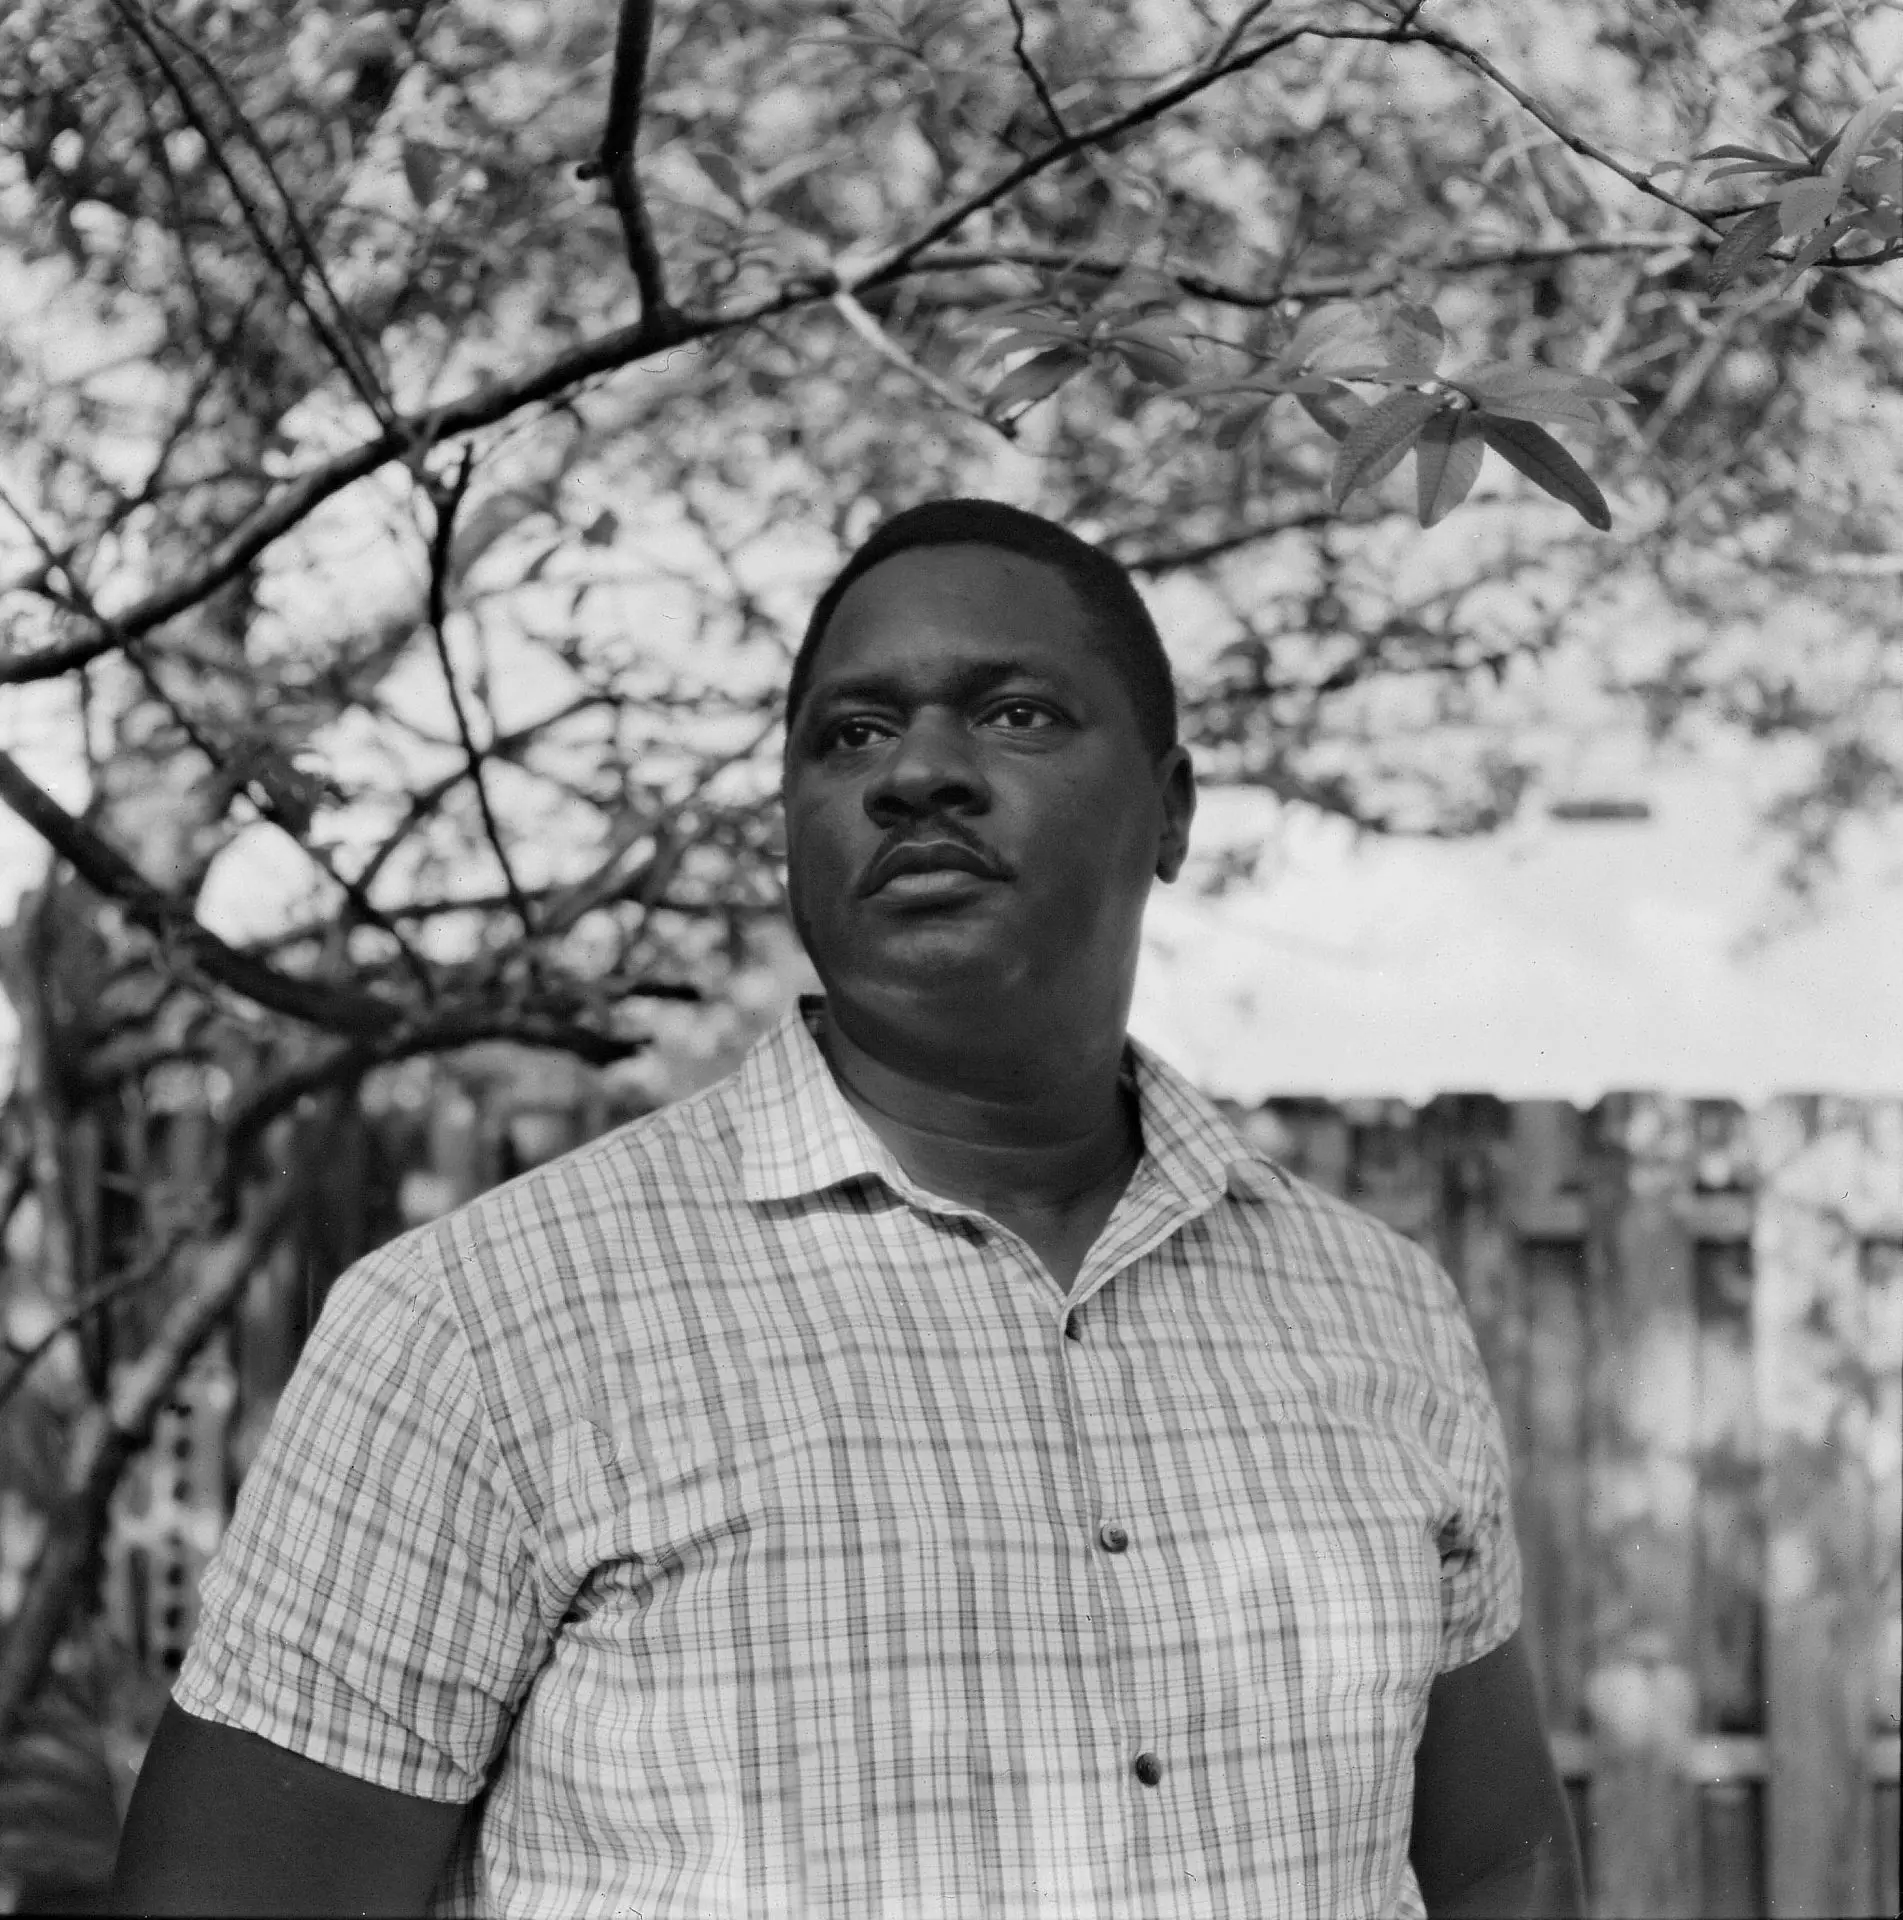
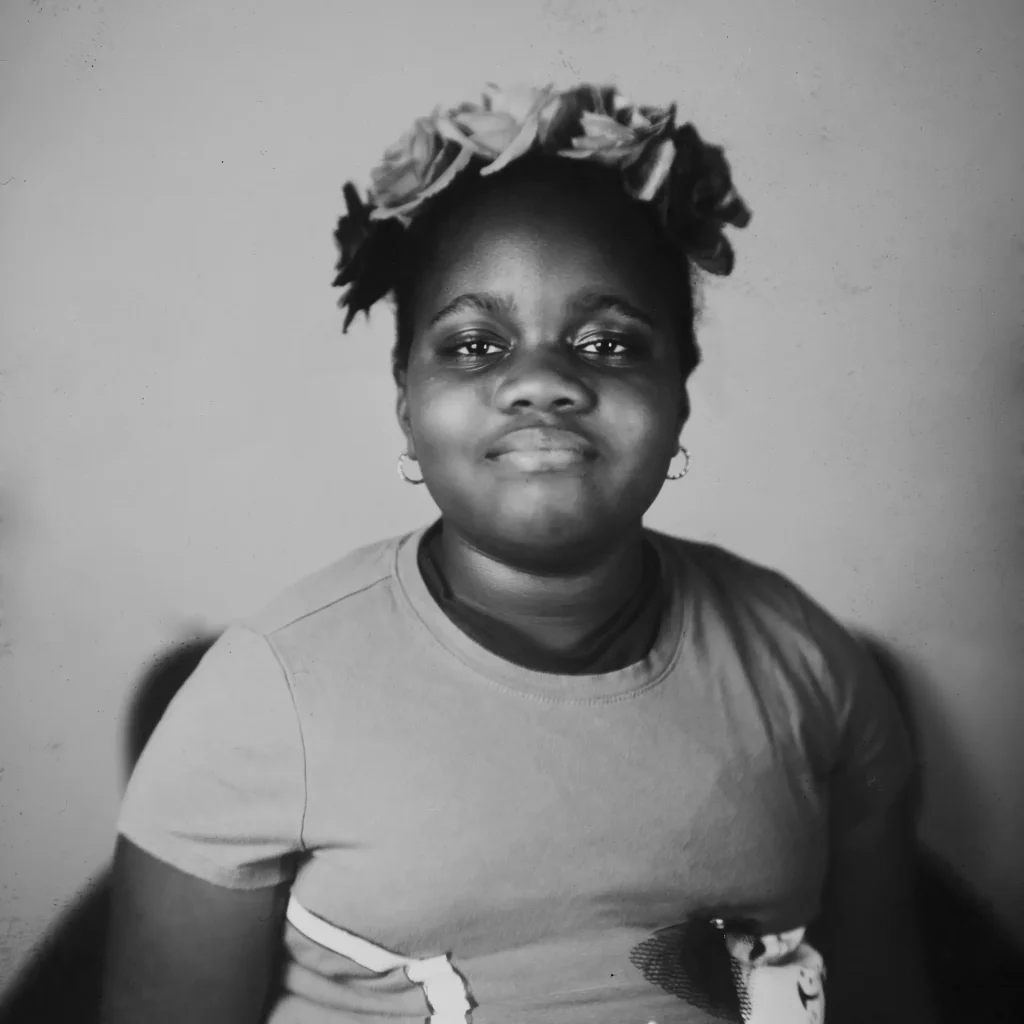
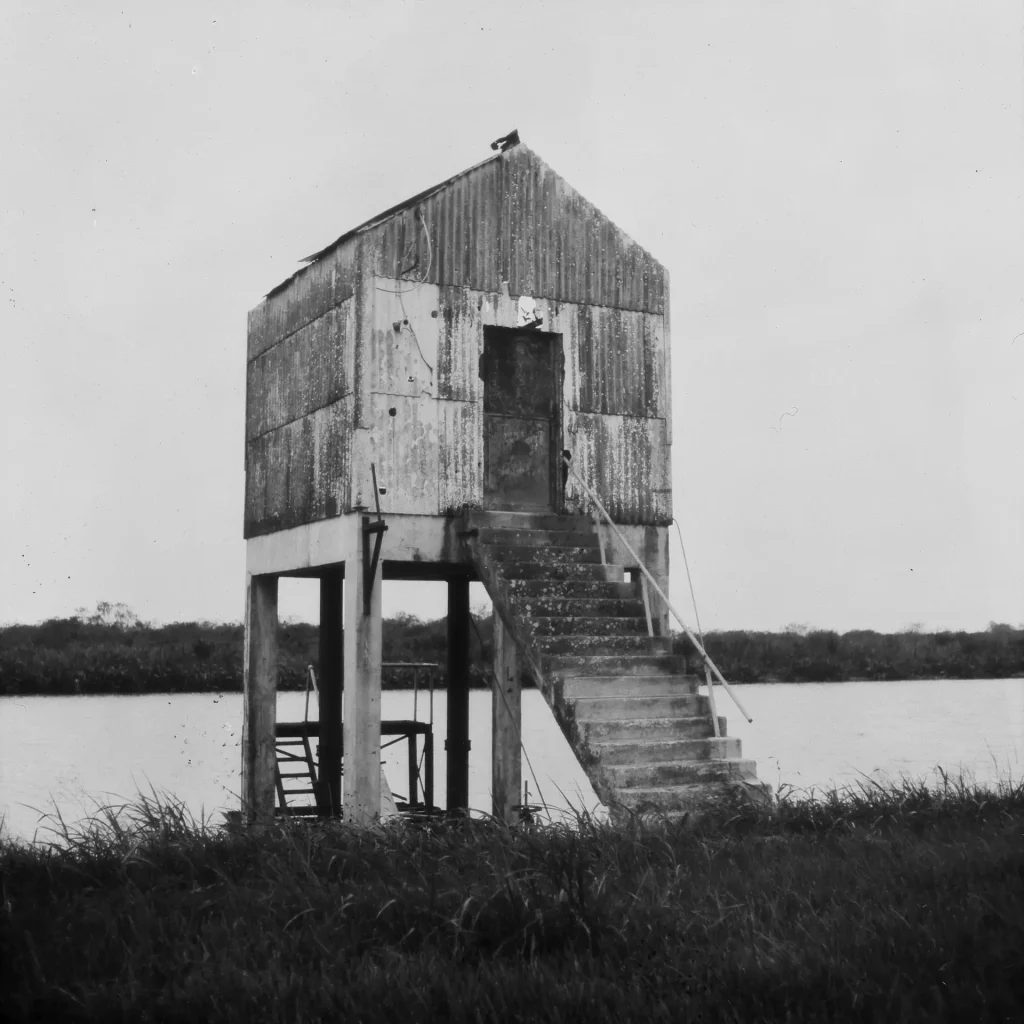
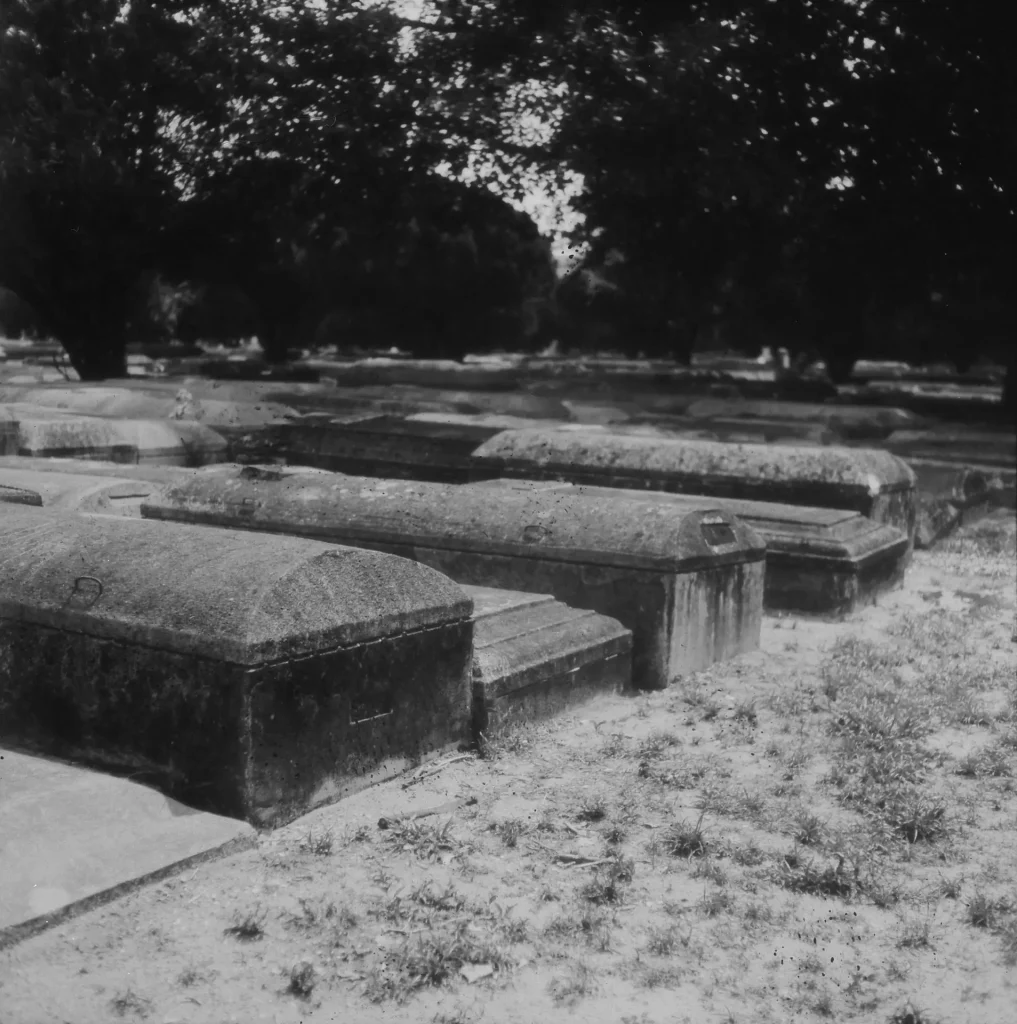
Before we go further we have to recognize that photographic paper was not designed to be used in cameras. It is meant to be used in a darkroom by having an image from a film negative projected onto it through an enlarger which forms a positive image on the paper. It is also not sensitive to wavelengths longer than 600nm which allow it to be safely handled under red or orange safelights in the darkroom. Although this paper is a black and white medium, not being sensitive to these “colors” shifts the tones of the images produced and things that are naturally red become very dark or even black and gives a vintage look almost like photos from the turn of the century.
The technical side, how to properly use darkroom paper in camera
So how do we prepare the paper to use in a camera? here are the items you will need.
- Darkroom paper
- Red safelight
- pencil or pen, scissors and a ruler
- A room that can be made completely dark.
- Your camera
- A dark bag is highly recommended so you can work in the field and not have to return to your darkroom after each shot to swap sheets.
Measuring
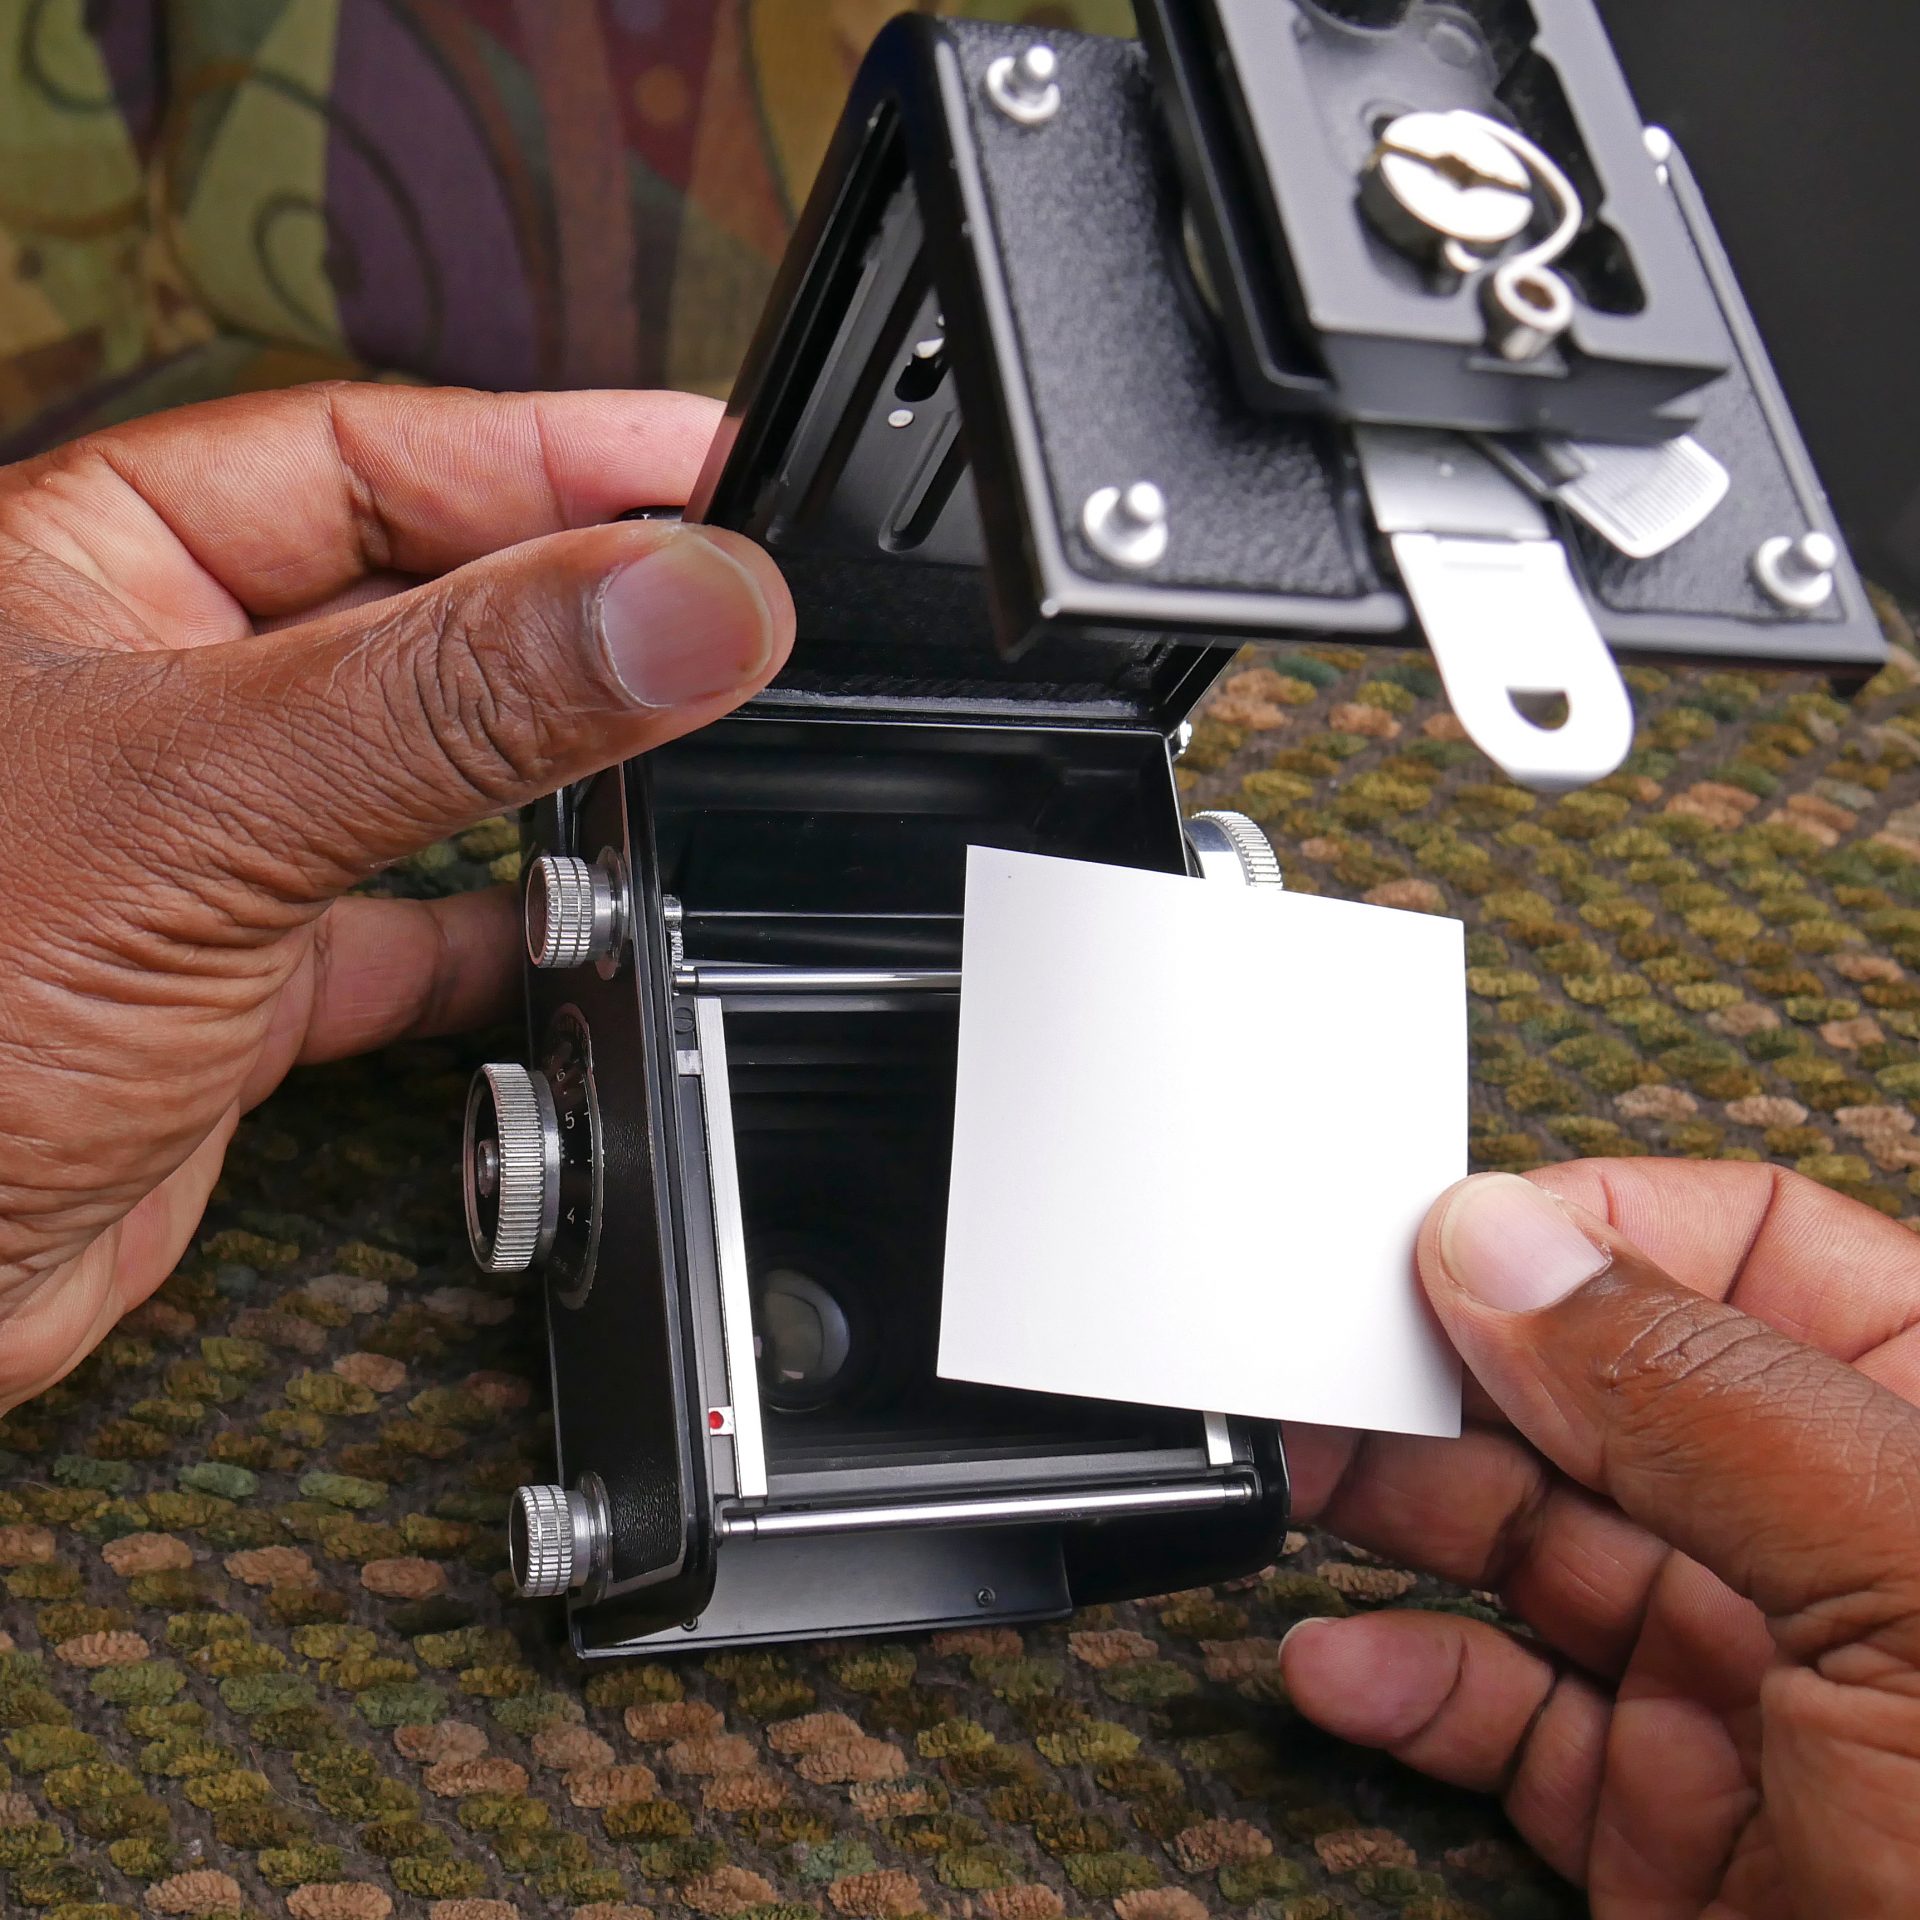
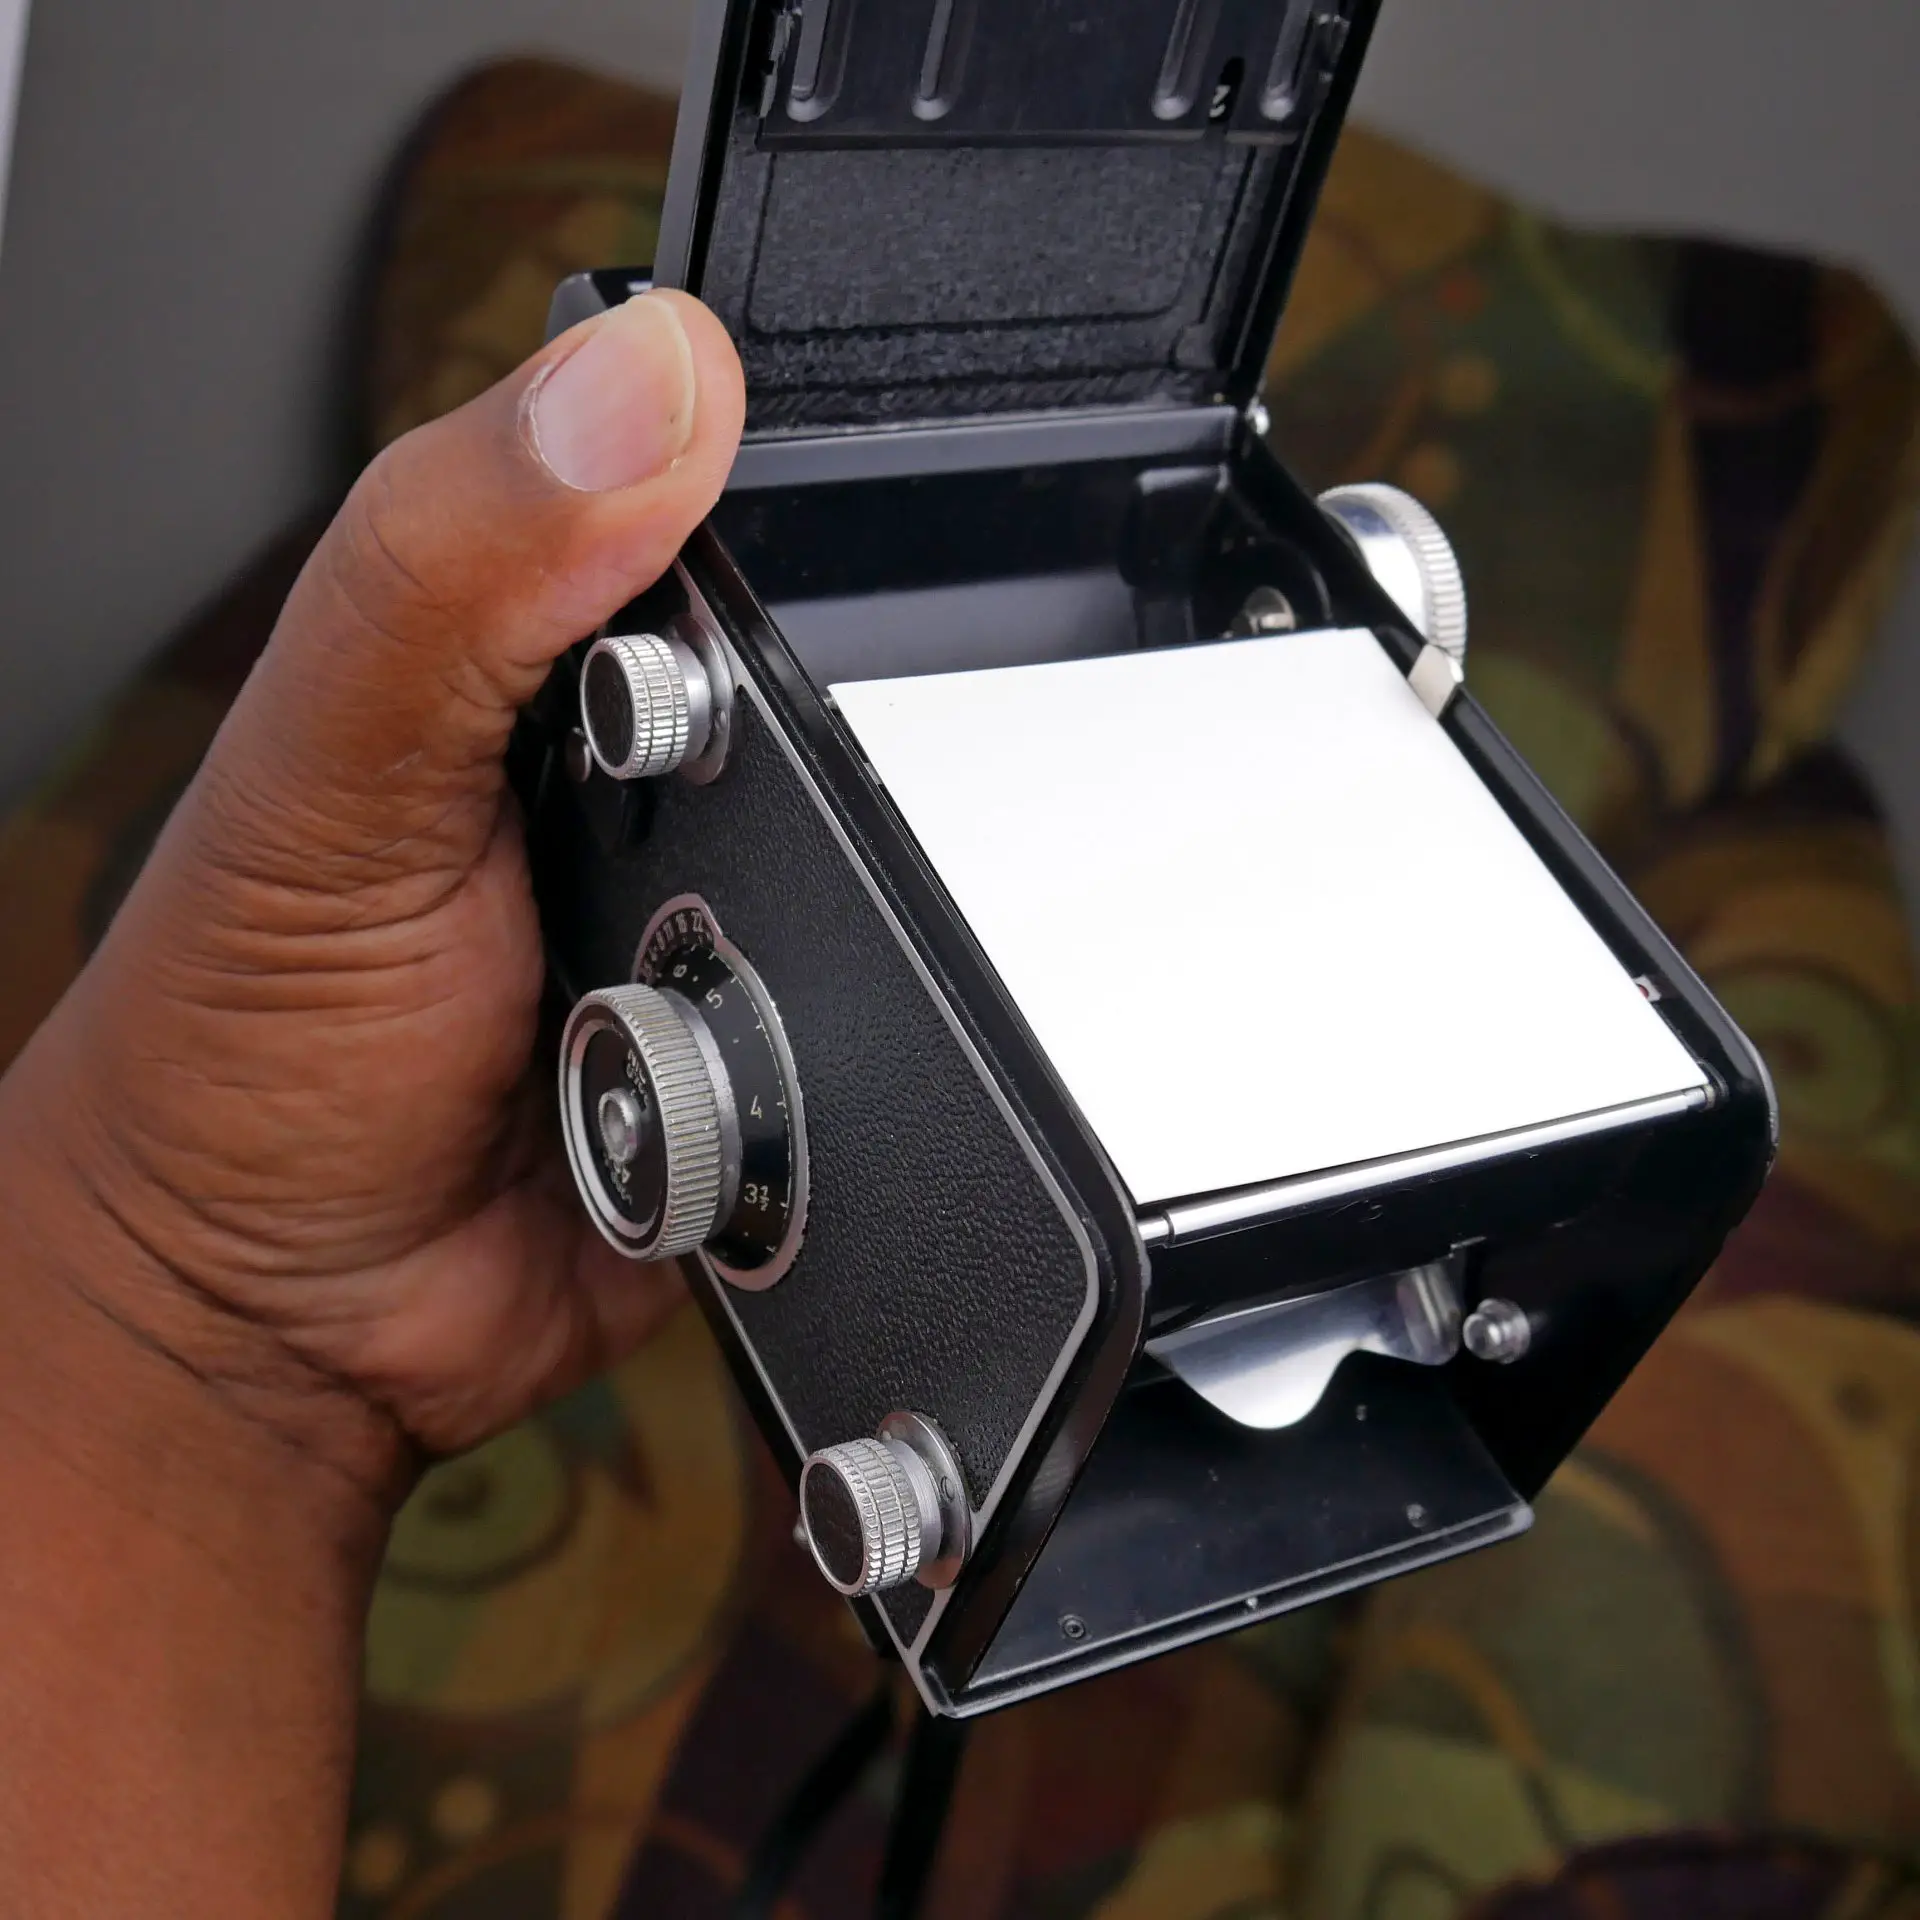
First take a centimeter ruler and measure your cameras film exposure area. My Rolleicord takes 6x6cm images but you don’t want to cut your paper the exact size because it will fall into the film chamber, for that reason I cut my paper 6.5×6.5cm making it slightly larger and giving it a “ledge” to rest in the camera bay as shown in the photo below, this also gives the images a nice border.
Cutting
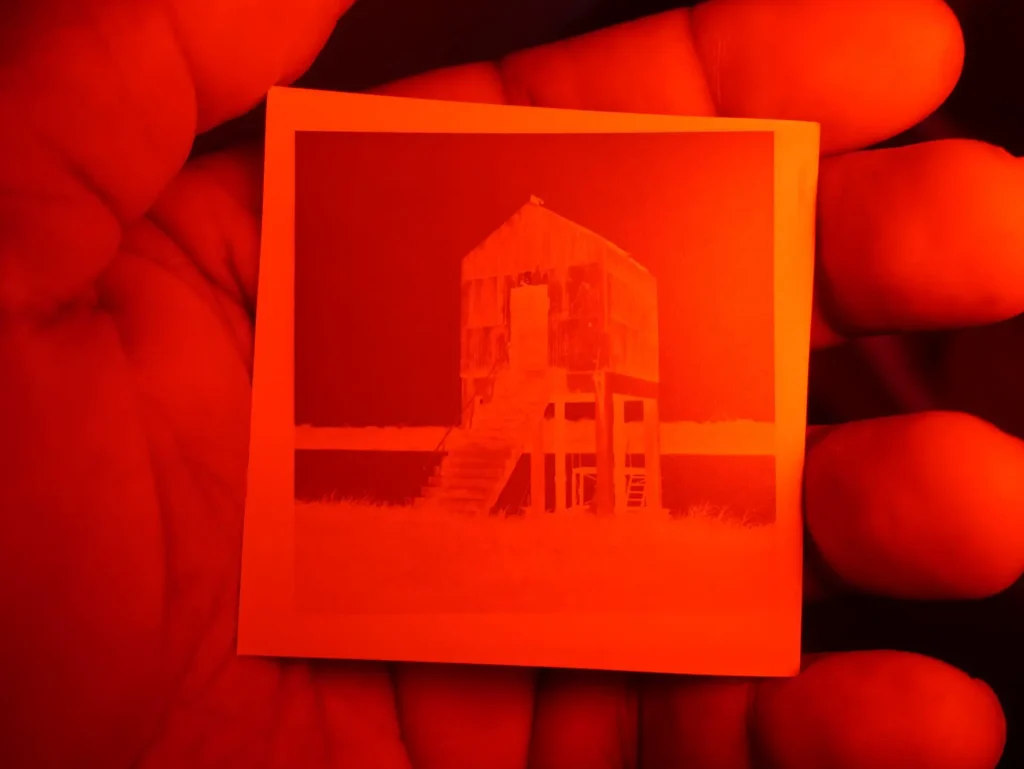
You will need a pure red bulb or light, I use an RGB LED light which I set to its red setting. Now find a dark room or closet to bring all your supplies in and turn on the red light. If there are windows they must be completely blacked out, a smart thing to do is wait till night to do your paper cutting in case light seeps in from outside.
Use a ruler and a pen to draw out a grid on the paper the exact dimensions you need for your particular camera, cut one section first and place in the camera bay to make sure its the right fit before cutting the rest of the sections. It’s a good idea to trim the top right corner of each paper with the emulsion side facing away from you to be able to feel for the correct orientation, the emulsion side is shiny but sometimes it’s hard to judge in a dark bag.
Place this sheet in the camera bay with the emulsion side facing the lens making sure it doesn’t shift as you close the back door of the camera, the pressure plate will hold it securely in place. If you will be changing sheets in the field It’s important to have two light tight containers in your changing bag, one for unused sheets and another for exposed ones.
Accurate Exposures
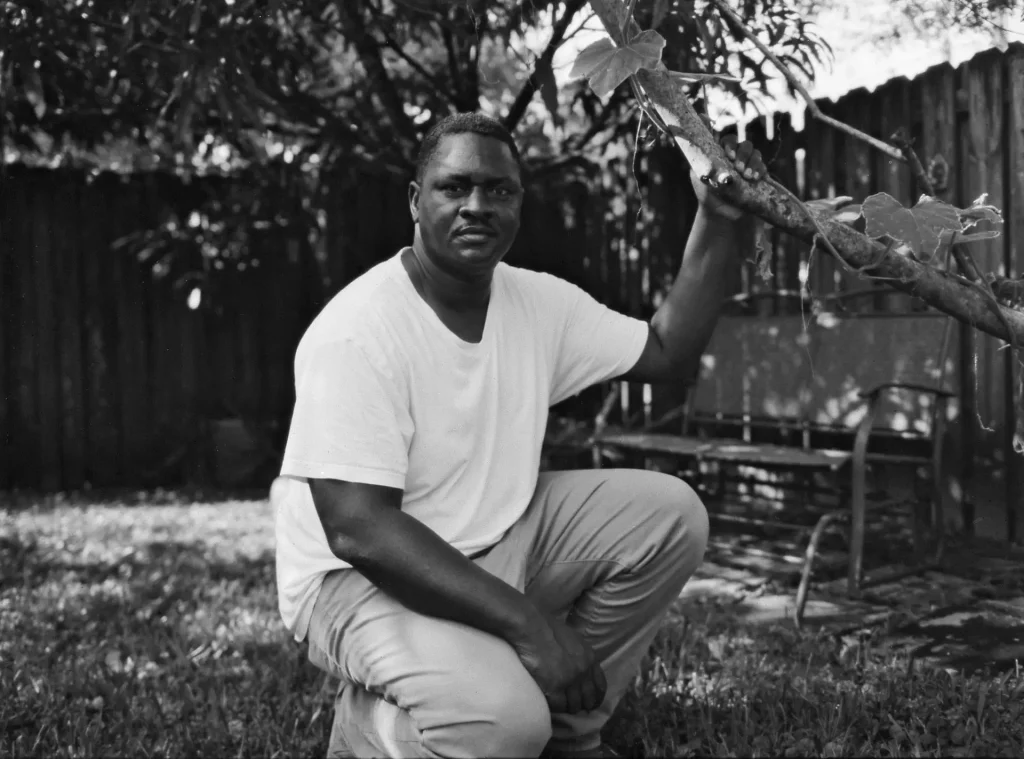
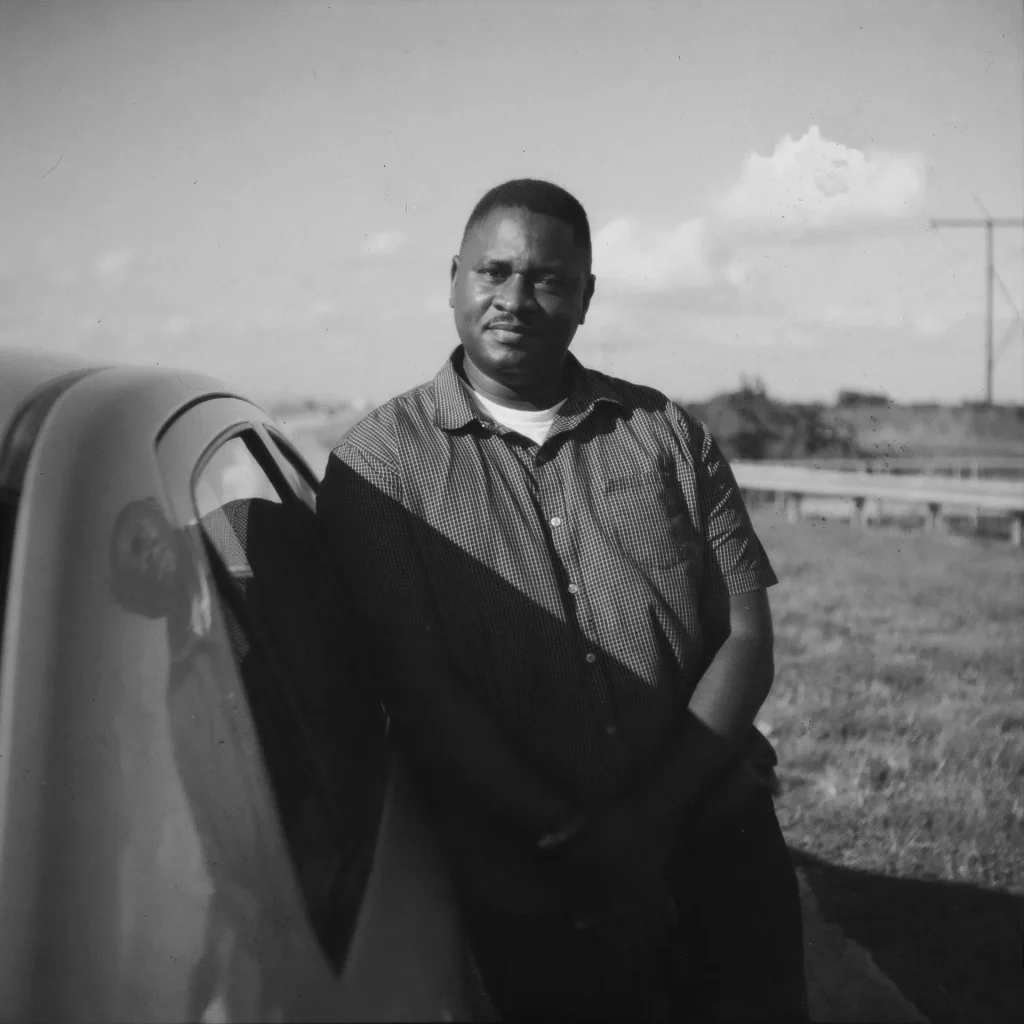
So why doesn’t everyone shoot paper in camera instead of film? I learned fast that paper doesn’t behave the same as film and its far less forgiving. Ironically this is what I liked about it from the start – finally the challenge I was looking for. First of all paper is naturally higher contrast, so much so that if you shoot a portrait in direct sunny conditions the light side of your subject may be blown out with the shadow side being very dark.
I compare getting accurate exposure on paper similar to slide film, there’s not much room for error because it doesn’t have the dynamic range of a good B&W film which you can overexpose almost to the point of recklessness and still retain some detail in the highlights and shadows. For this reason I wouldn’t recommend beginning photography students start learning on paper. Also when metering it’s especially important to consider which part of the scene you will prioritize, I usually meter for the main subject such as the average lighting on a person’s face, or if its a landscape I will point the meter slightly toward the ground and this works well.
My favorite part, the gear
Which cameras will work with paper negatives? almost any, but some are better suited, for example you can use a 35mm but I recommend larger formats as the paper negative is not as sharp as film and the small negative will limit the detail. Ideally many photographers choose larger formats such as 4×5, 5×7 or 8×10 as these provide superior resolution when scanning or contact printing. Also because of the low ISO of 6 you will be using slower shutter speeds, sometimes my indoor portraits can be as long as 1 second so make sure your camera has accurate slower speeds.
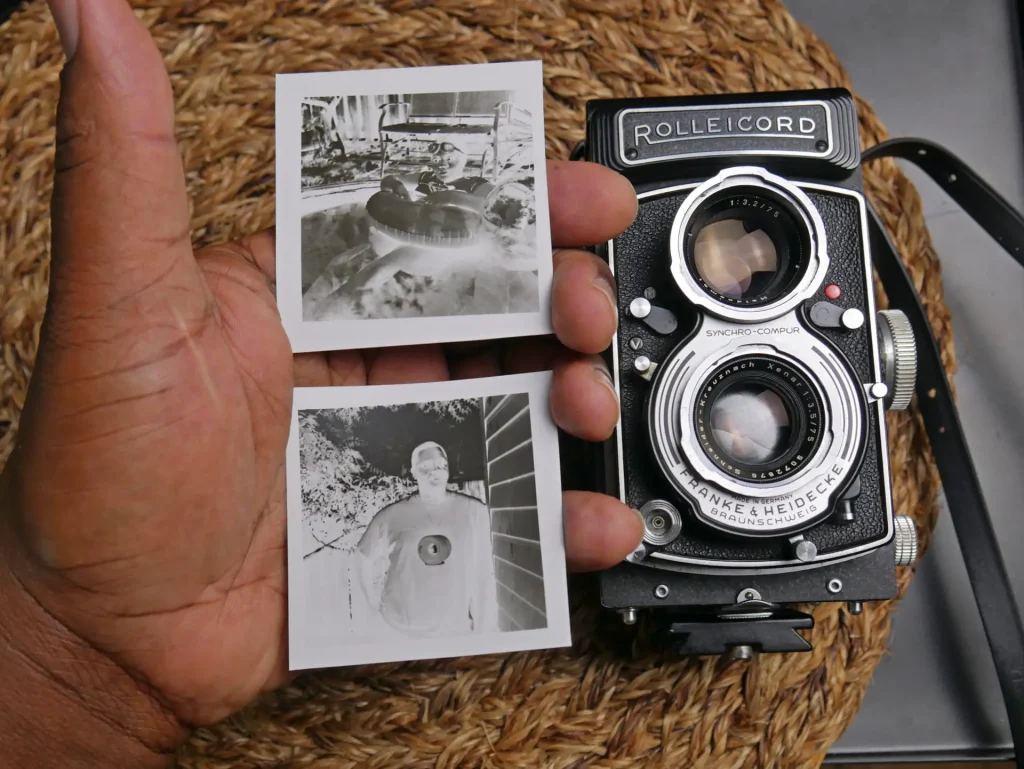
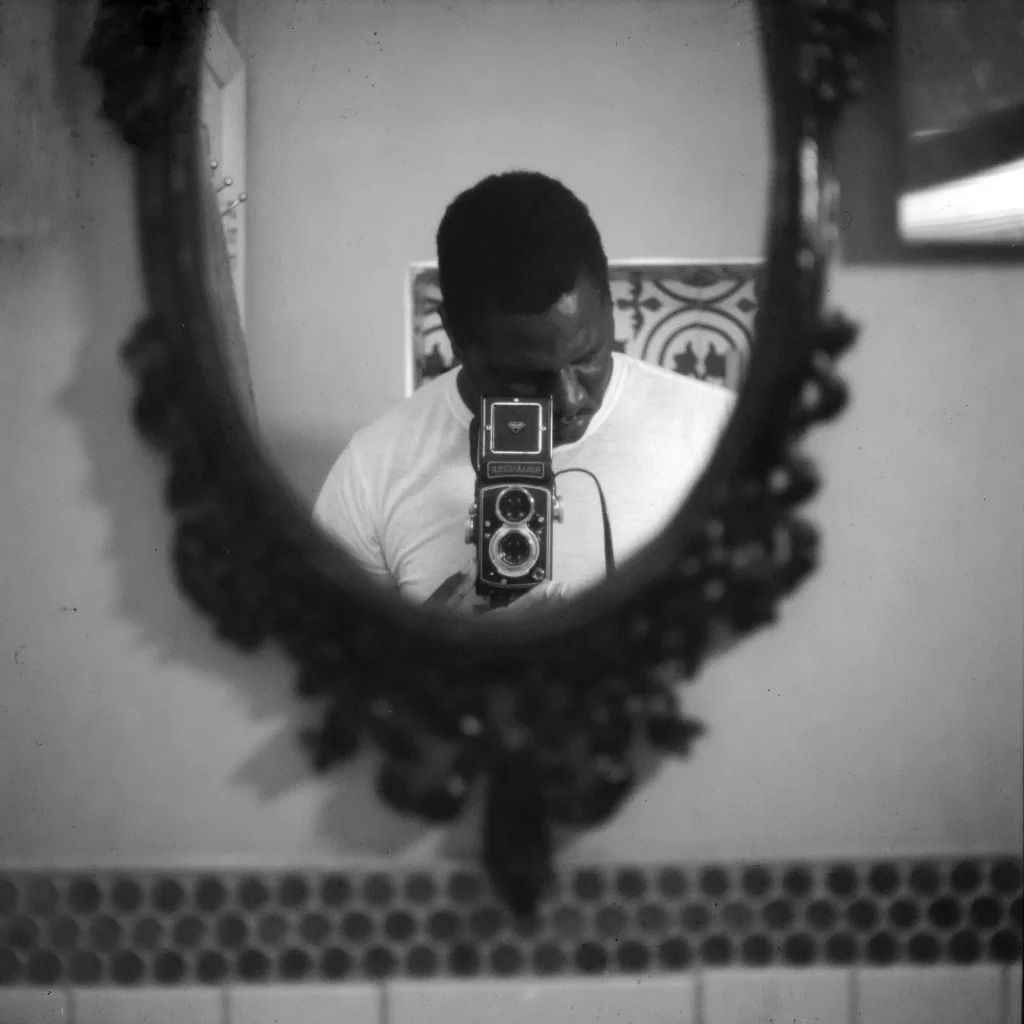
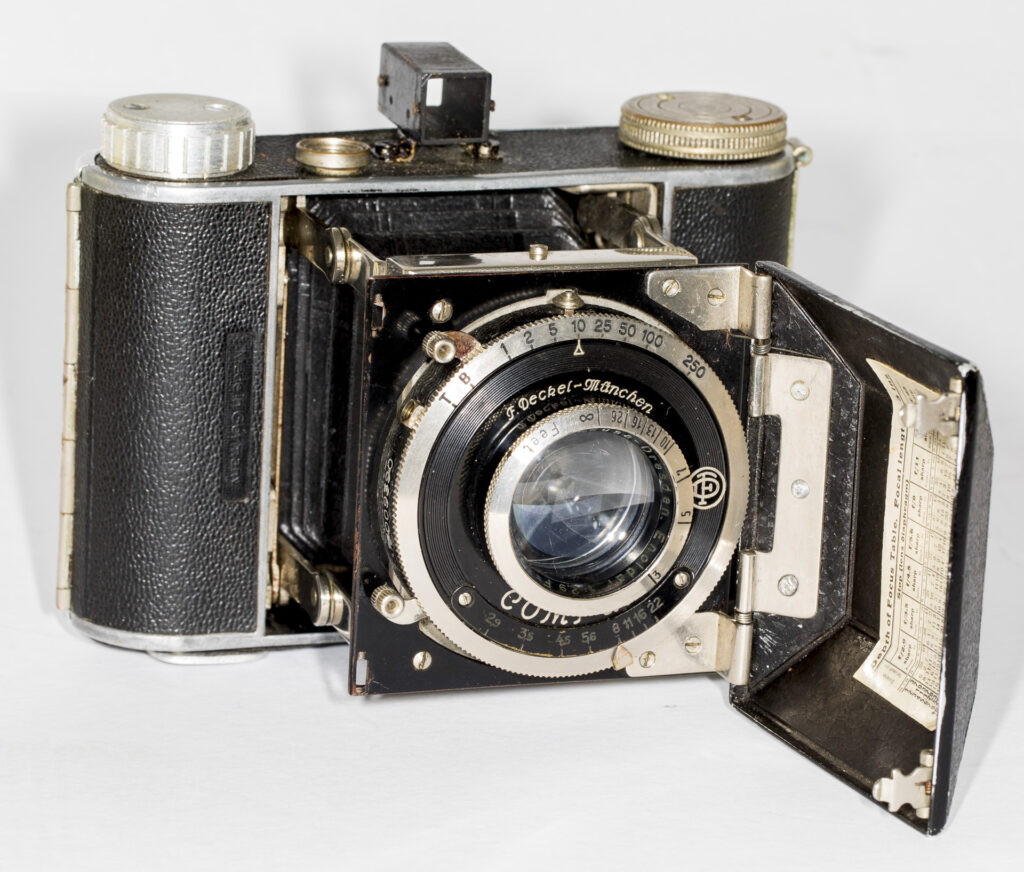
I use medium format because it’s what I have readily available and it’s a good compromise between quality and the sheer number of prints I can go through in the learning process, Keep in mind you will be doing lots of experimentation which if you were shooting film could get expensive. My main camera, the Rolleicord, is ideal as it has a cable release jack for longer exposures as well as a self timer for when I do my many self portraits. Most importantly your camera needs to have the ability to cock and fire the shutter when there is no film in it as some cameras won’t allow you to wind and cock the shutter if it doesn’t detect film in the chamber. My cameras have multi exposure switches that makes this possible. Whichever camera you choose make sure it’s one you enjoy because half the pleasure of analog photography comes from using these vintage works of art.
The cheat sheet
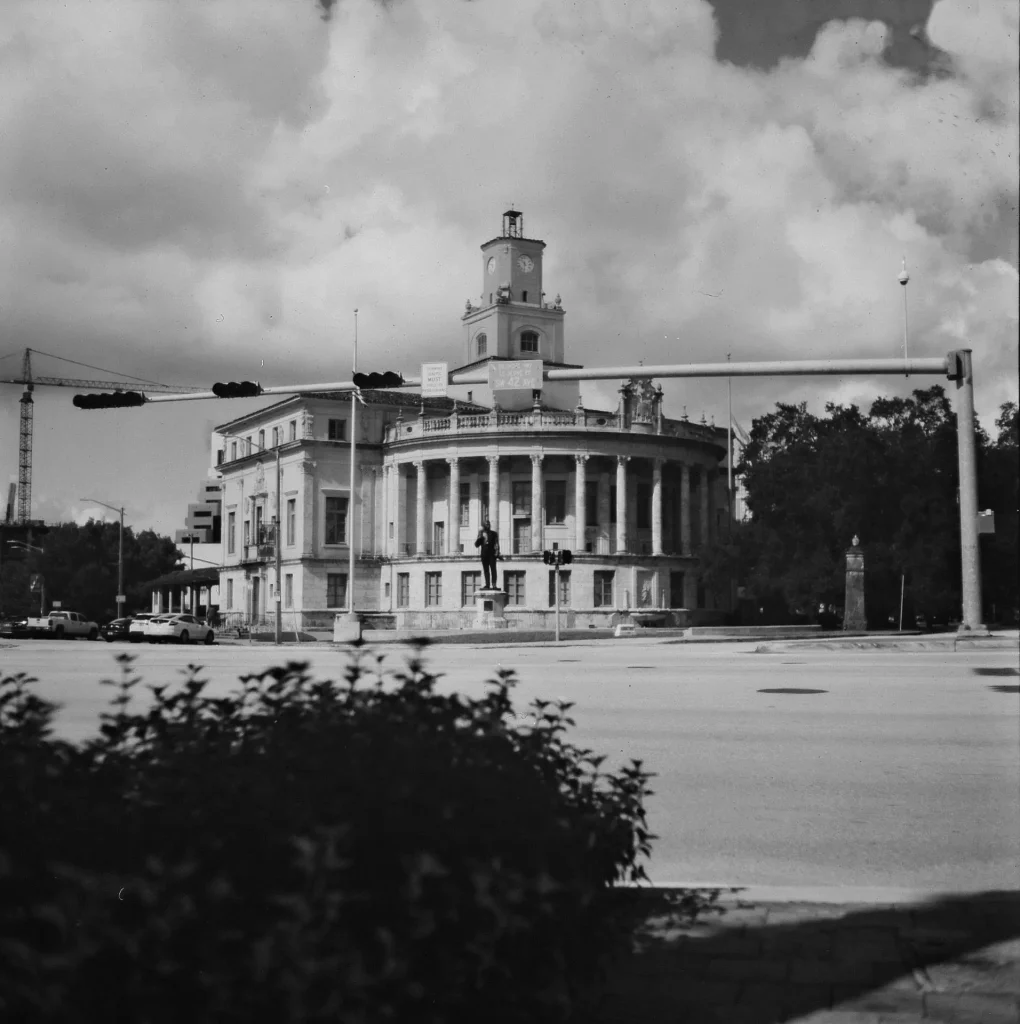
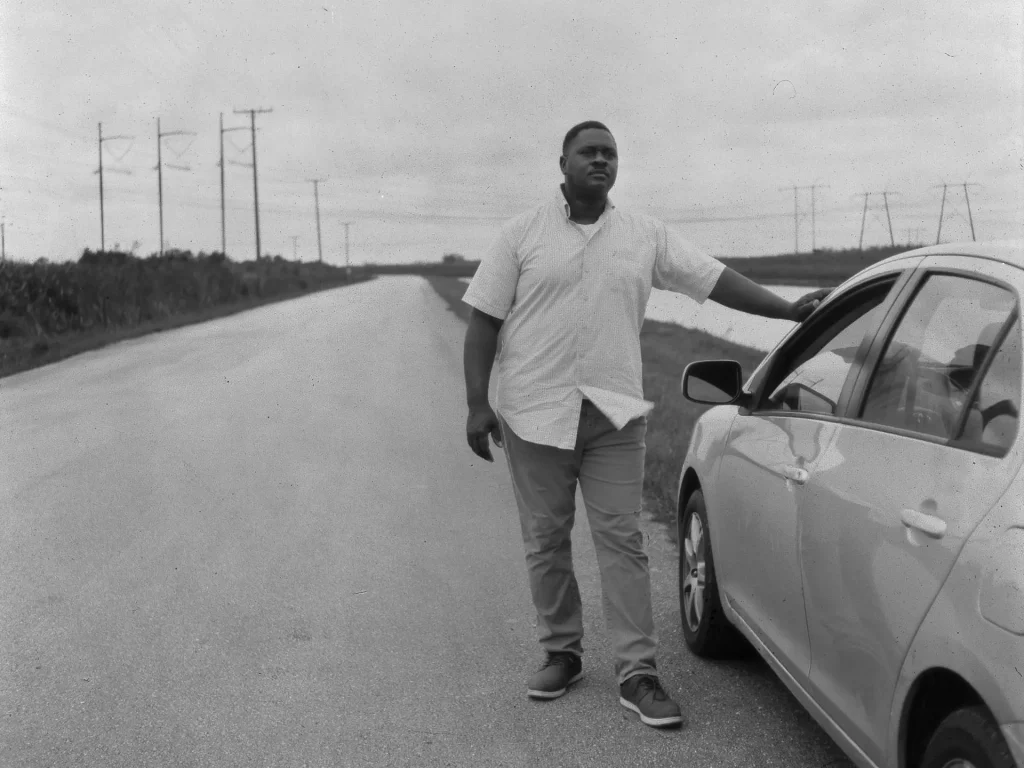
What are some tips and tricks I’ve found to help get better results? We know that colored filters bring different tones to the “colors” in BW images so I experimented with using a light yellow filter and found it helps retain contrast between the clouds and the sky which normally would be almost completely white. It can also bring out more separation of tones in clothing with certain patterns. On the other hand that yellow filter lightens vegetation, sometimes making plants look unnatural so as with most photography compromises must be made. I have not experimented with other filters as yet but maybe there are scenarios where other colors can be of benefit.
Another very important tip is take notes of your camera settings for each exposure, when I forget to do that I usually have several great images I wish I could remember how to duplicate, it’s also important to be able to include your settings when posting images online.
I have to develop the paper myself?? Yes you can!
So you’ve spent a day shooting and your dark bag is full of world class exposed sheets, what next? how do you develop them? Developing is a broad subject but I will keep it simple here. It takes three chemical baths, Developer, stop bath and fixer.
Let’s get started:
1) Go into your darkroom and turn on the red light. For a developer I use Rodinal, it’s the oldest developer and is actually made for film but it works perfectly well with paper. It’s a concentrated developer and I dilute it 1/50 in room temperature water but you can dilute it more or less, higher concentrations simply develop faster. Place your sheet of paper in a container of developing solution, I use about 80ml in a small container, slowly agitate the container in a circular motion and you will see your image start to form like magic, it usually takes less than 60 seconds for the image to fully form and stop getting darker but follow your developers directions.
2) Stop bath is basically an acidic solution you dilute in water that stops the developing process, you can buy it but I use a homemade solution of 5% vinegar diluted in water. remove your image from the developer and place it in the stop bath and agitate the same way for ten seconds or according to manufacturer instructions.
3) Fixer is the last chemical diluted in water that “fixes” the image onto the paper and makes it no longer light sensitive. Follow your fixers instructions but my fixer is dilution 1/4. Remove the paper from the stop bath and place in the fixer and agitate in the same way for one minute then rinse your images for two minutes and let air dry.
4) Finally once your images are dry the last thing to do is scan them, I use an Epson V600 scanner but you can also use a camera to take a photo of your negatives and import them into your editor to invert as a positive. It’s important to understand that your images will rarely come out of the scanner perfectly tuned, you will need to adjust the contrast, highlights and shadows as with any black and white image and this is the best way to learn how to tweak your shooting methods for better final prints. Like many of us you may also develop an obsession with making that perfect image, when you do, it will bring a satisfaction you probably never felt shooting other mediums such as film or digital.
The final leg
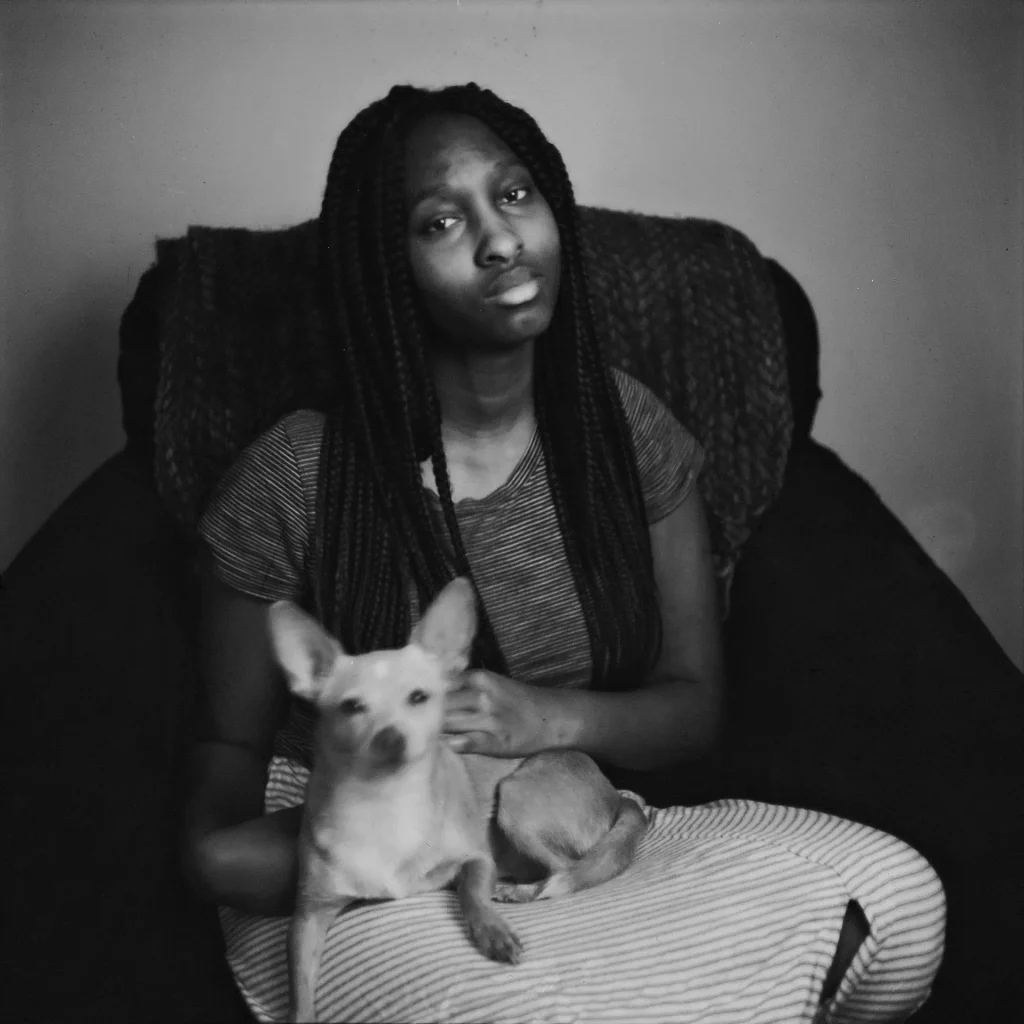
If your goal is to make an image you will be proud to print large and frame, paper will force you to use all the fundamentals of photography you learned in the beginning and some you forgot. How will you evenly light that darker side of your models face that wouldn’t have been a problem with films dynamic range? should you use a reflector or move the subject into the shade? From experience you learned when having dark clothes on a light skinned person sometimes both won’t come out perfectly exposed, will you ask the model to bring more neutral toned clothes, use a filter or will you simply use the high contrast artistically? These experiences shooting paper will not only be a lot of fun but will make you a more effective photographer and editor of film and digital.
My name is Aloy Anderson, I’m a photographer based in South Florida who also runs a photography oriented YouTube channel. For more information about my work and and ongoing experiments feel free to visit my other social media links below.
My Youtube Channel
My Flickr Photo Album
My Instagram
My Ilford Magazine Infrared Film Tutorial
Share this post:


Comments
Matthias Rabiller on Shooting Darkroom Paper In-Camera – a Beginner’s Guide – By Aloy Anderson
Comment posted: 13/11/2020
Comment posted: 13/11/2020
Michael J on Shooting Darkroom Paper In-Camera – a Beginner’s Guide – By Aloy Anderson
Comment posted: 13/11/2020
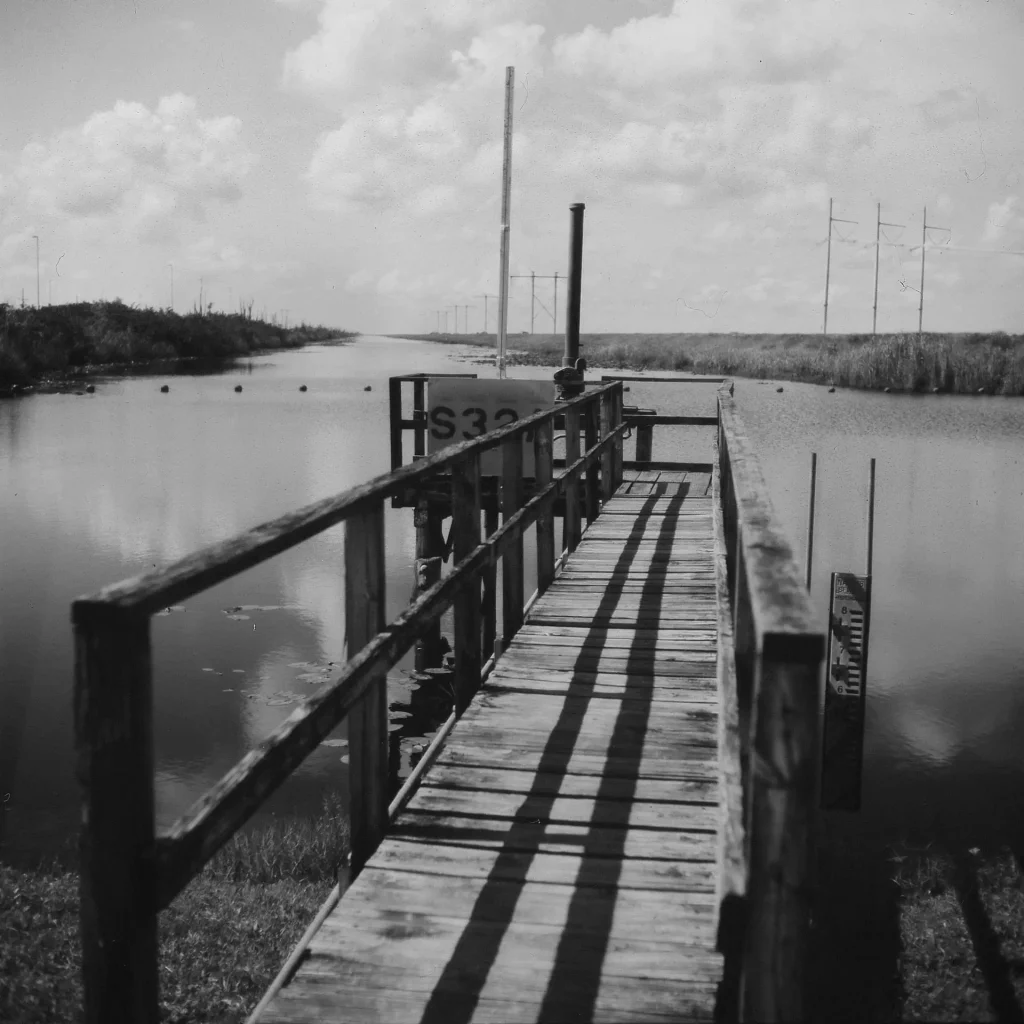
The photo of the water pumping house with the corrugated siding is particularly beautiful.
Comment posted: 13/11/2020
Jonathan Leavitt on Shooting Darkroom Paper In-Camera – a Beginner’s Guide – By Aloy Anderson
Comment posted: 13/11/2020
Comment posted: 13/11/2020
Comment posted: 13/11/2020
AZD on Shooting Darkroom Paper In-Camera – a Beginner’s Guide – By Aloy Anderson
Comment posted: 13/11/2020
Comment posted: 13/11/2020
Daniel Castelli on Shooting Darkroom Paper In-Camera – a Beginner’s Guide – By Aloy Anderson
Comment posted: 13/11/2020
When I first began teaching graphic arts & photography in 1977, we used the round Quaker Oat's paper containers (they had a paper lid, not plastic back then) or shoe boxes. They were loaded with a sheet of enlarging paper, and the 'aperture' was made with a sewing needle & a piece of aluminum foil. Just poked a tiny hole and covered it w/masking tape. Untape to expose and tape up again. The kids took to the 'cameras' like a duck to water.
You have refined the process and carried the concept to a whole new level! I can just imagine how much excitement there is when you make your portraits; the energy must be infectious (in a good way!) I hope you post more work! I'm heading over to your instagram page right now!
Comment posted: 13/11/2020
Alex Vye on Shooting Darkroom Paper In-Camera – a Beginner’s Guide – By Aloy Anderson
Comment posted: 13/11/2020
Comment posted: 13/11/2020
Aivaras on Shooting Darkroom Paper In-Camera – a Beginner’s Guide – By Aloy Anderson
Comment posted: 14/11/2020
Comment posted: 14/11/2020
Castelli Daniel on Shooting Darkroom Paper In-Camera – a Beginner’s Guide – By Aloy Anderson
Comment posted: 15/11/2020
Thank you for the kind comment! I’d urge people to visit your media sites...they will be treated to a great visual buffet!
Coffee? Sure! Toss in a cinnamon roll (no raisins!) and I’ll be there. Have a happy & healthy holiday season!
Dan
Johan Svensson on Shooting Darkroom Paper In-Camera – a Beginner’s Guide – By Aloy Anderson
Comment posted: 15/11/2020
If you look up Joe van cleef on youtube theres a lot of goodies for you! Videos about turning regular photo paper into positives! If i remember correct he does it with hydroperoxide! Take a look , a lot of nice diy photo stuff!
// Johan
Comment posted: 15/11/2020
Damion on Shooting Darkroom Paper In-Camera – a Beginner’s Guide – By Aloy Anderson
Comment posted: 09/12/2020
Comment posted: 09/12/2020
Chuck Willemsen on Shooting Darkroom Paper In-Camera – a Beginner’s Guide – By Aloy Anderson
Comment posted: 12/03/2021
https://www.facebook.com/groups/68142897748/user/1558614081
Frank on Shooting Darkroom Paper In-Camera – a Beginner’s Guide – By Aloy Anderson
Comment posted: 18/03/2021
Carol on Shooting Darkroom Paper In-Camera – a Beginner’s Guide – By Aloy Anderson
Comment posted: 27/09/2022