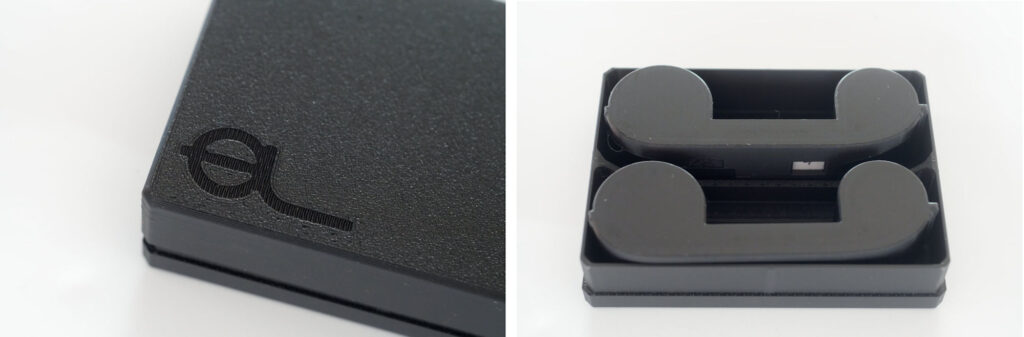
At the beginning of February, a representative of Ausgeknipst got in contact with me through the comments section of my ‘Perfecting the 110 re-load article’. Ausgeknipst are a company working out of Würzburg in Germany. They produce 3D-printed accessories, mainly aimed at analogue photographers.
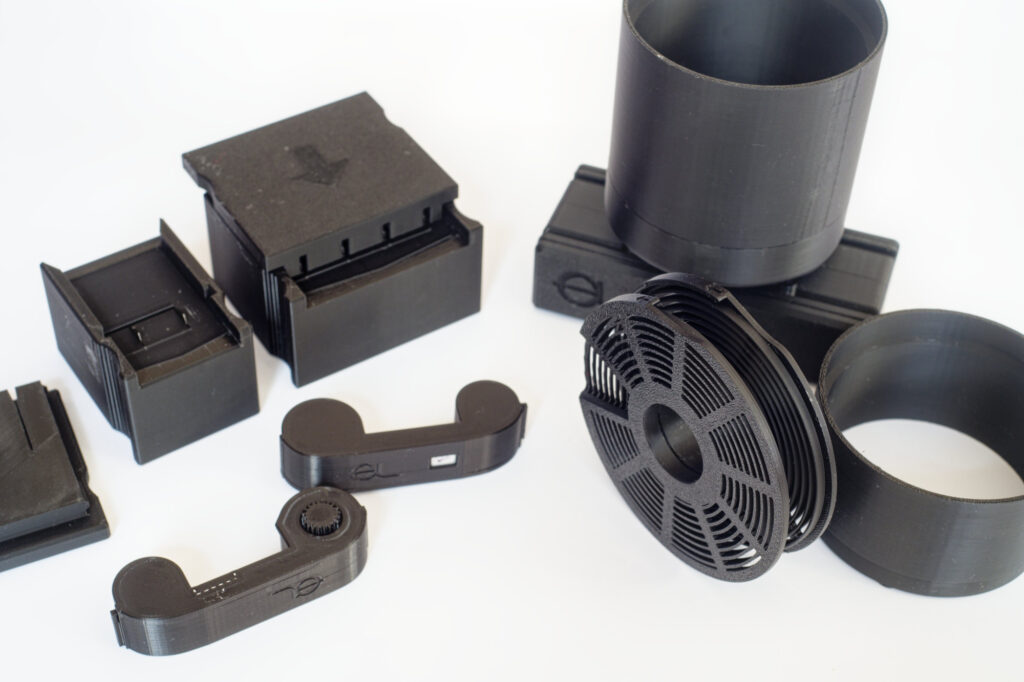
It seems that they had picked up on some of the 110 photography articles that have been published on 35mmc and have produced a set of 3D-printed accessories that support 110 and 16mm photography. They asked if I would give them feedback on their products. They ended up sending me an interesting selection of stuff from their 110 range, including:
- 16mm film cutters for 135 and 120 film
- Reusable 110 cartridges
- 16mm developing reels (compatible with Paterson tanks)
- Film copying accessories for digitising 16mm film using an interchangeable lens camera and macro lens
As well as giving them feedback, I did ask if they would be happy for me to review what they sent me on 35mmc.
Other than giving them feedback, I’m not involved with the company, and they have not influenced what I’ve written here. There may well be other similar products out there that are competitive with Ausgeknipst’s, but I hope that this review will show what the general capabilities of such 3D-printed accessories are.
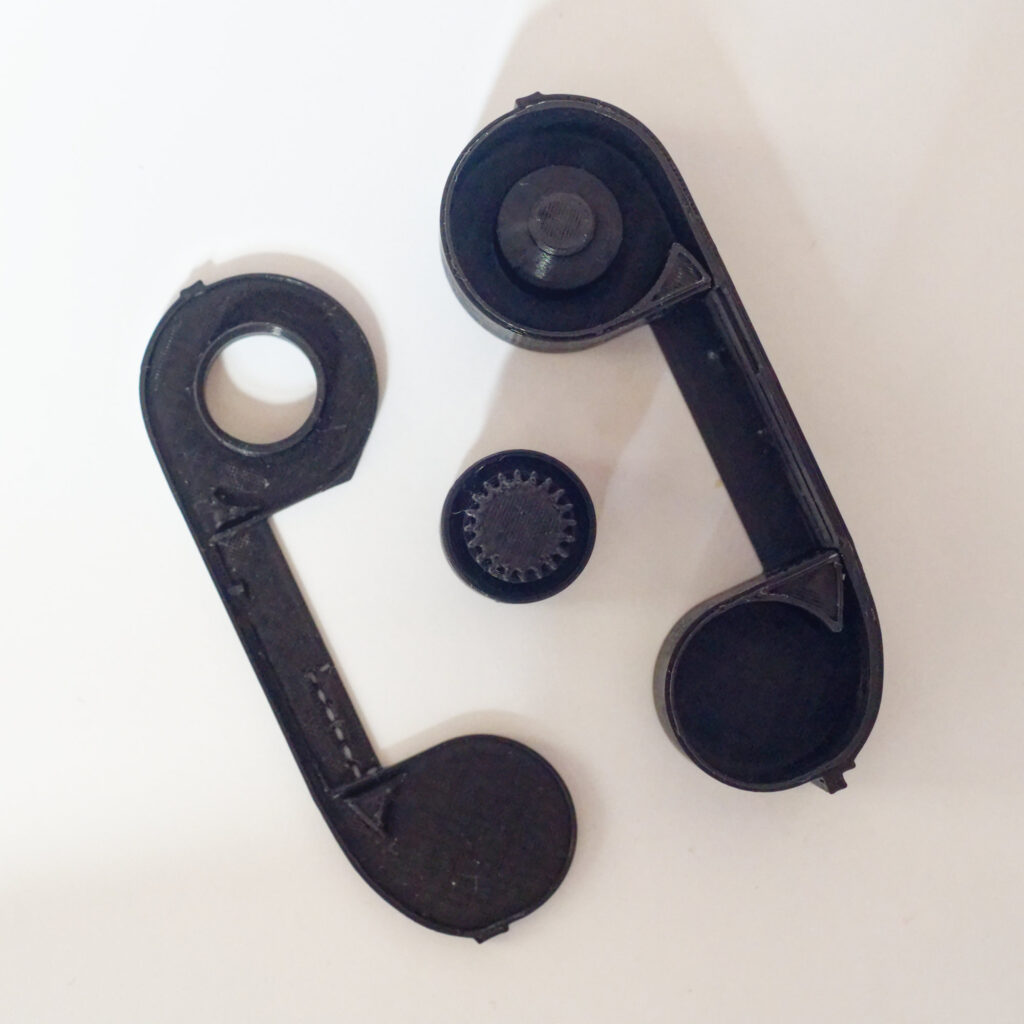
Film Cutters
I’m a total wuss when it comes to sharp things. I’m a long-term blood donor, but I still can’t watch the needle go into my arm. I tried cutting down commercial film to give 16mm unperforated strips, but my home-made efforts were less than successful, while the prospect of wielding blades sharp enough to cut through acetate film without being able to see where they are in relation to my skin makes my hair stand up… I ended up buying rolls of 16mm film and ‘featuring’ the perforations – other people (like Tony Warren) have more courage and made their own cutters..
Ausgeknipst produce two film cutters for 16mm. One is for 120 film (producing three strips from a roll), while the other cuts a single 16mm strip from the centre of a 135 roll.
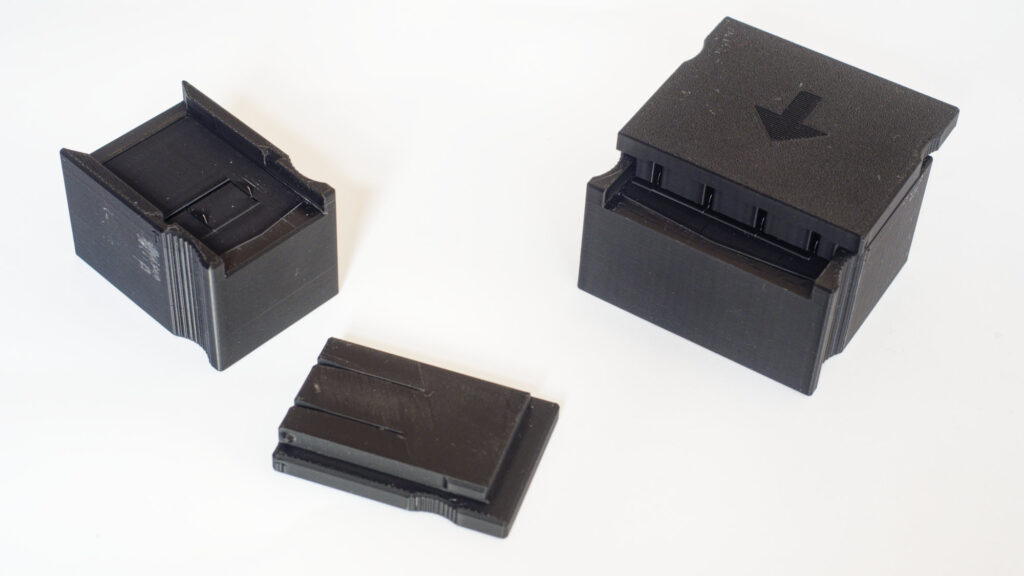
The cutters arrive with a big yellow label on the outside, warning of the presence of sharp blades inside. The actual blades used are the old double-edged safety-razor blades, which appear to be readily available and are relatively cheap. The cutter only exposes the last 10mm of one edge of each blade, so when one dulls, it should be possible to work through the other 3 ‘corners’ of each blade before needing to replace. As far as longevity and running costs are concerned, all looks good.
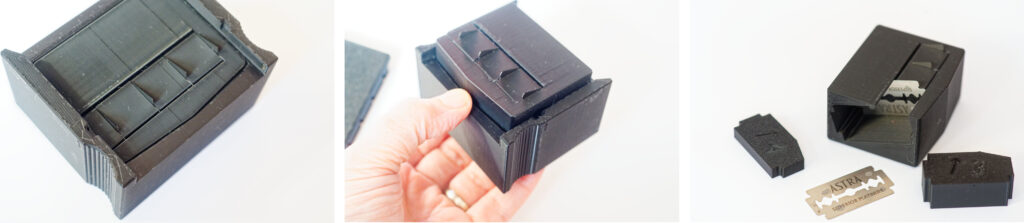
The blades are held in a block of plastic with spacers that keep the blades at the proper distance. I tended to position the film in daylight (with the majority of the film in the cassette or protected by the backing paper). After I’d put the sliding cover in place, I transferred everything into the dark bag before pulling the film through.
My dark bag is reasonably large (not one of those huge ones, but reasonably roomy), but I could have done with a bit more space. I would imagine that working in a dark room would be much easier. To get the combination of the film and backing paper through the 120 cutter requires a fair amount of pull (I wrapped the end of the film around an old 120 spool to give a decent grip). In the restricted space of the dark bag, I wasn’t able to pull the film through all in one go. Once the film is cut, you also need to be ready to sort out the relative confusion of three lengths of film and three lengths of backing paper (although with hindsight, the backing paper could be cut separately, outside the dark bag). The film obviously needs to go into a light-tight container before the lights go on/the dark bag is opened.
I found the 135 cutter far easier to work with, although the longer length did require four separate ‘pulls’ to produce the single 1.6-ish Meter length of unperforated 16mm film stock while working in my dark bag.
The ‘yield’ will vary between camera models, but a single strip of 16mm cut from 120 film gave me 21 exposures with my Pentax Auto 110.
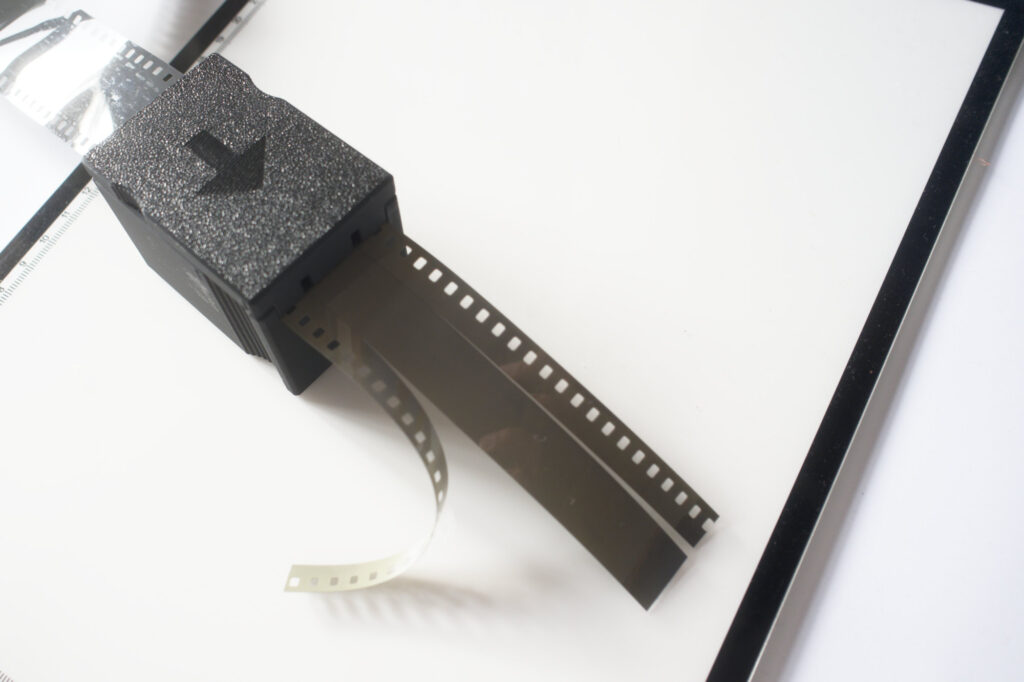
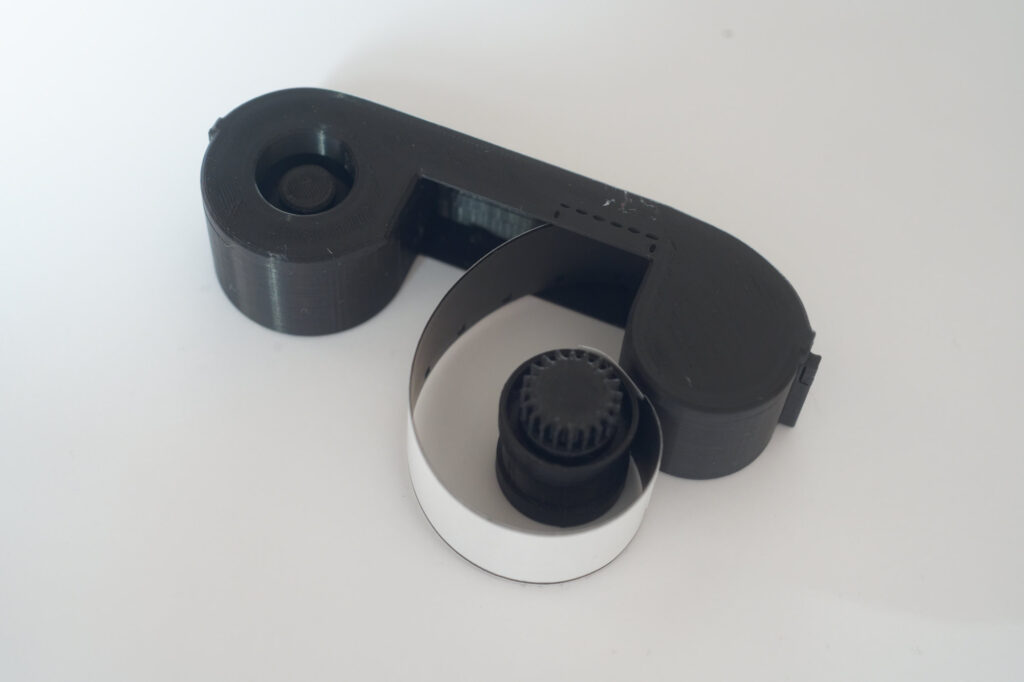
Film cartridges
Ausgeknipst do two ‘flavours’ of 110 cartridge, which their website (as of March 2026) suggests may have been influenced by earlier 110 reload posts on 35mmc from myself and Tony Warren.
One type is a straight replacement for the standard cartridge, with a window in the ‘bridge’ to view the numbers on light-proof backing paper (either cut down from 120 film or salvaged from a commercial roll of 110), while the other is totally enclosed for a length of 16mm film without a backing paper (similar to my Mk 1 converted cartridge from the previous article).
Now, while doing without the backing paper works well enough, and means that you can fit more film into a 110 cartridge, there are some downsides:
- The backing paper for 110 film does more than just protect from light. As the film is pulled along with the backing paper, there is very little movement between the surface of the film and the backing paper, while the outer surface of the backing paper is dragged against the inside of the cartridge. If you don’t have backing paper, the outer surface of the film is dragged against that surface and could pick up surface scratches, which was one of the reasons I lined my converted cartridge with a length of static backing paper. The 3D-printed surfaces do seem to be quite smooth, so this may not be a huge issue.
- If you don’t have visible backing paper, you get no indication that the film is being wound properly. You also don’t see how far through the film you are, or when you have reached the end of the film. I know Tony Warren caters for this by keeping count with a clicker in his pocket, but I don’t possess such diligence. What I’ve tended to do is to tape a short bit of a cocktail stick to the end of the film so that the camera will stop winding on when the end of the film is reached.
For these reasons, my own preference has gravitated towards using backing papers as per the original 110 design. I guess that, if you got the windowless cartridge and then wanted a windowed version, you could always just drill yourself a suitable hole in the back of the cartridge (although I stress I’ve not tried this).
Because the Pentax Auto 110 (my go-to camera for reloads) operates on two pulls of the wind-on, which don’t match the original 110 backing paper, I used a strip from a 120 film cut down to 16mm and marked 1cm increments on the white backing. This gives me an idea of how far through the film I am and how close I am to the finish.
Using some FP4 cut down from a 36 exposure 135 film gave me a single long strip of 16mm film. I used half of this (just under 80cm) at a time. This is OK for the length of backing paper I’d prepared and enabled me to fit the film and backing paper into the 110 cartridge. As the Pentax assumes normal film is ISO 80, the development will need to be ‘pulled’ by 2/3 of a stop. In the end, the half-strip of 135 film gave me 23 exposures – so you could probably get 40-45 shots off a complete roll..
Both types of Cartridge are really well made. They don’t have a partial cover over the take-up spool cog like the original cartridges, but they don’t seem to suffer for that. Unlike my own ‘load-you-own’ conversions, the ‘lid’ is on the bottom of the cartridge as it is put into the camera, which seems to work well.
The lid of the cartridge is a really nice fit, good enough to give a distinct ‘click’ when put in place (although I guess, in time, wear may make the click less distinct). The cartridge itself is a good (but tight) fit into a 110 camera. This presents no problem when using the Pentax Auto 110 but the Rollei A110 gives a rather more restricted access to the left-hand edge of the cartridge, which can make it difficult to remove. I ended up adding a tab of electrical insulating tape to the left end of the cartridge to give me something to pull on. It should be noted that the lack of a perforation to tell the camera when to stop winding makes ‘push-pull’ 110 designs (like the A110) less reload-friendly in any case.
There are some other nice touches to these cartridges.

- The cartridges are produced with a full-size bar on the right of the cartridge, which indicates to the camera that the film is a ‘normal’ ISO 80-100 rating, but this has a ‘break-away’ section. Once removed, a camera that senses film speed will then expose the film as ‘high speed’ (ISO 200-400, depending on camera model). Note that not all 110 cameras have a sensor for high-speed film – this is less dependent on whether a camera is a high or low-end model than on whether it was produced before or after high-speed 110 film was made available. Cameras that don’t sense film speed are limited to exposing for ISO 80-100 film.
- There is another breakaway section on the bridge of the lid. I hadn’t been aware, but apparently, some 110 cameras (possibly the Canon 110ED, but possibly others) can be fouled by the bridge at this point, but the Ausgeknipst cartridge has a perforated section that can be removed.
Also included with the kit was a little stick with a slot in it to aid in rolling the film and backing paper up before loading it into the cartridge. I gave it a try, but found it easier to wind the film by holding the edges of the rolled film between my thumb and index finger. Others may find it useful.
For me, the most awkward bit of loading 16mm film into a 110 cartridge is attaching the backing paper and film to the take-up spool. As I prefer to see what I’m doing, I’ve been going for a two-stage load.
I roll up the film and backing paper together in the dark bag with the opened cartridge, position this in the unexposed film chamber, and put the lid on the cartridge with the very end of the film and backing paper left out in the gate (this bit of the film gets exposed during loading in any case). I then attach the backing paper and film to the take-up spool in daylight before going back into the dark bag to reopen the lid and put the take-up spool in place before replacing the lid.
Part of my feedback to Ausgeknipst was that if they made the ‘lid’ in two parts, the last part (including the threading of the film through into the exposed film chamber) could be done in daylight. Note that it is also possible to simply cut the lid at a suitable bit of the bridge to achieve the same effect, although that probably invalidates any warranty.
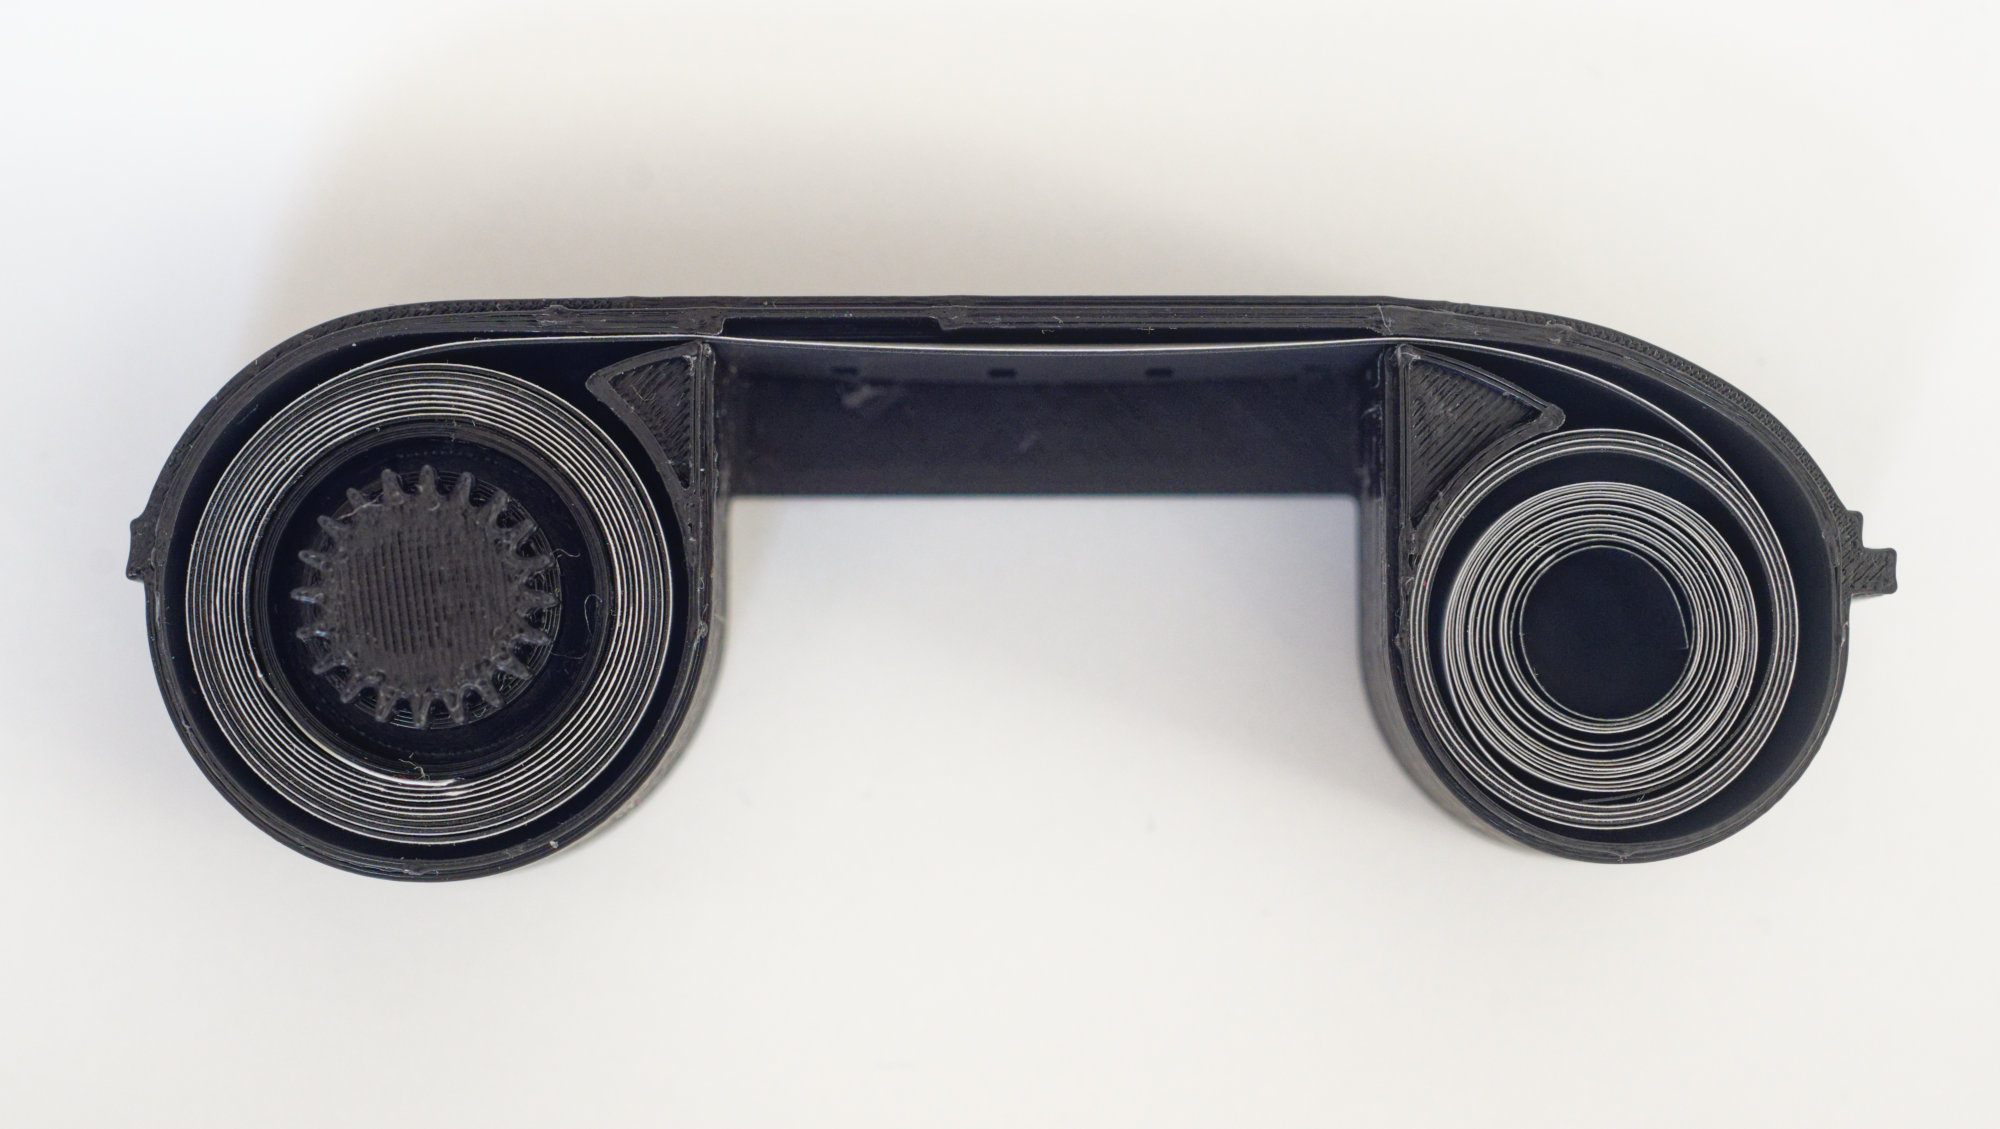
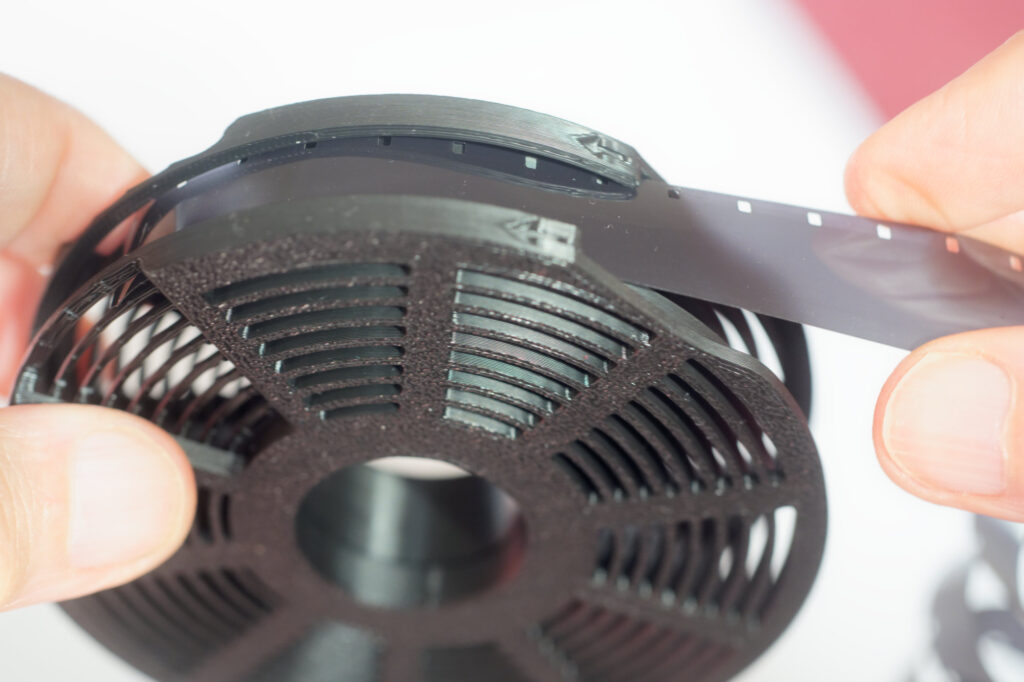
16mm reels
These reels have been covered before in an article by Andrew Long, but I’d like to give my own take on them.
They fit the centre spool of a standard Paterson tank, and two of them take up about the same space as a single conventional Paterson reel collapsed to 35mm size. As they are formed from PLA, which has a reasonably low melting point, leaving them in high-temperature environments should be avoided. They should be absolutely fine for C41 development temperatures (39°C / 102°F), but maybe avoid pouring boiling water over them or leaving them to dry in direct summer sunlight.
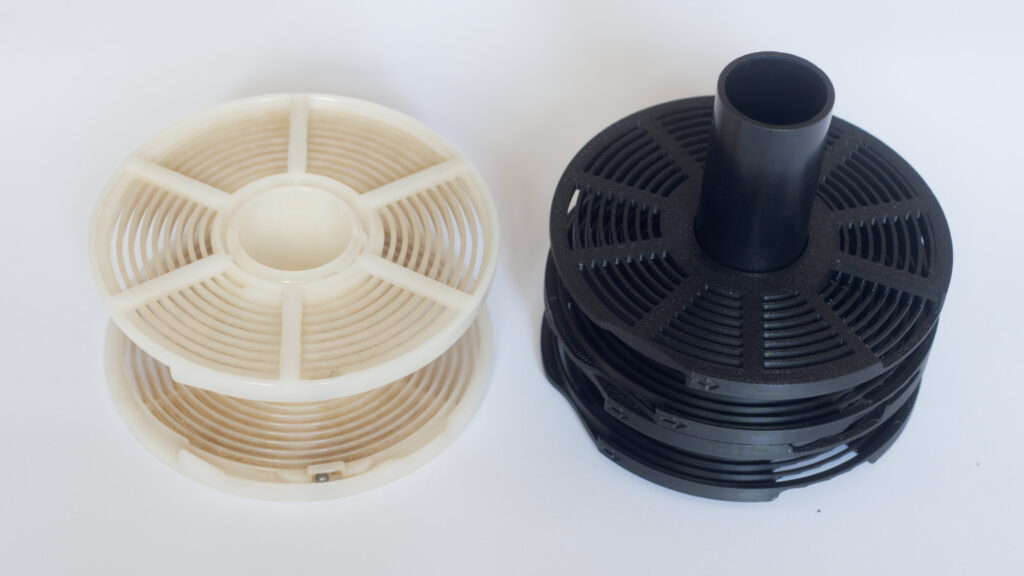
The reels are nicely finished. The two halves can be separated by sliding the left side down beyond the stop while the arrows are pointing upwards.
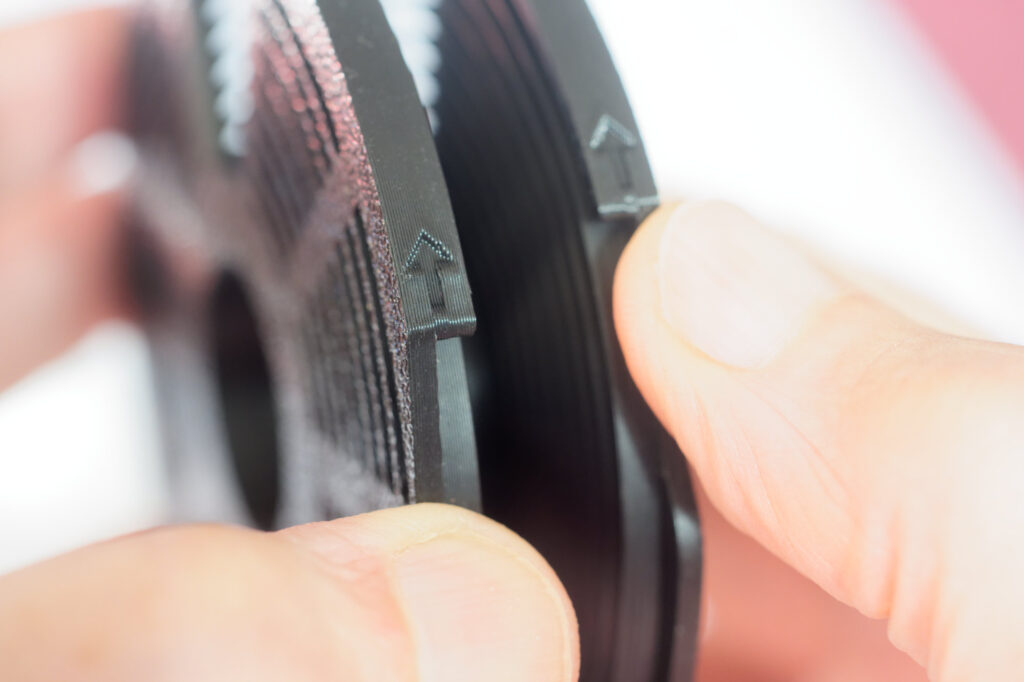
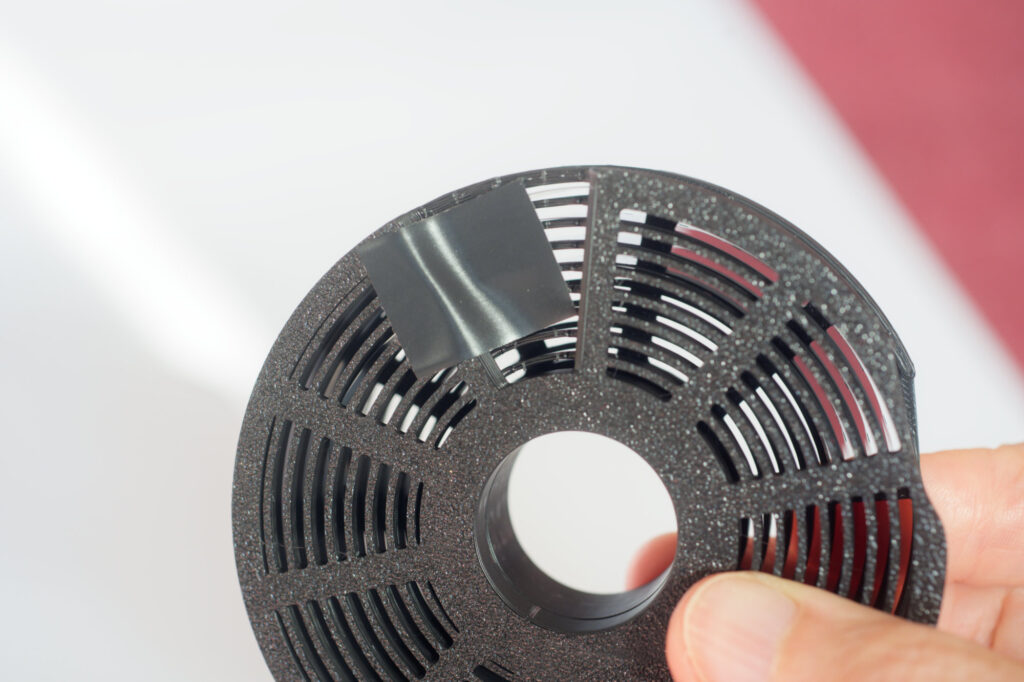
A key feature of these reels is an ‘open’ section just after the gate that allows contact with the edge of the film on both sides. I think this greatly assists loading.
There are (at least) three ways of loading the film into the reel. In each case, it helps to cut the corners off the end of the film leader so that they don’t snag on the open section of the reel.
- You can simply push the film in through the gate.
- You can use the open section to shuffle the film into the reel, holding it at the edge.
- You can use the rotation of the two halves against each other, but as the reels don’t have the little ball bearings that the Paterson reels use, you need to stop the film from sliding back by applying friction to the film edge through the open section.
Once the film is loaded onto the reel, it does resist being pulled back out, but I was concerned that the film might move off the reel when not under tension during agitation. Because I tend to agitate by twiddling in a clockwise direction and because I’m a belt-and-braces type guy, I made sure my rotation was encouraging the film further into the reel, and then I doubled (tripled?) up by sticking a bit of electrical insulating tape over the edges of the film on the open section.
Modular film holder for digitally copying 16mm film
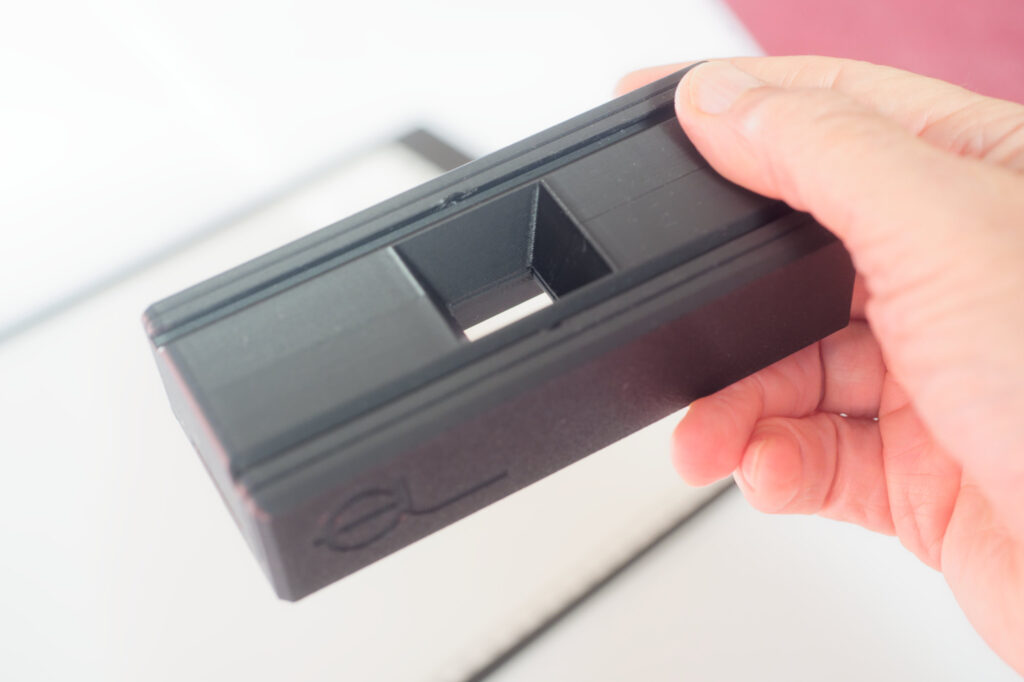
This bit of kit aids camera copying of images on film. The main part, which Ausgeknipst refer to as a 110 Base Plate, has rubber feet and separates into two parts. The lower part (which I will call the stage) holds the negative a decent distance from whatever light source you are using. The second part (which I will call the lid) holds the film in place (and flat) by a set of magnets.
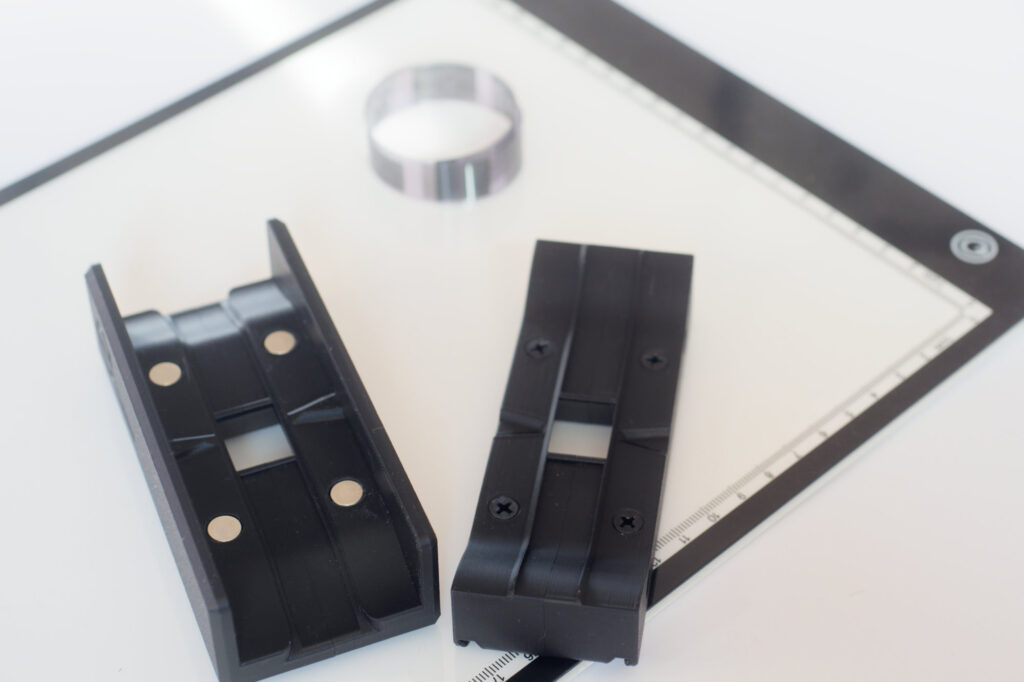
The path for the film across the stage is curved. When I queried this, I was told this was to get the film flatter across the ‘gate’. I’m not entirely convinced that 16mm film has this degree of flatness problems, but the channel that the film sits in seems smooth enough for the curve not to give issues with scratches.
On top of the base plate, you can fit (via a set of grooves in the top of the lid) a funnel-like device, which then takes tubes. When I first got hold of this, I was thinking that it was intended to put a macro lens inside the tube, but it is actually there to shade the top of the negative from any light, which is a really nice touch and which it does very effectively.

The website tends to talk down dedicated film scanners a bit more than I think is warranted, but copying 16mm negatives with a stage like this certainly avoids the fiddling around with fitting bridges in 35mm film holders to take 110 film. Longer strips of film (over 140mm) are easier to handle through the base plate, as it helps to have some film sticking out one side or the other to aid feeding.
On the version sent to me, the aperture of the gate is 18.5x15mm, which is suitably generously sized to allow for standard 110 or 16mm negatives with space to spare, but those of us that load our own 110 cartridges know that once you don’t have the standard 110 masking that you get on commercial film, the actual viewing area can be appreciably bigger. In the case of my Pentax Auto 110, it gives 20×14 negatives, so the 110 base plate I’ve been using crops 1.5mm off this extra length. I fed this back to Ausgeknipst and was told that the latest models are already set up to show 21×14.5mm. Apparently, one of the advantages of 3D printing is speed of modification…
I remain unconvinced by the curved film path, but the stage holds the negative a sensible distance above the light source, avoids any extra surfaces to attract dust and the tube provides a great light shade that makes my normal practice of copying the emulsion side of the negative unnecessary. On the basis of this, I may check out their medium format stages.
Prices
Prices can change, but personally, I always like to know ballpark costs when I read about products like these. So I’m including prices of the stuff I’ve mentioned above, according to Ausgeknipst’s website in March 2026 (note that some prices are in GBP and some in Euros):
- 135 film cutter – £36
- 120 film cutter – £53
- Reusable 110 cartridge (single, with or without window): £27
- Developing reel (single): £27
- 110 Modular film holder: €47.96 eros
- Rings for modular film holder: €14.36 Euros
Postage is free within Germany, €7.90 to the rest of the EU, €16.90 to the UK and $49.95 to the USA (via DHL). Customs charges will likely be payable outside the EU (full details are on the website)
Pictures
My excuse for including pictures in a review of some kit is that the film for them was cut using the 120 cutter from a roll of HP5, rolled into one of the windowless cartridges, developed using the reels and copied using the film holder.
These copies were made with a 33MP full-frame sensor. As my macro lens (like most) only goes to 1:1, I then had to crop, so probably only 1/4 of those pixels were used. I did also try an older 24mp APS-C sensor camera, which should have enabled more pixels on the negative, but there was no visible advantage.
HP5 processed in R09 looks a bit ‘lumpy’, even when ‘pulled’ to ISO 100, but I maintain that the grain gives the full sub-minature experience…
FP4 processed in Perceptol gives a bit finer grain, it was only pulled 2/3 of a stop..


To give a more ‘level’ comparison of HP5 and FP4 shooting 110/16mm, the following pictures were both processed in Perceptol.
In summary
I confess myself rather impressed by the quality of these 3D printed products. It appears that Ausgeknipst have a whole range of 3D-printed items which may well be of particular interest to sub-minature analogue photographers. They also seem to do bits for larger formats and seem quite open to suggestions for new products from potential customers.
Ausgeknipst have a multi-lingual website showing their products and prices. Their introductory video is delivered in impeccable English. To my shame, I still can’t quite catch how to properly pronounce their name, though…
Their products are not bargain-basement cheap, but they are well-made and look like they will last quite well. Note that other 3D printing companies may well be out there with competing products. If you know of any other suppliers, please let us know in the comments.
Share this post:


Comments
Martin Siegel on 3D-Printed accessories for 110 (and 16mm) from Ausgeknipst
Comment posted: 17/04/2026
Thanks for an extensive article on a somewhat niche topic, Bob. It's alwasy good to know not beeing the only one loves those tiny cameras.
Comment posted: 17/04/2026
Vladislav Shenker on 3D-Printed accessories for 110 (and 16mm) from Ausgeknipst
Comment posted: 17/04/2026
Michael Zwicky-Ross on 3D-Printed accessories for 110 (and 16mm) from Ausgeknipst
Comment posted: 17/04/2026