As I mentioned in a previous article in which I dissected an Old Canonet, I have occasionally taken interesting but non-functioning cameras apart – mainly to investigate, but there have been the occasional times when I’ve managed to fix something.
What I intend to do with this article is to show how fiendishly complicated an SLR camera can be by taking apart an old Minolta SRT 303b from the 1970s.
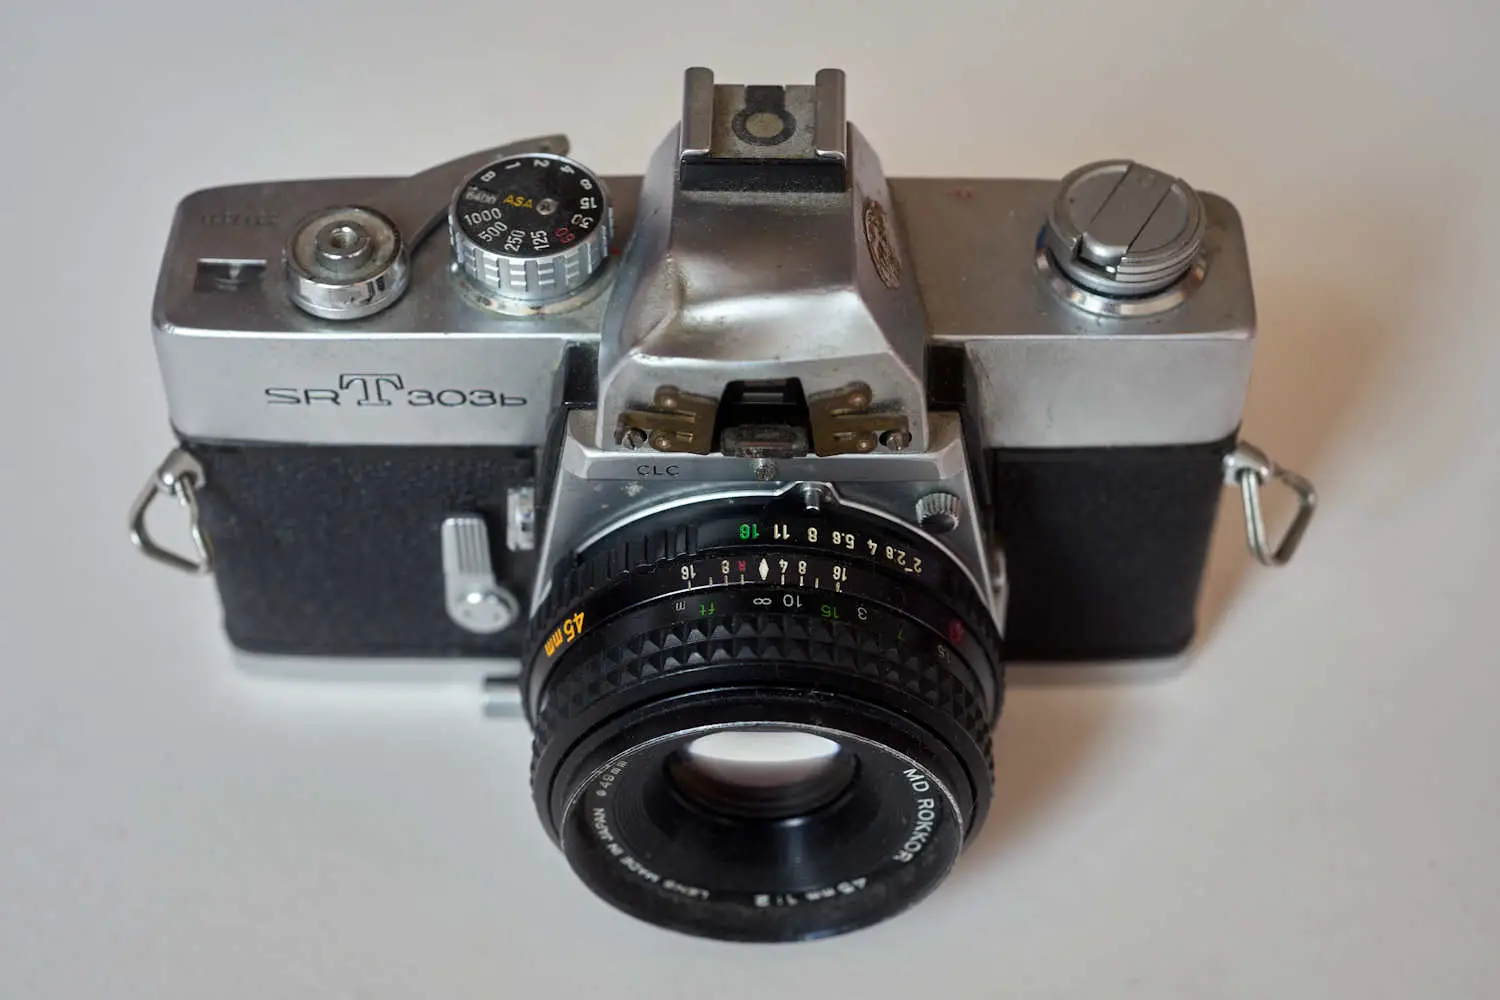
The body in question
This particular 303b is a functioning camera: the shutter fires and seems to give reasonable times; the lens stops down; and the focusing screen allows the lens to be focussed properly.
On the down side, it has suffered some reasonably severe crushing of the pentaprism, it is also dirty, is missing the plastic tip of the wind-on lever , operation of the mirror lock-up seems erratic and the meter is not working. It was also missing the battery cap, although that could be scavenged from or shared with another camera. In fact (as pointed out by one of the commenters below), it may be a 303 that has been given an old 303b top-plate – but in any case, its days of being a desirable camera are past.
The right tools for the job
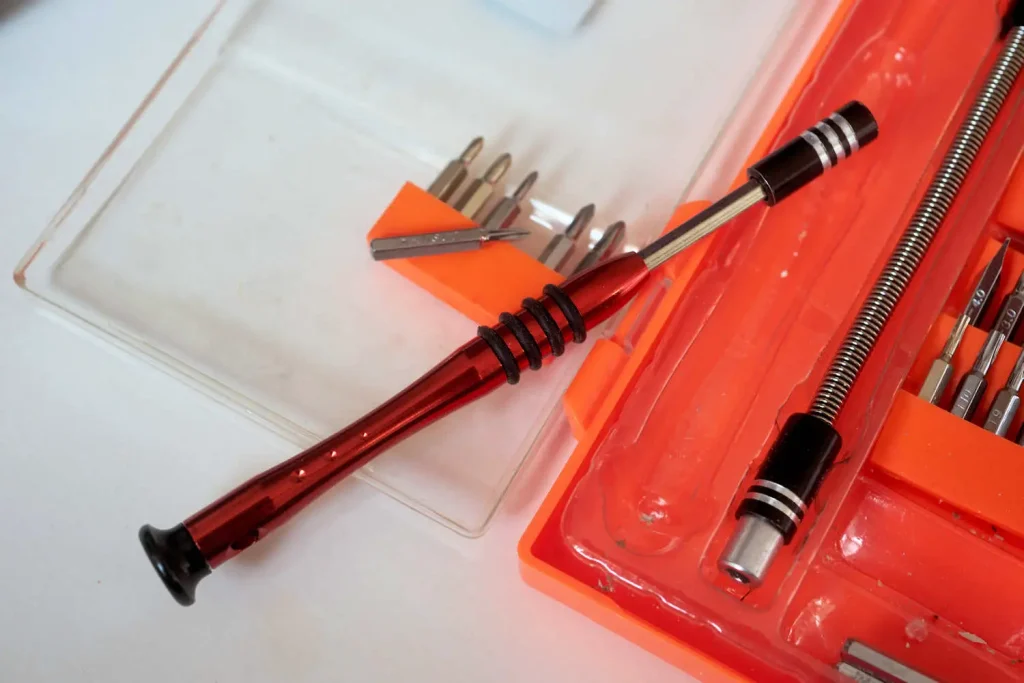
Japanese cameras after about 1968 tend to use cross head screws, but those are not ‘Frearson’ or ‘Phillips’ screws as they might be in Europe or America, Instead they are JIS (Japanese Industrial Standard) screws. The JIS screws are designed to give a better hold than you get with the other cross-head screws – you can use a standard set of Phillips precision screwdrivers, but you need to be careful that you don’t ‘cam out’ and damage the screw head. To be honest, I can only identify the JIS sockets in my set by reading the little engravings, but if you are going to do this sort of thing regularly yourself (and particularly if you have ambitions to put things back together and use or sell them afterwards), you might want to treat yourself to a suitable set of JIS precision screwdrivers.
Objectives
I’m intending to strip down this camera to:
- Remind myself how the SRT cameras operate ‘under the hood’ (I last did this stuff some years ago) and to supply information for this article. I’m particularly keen to show what I remember as complex linkages to position the ‘paddle’ for the match-needle exposure and also to show what the ‘Aperture Direct’ viewing system looks like under the hood.
- See if I can see why the meter isn’t working, whether the impact damage has upset anything else and whether any bits can be salvaged – particularly if they might be used in one of my working SRT 101s.
I’m not intending to put this camera back together – the only thing that would change my mind is if I saw something obvious and simple that was causing the camera meter not to work, in which case I might try a fix and put a film through what would then be the ugliest camera I’ve ever shot with.
Removing the top-plate
It is a good idea to set the shutter speed to 1000 and note ASA (so it goes back in the same place if there is a need to re-assemble) before undoing the little off-centre screw on the shutter speed dial.
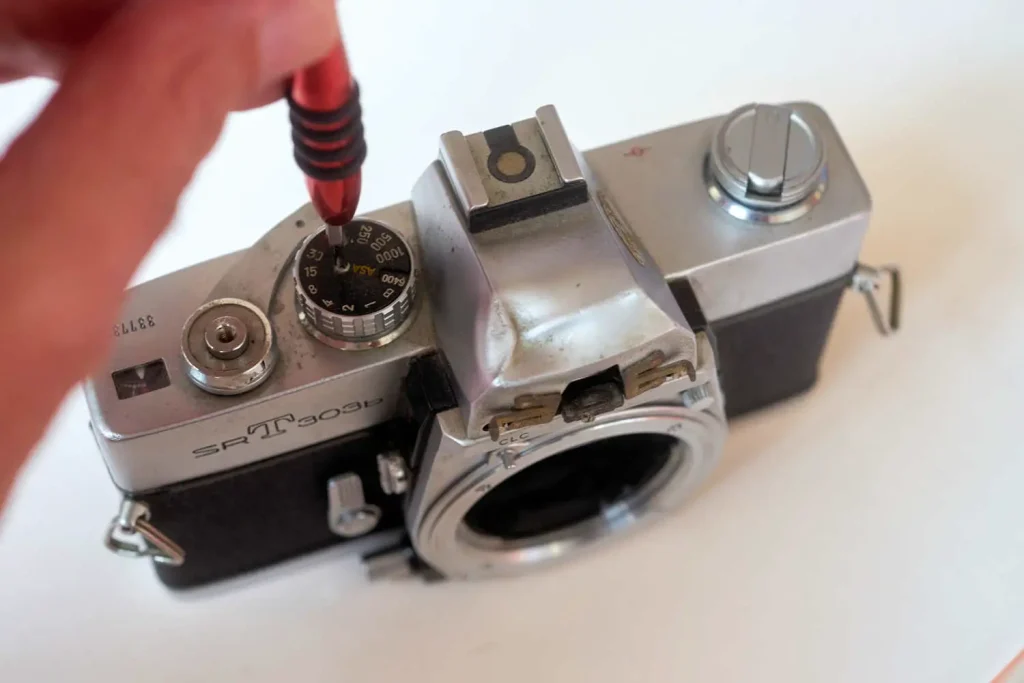
The dial top will be pushed off by the spring underneath.
The shutter speed dial then just lifts out.
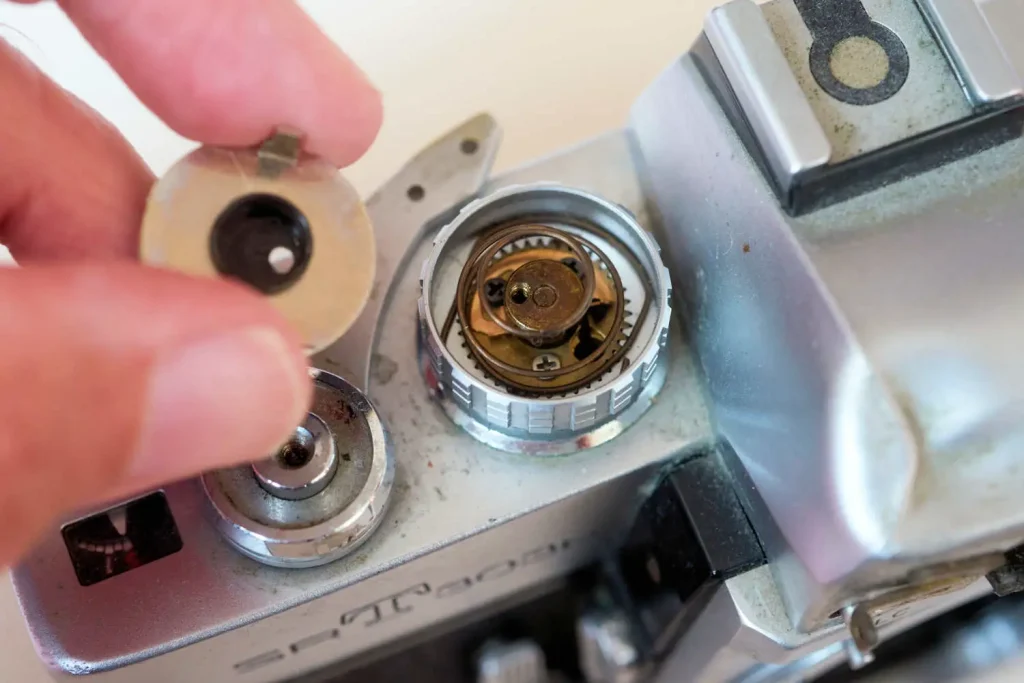
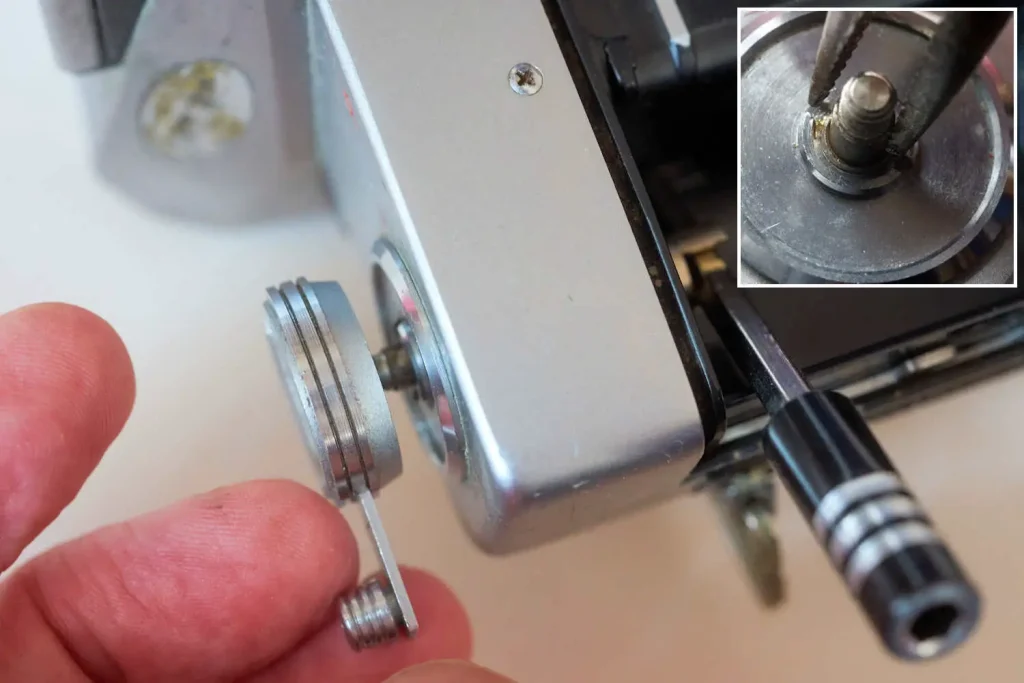
You can remove the rewind knob by turning anti-clockwise while you put a bar across the forks inside the back to stop the spindle turning. The disk under the rewind knob has notches either side of the spindle – they can be turned using a pair of dividers or needle-nosed pliers (see inset picture).
Remove the collar around the shutter release by turning anti-clockwise. This one came off easily with finger pressure. If it is tight, use a pair of pliers across it but maybe pad the edge of the collar with a strip of cardboard or similar to protect the chromed finish (this one shows past damage).
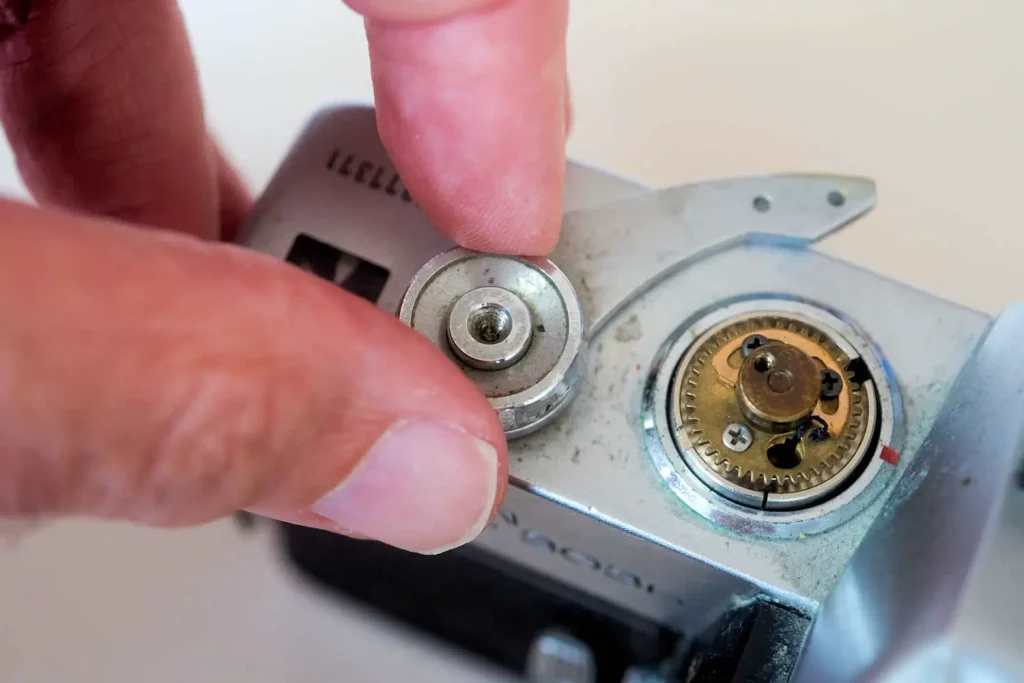
Note how the washers sit under the collar before lifting the wind-on lever off.

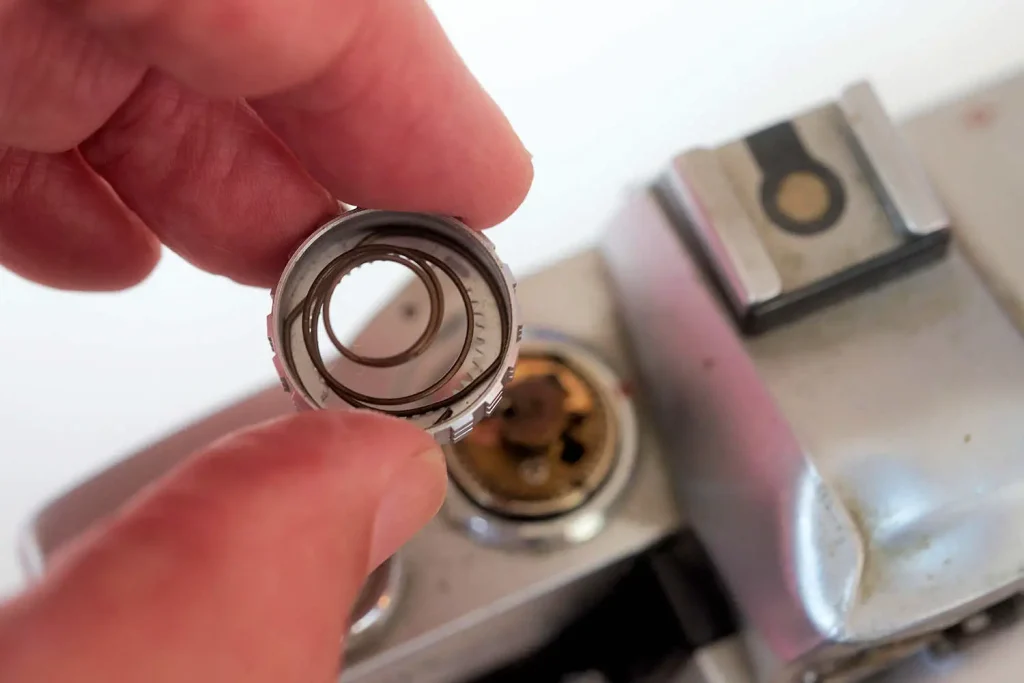
In addition to the obvious cross-head screw around the top-plate there is also a slot headed screw that hides under a little red plate that also acts as a mark to line up mounting SR lenses. Gently prise off the red plate to reveal the slot underneath – those other two slot-headed screws (which would normally hide beneath a ‘Minolta’ logo) also need to come off before the top-plate will come away. Note that the switch to cross-head standard screws, introduced in the late 60s, mainly seems to apply to visible screws. We are going to see more slot-head screws from here…
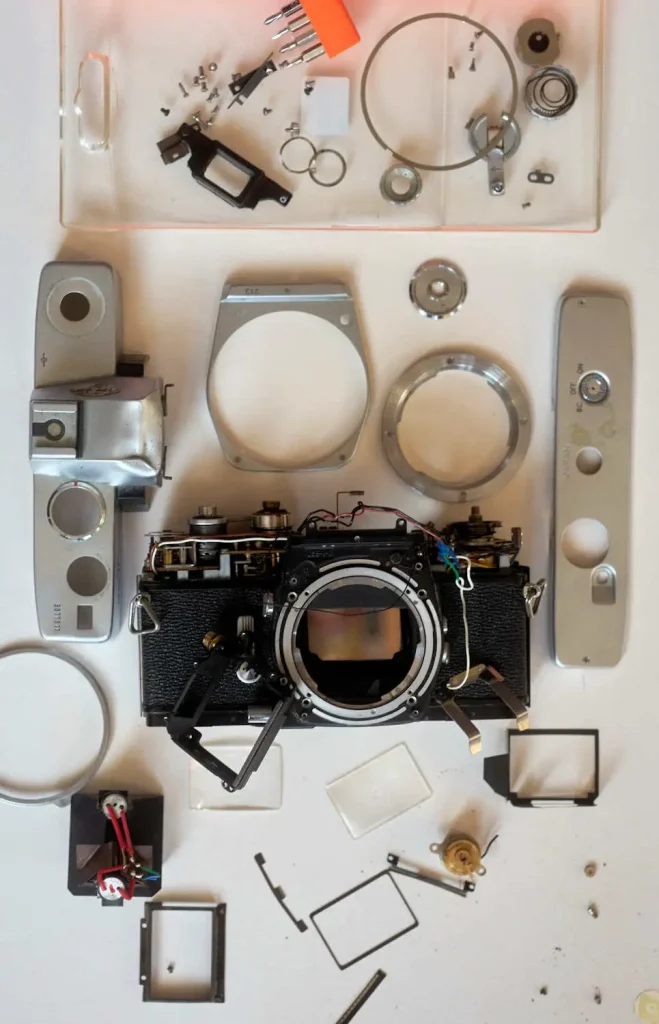
Examination of the insides
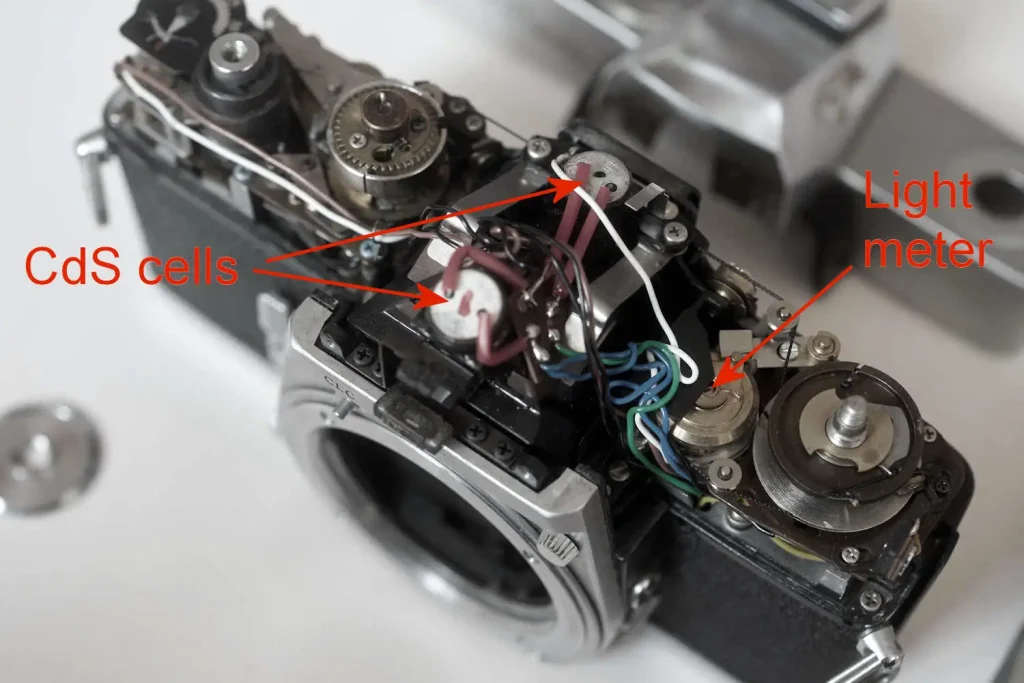
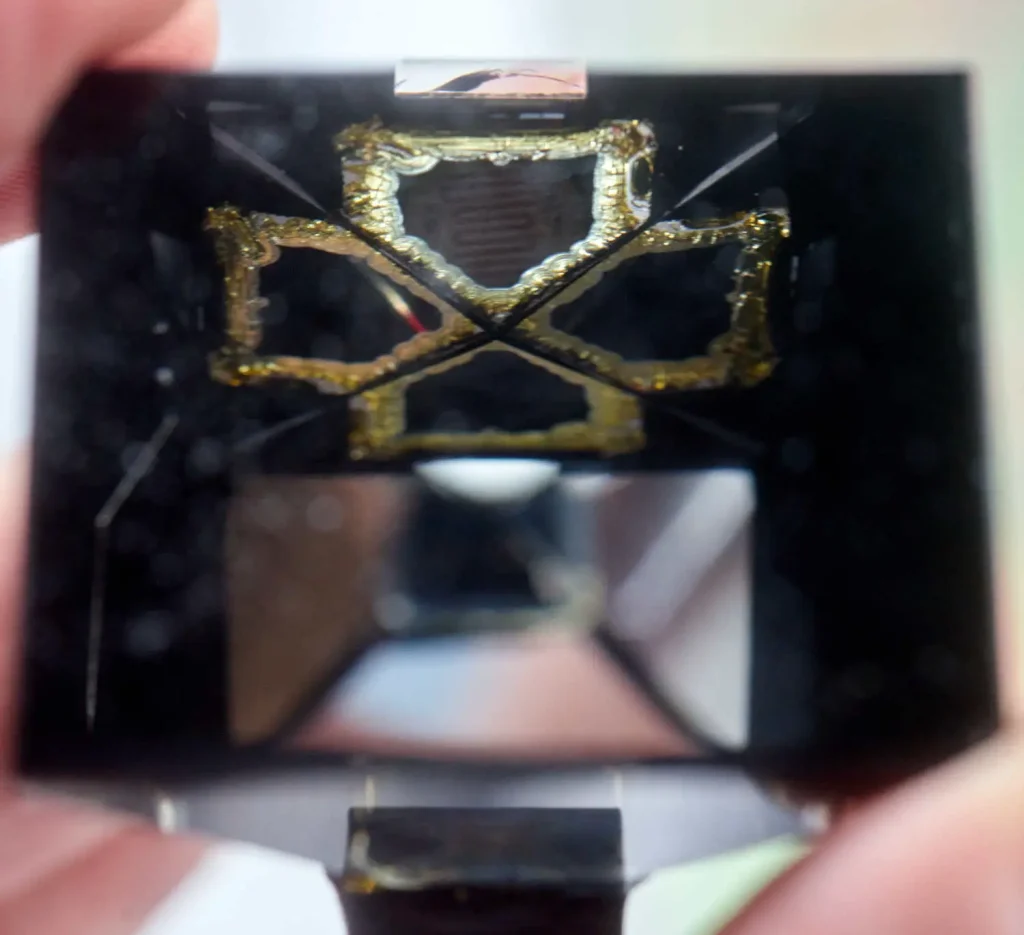
What looked like catastrophic damage to the top-plate ‘hump’ does not seem to have been transferred to the inside components. Note the two separate CdS sensors, each of which samples a different bit of the subject and which together allow the CSC metering system to do its stuff.
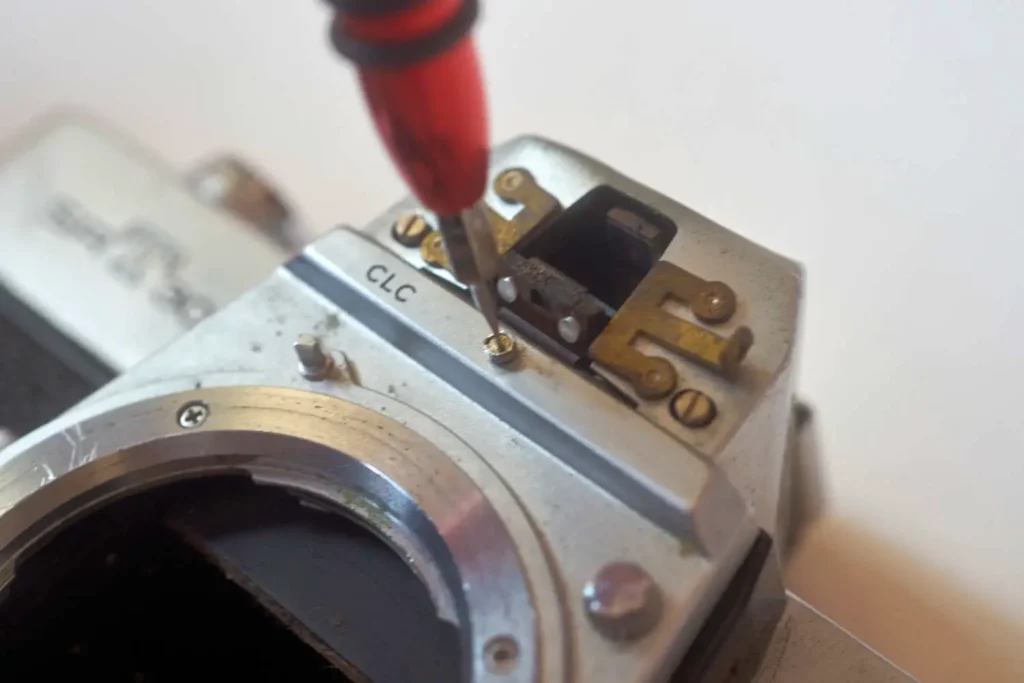
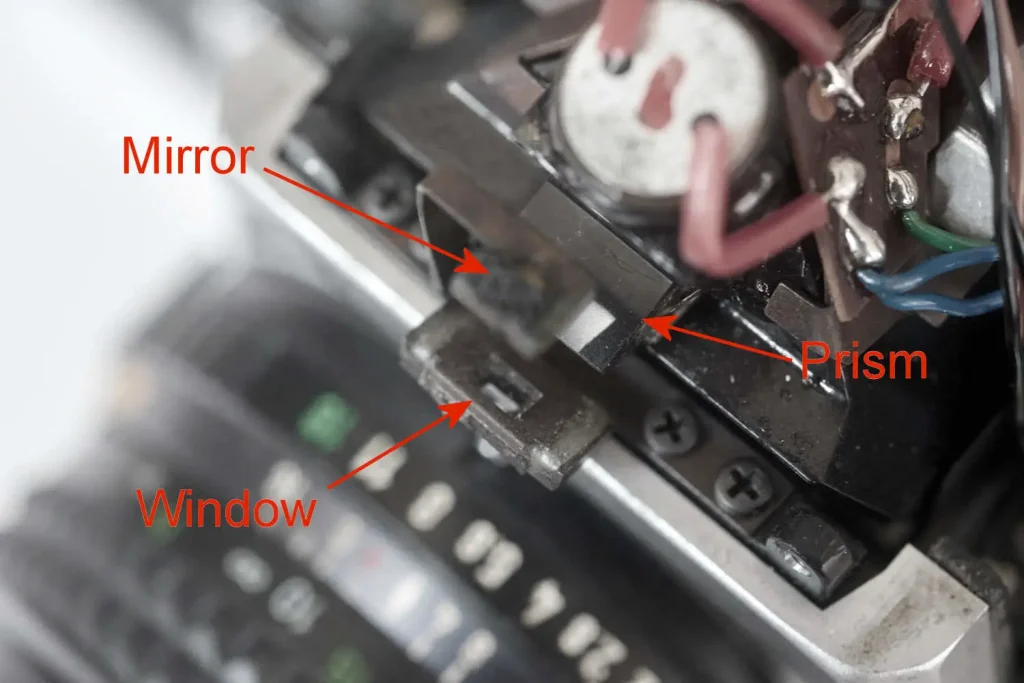
Here you can see the Aperture Direct window, which projects the aperture set on the lens into the top of the viewfinder. The image from the aperture ring is reflected off a little mirror on an arm, then down into a prism cemented onto the main pentaprism.
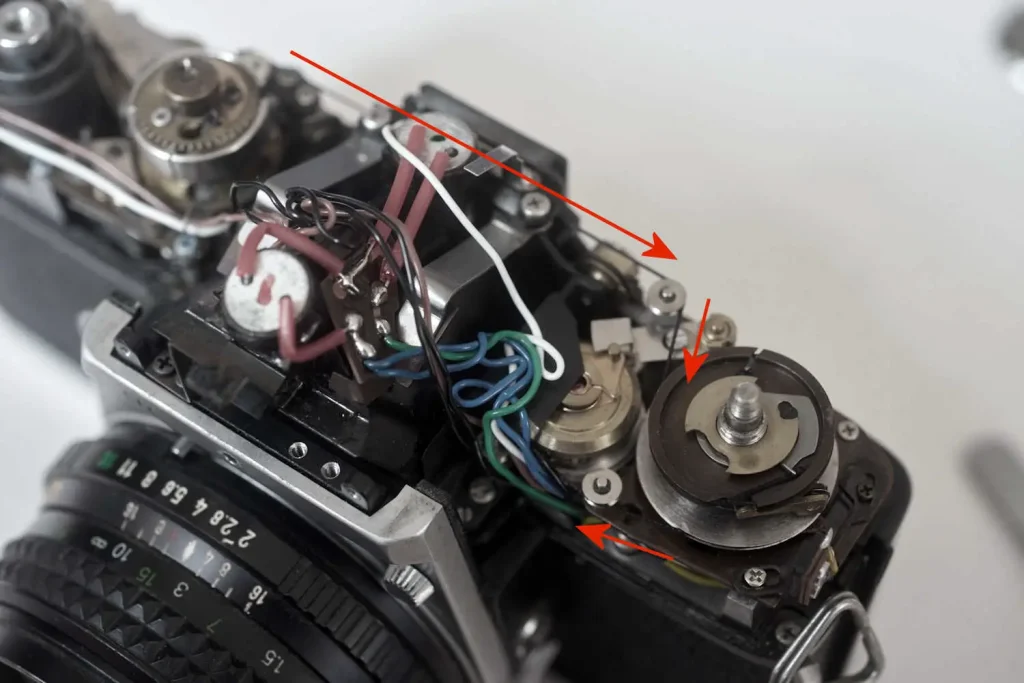
Looking at the back of the camera, you can see the cable runs (indicated by the red arrows) which go via a bunch of pulleys to allow the camera to set the ‘paddle’ in the viewfinder in the correct position to indicate proper exposure – this cable affects its position with regard to set shutter speed and ISO.
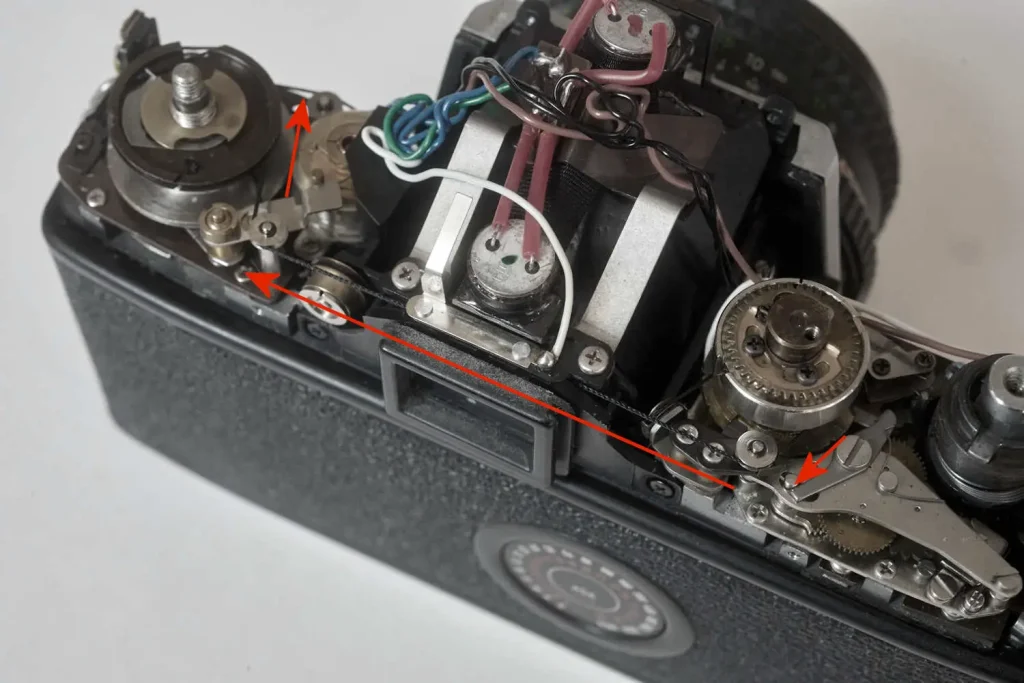
In this shot you can see how the cord from the shutter speed dial wraps around the large upper pulley, while the (larger) lower, silver coloured one has another cord that transfers information about the position of the aperture ring on the lens (this is read by the body via a ring attached to the little knob visible next to f/8 on the lens).
The positioning of both pulleys is transferred by an arm and pivot that is attached to the ‘paddle’ (arrowed in red and highlighted in magenta). Note that the pivot moves as the shutter speed dial is turned. The inset picture shows the meter, pivot and paddle from the other side after they have been removed from the camera.
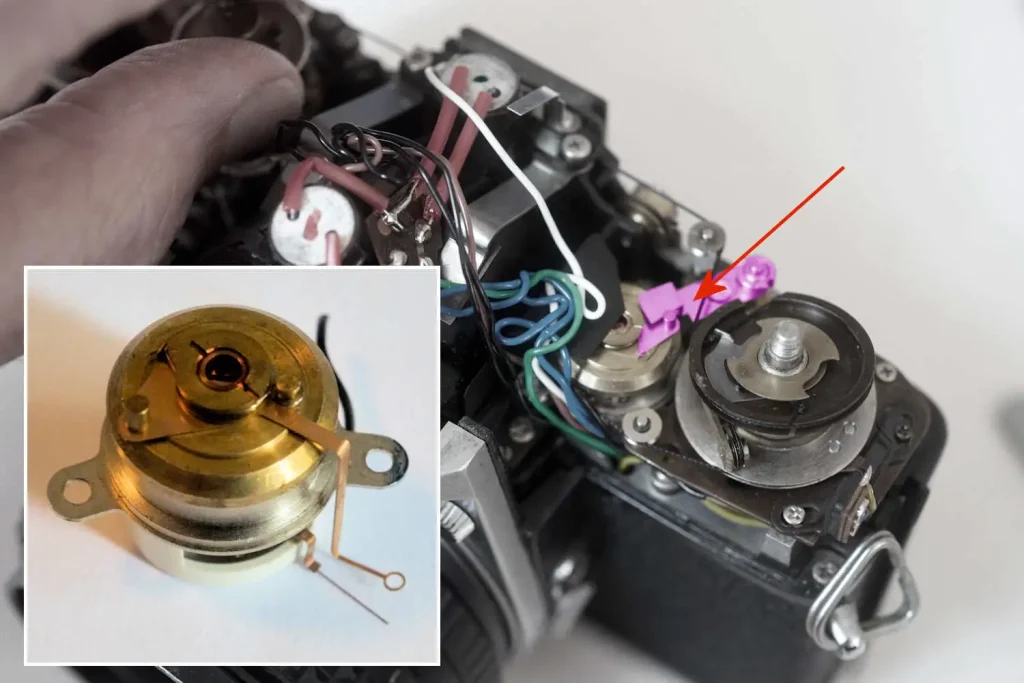
Fiendishly complicated! The top pulley would normally be held flat by the disk around the spindle.
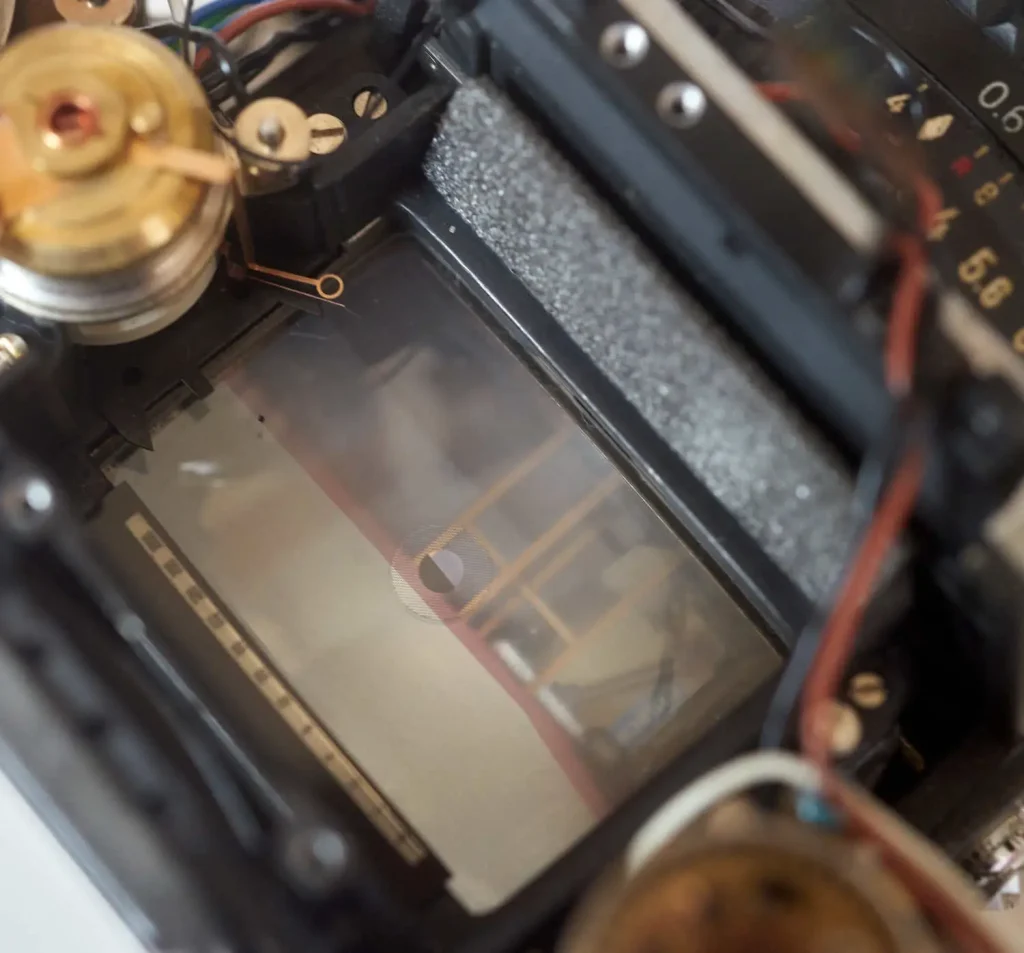
With the pentaprism removed you can see the focussing screen clearly. Note that there are quite a few slot-head screws around here, despite this particular model being released in 1975. Fans of waist-level viewfinders may note that this camera is still functional.
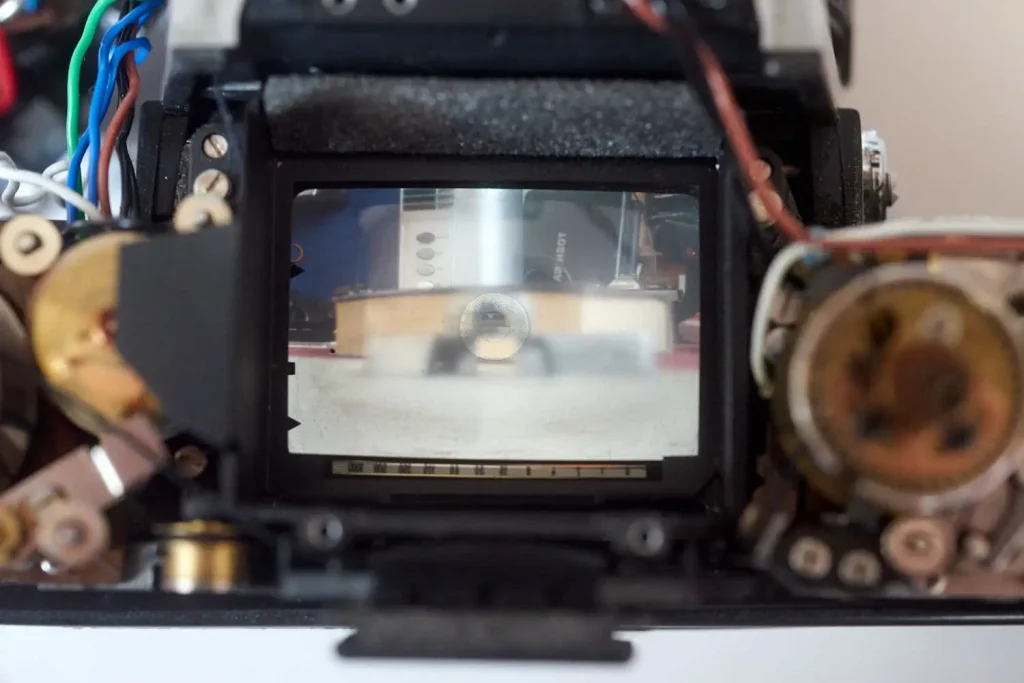
With the baffle removed it is easier to see the paddle and the meter needle. You can also see the low and high limit marks of the meter and the battery check index (when you set the battery check, the meter needle should deflect to that tab).
The cord attached to the aperture reading ring.
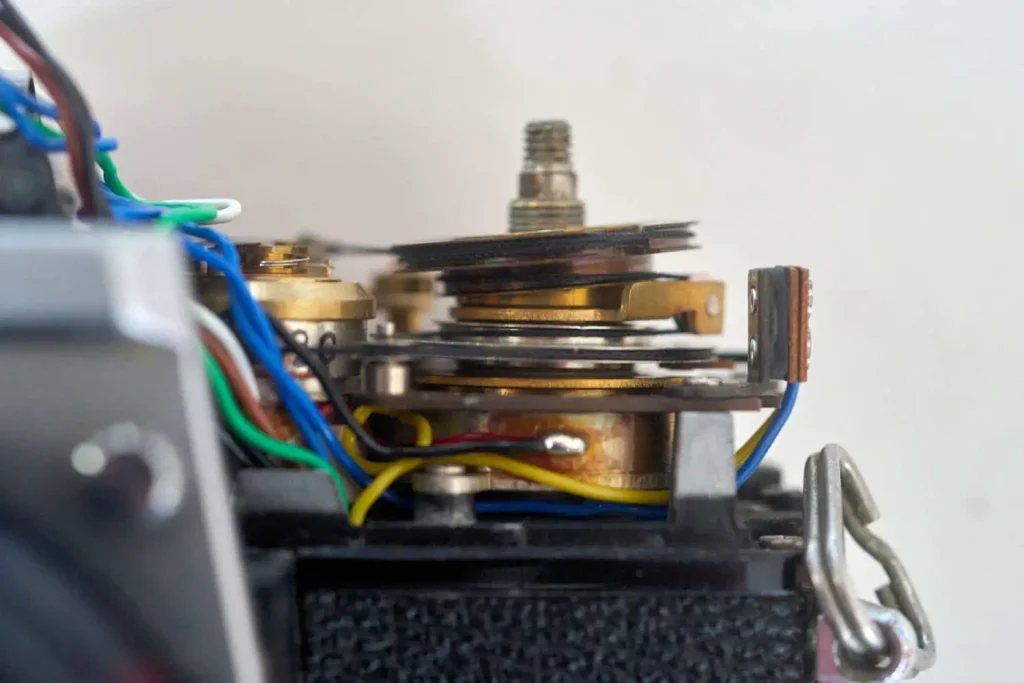
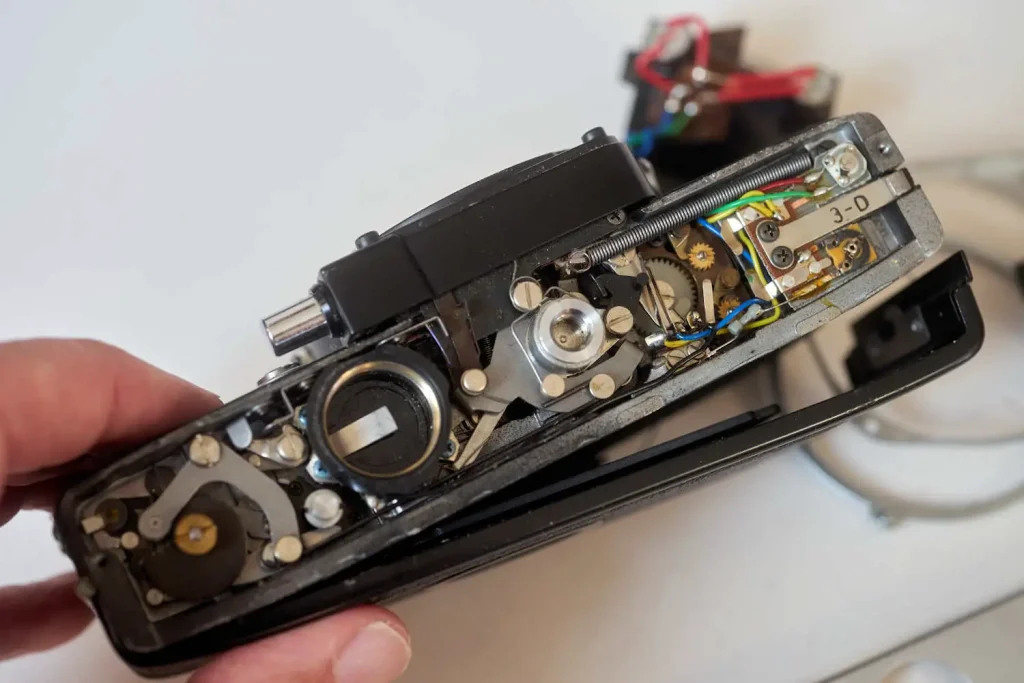
Under the base-plate – there are no obvious signs of corrosion or disconnected wires that might account for the meter not working.
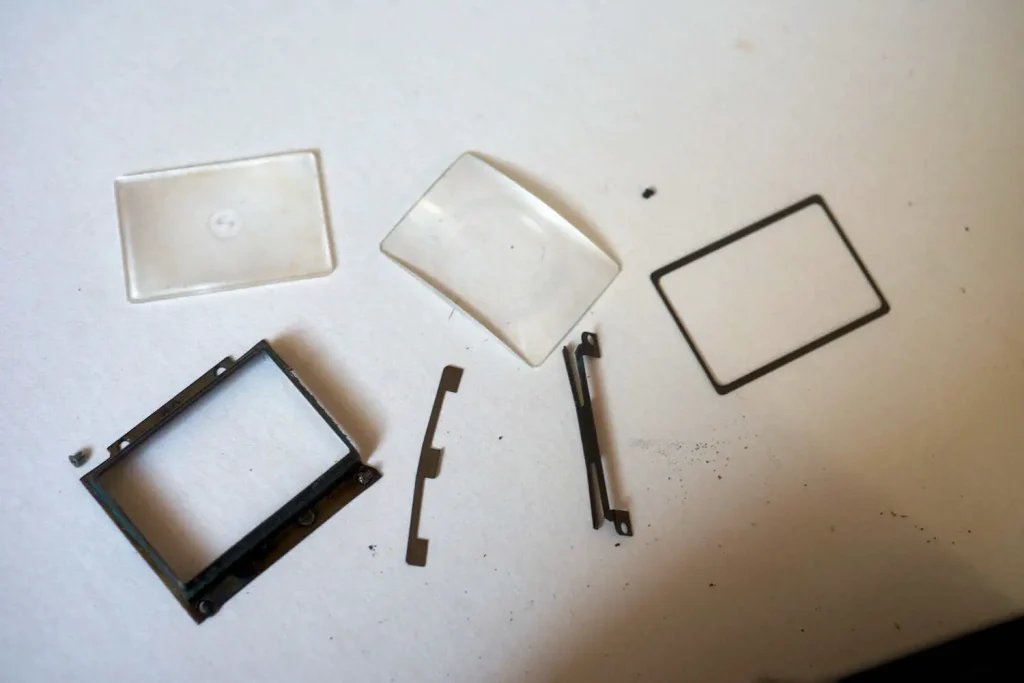
The focussing screen lifted clear.

The screen and condenser taken out.
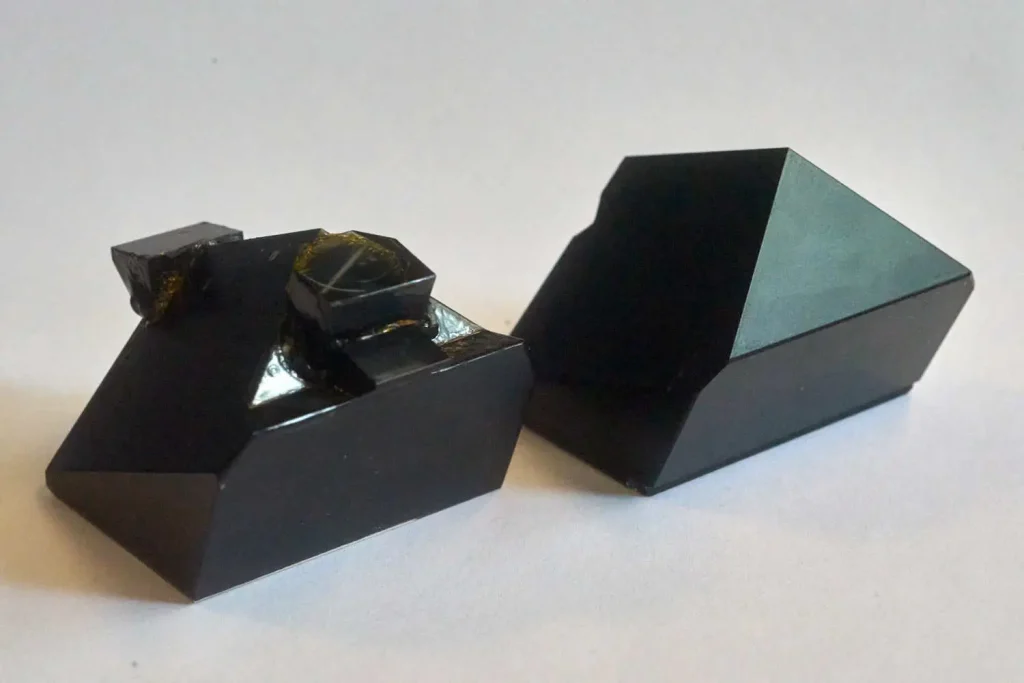
A view of the pentaprism from underneath, showing the front CdS cell.
The prism from the 303b with the CdS cells removed is on the left, with a prism from an SR 7 (an earlier Minolta without TTL metering or an Aperture Direct Window) on the right for comparison. You can see how the CSC metering and the Aperture Direct prism really complicate the shape of this precision engineered prism.
To sum up
I could not see any sign of what was preventing the meter from working on this particular camera. If it was related to the damage, it certainly was not obvious. It is notable that it was the electronic parts of this camera that failed. Even stripped down the mechanical functions controlling film transport and shutter actuation were still functional; If I had re-attached the bayonet and put a lens on it, it could still have taken photographs.
Mechanical SLR cameras are complex machines. It is astounding to think of the work involved in designing and developing such a device, particularly in an era before Computer Aided Design.
Share this post:


Comments
Peter on Inside the Mind of Minolta – an Investigation of the Internals of Minolta’s SRT 303 – By Bob Janes
Comment posted: 23/10/2020
Alexander on Inside the Mind of Minolta – an Investigation of the Internals of Minolta’s SRT 303 – By Bob Janes
Comment posted: 23/10/2020
Comment posted: 23/10/2020
Comment posted: 23/10/2020
Comment posted: 23/10/2020
Comment posted: 23/10/2020
Comment posted: 23/10/2020
Kodachromeguy on Inside the Mind of Minolta – an Investigation of the Internals of Minolta’s SRT 303 – By Bob Janes
Comment posted: 24/10/2020
Comment posted: 24/10/2020
Giuseppe on Inside the Mind of Minolta – an Investigation of the Internals of Minolta’s SRT 303 – By Bob Janes
Comment posted: 25/10/2020
Comment posted: 25/10/2020
Sroyon on Inside the Mind of Minolta – an Investigation of the Internals of Minolta’s SRT 303 – By Bob Janes
Comment posted: 25/10/2020
Mending digital cameras – Fup Duck Photography on Inside the Mind of Minolta – an Investigation of the Internals of Minolta’s SRT 303 – By Bob Janes
Comment posted: 28/01/2021
Mariusz on Inside the Mind of Minolta – an Investigation of the Internals of Minolta’s SRT 303 – By Bob Janes
Comment posted: 12/08/2021
Thank's for the article, it's very helpful. Just wanted to mention - there's a video on youtube on a broken SRT meters. Apparently the meter assembly contain a foam stopers for the exposure needle made from the same material as light seals. Stopers deteriorate and become sticky. So repair may be only a matter of simply pushing a needle and removing this foam. I didn't test it yet thoug.
Jordi on Inside the Mind of Minolta – an Investigation of the Internals of Minolta’s SRT 303 – By Bob Janes
Comment posted: 14/05/2023
Do yo know any practical guide to replace the AV / TV strings?
Thanks!
Comment posted: 14/05/2023