When I was looking for a potential lens or rather a nice broken camera to retrieve a good lens from I stumbled on some articles here covering the Nikon AF600 (also known as Lite Touch). In fact I reached out to Hamish after finishing this little project to thank him for the site and the articles that featured the camera. He then asked me if I would be interested in sharing this project on the site… so here we are.
Briefly about me, my name is Andreas and I’m based in Cologne, Germany. I’ve been shooting almost all my personal work on film for the past 16 years. After arriving at pretty much my favorite cameras of choice I was tired of the GAS. I stopped longing for ‘peak performance’ and instead just wanted to try fun cameras or simply experiment with stuff. I’m a maker at heart so after getting into 3D printing in 2017 I quickly jumped into modding or creating new stuff around film photography. I discovered a bunch of talented people on Instagram who were also into that kind of stuff and then even joined a nice little Discord community called “Filament & Film”, which as the name suggest revolves around 3D printing for film photography.
Rodrigo Silva’s Helicoid Design
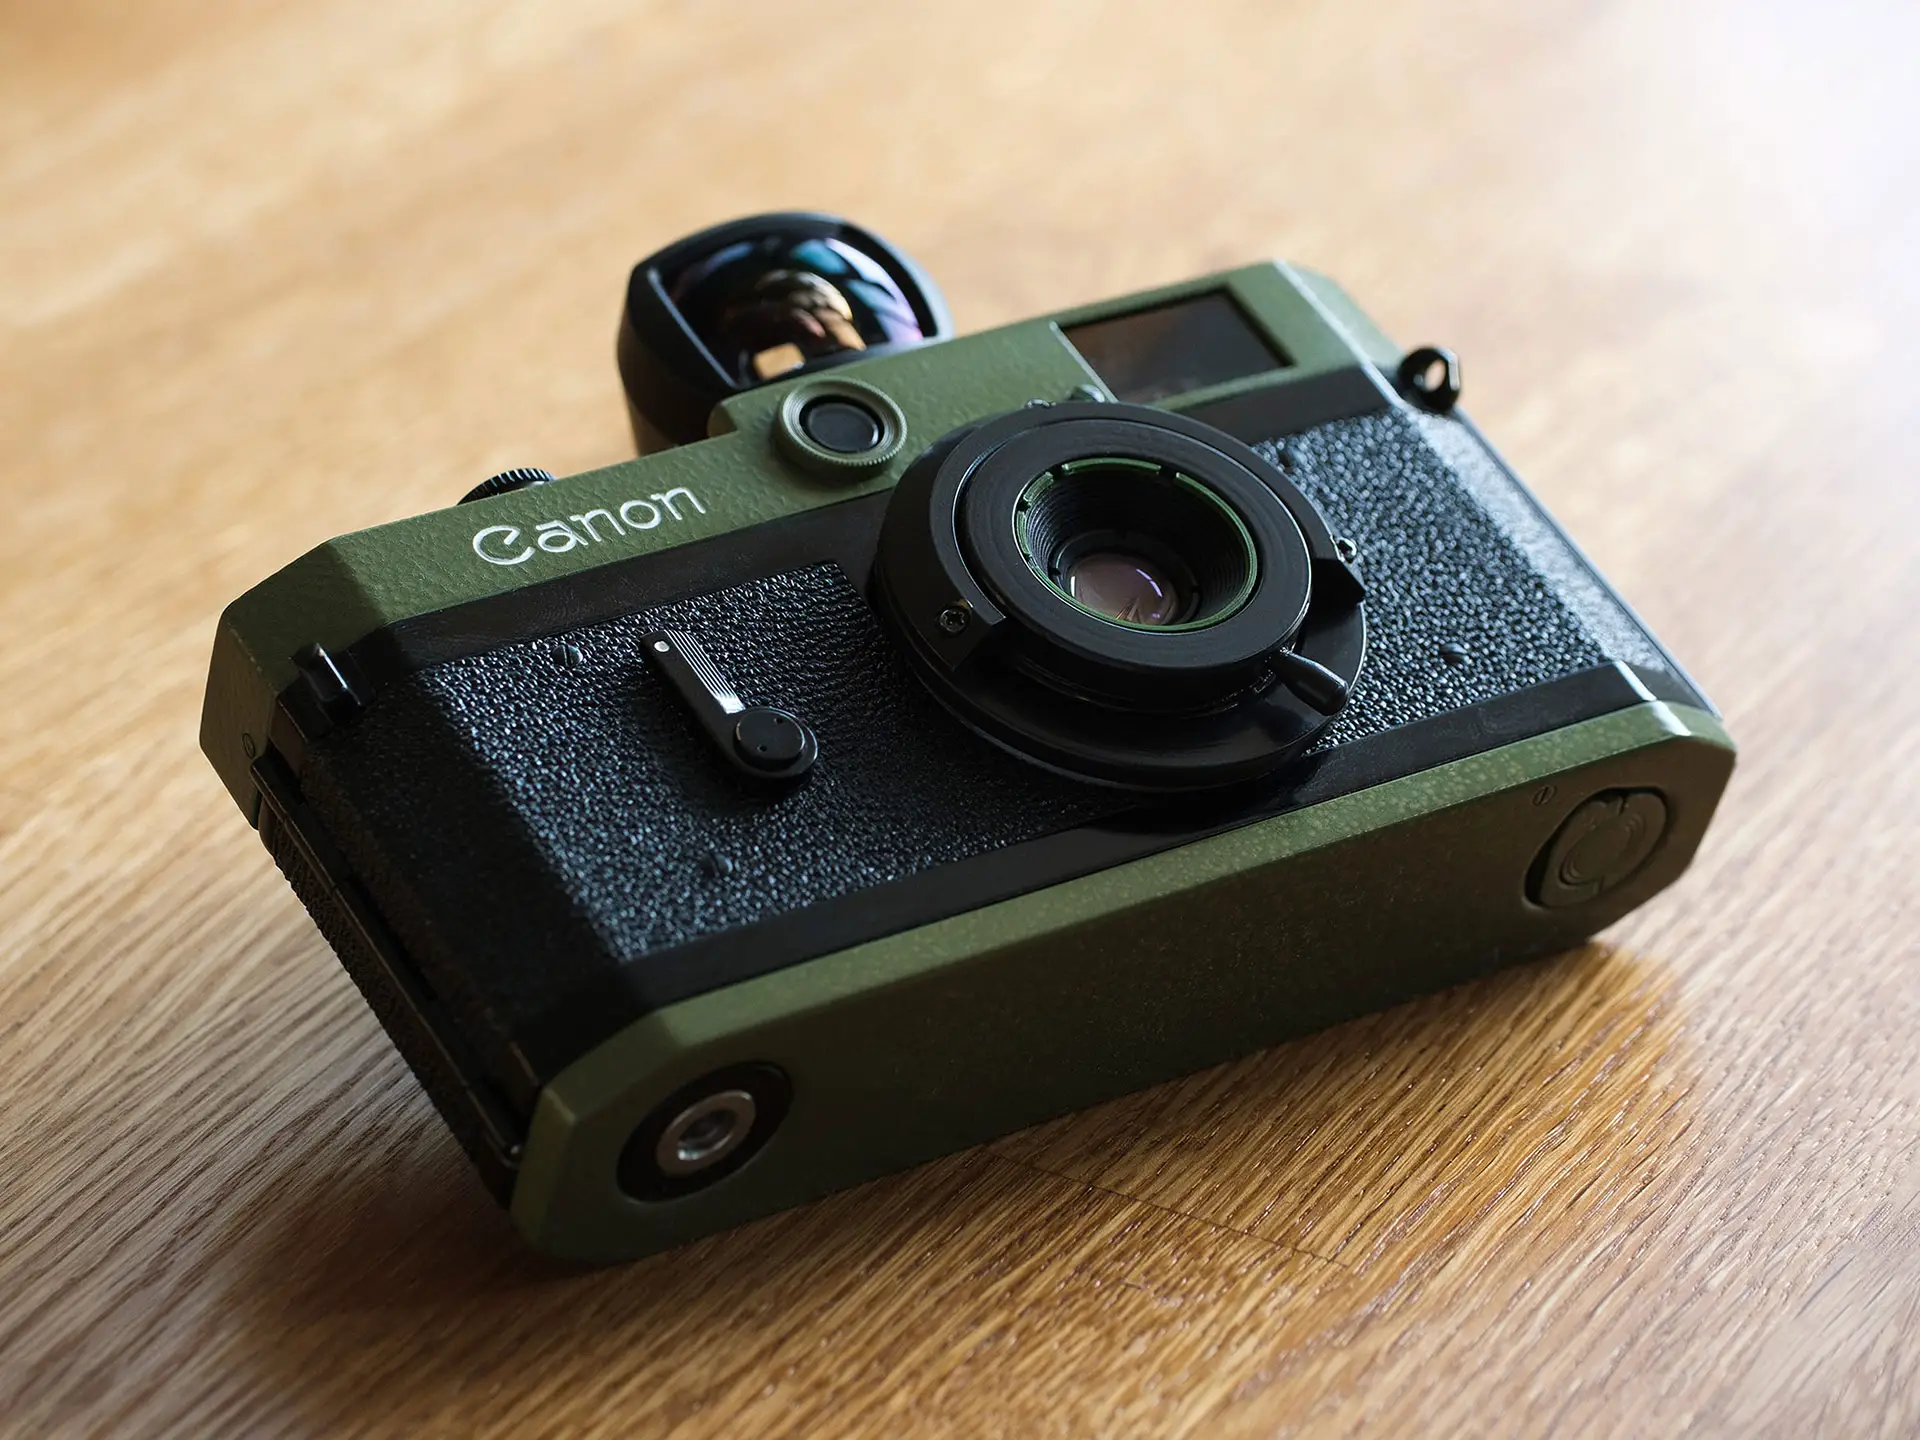
One of the talented makers I discovered on Instagram is Rodrigo Silva (@rodsgear) from Sao Paulo, Brazil. He has been doing many p&s lens conversions (among other things) which were done via 3D printing but one day he decided to create a proper brass or aluminum machined focusing helicoid for the LTM/L39 mount. Optionally with a cerakote finish and an additional M mount adapter. As an owner of a Canon P and a Nicca Type-3, I got interested in his project immediately. Rodrigo asked who would like to purchase a unit to see if the concept was viable production wise (made locally). The main idea was that those who were interested would not only get the machined helicoid but also order a fully finished lens conversion as well. Either by sending in a donor camera/lens or even Rodrigo getting a donor camera locally if possible. I believe I was the only one for the first batch who ordered just the helicoid because I was planning to do the conversion myself anyway. His design was super appealing because it could serve as a beautiful base for not only this particular lens conversion but also future ones to come.

In essence Rodrigo’s helicoid adapter allows the installation of p&s lenses to create a custom pancake style lens. Given the size of the whole unit and variety of different lenses the finished conversion ends up having a fixed aperture (like many compact pancake lenses do) and requires zone focusing. The lens conversions that Rodrigo mostly offers have the p&s lens of choice installed and then permanently fixed inside the helicoid. He can model and 3D print the part holding the p&s lens and screw that into the helicoid far enough to be at the perfect flange distance… then simply fix it in place with glue. A great universal design. I believe he either selects the fixed aperture himself or asks the client which aperture they would like to have for the finished conversion. Given the work it already takes to do all that for different lenses I really like his approach.
My Own Conversion
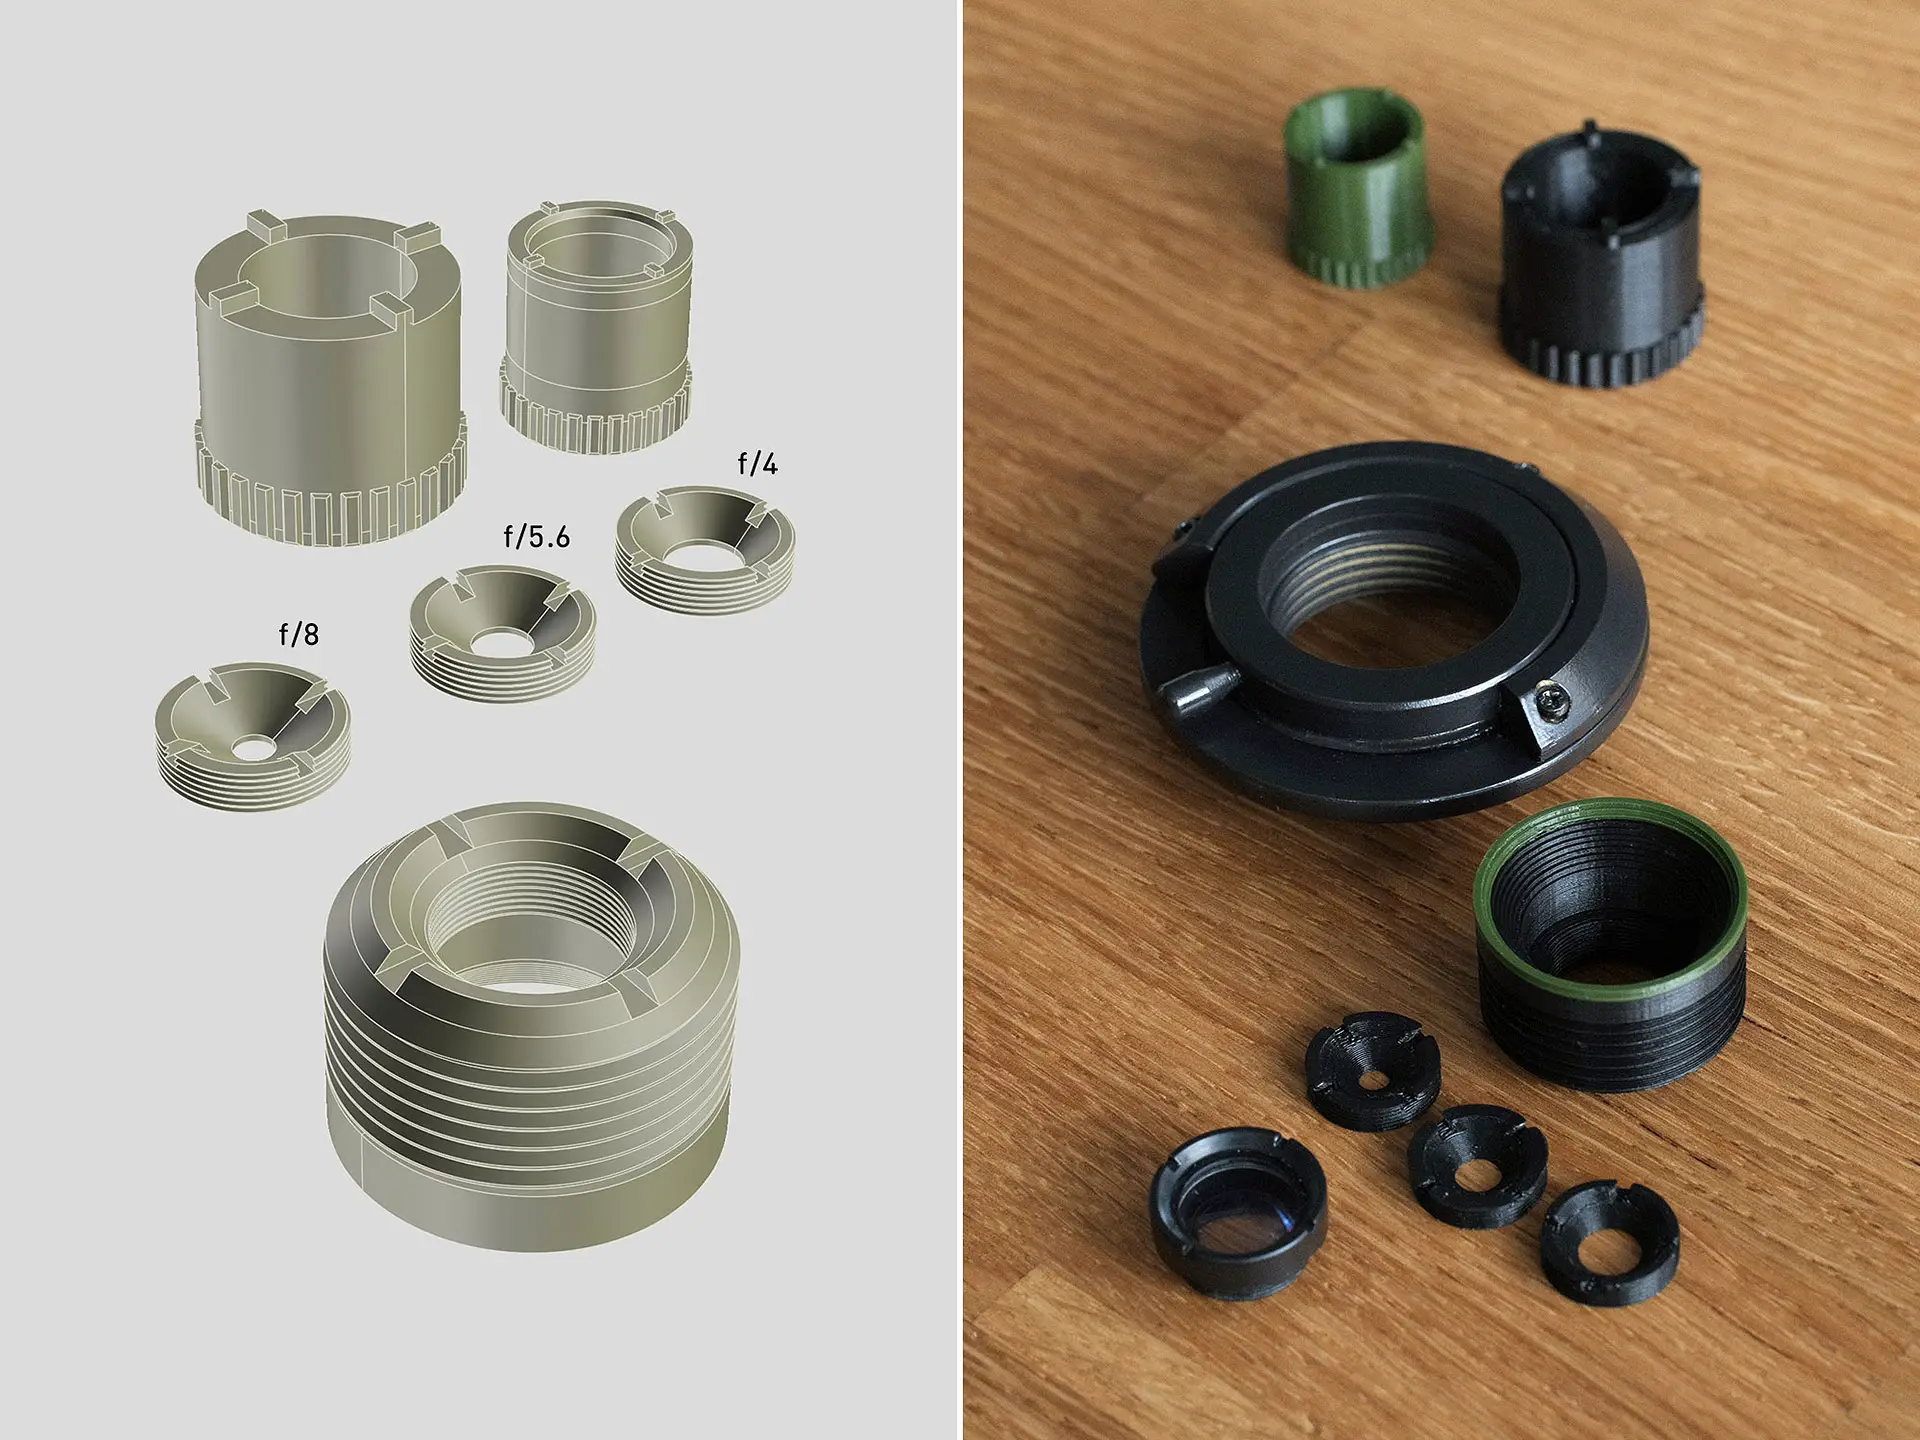
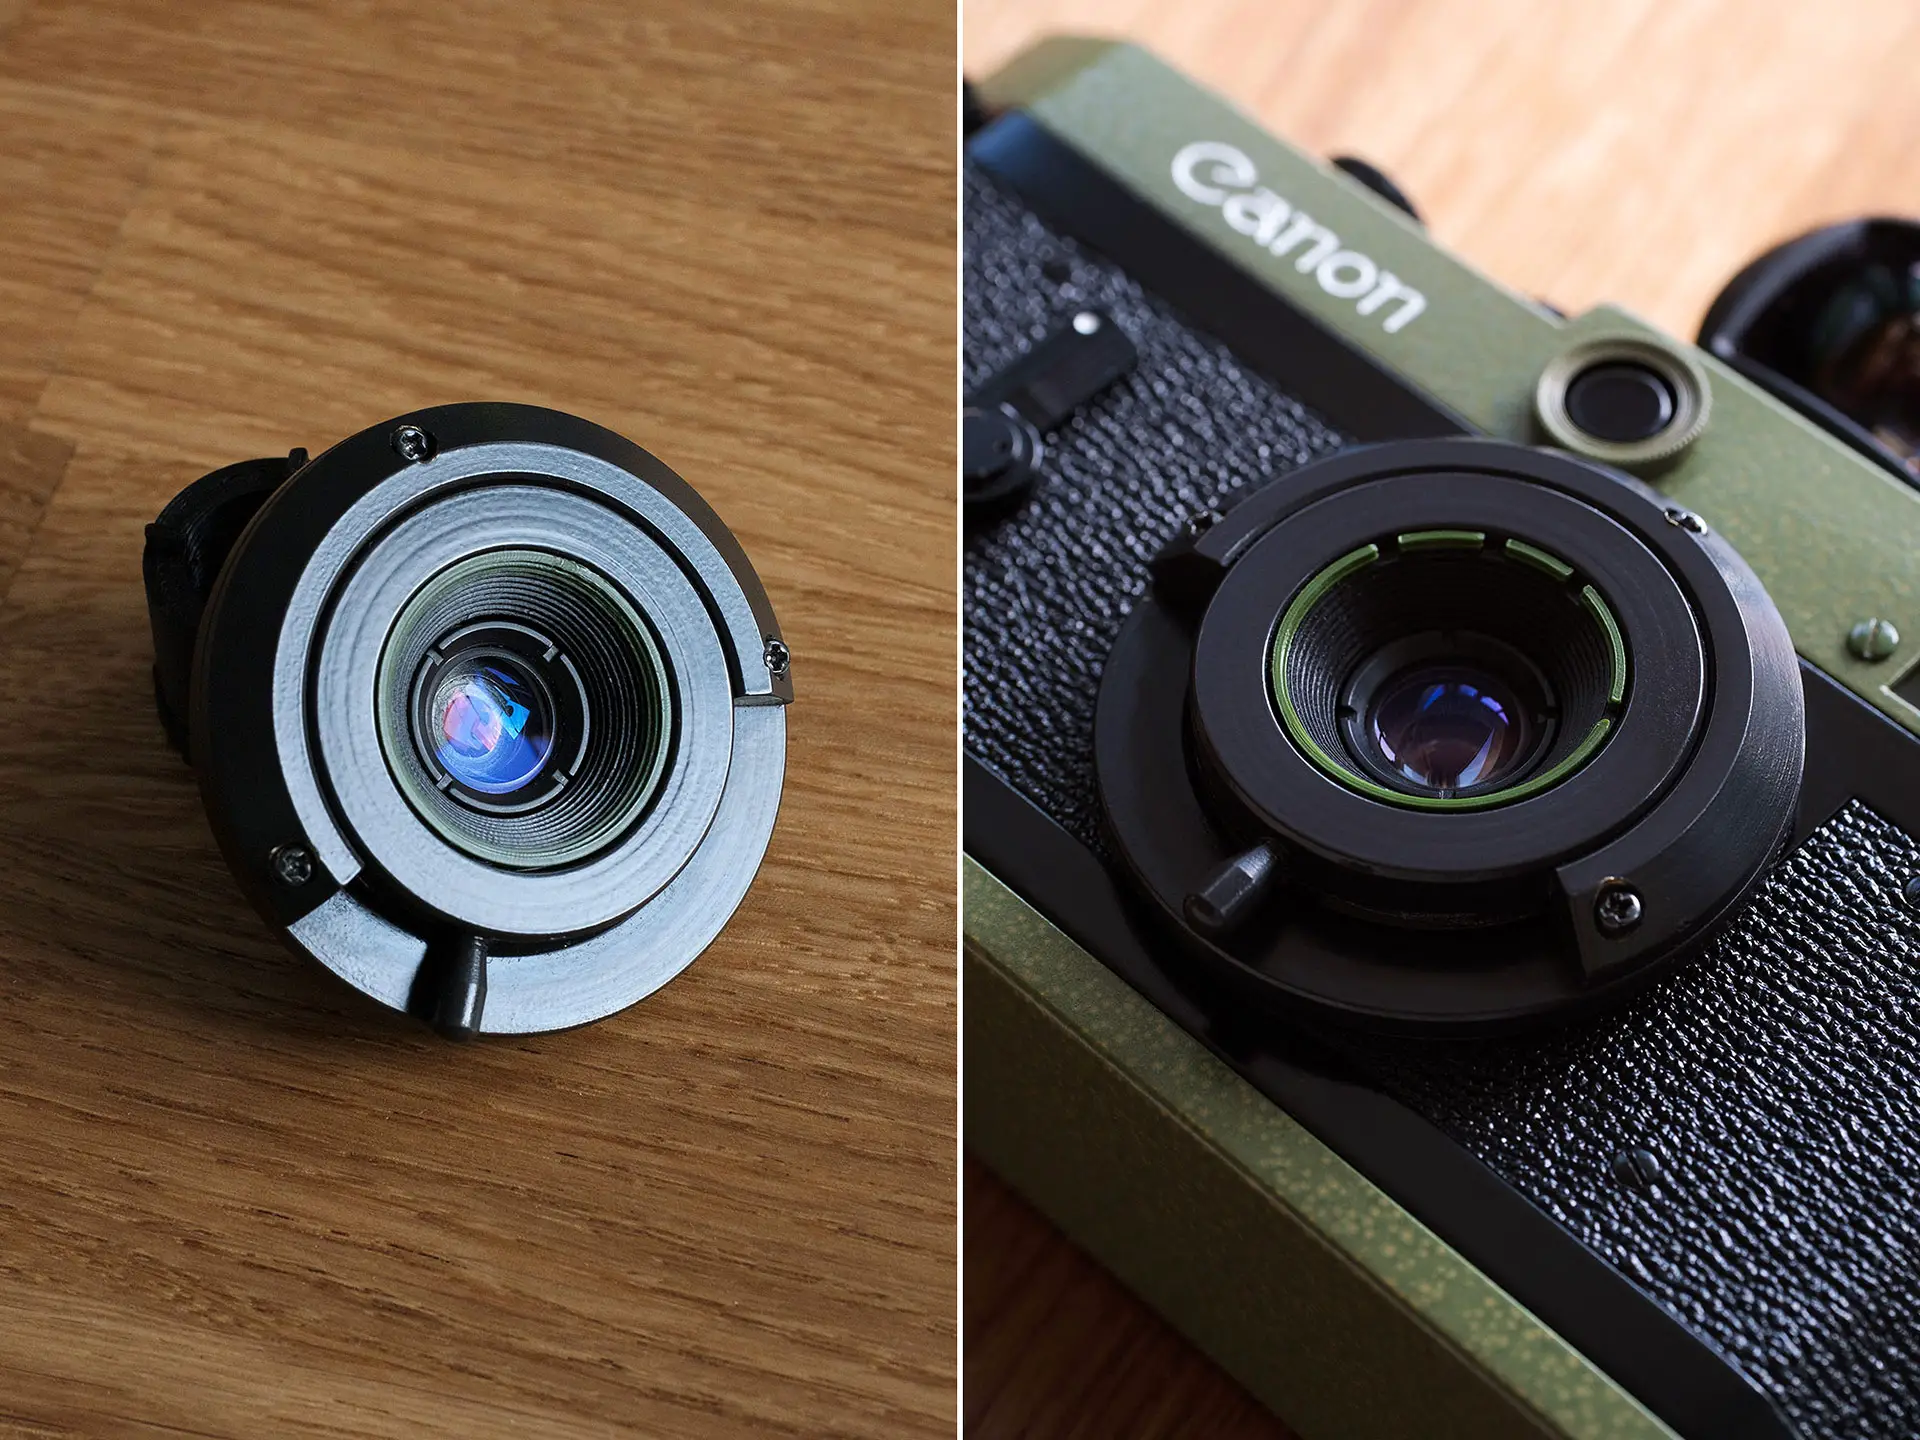
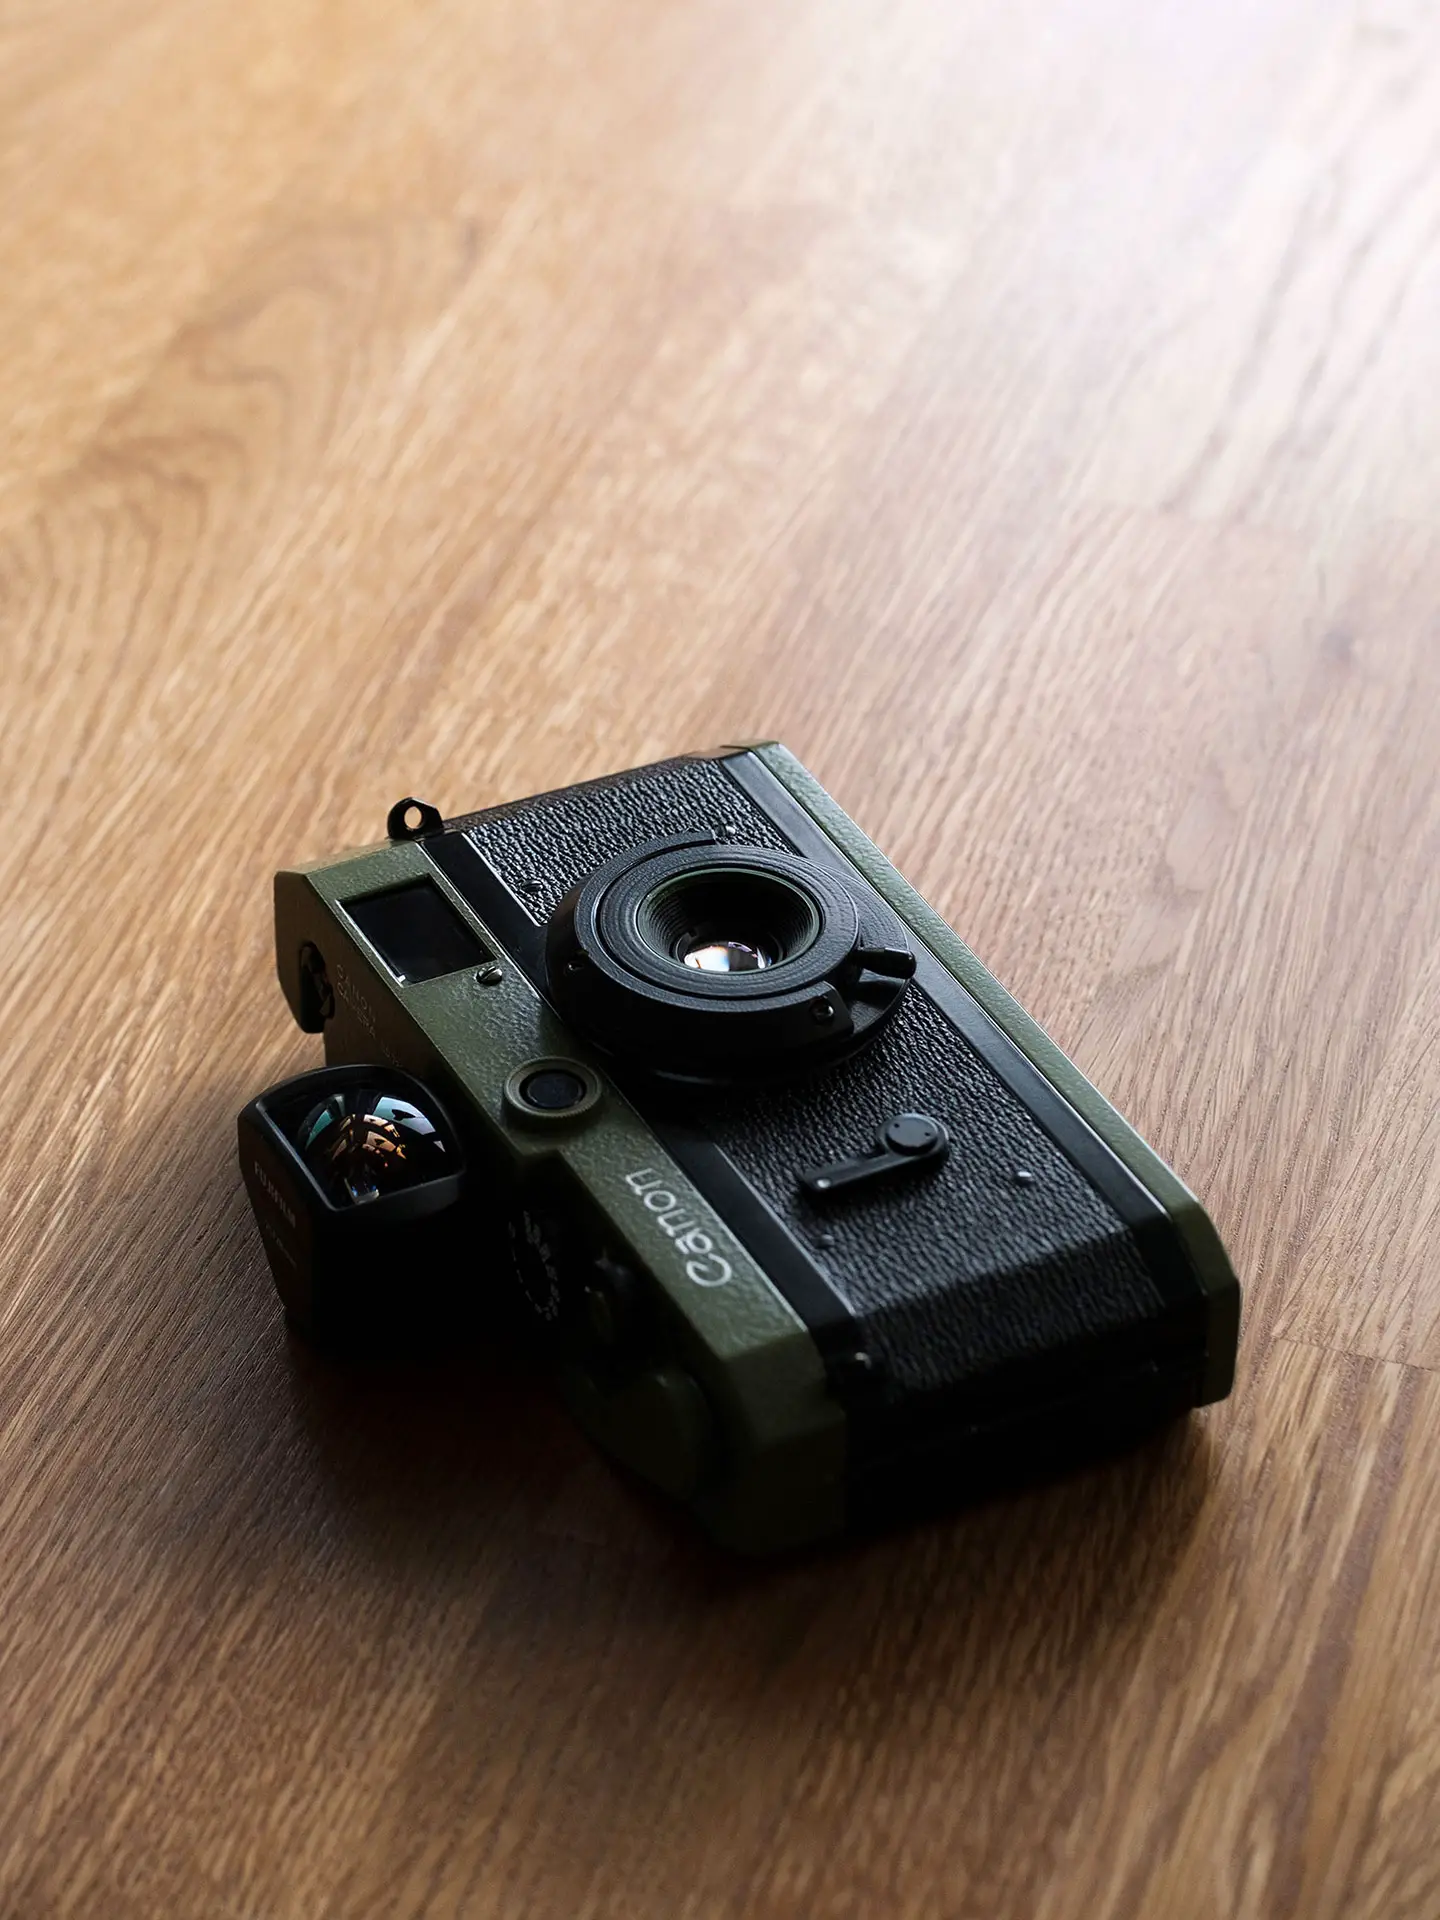
Given that I planned to do the conversion myself I had a lot more time to experiment and ways to develop something specific for my needs. Firstly I wanted to design the part that holds the lens in a way that it has an actual end stop when you screw it into the helicoid so I don’t need to permanently glue it in place, allowing me to remove it whenever I want to swap between lenses. To do that I had to do a bunch of measurements, model up the design but then really start iterating a whole lot until the 3D printed part screwed in and stopped at the ideal flange distance (judging by infinity focus). To judge whether the flange distance was in fact correct I was able to simply use an LTM adapter on my Fuji XT3. The second feature I wanted to include into my conversion was the ability to switch between different apertures. I mostly shoot 400 ISO films and wanted to be able to switch between roughly f4 to f8 depending on the day and light conditions. Thus I incorporated removable aperture rings into the design…basically screw in the right one before going out or even take different ones with you if you plan to switch between them on the go. Once again I had to iterate the design a bunch of times until the tolerances were on point and until I got my preferred apertures right. The latter was also done by iteration and via tests/comparisons to my dedicated LTM lenses from Voigtländer. To make the removal of the whole lens assembly easier I also 3D printed small tools just for this job.
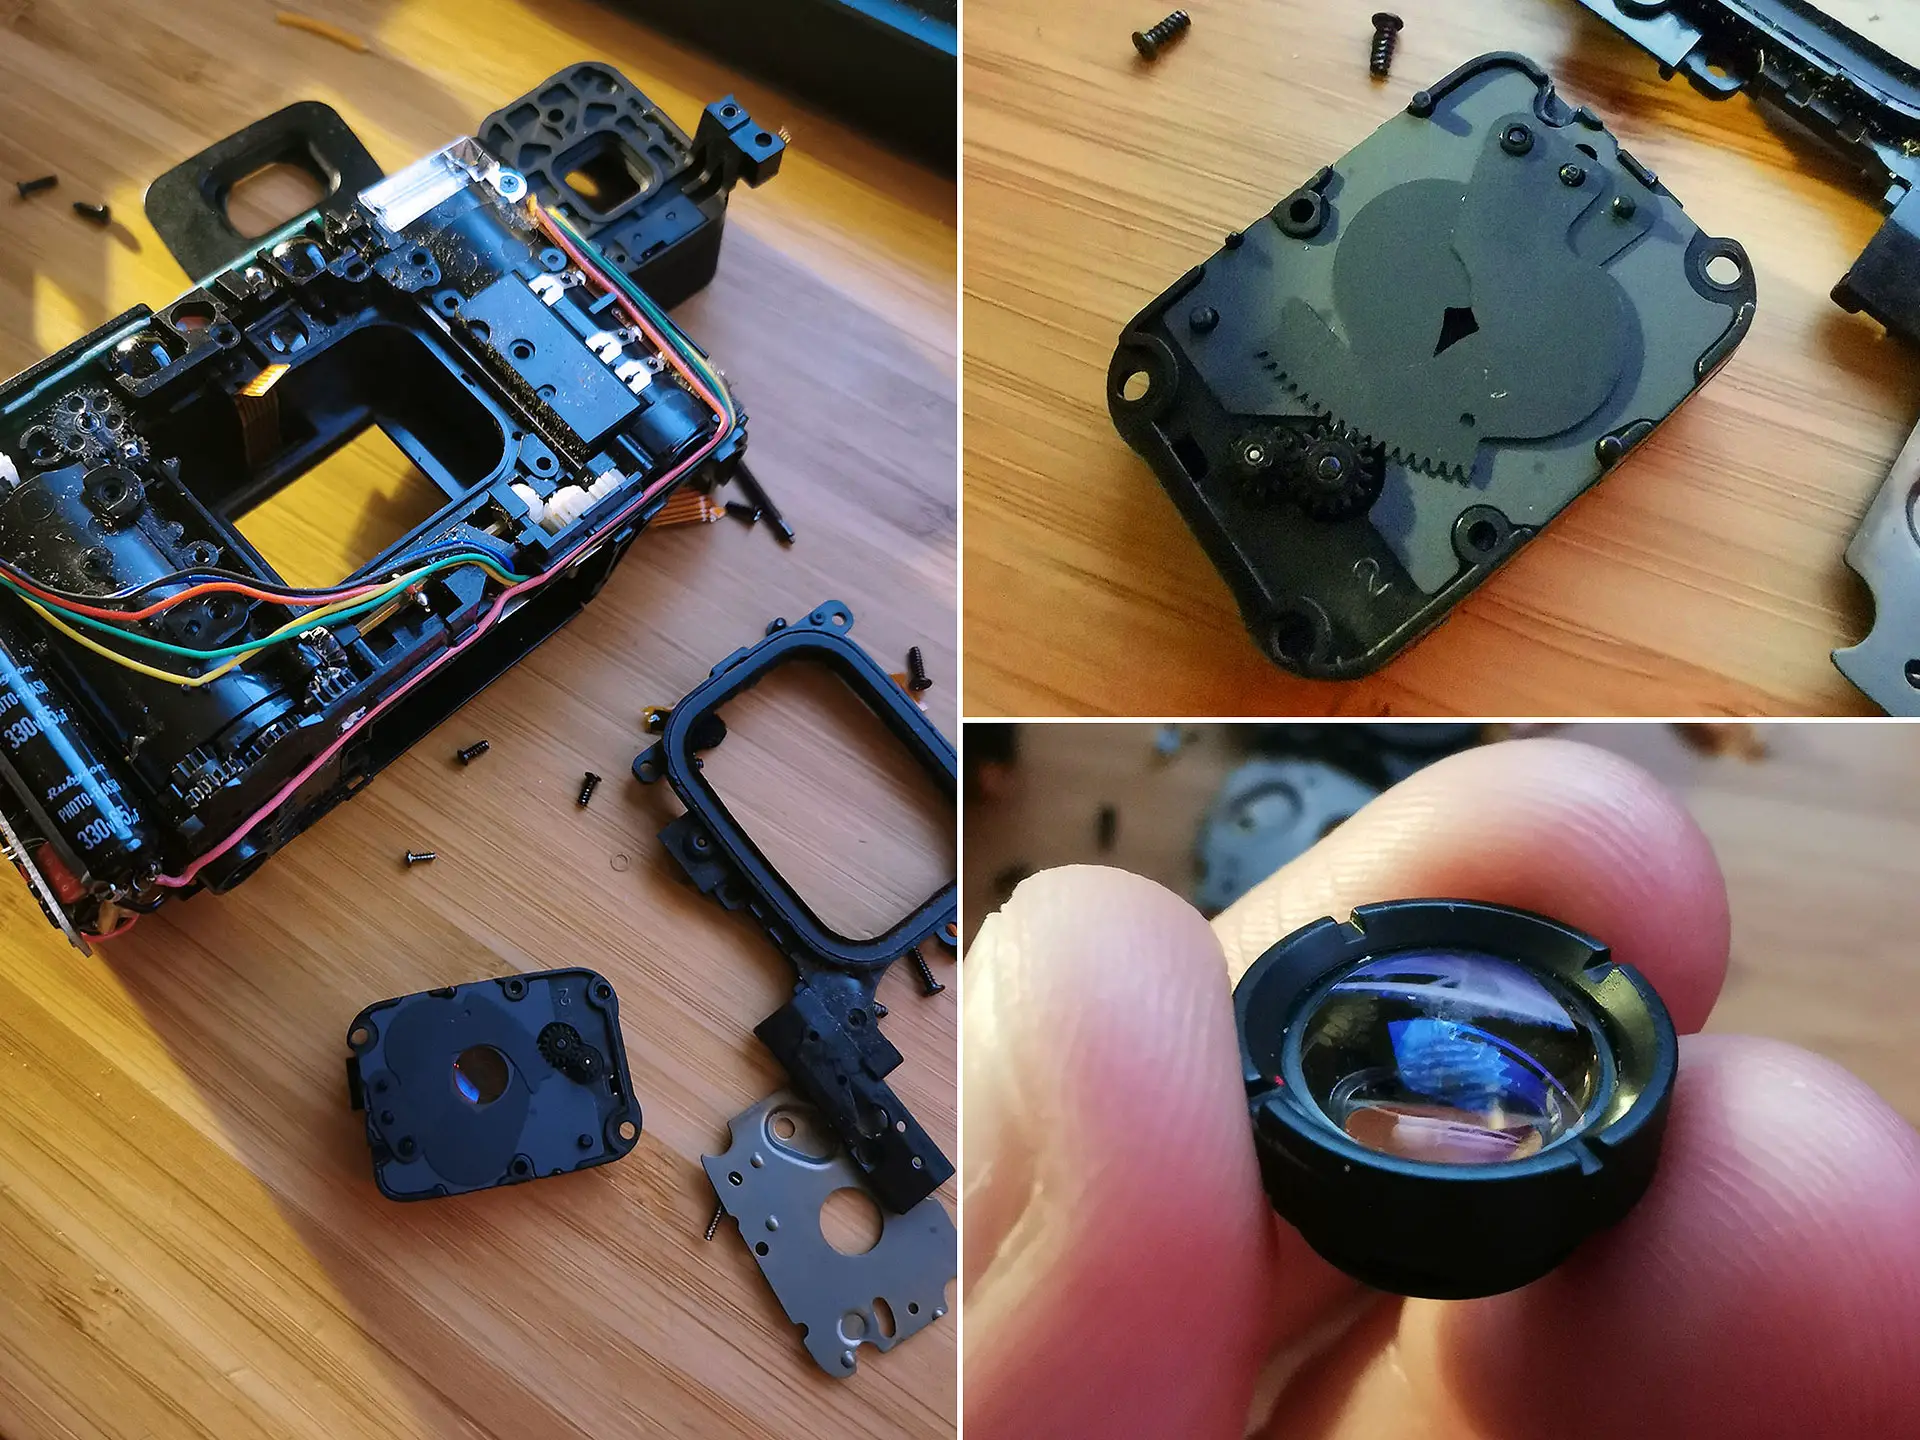
As for the actual lens and why I went for the Nikon AF600. I already owned 35mm and 21mm Voigtländer Color-Skopar lenses so to cover the in-between I wanted to use a 28mm p&s lens for this conversion. I looked at potential 28mm p&s cameras and really liked a lot of results I found online (including here) from the AF600. A quick Ebay search led me to a broken copy which I got for cheap. Extracting the tiny lens unit itself was relatively easy. It was also interesting to see the original 2-blade aperture design.
Once I got the lens to the correct flange distance I figured out the right focus scale and modeled the distance marks into the 3D printed part (some photos show the part before I incorporated the distance marks yet). All I really needed was the closest distance (roughly 50cm), then one for 1m, 3m and infinity. The distances in between can still be somewhat estimated. You can see the distance marks as cut-outs in the upper most green ring (green to match my repainted Canon P). I just have to align them to the upper screw of the helicoid. This way the design remains minimal but I still know how to use it quite reliably.
The Results
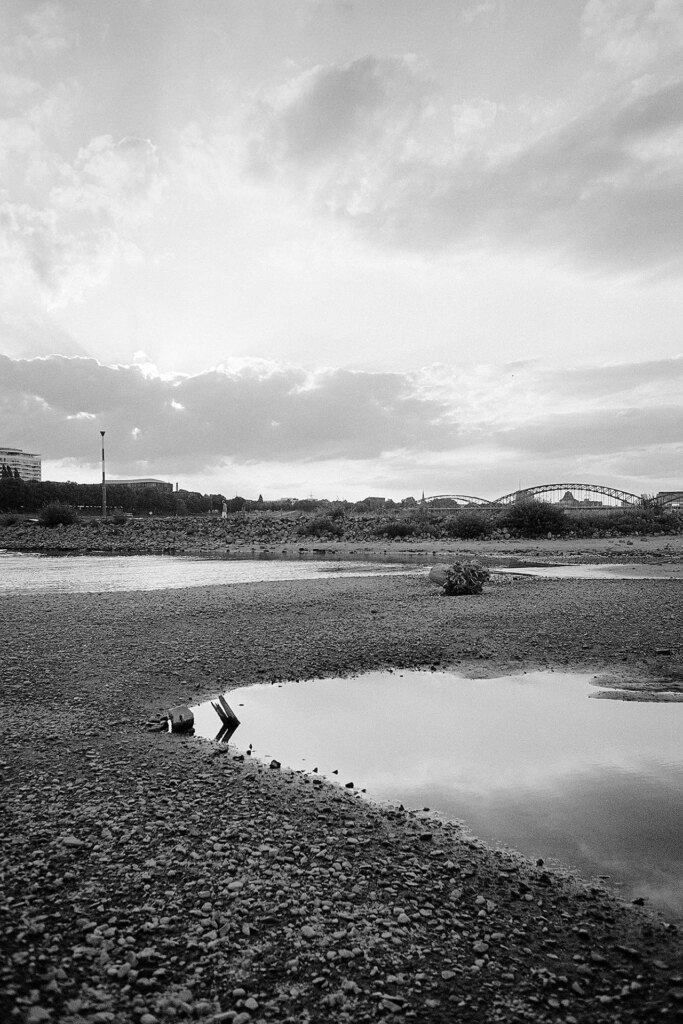
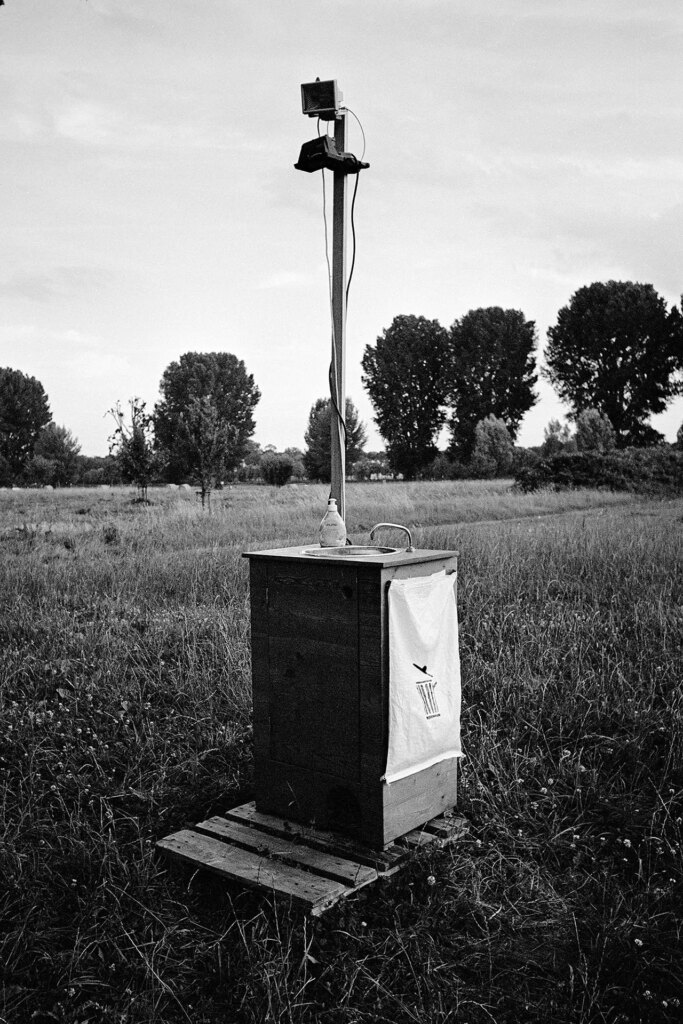
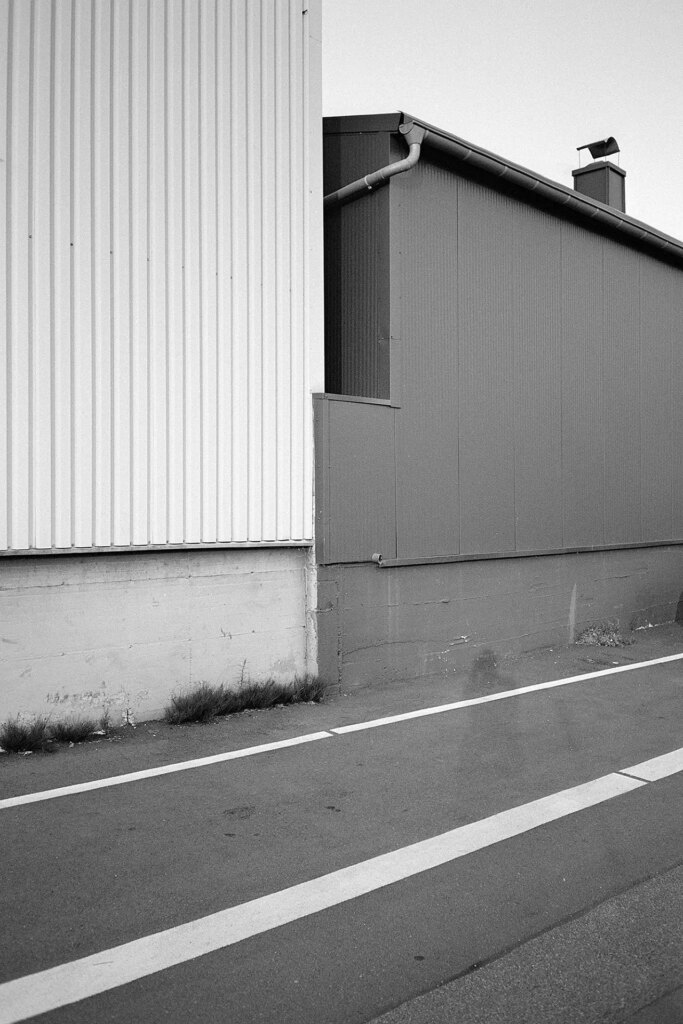
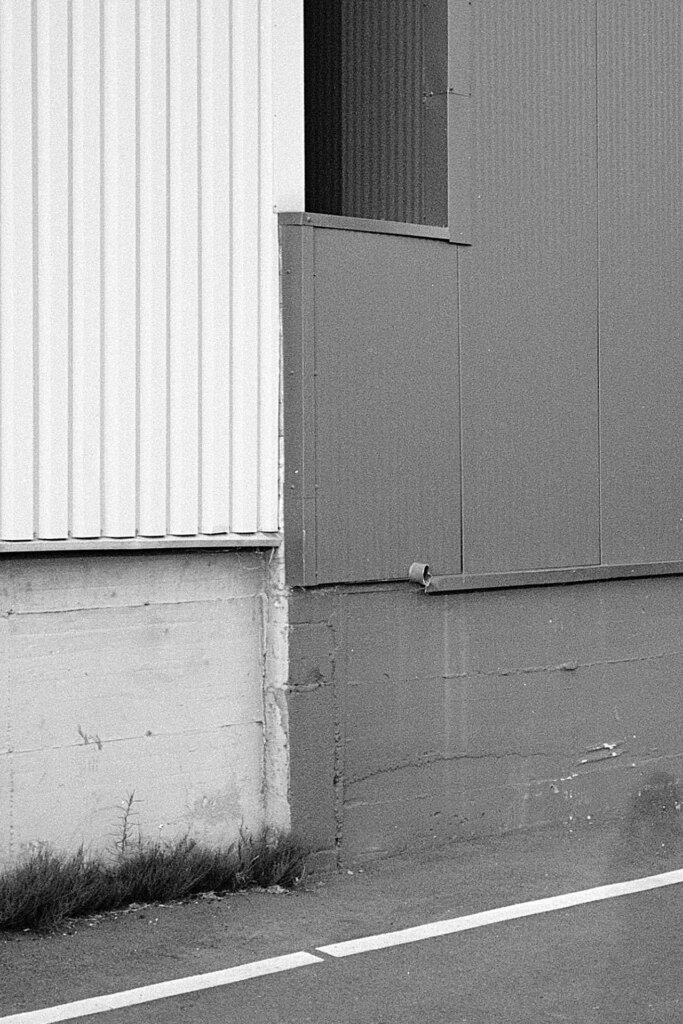
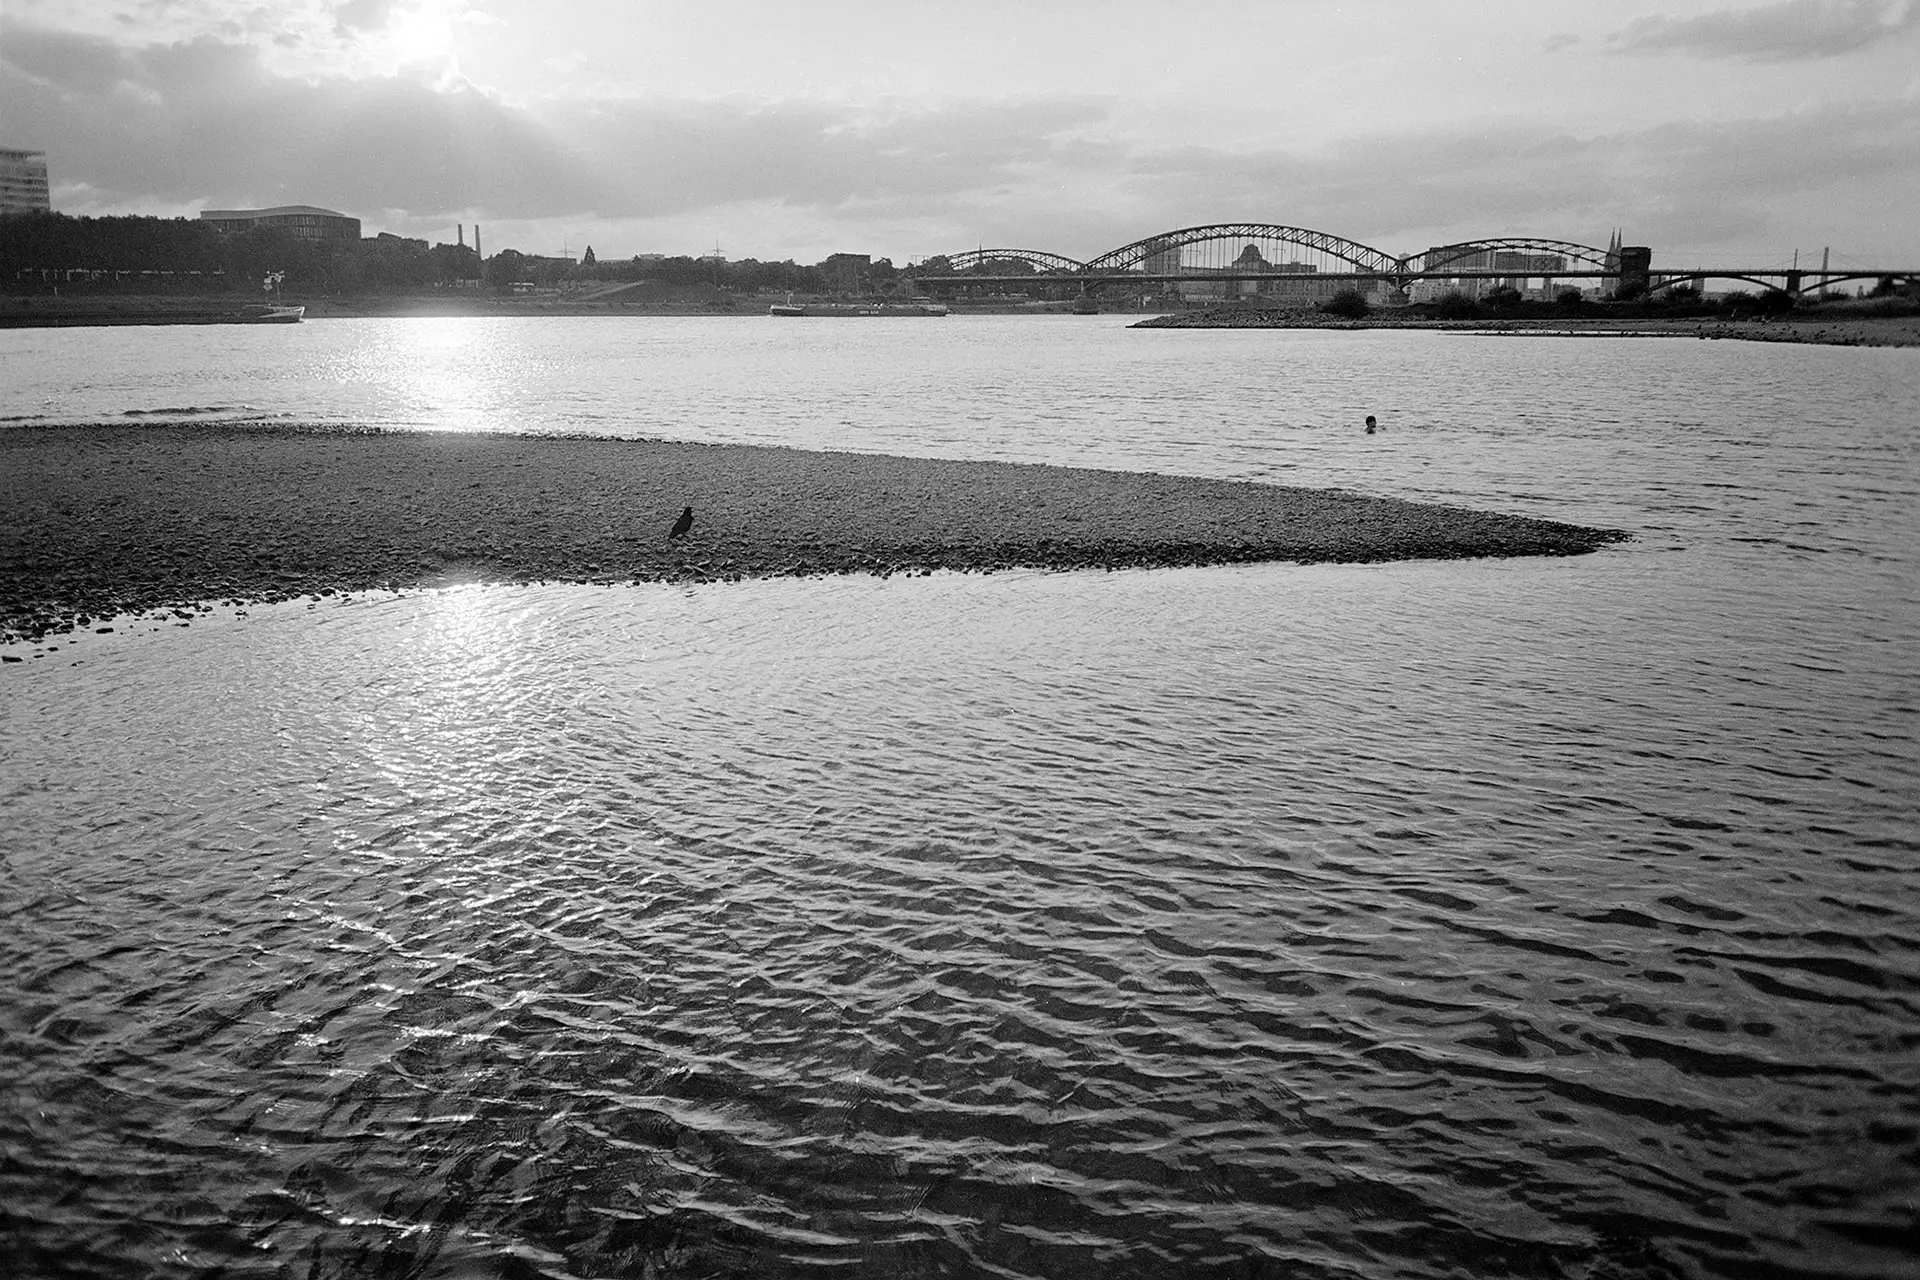
This write up already ended up quite lengthy because I wanted to focus on the design thinking and process behind this project. So I won’t be going into too much detail about the lens performance. Shortly put I couldn’t be happier given how tiny the lens is. It is super sharp, to my surprise it is almost distortion free and even performs well in direct sun light. I hope the photos I’m sharing here showcase what I mean (all shot on Ilford XP2). The only weakness I found so far is some field curvature in the outer most corners when focusing on something close. This however is rarely noticeable (at least in the kind of shots I tend to take) and as far as I can tell this can be often observed with many other p&s cameras as well. I really like how the lens renders. And now that the aperture is a perfect circle it also looks smoother in out of focus areas compared to the original, somewhat funky aperture shape.


I do not plan to offer lens conversions like these myself as of now. Aside from the amount of work required I would have to register a whole new business just to be allowed to take money for it. However I’ve sent Rodrigo my design files and allowed him to do whatever he wants with it. If you happen to want this exact lens conversion done and can provide a donor Nikon AF600 he might 3D print and install it for you directly. Since I finished my conversion Rodrigo has already done his second batch of the helicoid adapters including lens conversions. Reach out to him if you are interested or simply follow his work here: Rodrigo’s Instagram Besides that he also outlined the project for the first batch here: Rodrigo’s Blog Post
As for me, you can follow my photography on Instagram and on Flickr
And for my design stuff (3D printing/DIY and CGI) follow me on my design centered 2nd Instagram Account
Cheers to all who managed to read this far and I hope it was worth your time.
Andreas
A little PS from Hamish: Since Andreas got in touch with me, I have also had Rod make a lens for me. It’s a Yashica T lens mounted with a fixed f/5.6 aperture. I will be reviewing it as some point this year.
Share this post:


Comments
Stuart Walker on Lens Conversion – Nikon AF600 to LTM/L39 with a ‘Rod’s Gear’ Housing – By Andreas Mass
Comment posted: 25/01/2023
Why didn't you just buy a Voigtländer 28mm f/2.8 SLII-S and be done with it.
Crazy if you ask me the road you went down
All best
Stu
Comment posted: 25/01/2023
mike tynan on Lens Conversion – Nikon AF600 to LTM/L39 with a ‘Rod’s Gear’ Housing – By Andreas Mass
Comment posted: 25/01/2023
Comment posted: 25/01/2023
Anders Lewis on Lens Conversion – Nikon AF600 to LTM/L39 with a ‘Rod’s Gear’ Housing – By Andreas Mass
Comment posted: 25/01/2023
Comment posted: 25/01/2023
Andrew Bearman on Lens Conversion – Nikon AF600 to LTM/L39 with a ‘Rod’s Gear’ Housing – By Andreas Mass
Comment posted: 25/01/2023
Love the green! Who painted the P? It looks dappled yellow. Is that Cerakote?
Comment posted: 25/01/2023
Kurt Ingham on Lens Conversion – Nikon AF600 to LTM/L39 with a ‘Rod’s Gear’ Housing – By Andreas Mass
Comment posted: 25/01/2023
Comment posted: 25/01/2023
Mats on Lens Conversion – Nikon AF600 to LTM/L39 with a ‘Rod’s Gear’ Housing – By Andreas Mass
Comment posted: 26/01/2023
Very cool project and nice photos to boot
Comment posted: 26/01/2023
Comment posted: 26/01/2023
Comment posted: 26/01/2023
Comment posted: 26/01/2023