Those who shoot rangefinder cameras on a regular basis are probably aware of (they may even feel plagued by) vertical rangefinder misalignment.
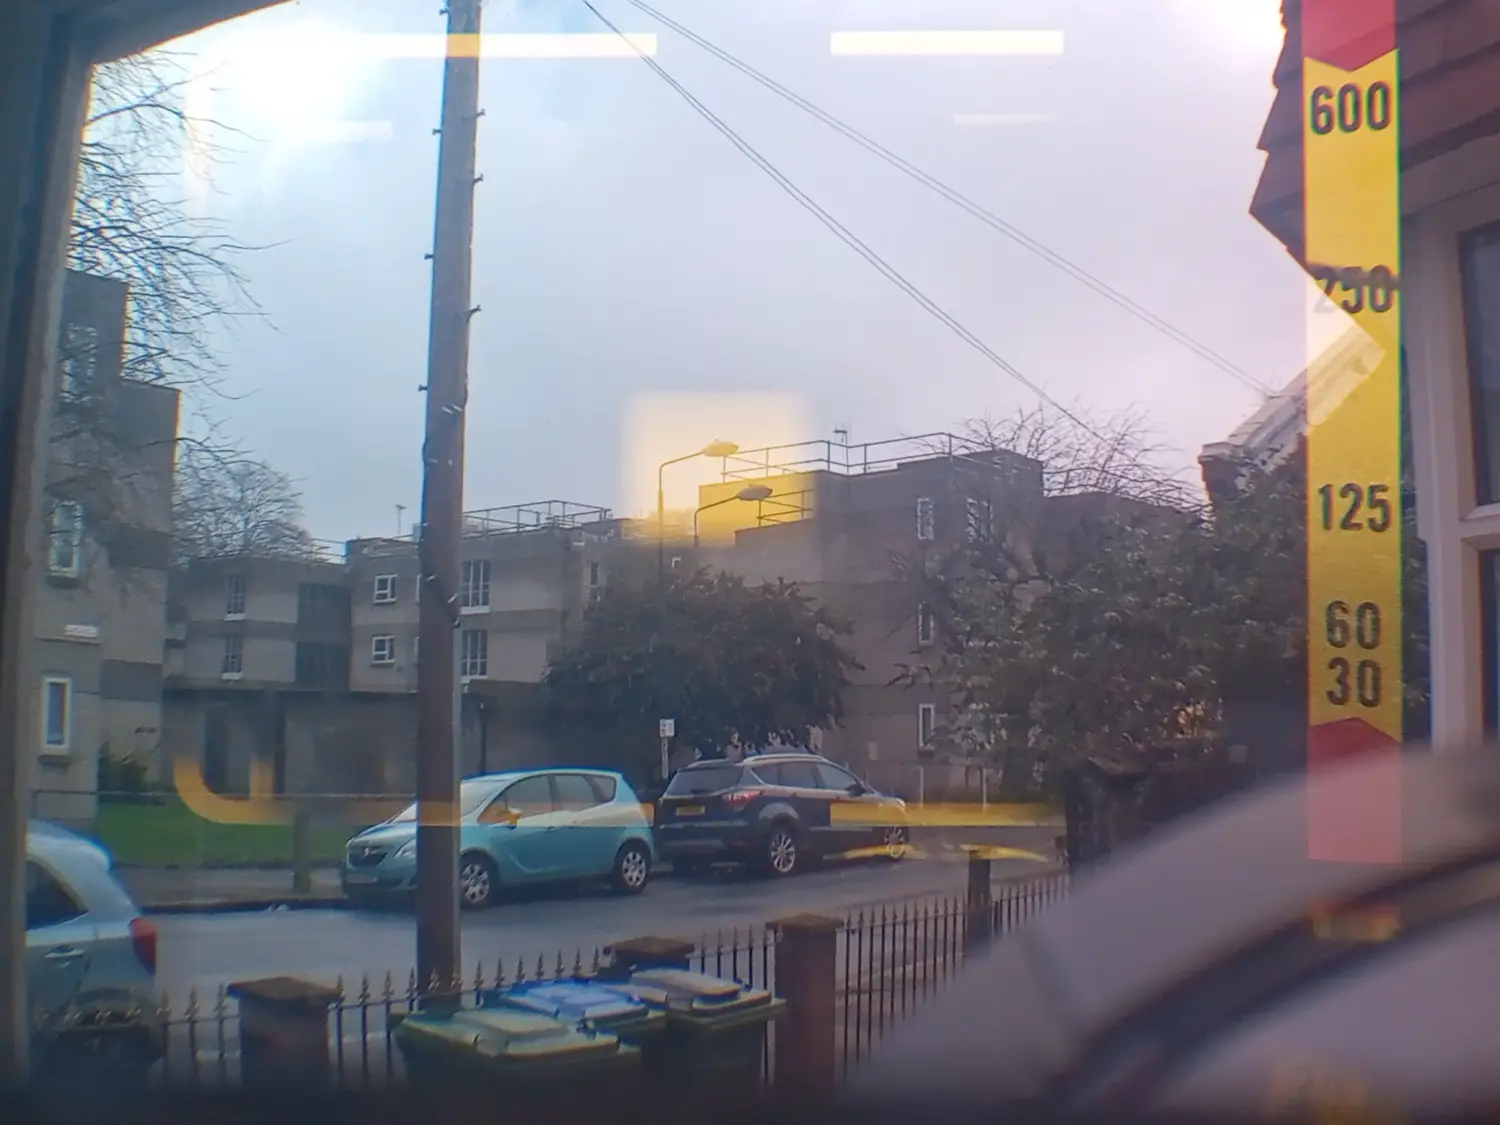
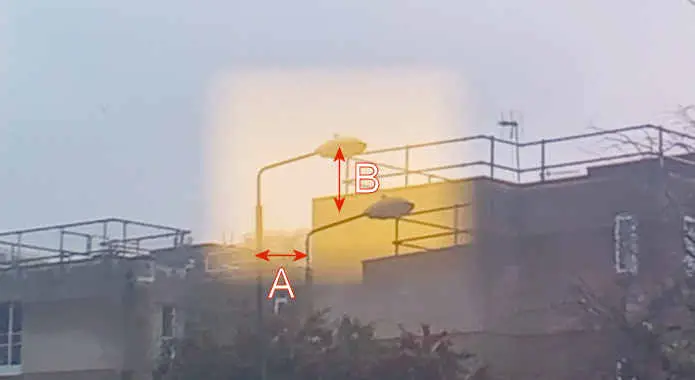
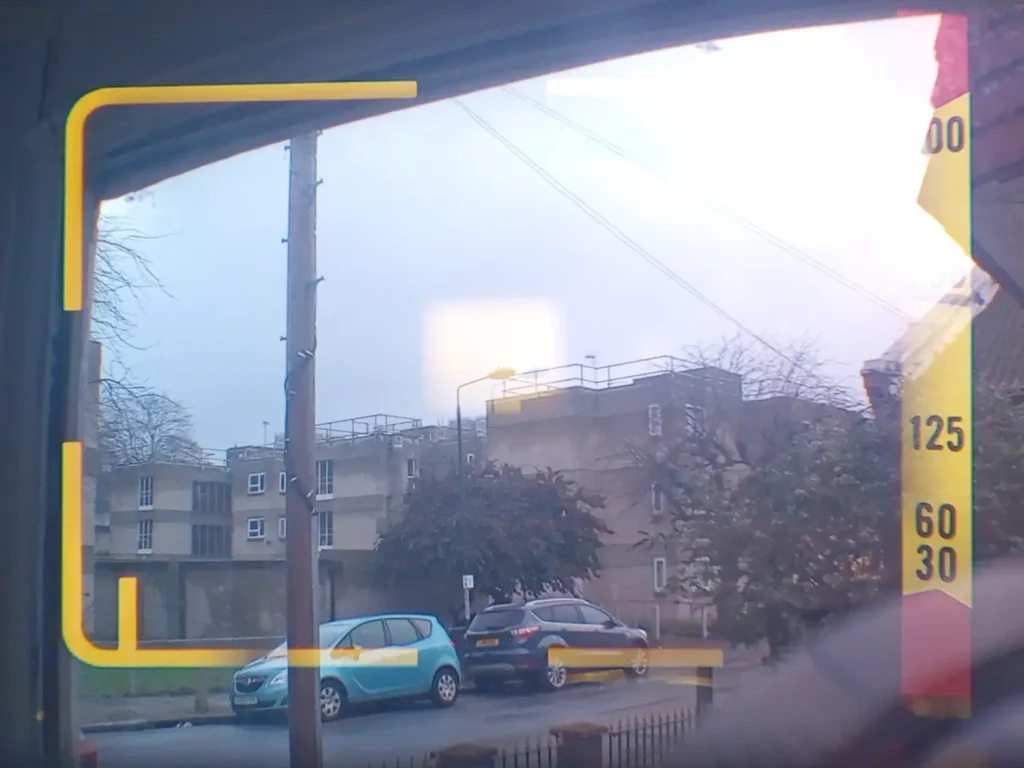
A camera rangefinder works by superimposing a (generally central) patch reflected from a position slightly to the side of the viewfinder into the direct vision viewfinder. When the calibrated rangefinder shows that both images coincide horizontally, we know the object in the patch is in focus. All quite practical, but there can be issues.
Unfortunately, the projected rangefinder patch can be out of phase vertically, even when focus is correct. For all practical purposes the rangefinder works, but it is harder to judge when the images are in horizontal alignment and so the whole focusing process is slowed.
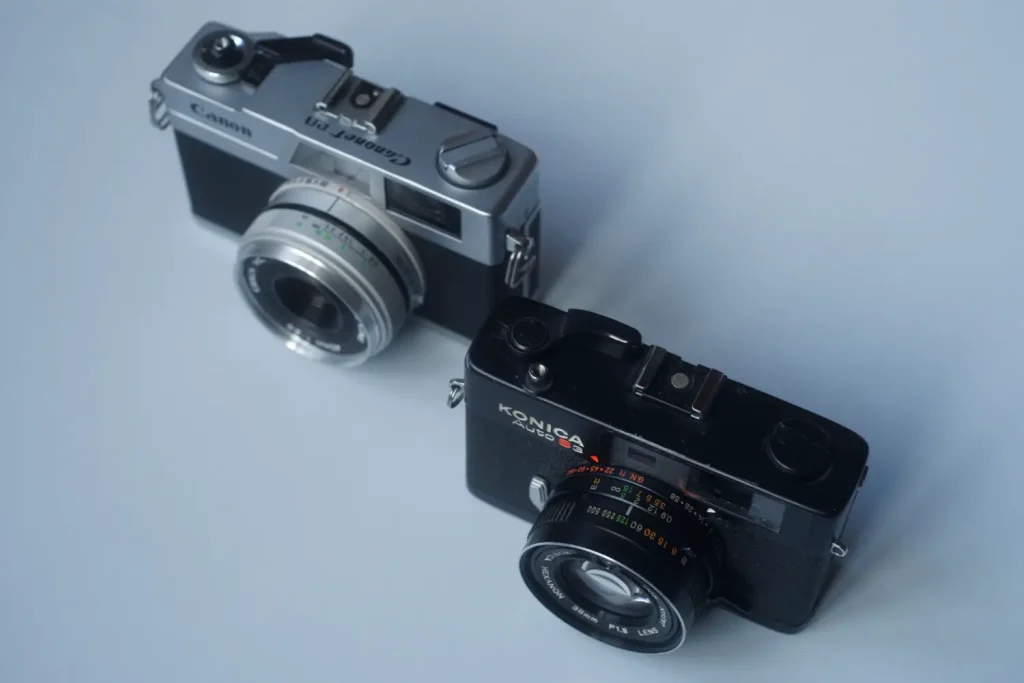
Rangefinder cameras generally have some form of adjustment to correct this vertical misalignment. In this article I would like to show you how to take the top plate off two fairly typical rangefinder cameras to enable adjustment. Of course all cameras are made slightly differently, but the same basic principles will apply for other small rangefinder cameras too. The two cameras I’m stripping down in this article are a Konica Auto S3 and a Canon Canonet 28
At this point, or quite soon, some readers will be scrolling down immediately to the comments boxes to point something out to me – I’d just like to reassure them at this stage, that I am planning to address my little error later on in the article…
Tools
Useful tools to have available for this sort of job are:
- a small cross-head precision screwdriver (preferably JIS), as the top-plate is likely to have some small screws holding it
- a small flat precision screwdriver, as the adjustments for the rangefinder are generally via a very fine slot head screw
- a pair of dividers and/or something grippy to allow the unscrewing of smooth retaining rings
Removing the rewind crank
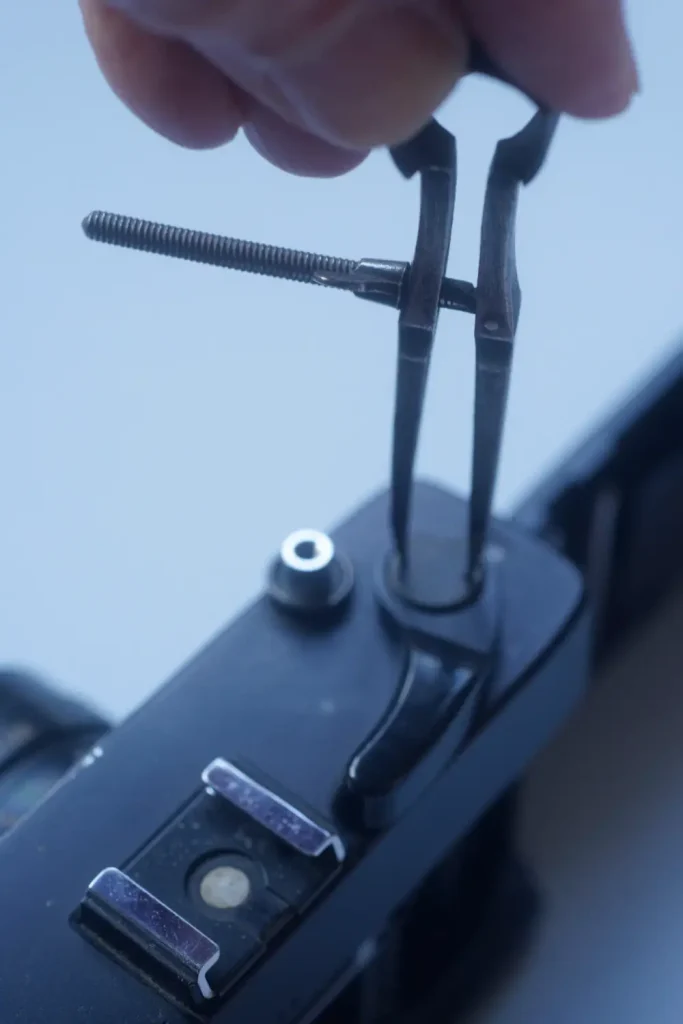
I always start off with the rewind crank. If there are no screws visible with the crank unfolded, this can generally be removed by opening the back, placing a screwdriver across the forks of the spindle inside the camera and unscrewing the crank anti-clockwise.
Locating and removing screws
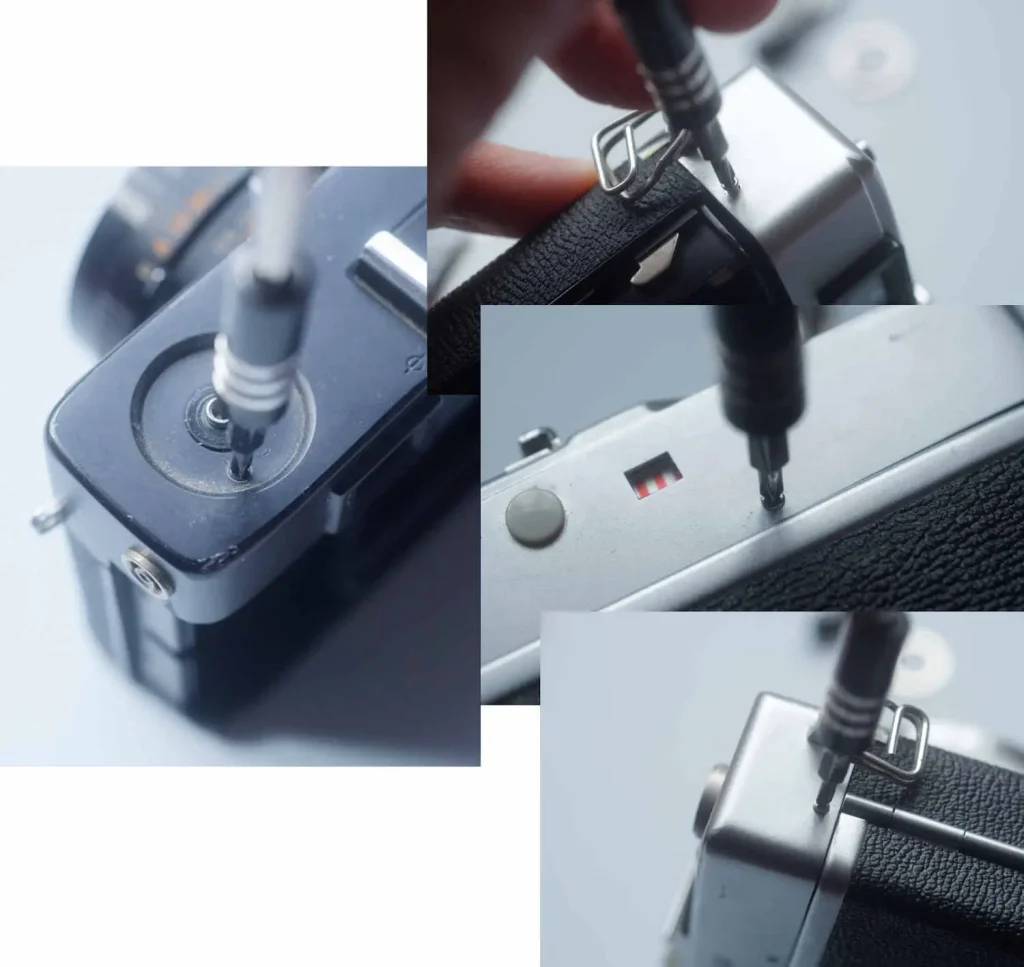
Once the rewind crank is off check around the body for screws—these might be hidden under where the crank was. There might only be one (as with the Konica), or there might be more dotted around the top plate (as is the case with the Canon).
Removing the film advance
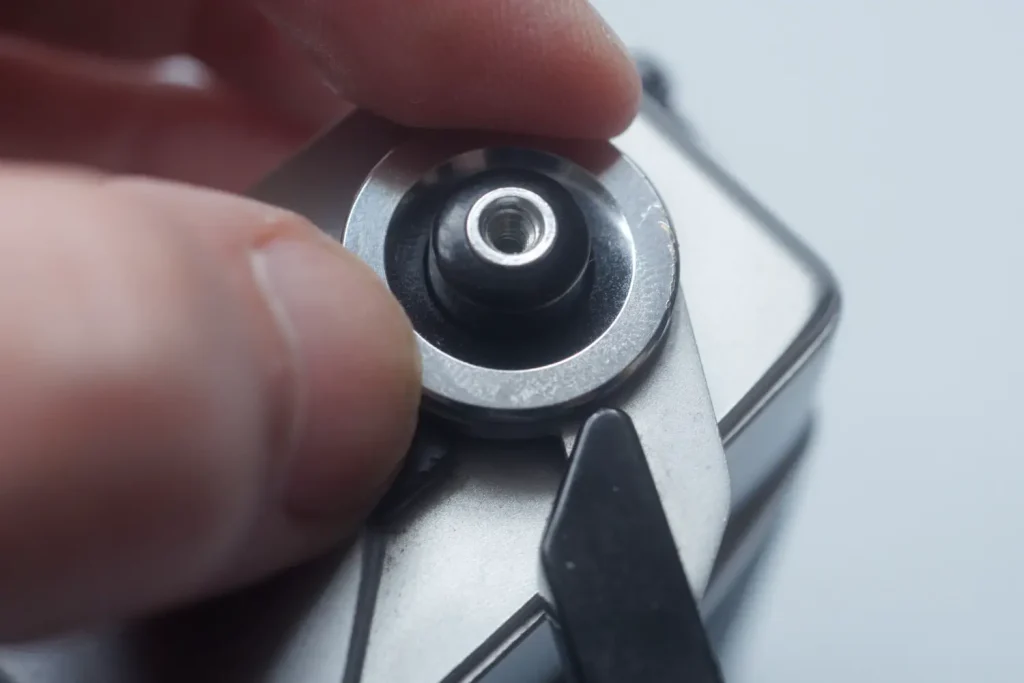
If the camera has a film advance on the top surface, you will need to remove that. The Konica has a cap over the lever boss with little holes in it to take the points of a pair of dividers. The one on the Konica comes off anti-clockwise, but beware of forcing similar caps as some may have a left-hand thread and putting too much stress on the cap may well make it shear from the thread holding it in place. With the cap, wind-on lever and sprung washers removed, you will see a little cam that engages with the lever. The cam just lifts clear, but underneath it is another ring with notches in it; this will come off with careful application of the dividers.
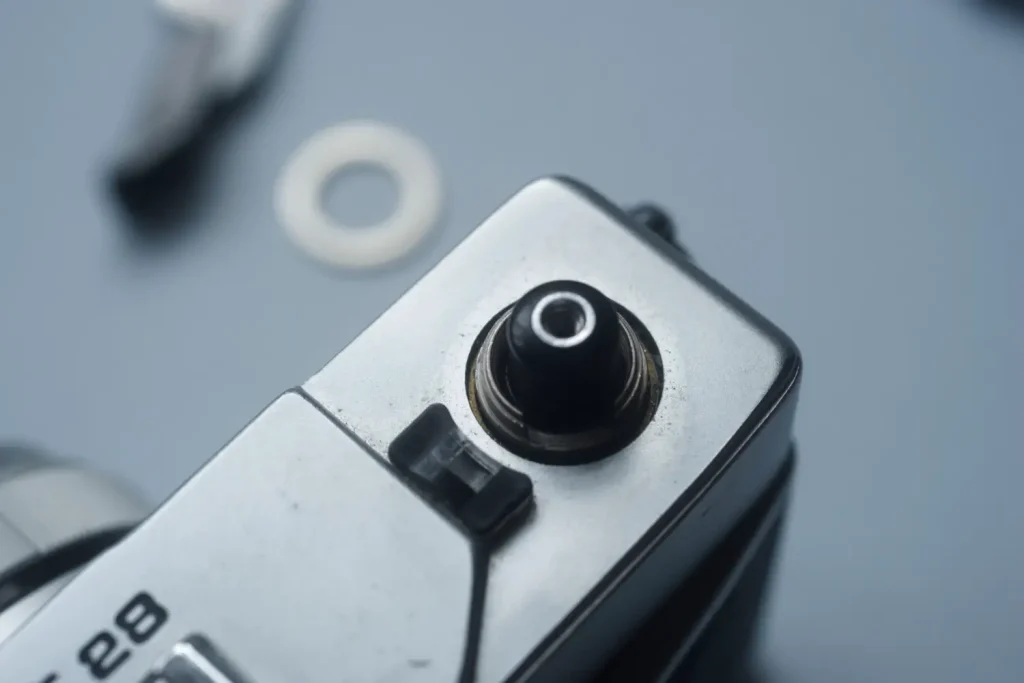
A smooth ring holds the Canon wind lever in place. This needs something grippy on it to undo anti-clockwise. Soft rubber friction wrenches are best, but you may be able to use your fingers, a bit of rubber sheet or a modified eraser. Pliers will work but you risk damaging the finish.
With all the screws and that smooth ring, you’d almost think that Canon didn’t want you to take that top-plate off… more of that later…
Lifting the lid
If you have removed all the screws, the top plate should now slide off. If you are taking apart a different model to either of the above cameras, investigate any resistance to find out what screw or catch is holding the top-plate in place. Sometimes screws can be hidden under logos, bits of trim or even hot-shoes. Remember that if they have hidden it, that may be a sign that they don’t think you should go in there. If in doubt, Google it, someone else will have tried it before and posted something somewhere.
Some rangefinder cameras with a hot shoe may have soldered wires connecting the body and top plate. In the case of my two examples, the Konica is wired, while the Canon connects via pressure contacts. I’ve seen similar on the Canonet 1.9, so that seems to be a Canon way of doing things.
Adjustment
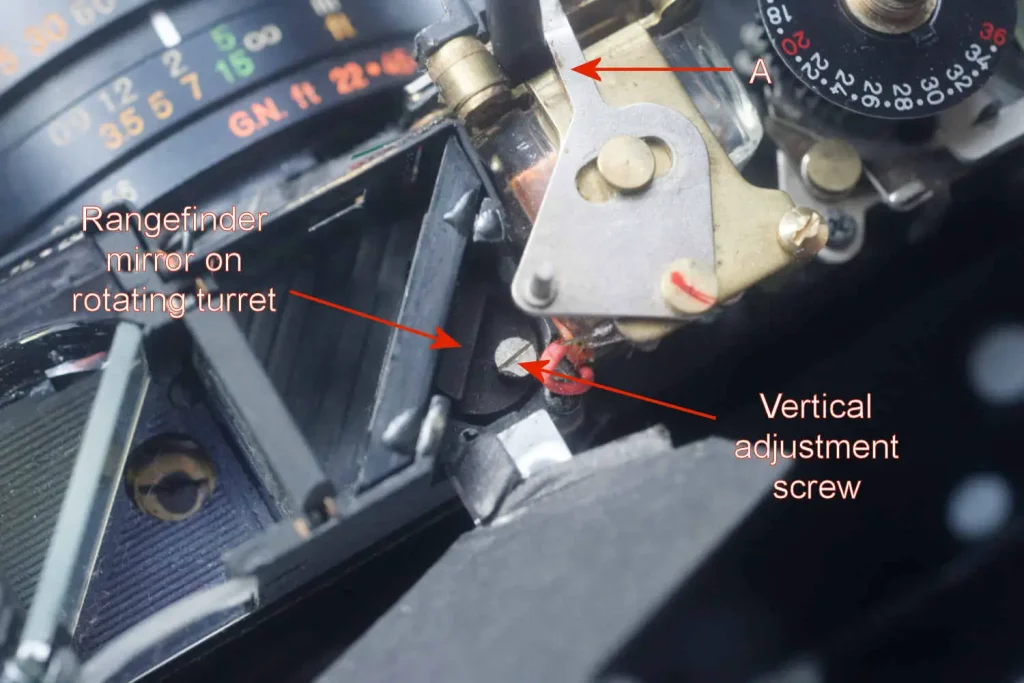
The Konica Auto S3 viewfinder/rangefinder unit seems to be a standard part which has also been used by a bunch of other companies. References on the net to the Auto S3 being similar to the Minolta HiMatic 7sii and the Vivitar and Revue versions made by Cosina, are largely because they share this part. The vertical adjustment is behind the moving rangefinder mirror and is adjusted from the top.
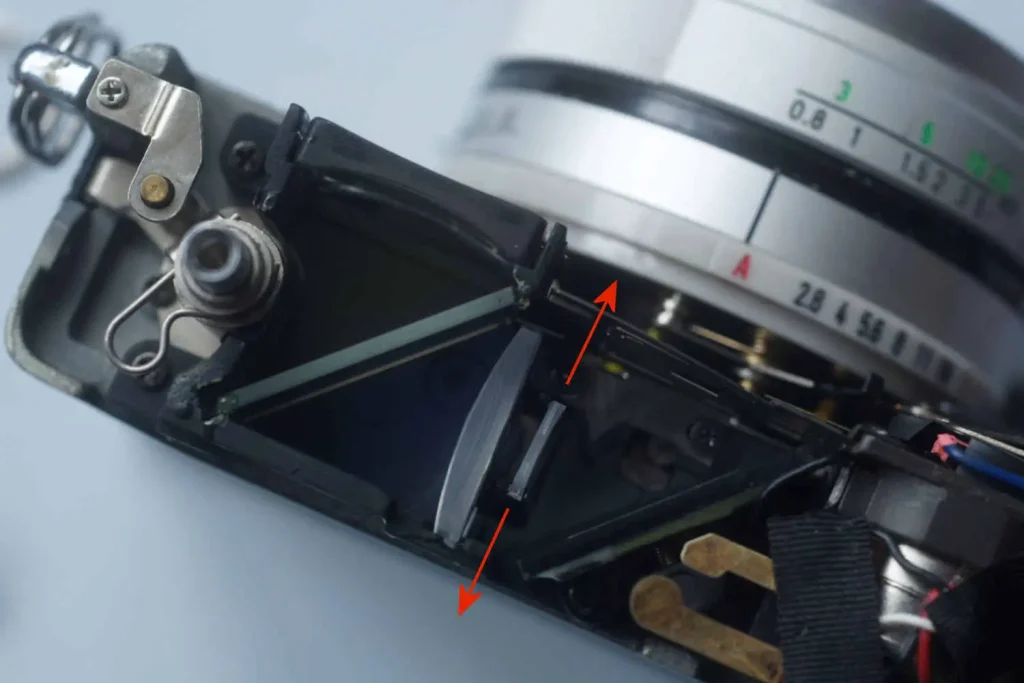
The Canon does not use a moving mirror for its rangefinder, instead it uses a little optical unit attached to the focusing mechanism to get the co-incident image. This technique is reminiscent of the rotating prisms used by Zeiss on their Super Ikontas and seems quite elegant in its simplicity.
In the case of the Canon, the vertical adjustment screw is on the back of the fixed mirror.
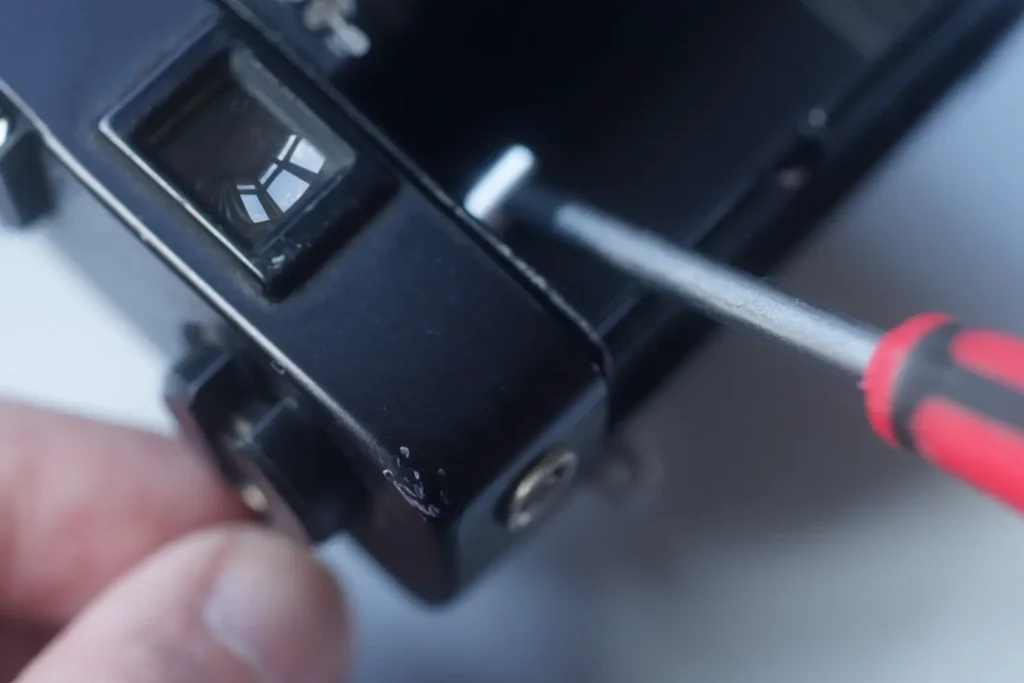
To adjust the vertical alignment, get the camera focused on a distant object so that the two images line up one below the other. With the flat-head driver in the slot for the adjusting screw, rotate until the images also align vertically. Give it a few tests for focusing on close and distant objects to make sure all is correct before reassembling the top-plate.
Note that turning an adjusting screw that is attached to a moving part (as in the Konica and others) will likely shift the patch both horizontally and vertically as you rotate the screwdriver. I’d suggest small incremental adjustments, with alignment checked once there is no rotational pressure on the screwdriver and the rangefinder has sprung back against its stops. One of the benefits of Canon’s approach is that you don’t get this ‘backlash’ effect when adjusting.
My little error
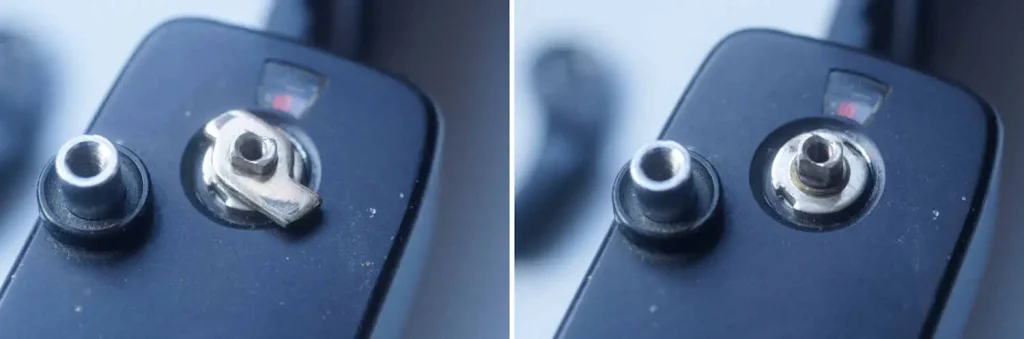
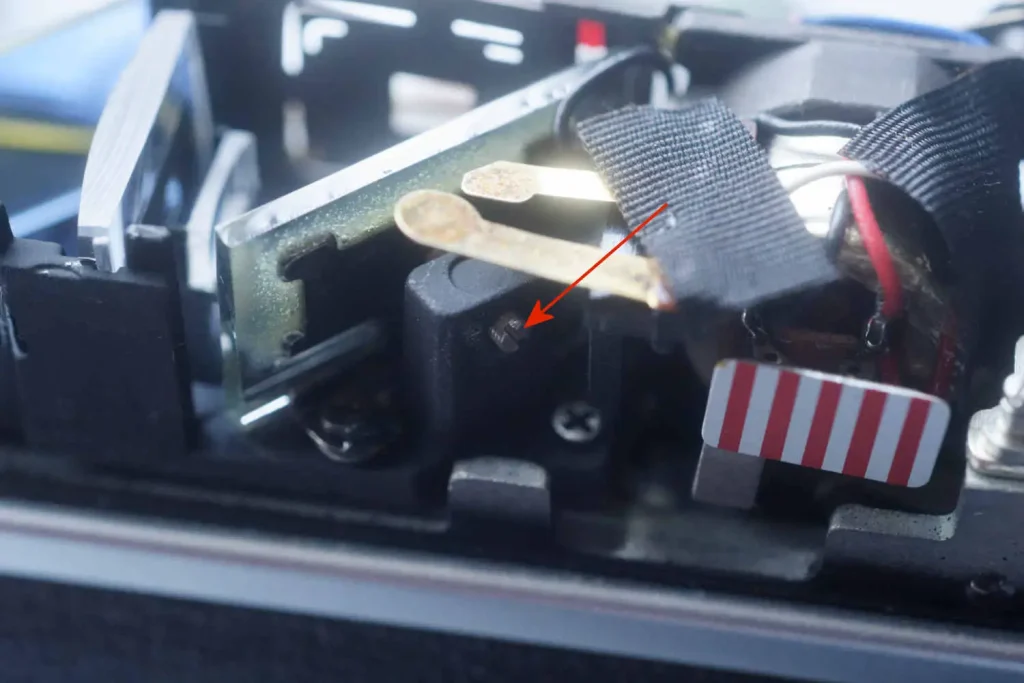
Just as I was about to replace the top plate on the Canonet 28 I remembered that I’d meant to investigate the little grey plastic insert on the back of the top-plate. I’d noticed that the Canon hot-shoe had an extra contact and I assumed I’d find a little LED bulb behind it to show the status of the flash. But there was no bulb behind the little insert; instead directly behind the insert was the vertical adjustment screw for the rangefinder. Doh!
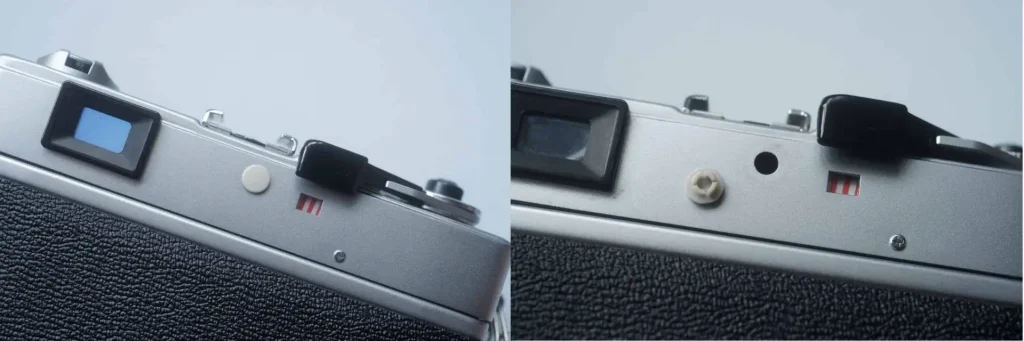
All of a sudden it became clear why the Canon had more screws and why they didn’t make it easy to get the wind-on lever off (unless you have the proper tools). Canon had constructed the camera so that you didn’t have to take it apart to make that adjustment. All you had to do was to pop the little grey plug out and stick a screwdriver into the slot in the adjusting screw. Then I remembered the Canon 110 ED I’d used recently, which also had an easily accessible vertical adjustment for its rangefinder. This was just what I should have been expecting them to do.
All credit to Canon, who through thoughtful design have sought to make sure that their customers don’t have to fiddle with the insides of cameras any more than is necessary. If you do need to adjust a Canonet 28 through that little hole, I’d recommend having a decent penlight to help locate the screwdriver into the slot in the grub screw.
I was very impressed with the clean layout under the lid of the Canon. I have gained a new respect for this unassuming little camera which will be getting a run out with a roll of film fairly soon.
Summing up
For those who have a nice rangefinder with vertical alignment issues, I hope this article will have shone some light into what is required in order to tackle that issue. Of course, If you have the Canonet 28, or a similar camera with easy access to the adjustments, you don’t have to worry about any of this top-plate-off stuff.
After finding out that taking it apart was not strictly necessary I thought I’d still include the Canonet 28 here as it demonstrates relevant issues while showing a different flavour of rangefinder. Its inclusion also demonstrates the advantages of doing more comprehensive research before launching in on a project. We live and learn.
If you have any experiences of making this adjustment on these or other cameras, please share them in the comments.
Share this post:


Comments
Morris Bagnall on Fixing Vertical Rangefinder Misalignment in Compact Rangefinder Cameras – By Bob Janes
Comment posted: 25/03/2021
Gil Aegerter on Fixing Vertical Rangefinder Misalignment in Compact Rangefinder Cameras – By Bob Janes
Comment posted: 25/03/2021
Clive Shepherd on Fixing Vertical Rangefinder Misalignment in Compact Rangefinder Cameras – By Bob Janes
Comment posted: 25/03/2021
Sroyon on Fixing Vertical Rangefinder Misalignment in Compact Rangefinder Cameras – By Bob Janes
Comment posted: 25/03/2021
Bob Janes on Fixing Vertical Rangefinder Misalignment in Compact Rangefinder Cameras – By Bob Janes
Comment posted: 25/03/2021
Jim Hanes on Fixing Vertical Rangefinder Misalignment in Compact Rangefinder Cameras – By Bob Janes
Comment posted: 25/03/2021
davesurrey on Fixing Vertical Rangefinder Misalignment in Compact Rangefinder Cameras – By Bob Janes
Comment posted: 26/03/2021
My ever growing collection of film cameras has a few non-workers, and I’m aiming on doing all I can to rectify that situation. So any articles like this can be a great help.
Dave
Abe on Fixing Vertical Rangefinder Misalignment in Compact Rangefinder Cameras – By Bob Janes
Comment posted: 28/03/2021
Alex on Fixing Vertical Rangefinder Misalignment in Compact Rangefinder Cameras – By Bob Janes
Comment posted: 05/01/2022
Comment posted: 05/01/2022
Sam Gustafson on Fixing Vertical Rangefinder Misalignment in Compact Rangefinder Cameras – By Bob Janes
Comment posted: 02/06/2022
Comment posted: 02/06/2022