I love digital infrared. Until this year, my best IR camera was a 3.4-megapixel Nikon Coolpix 990 that a good friend converted for me. The “antiquarian” color scheme in which its CCD sensor sees infrared wavelengths is so lovely that I rarely convert the camera’s files to monochrome.
But the camera isn’t exactly compact when worn around one’s neck for hours. I’ve long wanted a higher-resolution– but smaller– IR shooter. But sadly, after the 3-megapixel era, digital cameras really had to be converted if one wanted to shoot tripod-free, hand-held, IR. And this conversion was either expensive when done by someone else, complicated to do oneself, or both. I often trolled YouTube for videos about conversions that I might be able to handle, and this year, I finally found these excellent vids about converting Panasonic’s Lumix DSC-ZS3 (called the TZ7 outside the U.S.):
• Part 1: Removing the ZS3/TZ7 IR hot-mirror
• Part 2: Attaching an IR bandpass filter
In Part 1, you remove the camera back, remove the “hot-mirror” glass that stops IR rays from reaching the sensor, and then put the camera back together. Part 2 shows how to attach an IR “bandpass” filter to the camera lens. This filter looks like black glass because it blocks visible light and lets only IR rays reach the sensor.
These kinds of conversions usually require a number of steps– including the sometimes tedious removal of many tiny screws. But the ZS3 procedure required few steps, and the removal of only nine screws. I could handle that!
In the Operating Room
So I grabbed an inexpensive ZS3 online, and in less than 30 minutes, performed the operation and attached a 37mm Tiffen #87 IR filter.
IMPORTANT: Use the kind of sturdy Phillips screwdriver that’s described in the Part 1 video. If you try one of the skinny drivers that come in hardware store sets, you may not have enough torque to break the “thread lock” that camera manufacturers sometimes use. And you could easily strip the tiny screw heads.
I did deviate from Part 2’s method for attaching the filter to the lens. Instead of using epoxy glue, I preferred something almost as strong, but much more controllable and reversible: the thick, two-sided mounting tape that’s sold in most craft-supply stores. It’s:
- Easily cut into any desired shape (glue is much harder to control)
- Flexible for precise positioning
- Strongly adhesive
- And easily removed if desired
I cut and bent a skinny strip of the tape into a sticky ring between the lens and filter. You can see this white ring behind the filter here:
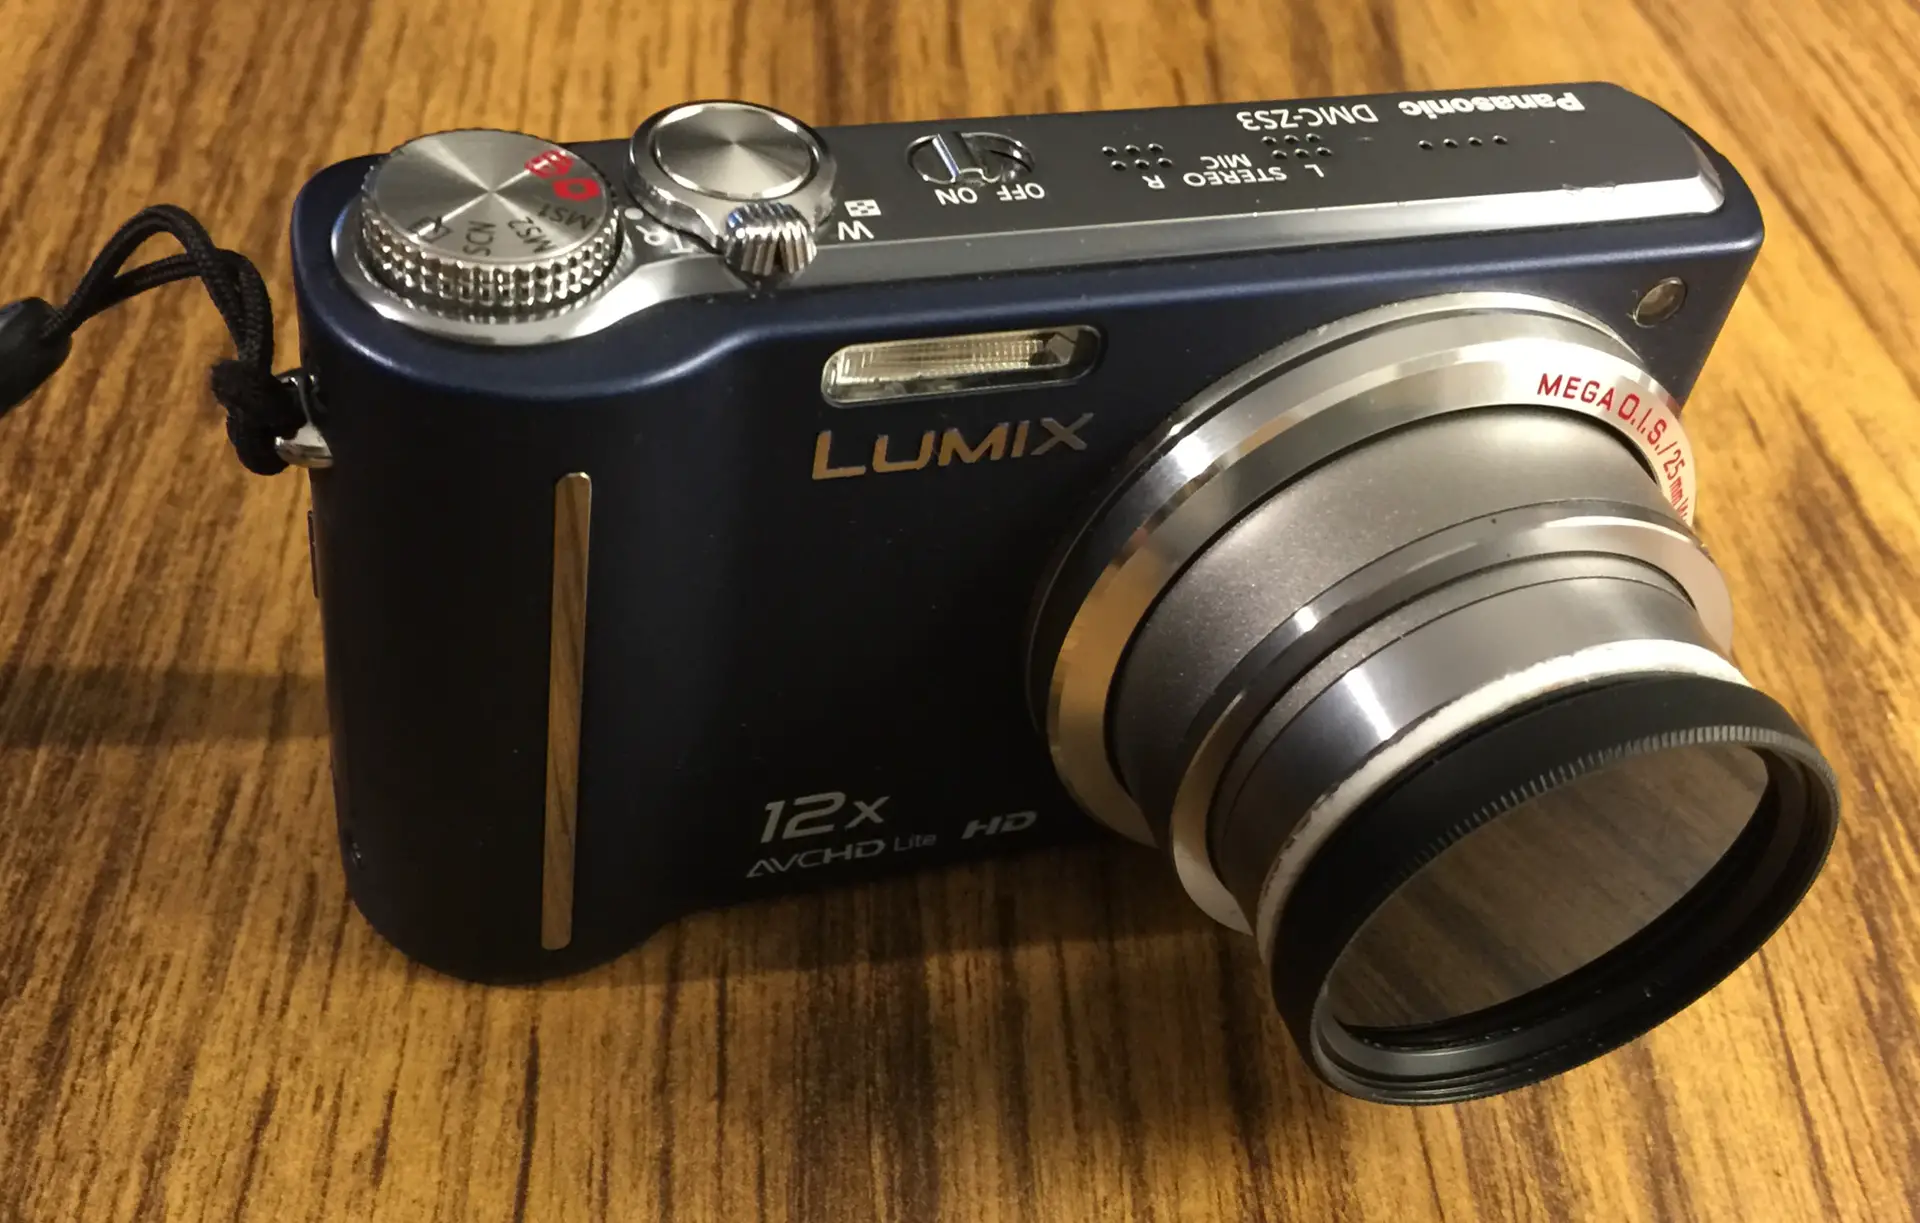
I also used adhesive-backed felt to fabricate a friction-fit Kodak Series VI lens hood:
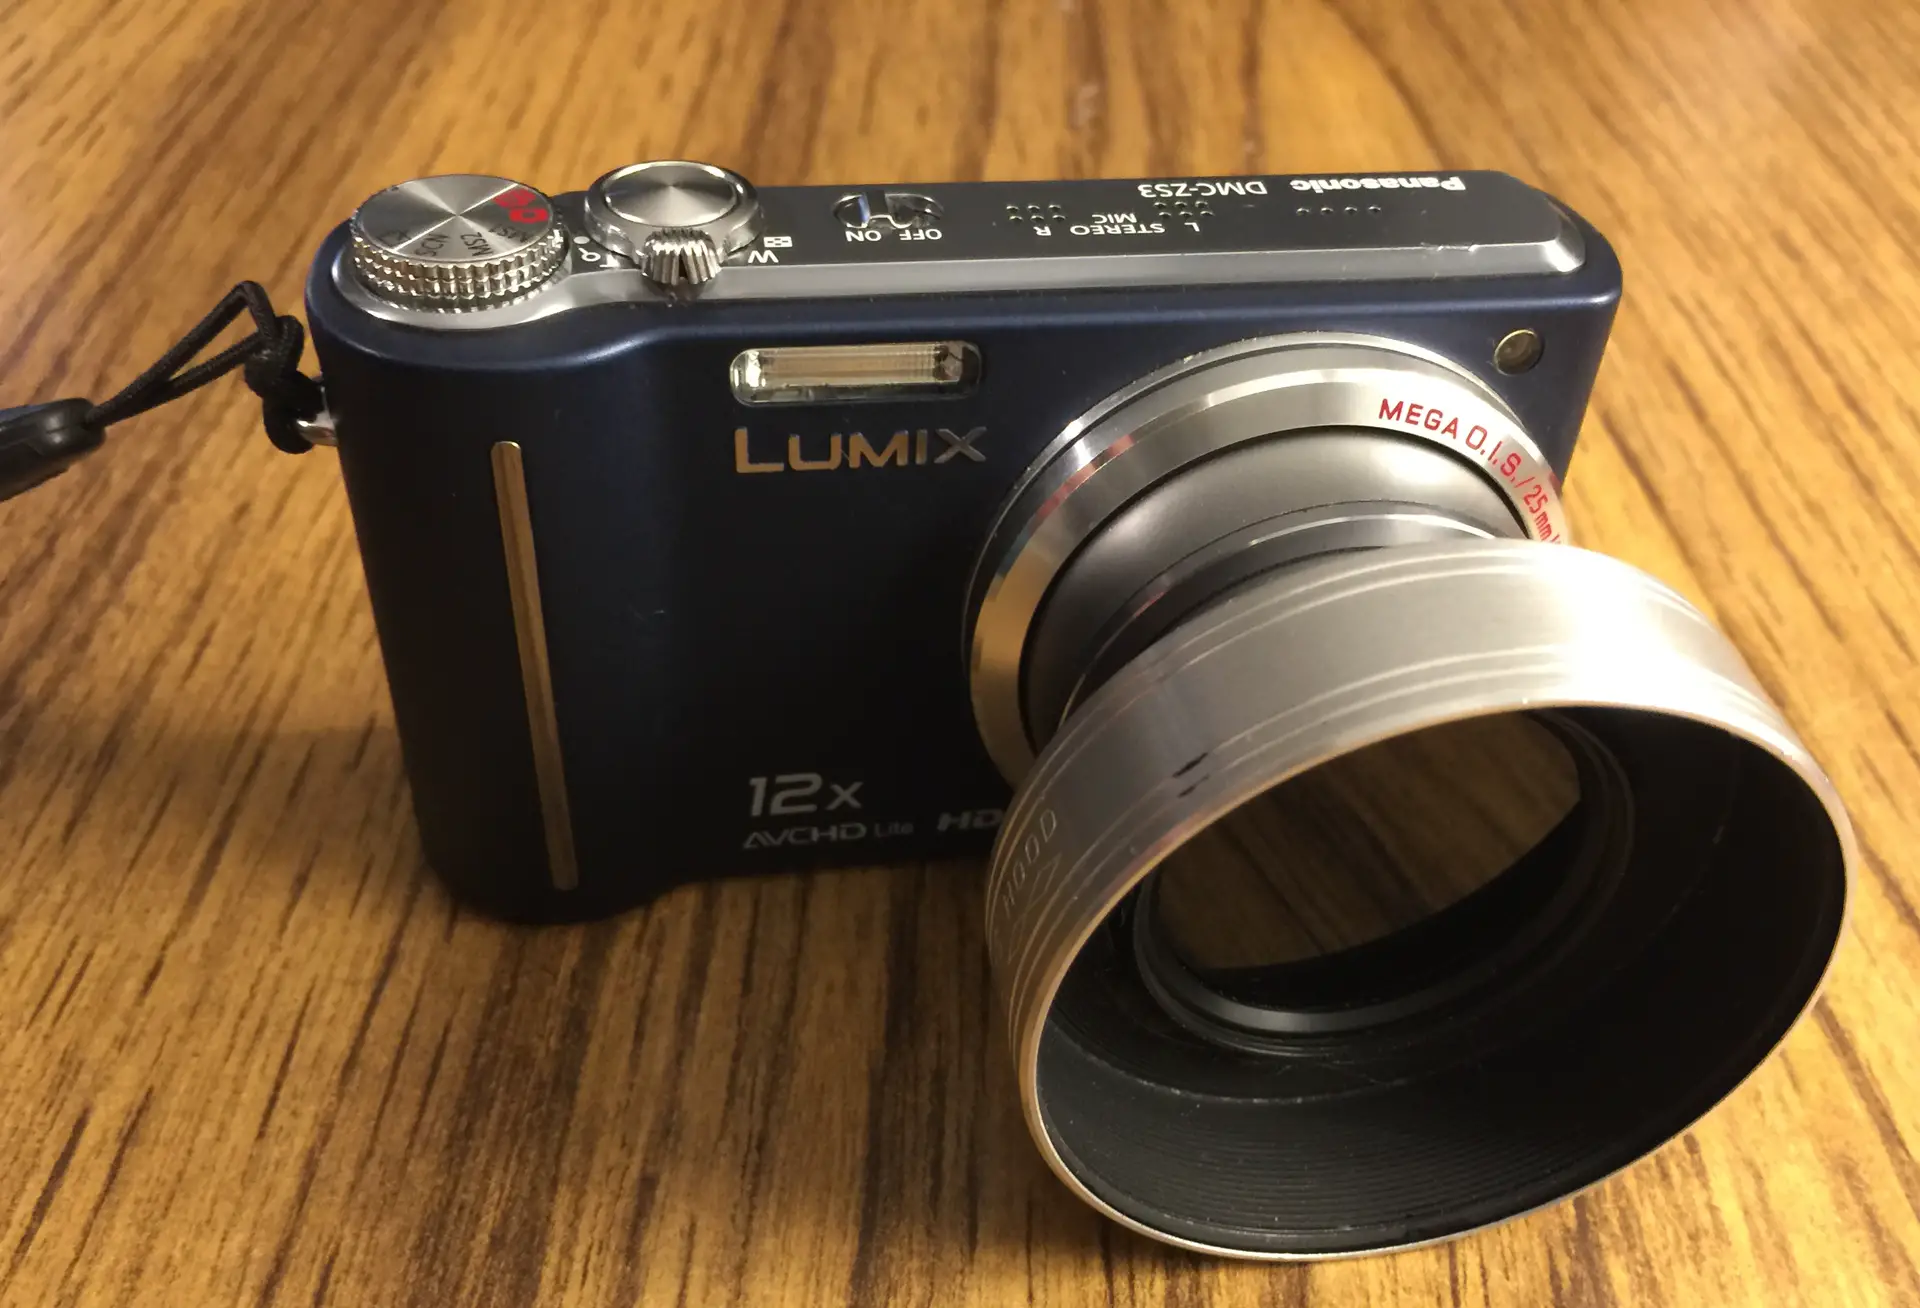
When a circular white ring appeared in my first test images, I correctly assumed that IR rays were reflecting onto the lens from the tape ring’s inside edge. Blackening it with a permanent marker fixed the problem.
Off to Iceland
Then, the camera joined my wife and me on a circumnavigation of Iceland on a 189-passenger arctic expedition ship. During the adventure, my tape-ring hack remained strong, and the DIY lens hood prevented direct sunlight from hitting the filter and reducing image contrast.
To maximize image quality, I:
- Selected the camera’s lowest ISO (80)
- Set a minimum allowable shutter speed of 1/30 sec
- Selected the camera’s strongest image-stabilization setting (Mode 2)
- And shot in “B/W” Color Mode
Some of these settings might seem counter-intuitive for shooting through one of the darker available IR filters. But they worked. The low ISO reduced digital noise to a pleasant film-like grain. The minimum allowable shutter speed kept the camera from falling down into hand-held hell. Maximum image stabilization was necessary since a tripod was impractical on this trip. And I shot monochrome to save me from having to convert the camera’s garish pink IR JPEGs.
Great Results
The following photo was a Hail-Mary shot that I grabbed near Reykjavik city hall:

While we waited for our bus, some of the city’s ever-present bicycles whizzed past. Without thinking, I quickly raised the ZS3 and shot. The camera admirably froze the bicycles’ motion with an automatically selected aperture of f/3.3 and shutter speed of 1/100 second. This relatively fast shutter surprised me, since I was shooting at low ISO through very opaque glass. But I was now confident that careful hand-held shots would be even sharper. And as it turned out, my images’ EXIF data revealed that the ZS3 frequently attained shutter speeds as fast as 1/400 second. Not bad!
Next is one of Iceland’s most fascinating locations (taken at f/4.2, 1/100 second):

Part of Iceland’s “Golden Circle,” this UNESCO World Heritage site is Thingvellir National Park. It’s said to be the location of the “world’s first parliament,” where– around the year 930– Icelandic settlers began meeting to talk with words rather than knives, swords and axes.
This is also one of the few places on earth where the mid-Atlantic volcanic rift runs up onto dry land (and nearly cuts Iceland in half). According to our guides, the tall cliff at the right is on the “North American” tectonic plate and the “Eurasian” plate is off to the left. This rift valley grows about one inch wider each year… and is around 5 inches wider today than when we were here in 2017. Iceland is reportedly the only place where one can literally walk back and forth between the North American and Eurasian plates.
The “Land of Fire and Ice” is deservedly famous for its volcanoes and glaciers. But thousands of its volcanic features aren’t volcanoes at all. For example, consider these large “Pseudo Craters” beside Lake Myvatn’s parking lot (image captured at f/3.8, 1/100 second):
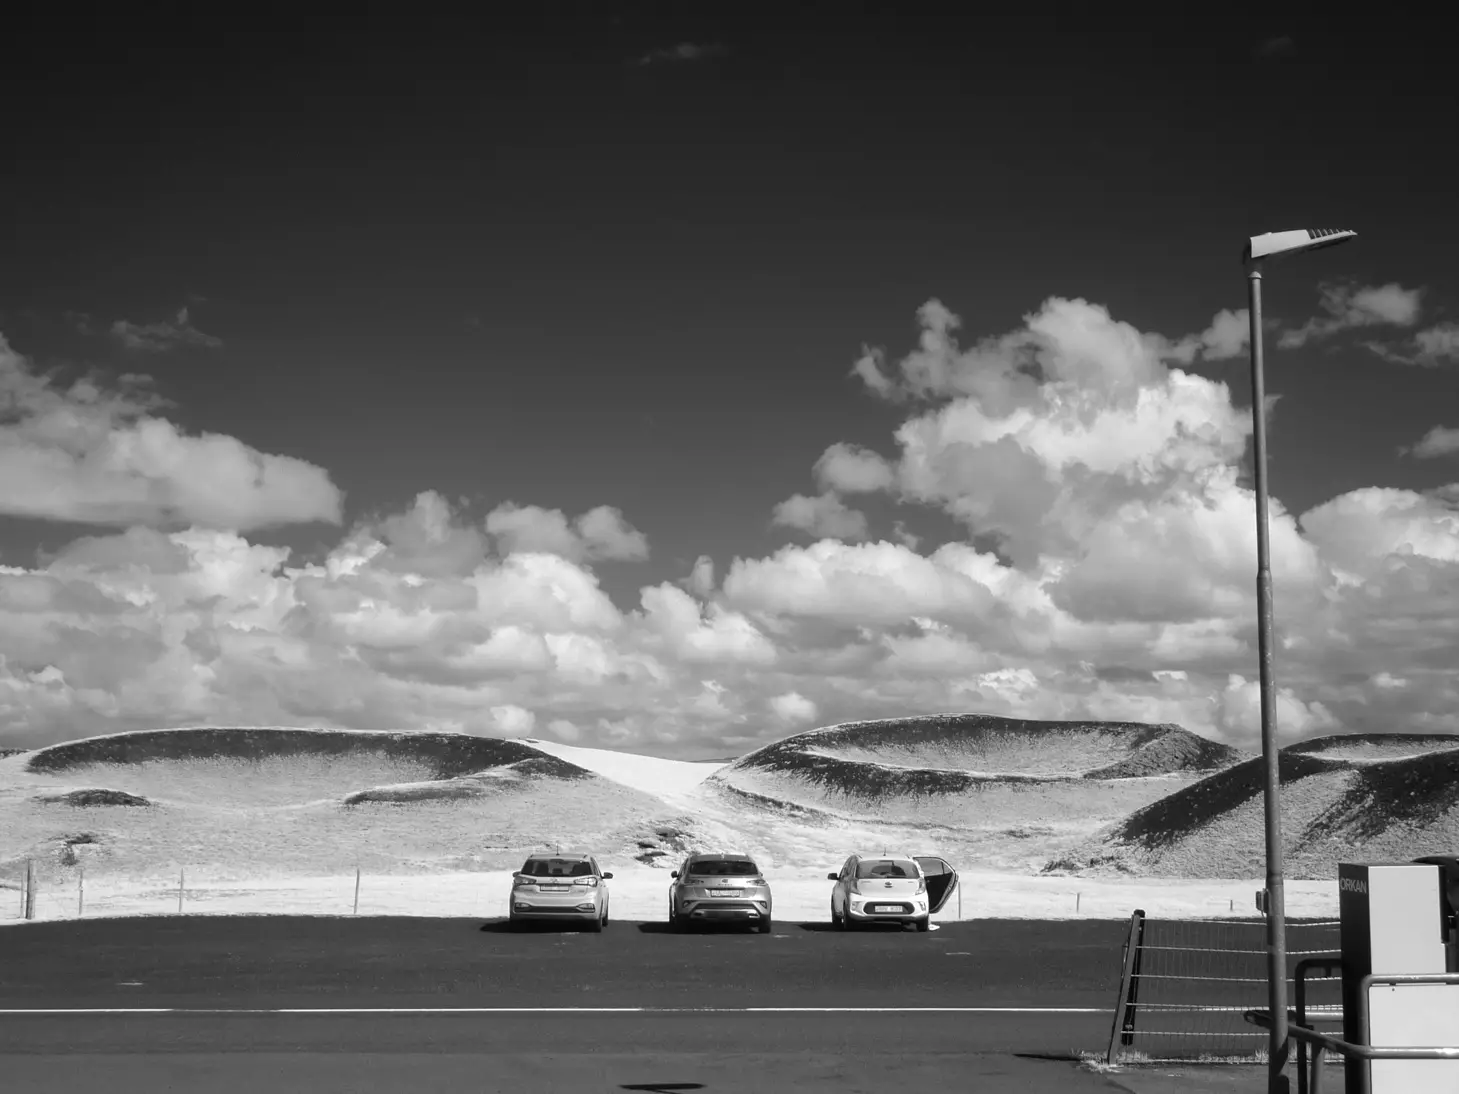
While truly volcanic in origin, they don’t have underground magma chambers. They actually formed around 2,300 years ago, when molten lava flowed over wet boggy ground. The resulting steam explosions created large lava bubbles… some of which burst open and cooled into craters like these. But other bubbles didn’t burst, and formed hollow domes in which resourceful Icelanders sometimes house farm equipment, supplies and animals. (I wouldn’t be surprised if some folks even live in them… Icelanders are quite creative!)
NOTE: Infrared can strongly differentiate rocks and plants. The brighter sides and interiors of the craters are actually grass, while the dark rims are lava.
I shot the next photo in Iceland’s Námafjall (“Devil’s Kitchen”) geothermal area (exposed at f/4, 1/200 second):
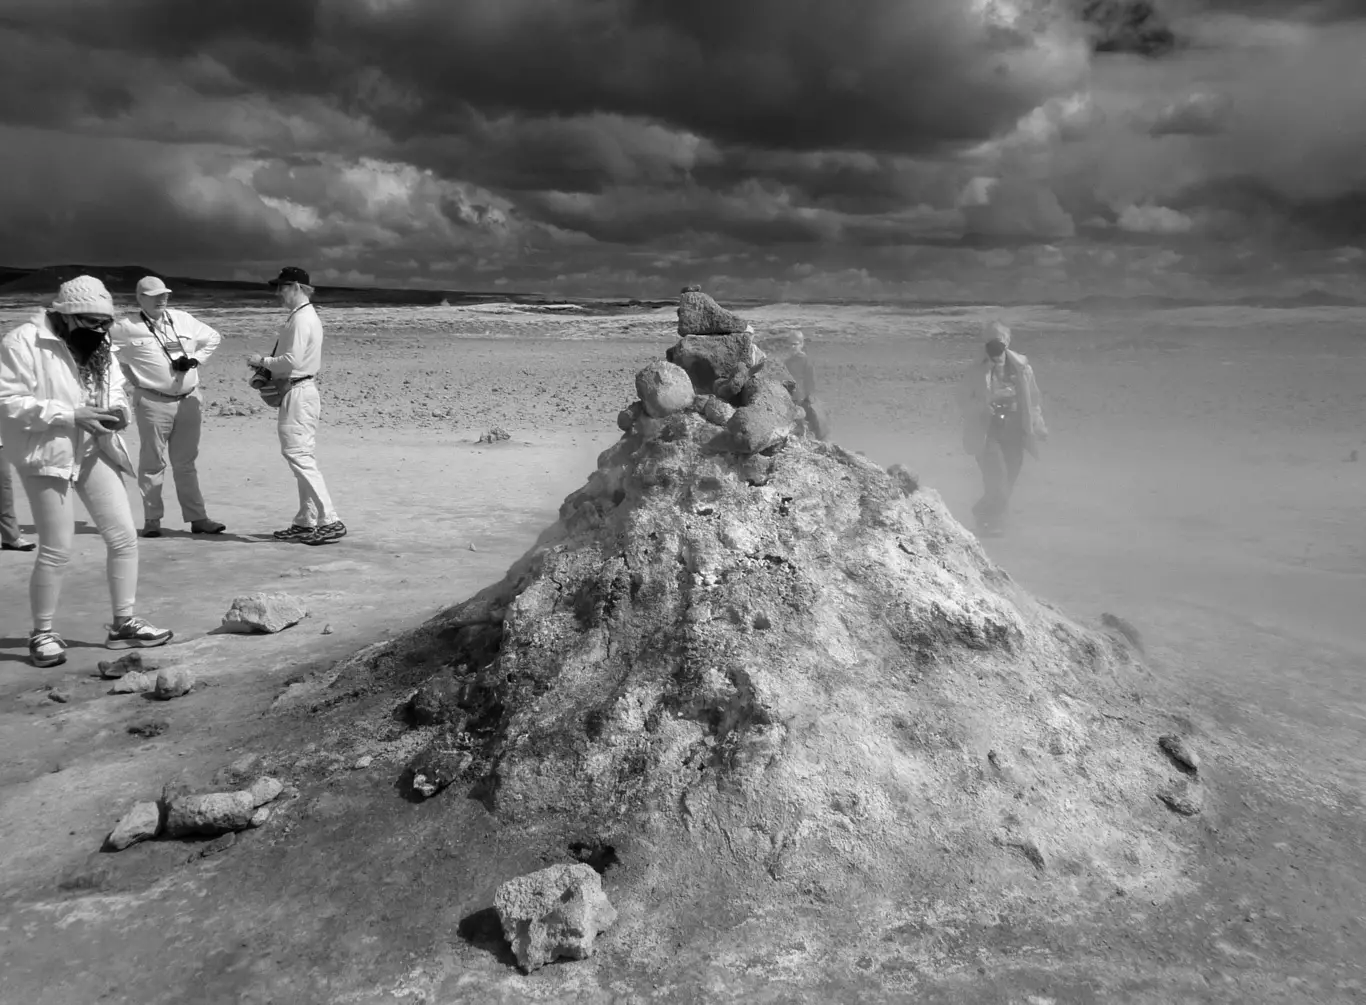
The country has many fumaroles like these, where hot volcanic gases vent into the atmosphere. They can be both smaller and bigger than this one. TIP: Don’t stand downwind!
And finally, one of the country’s largest waterfalls is Godafoss (captured here at f/4, 1/125 second):
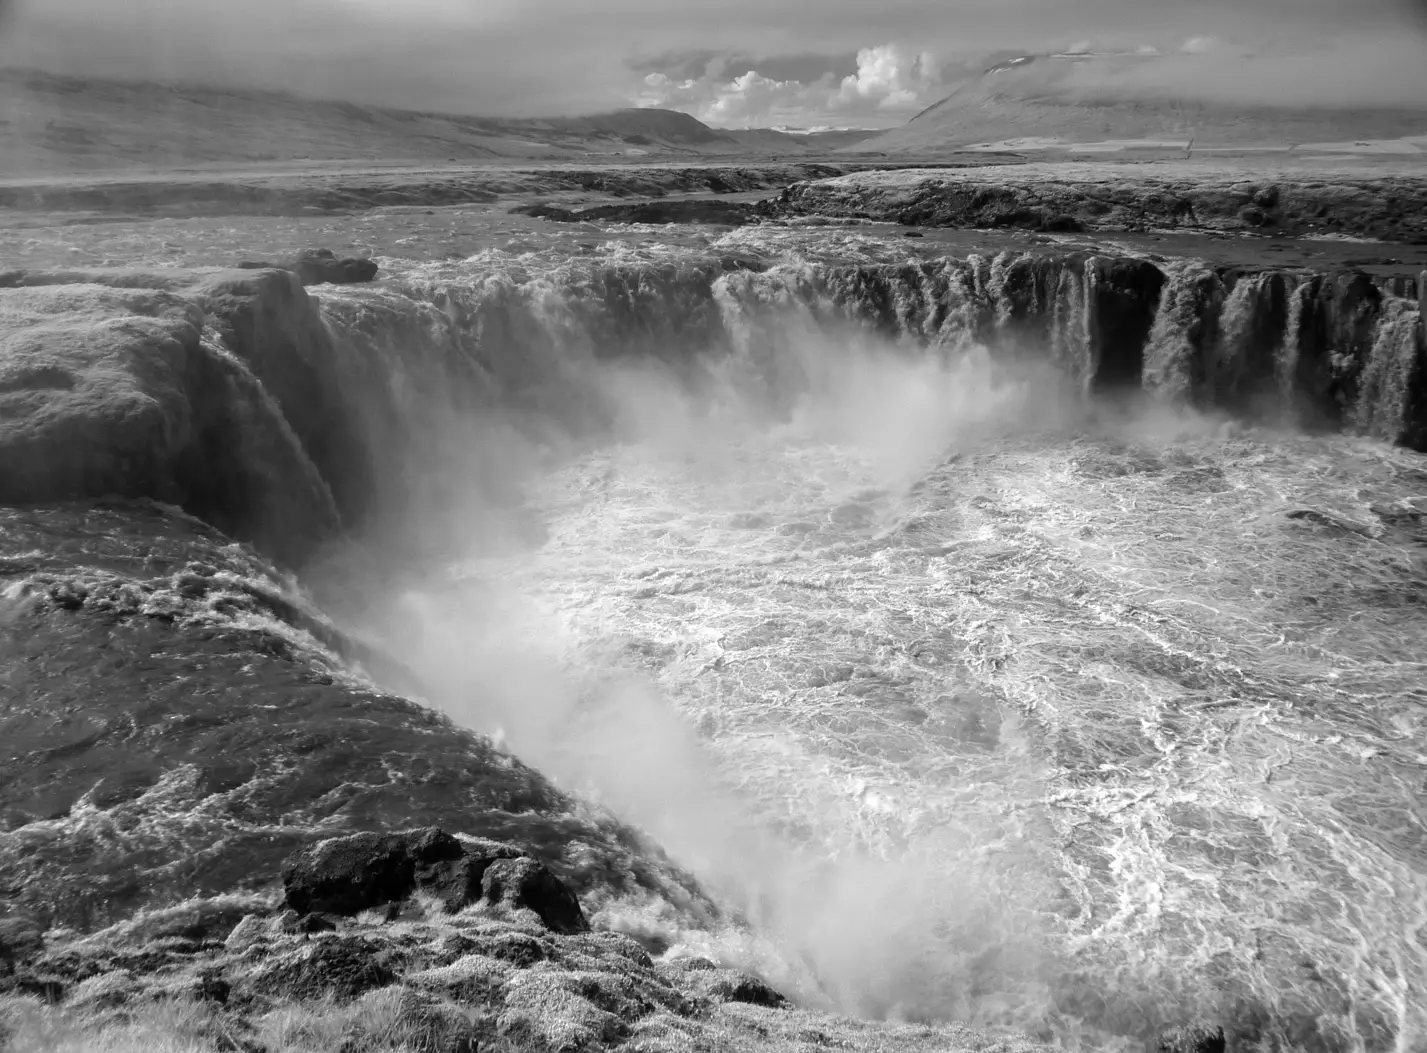
It’s easy to see why Icelanders call it their “Niagara.”
Perfect for Infrared
Though I also shot many visible-light photos with an equally small Lumix ZS-100 camera, digital infrared seems especially appropriate for Iceland’s stark beauty. If these few examples inspire you to IR-convert your own ZS3/TZ7, I don’t think you’ll be disappointed. Whether photographed with film or digital cameras, and in visible light, infrared, or both, Iceland is spectacular. And if you haven’t yet visited the island and its friendly people… GO!
FINAL NOTE: Other than occasional cropping, my only post-processing was to spread image histograms across the full range of grayscale tones using the Levels command’s black- and white-point sliders.
–Dave Powell is a Westford, Mass. writer and avid amateur photographer.
Share this post:


Comments
Nikojorj on 5 Frames with an IR-Converted Lumix ZS3/TZ7 in Iceland – By Dave Powell
Comment posted: 25/06/2022
Note that the small Samsung NX Mini is perhaps as easy to hack, has a good 1" sensor and accepts interchangeable lenses (but these are hard to find as the mount is NOT the samsung NX one, and the NXmini-NX adapter is even harder to find).
See http://mecastronics.free.fr/SamsungNXminiTopIR.html or https://www.ifixit.com/Guide/Samsung NX Mini Disassembly/55038
Comment posted: 25/06/2022
Nikojorj on 5 Frames with an IR-Converted Lumix ZS3/TZ7 in Iceland – By Dave Powell
Comment posted: 25/06/2022
I wasn't aware of any dust-removal thingy on this camera btw (but IR converted it just after I bought it).
Comment posted: 25/06/2022
Kurt Ingham on 5 Frames with an IR-Converted Lumix ZS3/TZ7 in Iceland – By Dave Powell
Comment posted: 25/06/2022
Comment posted: 25/06/2022
Ben Garcia on 5 Frames with an IR-Converted Lumix ZS3/TZ7 in Iceland – By Dave Powell
Comment posted: 29/06/2022
Seeing pictures of Iceland, and Reykjavik particularly, brings back many good memories. Not having seen many non-landscape IR shots, I'm surprised that most people appear as all white. Is this normal or a cloth-related reflectivity issue?
Comment posted: 29/06/2022
Bastian on 5 Frames with an IR-Converted Lumix ZS3/TZ7 in Iceland – By Dave Powell
Comment posted: 30/06/2022
Comment posted: 30/06/2022
William on 5 Frames with an IR-Converted Lumix ZS3/TZ7 in Iceland – By Dave Powell
Comment posted: 01/07/2022
Comment posted: 01/07/2022
William on 5 Frames with an IR-Converted Lumix ZS3/TZ7 in Iceland – By Dave Powell
Comment posted: 01/07/2022
Alex Hazuki on 5 Frames with an IR-Converted Lumix ZS3/TZ7 in Iceland – By Dave Powell
Comment posted: 18/08/2022
Comment posted: 18/08/2022
Ibraar Hussain on 5 Frames with an IR-Converted Lumix ZS3/TZ7 in Iceland – By Dave Powell
Comment posted: 08/09/2025
Can't wait to see your A Haunted House for Halloween. I've been busy collecting Simon Marsden's books, now I have 5!! All I need now is some Kodak HIE!
Comment posted: 08/09/2025
Comment posted: 08/09/2025