5 Frames from my First Roll of Kodak Portra 160 – By Stu Myers

By StuMPhoto

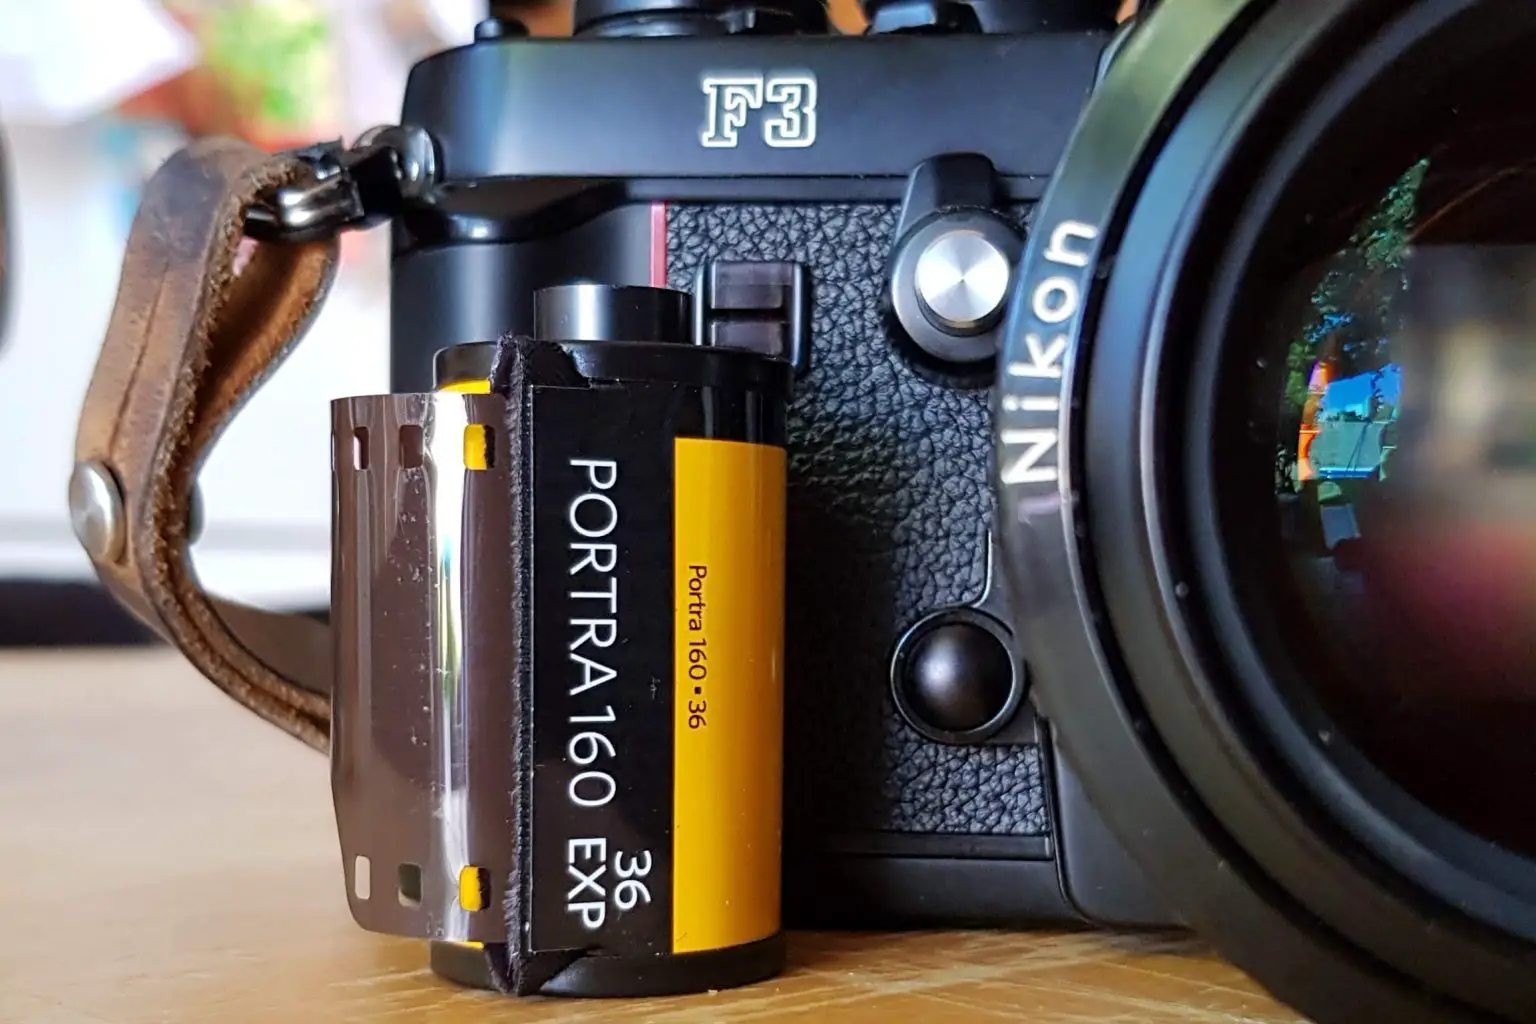
The shots in this post are from a roll of Kodak Portra 160 very kindly donated by Kodak Alaris at the Beer and Cameras Birmingham photowalk. Colour film is a bit of an enigma to me, to be honest. I always wonder how you can get an accurate representation of colour from a scan and how much the digital part of the hybrid process interferes with what you’d actually get.

With film photography, I want as little input as possible other than shooting. My weapons of choice for scanning and conversion are Vuescan & colourperfect plugin. I tweak a little but try to just choose my film from the dropdown and go with that and a few curves/sharpening adjustments. Any tips are always well received.

This is a roll of firsts for me. It was my first roll of Kodak Portra 160, but it was also my first time shooting aperture priority on my Nikon F3. I’ve been flirting with film photography on and off for about 4 years now. I started off shooting an old Minolta XG-M that I lost, found, and then which died. Eighteen months later I rescued an Olympus OM1n from the Photography show which rekindled a little spark in me for film photography. I shot mainly black and white film through it and started developing at home as a way to keep the costs down. Then, for my 40th birthday I picked up a Nikon F3 and just fell in love…

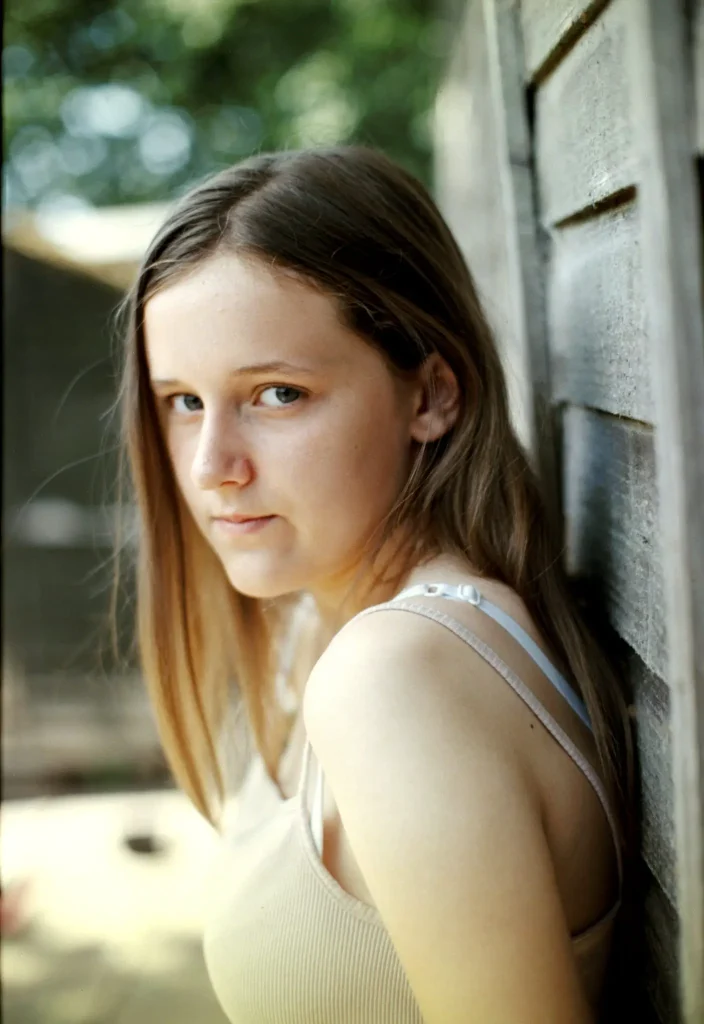
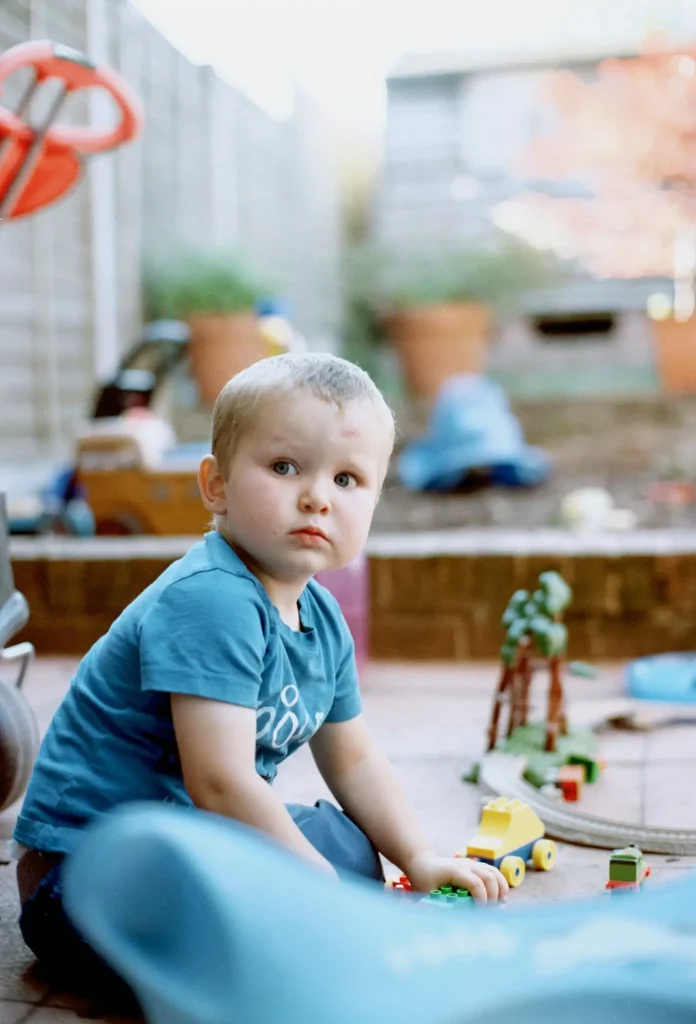
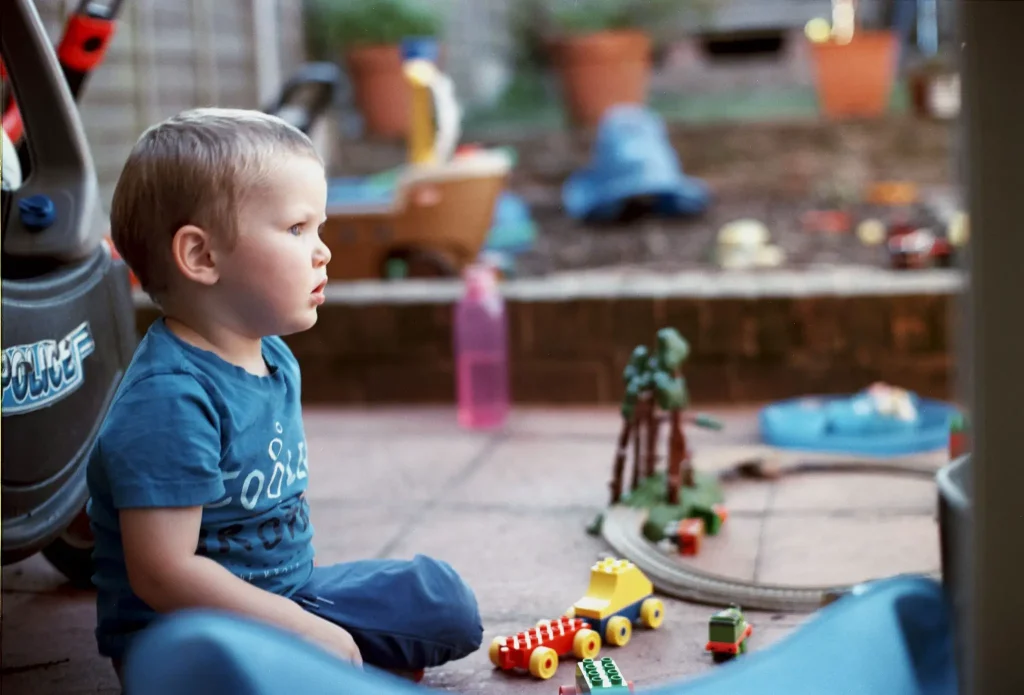
These shots are a bit of a mix, my boy, who is too young to disagree; an exceptionally rare shot of my eldest, who as you may tell did disagree at the time; and a couple of shots from a friends wedding.


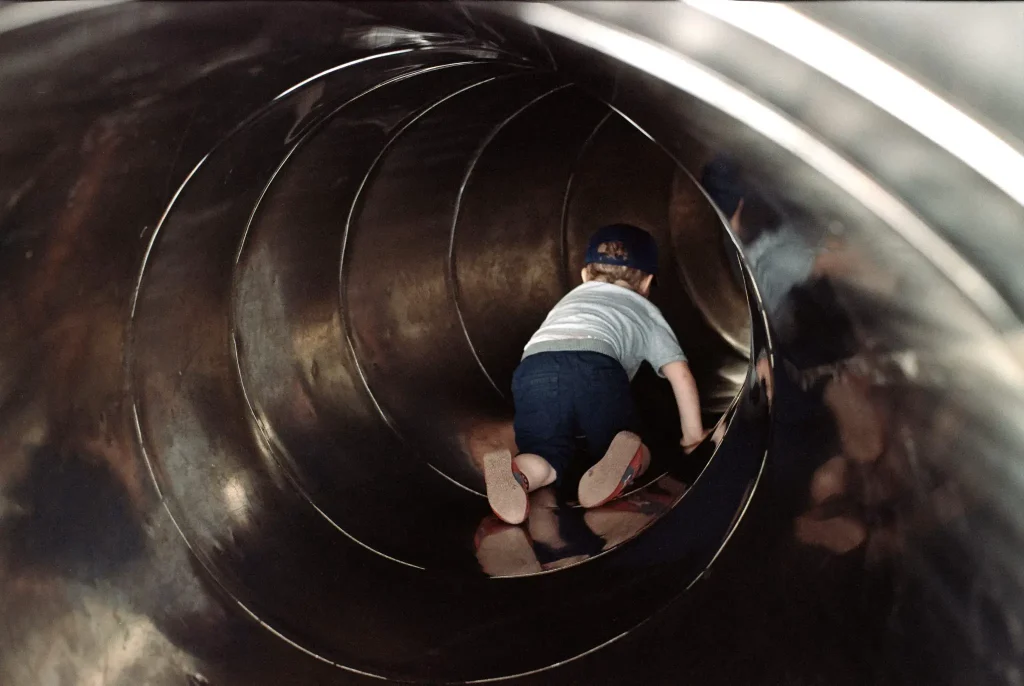
Here’s the technical: Portra 160 shot on a Nikon F3, 50mm f1.2 aperture priority set at +1 exposure compensation.
Thanks,

Stu 🙂

@StuM35mm on Twitter

Share this post:

Find more similar content on 35mmc

Use the tags below to search for more posts on related topics:

Contribute to 35mmc for an ad-free experience.

There are two ways to contribute to 35mmc and experience it without the adverts:

Paid Subscription – £2.99 per month and you’ll never see an advert again! (Free 3-day trial).

Subscribe here.

Content contributor – become a part of the world’s biggest film and alternative photography community blog. All our Contributors have an ad-free experience for life.

Sign up here.

About The Author

Comments

Matthew on 5 Frames from my First Roll of Kodak Portra 160 – By Stu Myers

Comment posted: 29/08/2018

Nice! I also feel more comfortable shooting black and white than color. I think it's because I've been doing it so regularly that I compose images and look at things around me in terms of light rather than color.
Reply

Leave a Reply

Your email address will not be published. Required fields are marked *

StuMPhoto replied:

Comment posted: 29/08/2018

Thanks Matthew! I think sometimes colour complicates things. Black and white is definitely more intuitive and satisfying for me but learning never stops and any type of film is for shooting.

Reply

Leave a Reply

Your email address will not be published. Required fields are marked *

Nick Lyle on 5 Frames from my First Roll of Kodak Portra 160 – By Stu Myers

Comment posted: 29/08/2018

I am a fan of Portra 160 and shoot mostly color print film. I use ColorPerfect both with a film scanner and when digitizing 120 film with a digital camera, macro lens, and a light-tablet. After hundreds of experiments I am getting something of a handle on color, using a combination of Photoshop and Lightroom for post-processing my scanned film. It doesn't always go well, but most of the time now I arrive at colors that reflect how the scene looked to me when I shot it. Sometimes the colors look good as arrived at by ColorPerfect, but much more often I need to adjust them further in Photoshop. This is no different in principle from post-processing in the traditional color-printing process either in the darkroom, or in machines. There is no such thing as "straight out of the camera" in any analog process; in spite of standardized C-41 printing or E-6 process there is no guarantee of "true" color. Even in fully automated digital processes the way your camera processes files is subject to interpretation. All this is part of the fun for me, and the extra time spent adjusting and thinking about color helps most images look even better, or at least more interesting.
Reply

Leave a Reply

Your email address will not be published. Required fields are marked *

StuMPhoto replied:

Comment posted: 29/08/2018

Colour Perfect definitely gets me to a starting point I'm happier with quicker than any other method. Straight out of camera has never really been my style from a digital standpoint. I'm just trying to dial in my workflow, I suppose, to achieve a pleasing colour balance with minimal PC time. Sometimes arriving at a pleasing colour balance can be one step forward, two steps back.

Reply

Leave a Reply

Your email address will not be published. Required fields are marked *

Dave on 5 Frames from my First Roll of Kodak Portra 160 – By Stu Myers

Comment posted: 29/08/2018

Hey fucking ho, you used film, been using it for years.
Reply

Leave a Reply

Your email address will not be published. Required fields are marked *

Hamish Gill replied:

Comment posted: 29/08/2018

Hey fucking ho, I’m pretty sure Stu has too... you know, because if you actually read the post, you’d have seen plenty of evidence of this. This is a post about someone using a specific film for the first time after it was given to him to try. If you’re going to troll, please try harder.

Reply

Leave a Reply

Your email address will not be published. Required fields are marked *

Peter Gardner on 5 Frames from my First Roll of Kodak Portra 160 – By Stu Myers

Comment posted: 30/08/2018

If I may... if you're concerned about exact colour representation, I found Colorperfect to be not the best for retaining colours, as it seems to take into considering each photo on the roll differently (as it doesnt seem to have a locked parameter, and I also found it tended to over expose? Which is weird..) So i'd have photos that were taken minutes apart, looking quite a bit different colour wise.

I'm also a Vuescan user, this is the method I've started using, and I've found it to be both much better for colour, but also a faster method over all.

1) Load the film up in the scanner and hit Preview. (You may have to purposely move the film so the pictures are not lined up in the holder for this part)
2) Drag a selection over a strip of film that is blank, in between two actual frames.
3) Preview again.
4) Check the box for “Lock Exposure”.
5) Preview again.
6) Check the box for “Lock Film Base Color”.
7) In the colour tab, set White Balance to "Auto Levels", make sure film stock is set to generic. Now you could if you wanted to, set a curve in these settings but I set me Low and High Curve points to .01 to get every bit of detail I can out of the scan, and then adjust curves in photoshop as needed.
8) Set it to save as a TIFF not RAW (obvs?) but you could do jpg too. Off you go! Scan away!

I do Multi Exposure, and full strength dust removal (though even that is pretty weak.) But after the scan I do some minor levels/curves adjustment and sharpen in Photoshop. But that doesnt take very long at all.

Also worth noting, I used to hate the look I was getting from Fuji stocks and kind of wrote them off using Colorperfect. Using this method, Fujifilm stocks actually look really nice!

Anyway, might be worth giving it a try. I've had really, really great success with it. Maybe you will too! Or maybe you'll think its awful, haha. But thought I'd pass it along :)
Reply

Leave a Reply

Your email address will not be published. Required fields are marked *

StuMPhoto replied:

Comment posted: 30/08/2018

Thanks for the reply Peter and I was hoping people would, so yes you may! I think a bit of clarification on my part is required though, writing ain't my thing, tbh. I'm a wedding photographer for my sins and shoot mainly digital. I love the process of film but scanning not so much, reminds me to much of editing days! I don't want to be sat for ages at a pc messing with colour balance really. This causes me much frustration and I would prefer an end result that requires minimal tweaking so I suppose "pleasing colour balance" would be a more accurate description. Maybe pro scanning might be the way forward but my Northerness and my wife wallet disagree with that course of action. I tried the lock exposure thingy in Vuescan but still didn't seem to do it for me. I'll definitely give your method a go though, happy to try anything. I'll let you know how I get on and thanks again for taking the time!

Reply

Leave a Reply

Your email address will not be published. Required fields are marked *

Peter Gardner replied:

Comment posted: 30/08/2018

Yea the nice thing I've found about the method I posted, compared with the Colorperfect method, (once you set up a roll) there actually is less fidgeting! Its more or less a set it and forget it kind of system for colour blanace. :)

Reply

Leave a Reply

Your email address will not be published. Required fields are marked *

StuMPhoto replied:

Comment posted: 30/08/2018

That sounds good to me. I've just got back from hols so a load of film will be off for processing.

Reply

Leave a Reply

Your email address will not be published. Required fields are marked *

karenshootsfilm on 5 Frames from my First Roll of Kodak Portra 160 – By Stu Myers

Comment posted: 30/08/2018

I have a roll of this yet to be shot but it is medium format. I wonder if there is much difference.
Reply

Leave a Reply

Your email address will not be published. Required fields are marked *

Daniel Fjäll replied:

Comment posted: 30/08/2018

Not really

Reply

Leave a Reply

Your email address will not be published. Required fields are marked *

Hamish Gill replied:

Comment posted: 30/08/2018

Smaller relative grain size mean that Portra 160 is very clean looking in MF

Reply

Leave a Reply

Your email address will not be published. Required fields are marked *

StuMPhoto replied:

Comment posted: 30/08/2018

Not sure Karen. Only ever shot Portra 400 in MF. I'm sure it'll be great with you shooting it :)

Reply

Leave a Reply

Your email address will not be published. Required fields are marked *

Leave a Comment

Leave a Reply

Your email address will not be published. Required fields are marked *