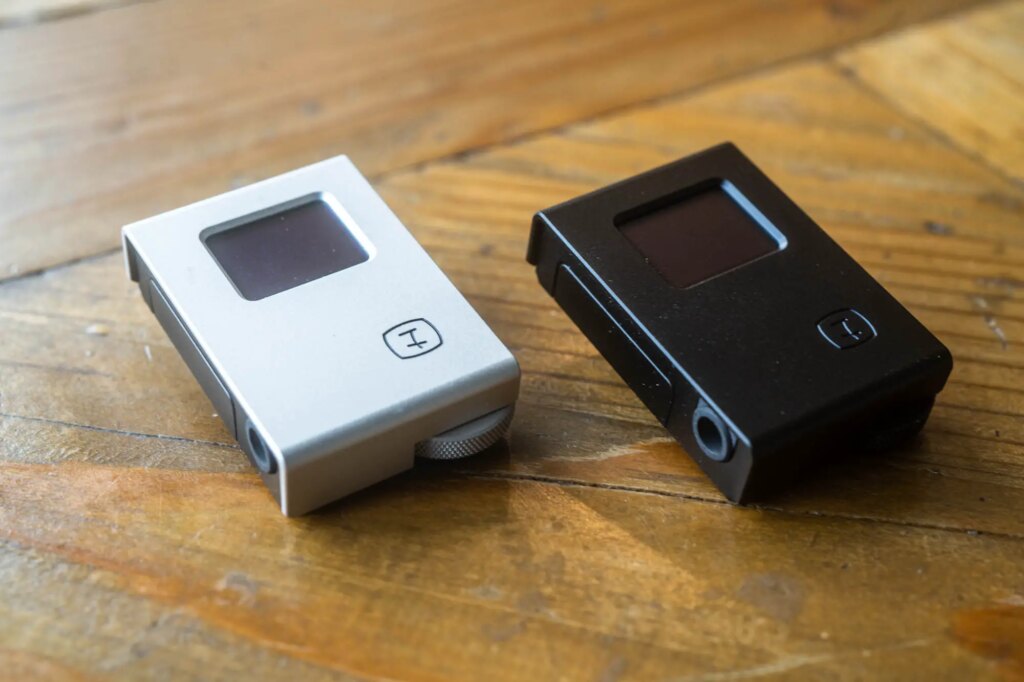
I’ve just received a pair of brand new Hedeco Lime Two light meters. As you might gather from the name, this is the second iteration of the Lime meter from the German brand, Hedeco, and whilst it might not be a revolutionary step forward, it does definitely represent a significant polishing of an already well rounded light meter.
As you can see when comparing the first version of the meter, the Lime One, with this new Lime Two meter, the basic design is pretty much the same. To that end, if you’re interested in a bit of background, I would recommend you read my first article here. That said, one thing this is worth noting is that the Lime One meter I previously reviewed was a late prototype. Though, as far as I know, the version that was delivered to customers after the kickstarter wasn’t all that different. As I’ve mentioned, this new version isn’t massively different either, but it does come with a few tweaks and improvements that make for a product that feels more mature.
Build quality
For a start – and this is probably the main upgrade – the new Lime Two meter immediately feels a lot nicer built. I should caveat that by first saying that it doesn’t feel much heavier. I must admit, when Johannes got in touch with me to tell me about the new version I had hoped it would have a little more weight. I’m not actually sure what it is that bothers me about the light weight, as overall I prefer my kit to weigh less. There’s just something about this tiny meter that feels a touch insubstantial. But, there’s a strong chance that this is just a subjective issue of my own, and as I say, light weight or not, it does feel and look much better made than the first version.
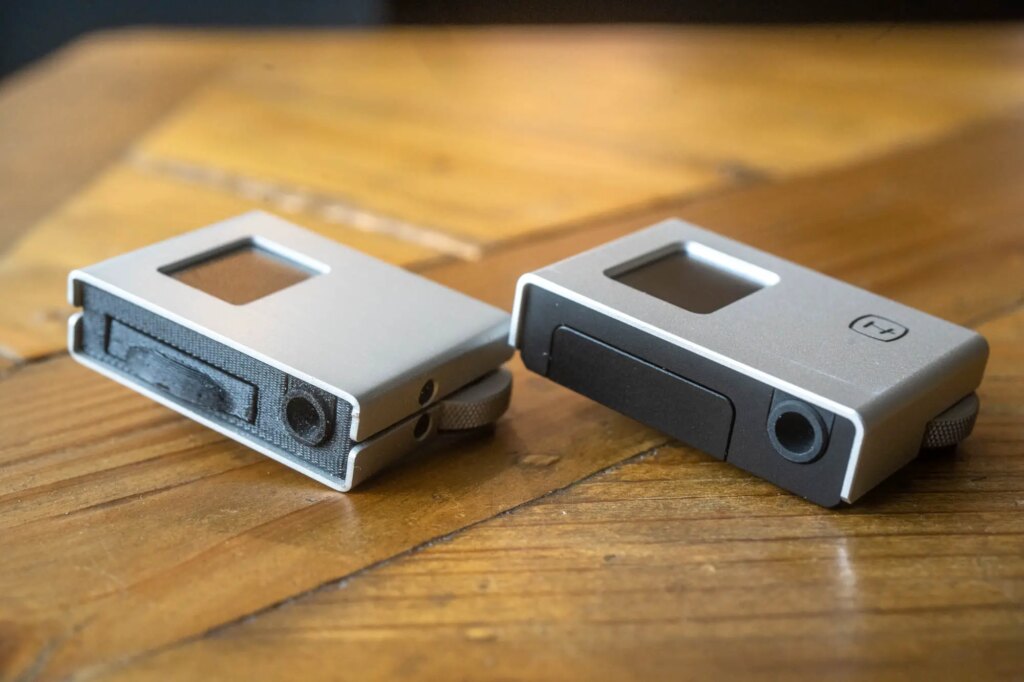
It seems that much of this is down to the fact it’s now made of CNC’d aluminium as opposed to the couple of bent sheets of aluminium and 3D printed plastic it was previously made of. The only bit of 3D printed plastic that’s now used in the design is the battery tray, but even that has an aluminium plate on the front of it which makes for a much cleaner external finish, though I feel like I should mention that it does fit a little lose without a battery held within it.
Now, as I’ve made it clear on this website before, I have nothing against the use of 3D printing at all, but that’s when comparing it to injection moulded plastic. When comparing it to CNC’d aluminium, there is definitely a difference in the feel of quality. The Lime Two meter just looks and feels very smart – especially when mounted on the camera.
The Lime Two meter also brings another step up in build in the form of additional foot mounting holes on the bottom. This increases the potential for the meter to be mounted on more different cameras. In fact, Johannes has also increased the options for 3D printed mounting adapters that range from simple hight extensions to the mount, to a 90 degree mount adapter and to very specific adapters that allow it to be mounted to specific cameras in specific ways. He’s even designed an air tag holder for the meter so it’s harder to lose, as well as a clip on adapter to allow the side mounted button to be pressed from the back of the meter. In short, a good deal of thought has been put into how this meter is camera mounted, as well as how it might be used in the field.
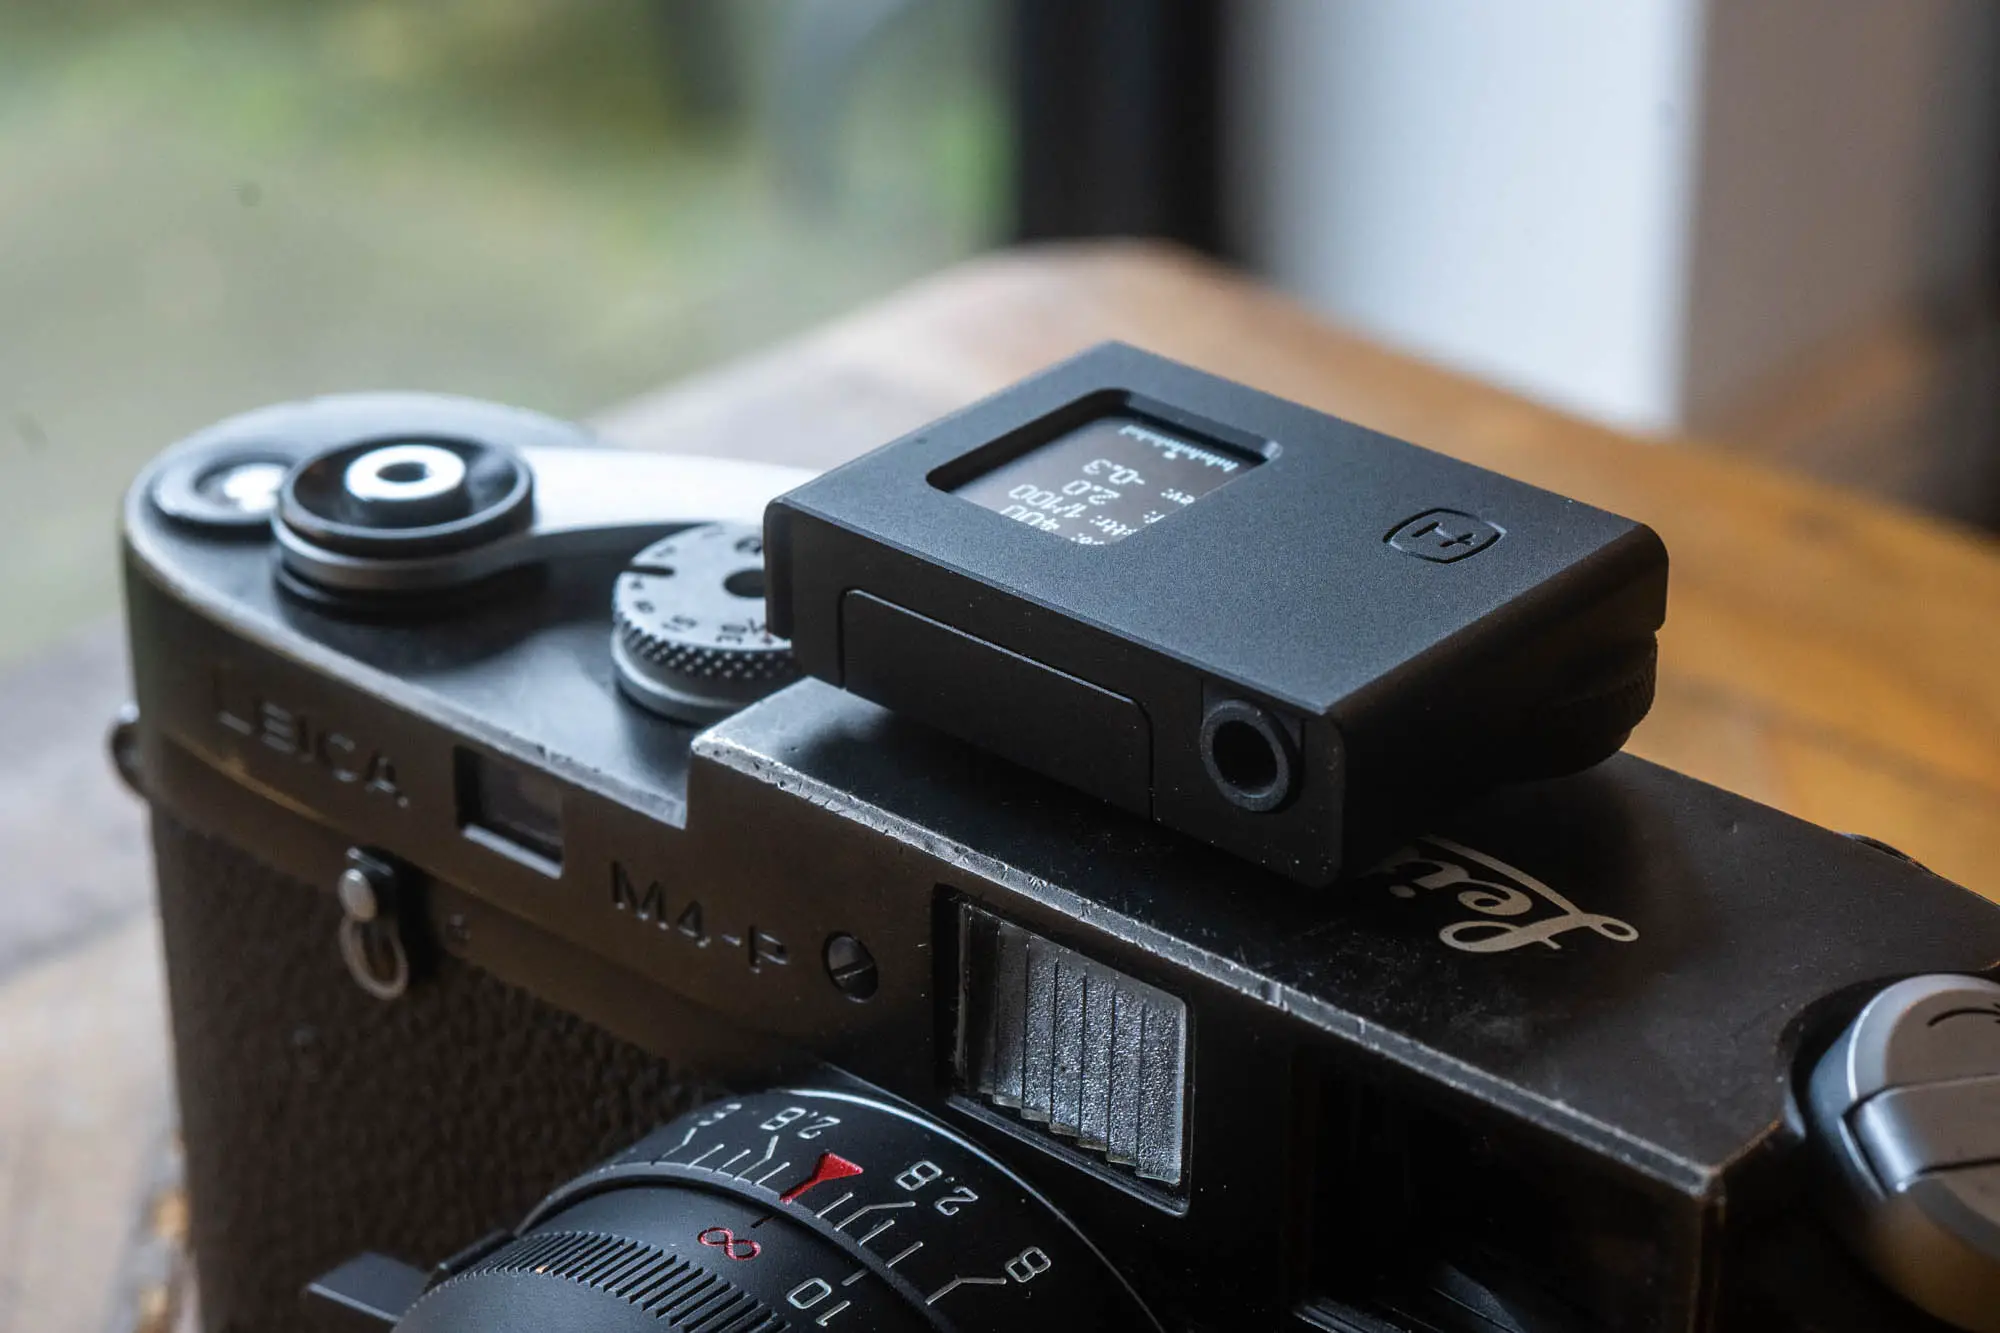
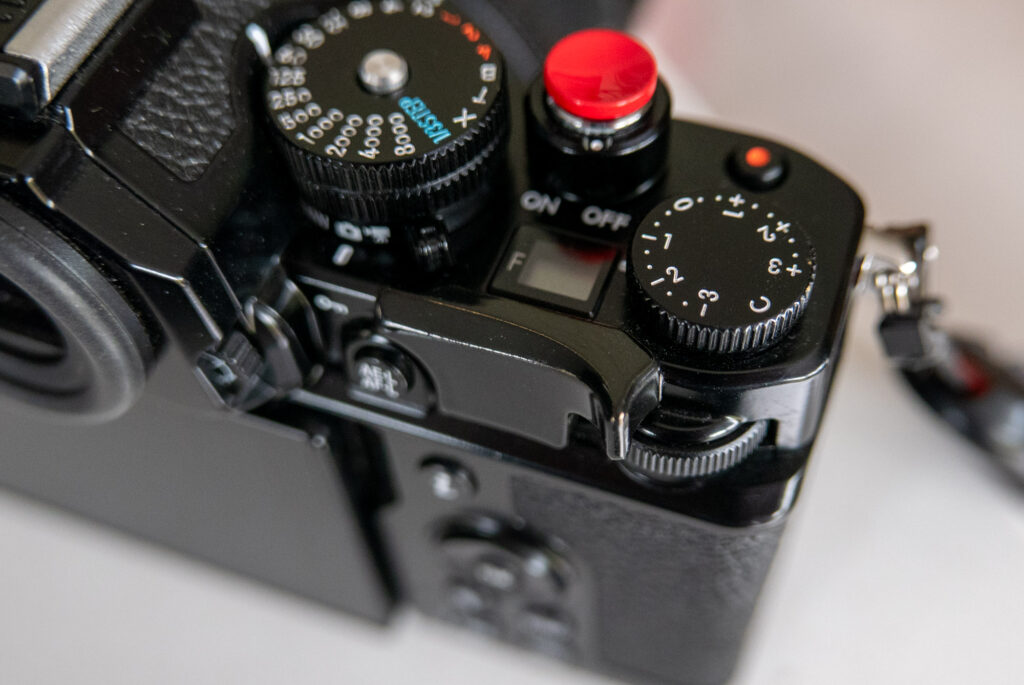
As a final note on the build quality, it’s also worth pointing out the little sprung ball bearing that’s mounted into the foot on the bottom. Unlike a few of the other shoe mount meters on the market that come with a variety of different feet for a snug fit on different cameras, the Lime Two is seemingly fairly universally mountable with its single foot design. I actually didn’t notice this until I mounted it on my M4-P and thought how well fitted it felt without feeling to snug. When I removed it, I noticed the ball bearing on the bottom and tried it on a few of my other cameras. It fit fine on all the cameras I tried. How well this design works long term compared to mating the foot to the camera I’m not sure. It feels well fitted, but not tight, so I suppose there’s a small chance it could be more easily knocked off, but the more universal fit definitely feels more elegant.

Features & Function
That feels like a lot of waffle about the build quality, so what about features…? Well, like the Lime One meter, the Hedeco Lime Two is nice and simple, though it does come with a few small upgrades over the first version. That being said, it does work essentially exactly the same as the first meter. There’s a button to switch the meter on, and then take readings or select modes. Additionally to the button is a wheel that cycles through the readings, modes and menu items. Pressing and holding the button whilst turning the dial also offers different functions depending on the mode.
Metering modes
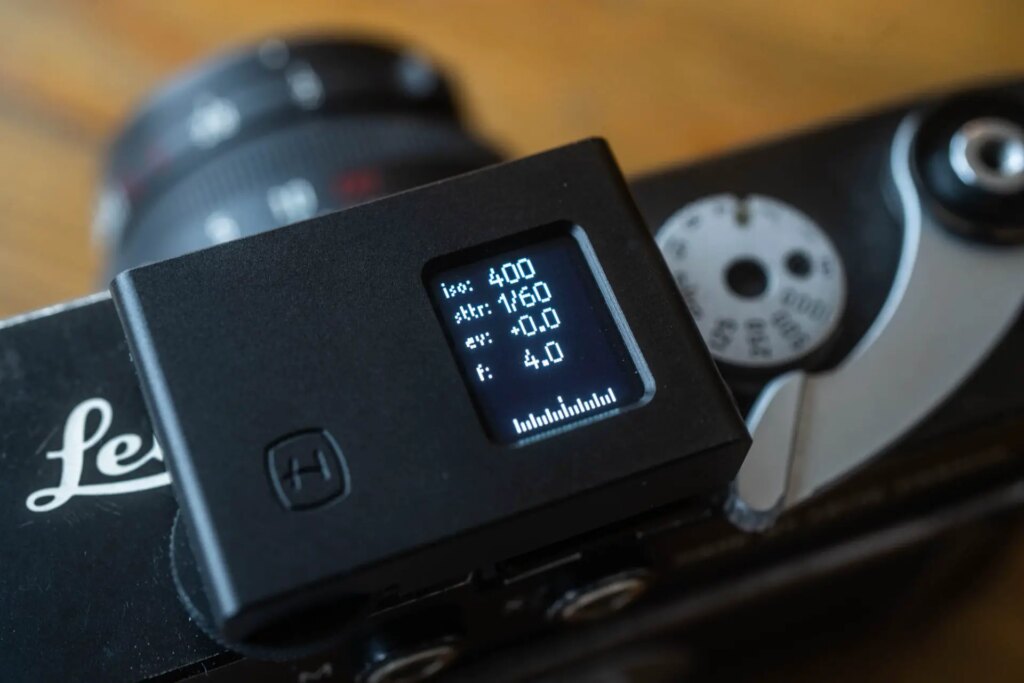
There are 4 metering modes, aperture priority, shutter priority, manual and EV. This is possibly the key difference between the Hedeco and the other OLED screen shoe mount meters which largely just have shutter and aperture priority modes. The Hedeco Lime Two is very simple and very logical to read too. You start at the top, and work down the screen basically. In any mode you’re in, it’s the bottom item on the screen that you pay attention to.
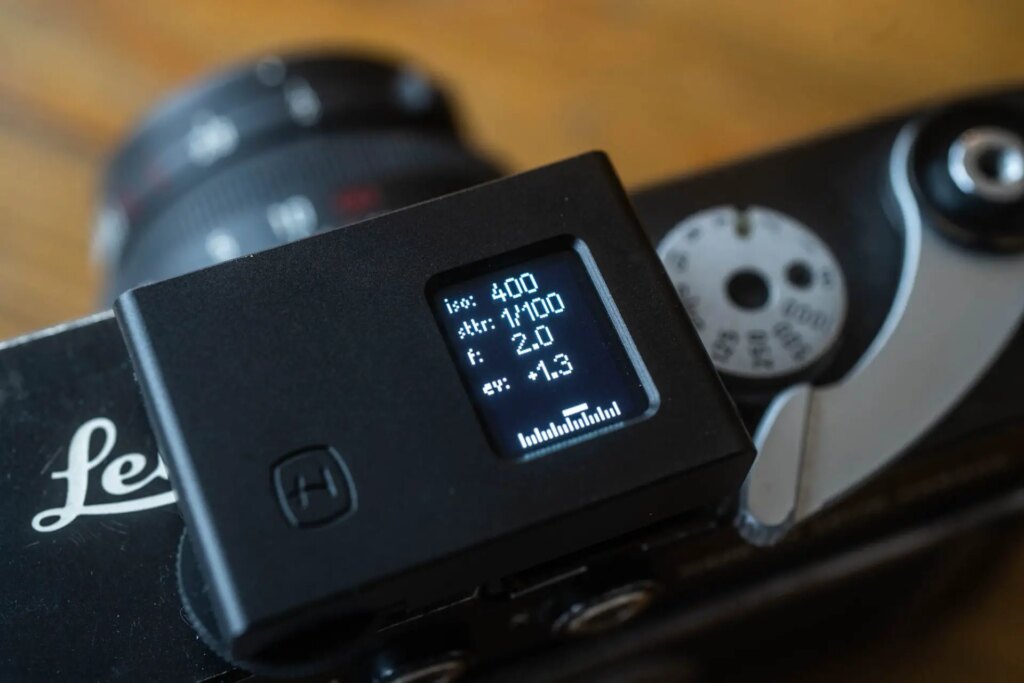
Shutter priority
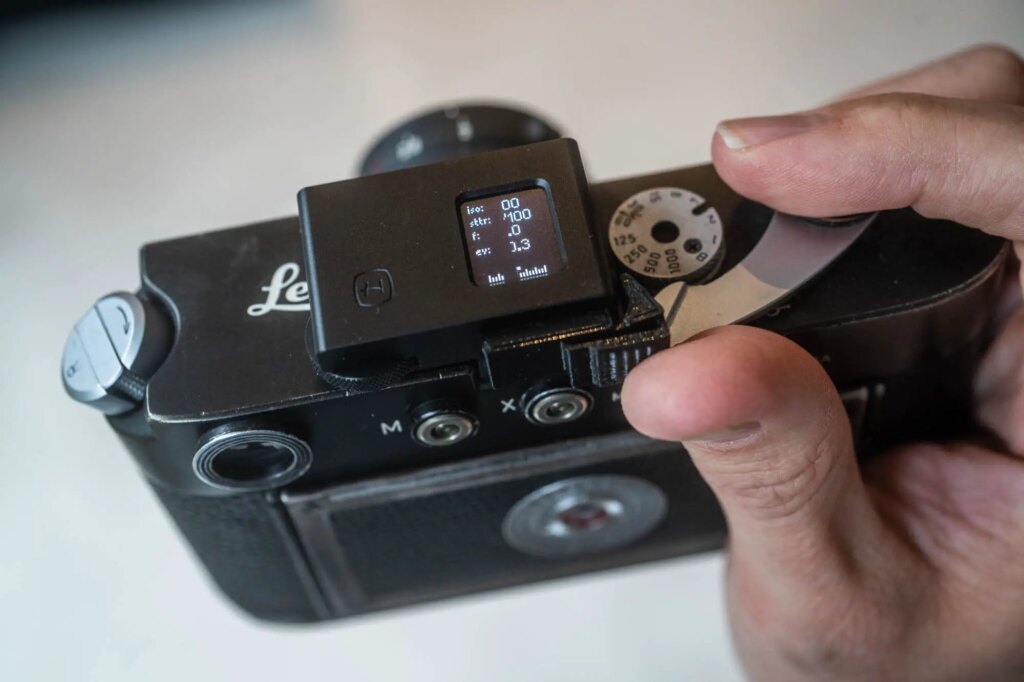
In shutter priority the screen reads, from the top down: “iso”, “sttr” (shutter speed), “ev”, and then “f” (aperture). ISO is setting in the menu first – more on that in a mo. Turning the dial changes the shutter speed and gives a corresponding aperture read out based on the set ISO. Pressing and holding the button locks the readout whilst the button is depressed (note, this is the default setting, but it can be switched so pressing the button updates the reading – again, more on this later). Finally, exposure compensation can then also be applied to the reading by rotating the dial whilst the button is pressed.
Aperture priority
In aperture priority the shutter readout and aperture readout are switched around to the aperture is just below ISO. Otherwise the operation is the same. ISO is set in the menu. Turning the dial sets changes the aperture which impacts on the shutter speed readout at the bottom. As above, pressing and holding the button locks the readout whilst the button is depressed. Exposure compensation can then also be applied to the reading by rotating the dial whilst the button is pressed.

Manual mode
Manual mode is a little different, the order of the readout is changed to “iso”, “sttr”, “f” then “ev”. ISO is set in the menu. Turn the dial to change the shutter speed, and press and hold the button whilst turning the dial to change the aperture. The bottom EV reading then tells you how far under or over exposed you are. There’s more notes on this mode below, as it is how I found myself using this meter.
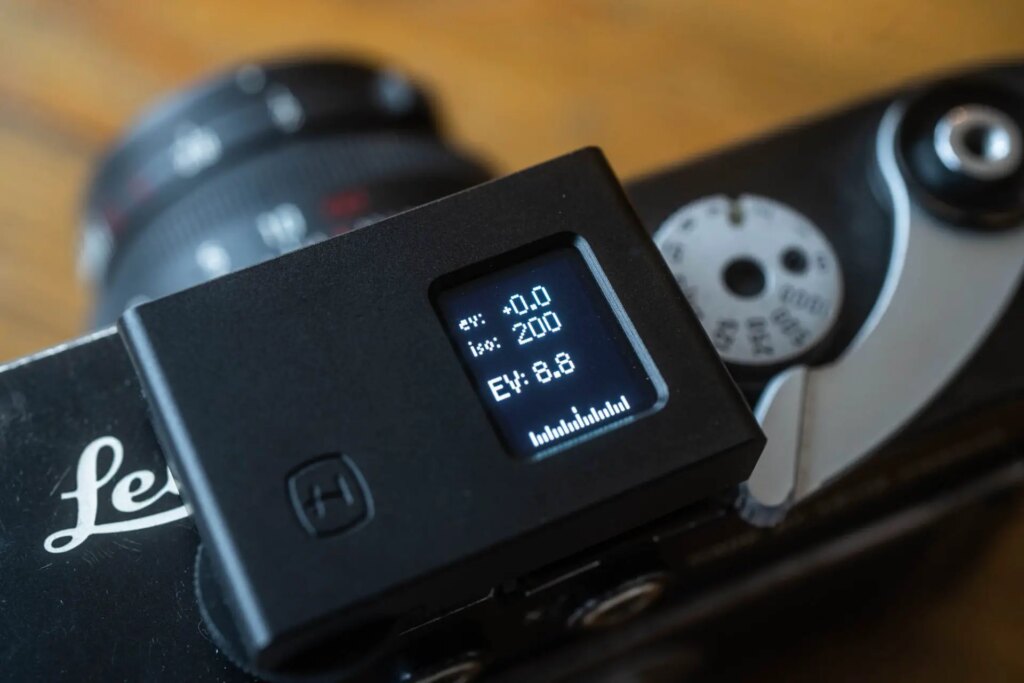
EV Mode
EV mode is different again. This mode is designed for using with cameras that set the shutter and aperture via an EV setting on the lens or camera. The readout changes to “ev”, “iso” then “EV” (in caps). In this mode, the meter reads out an EV number to transfer to the camera. Turning the dial changes the exposure compensation, pressing and holding the button whilst turning the dial changes the ISO. It should be noted the EV readout here is precise to 1/6th of a stop. This is a step up over the Lime One, which was precise to 1/3rd of a stop.
Configuration and Menu
To access the menu, double click the button. Double clicking also exits the menu. When in the menu, rotating the dial will scroll through the different options whilst the two hyphens are either side the menu item at the top. On each menu item, you click the button to move the hyphens down to the setting below to change it.
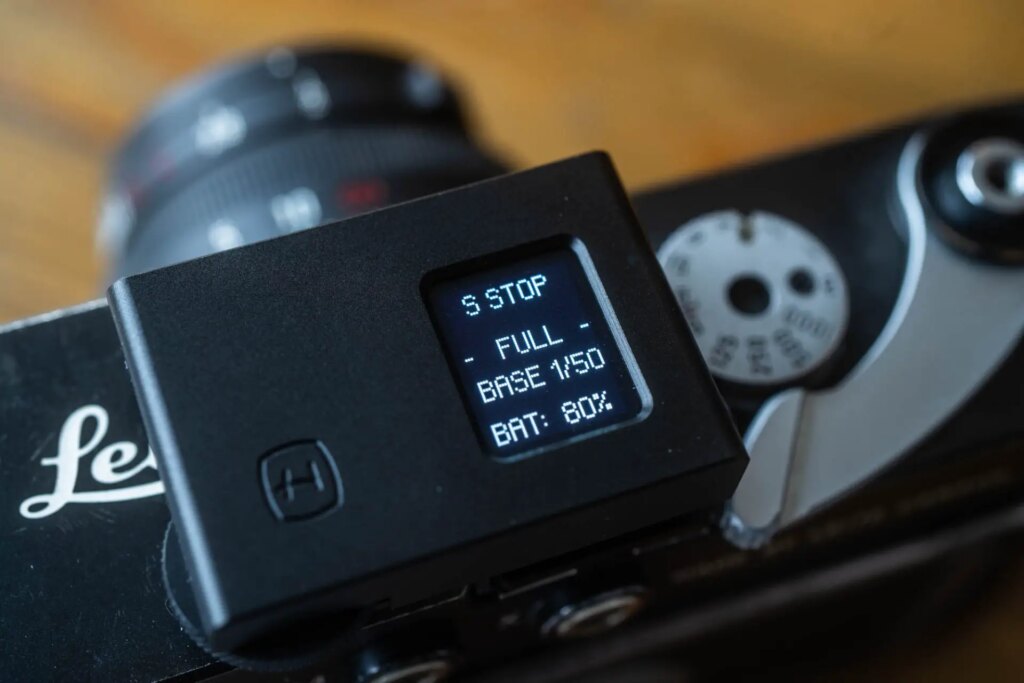
The first menu item is the mode. The second is ISO. Both self explanatory. The second and third allow the resolution of the aperture and shutters settings to be independently changed between 1/3rd, 1/2 and full stops, the latter being a new feature on the Lime Two. Additionally – and this is also a new feature over and above the Lime One – the shutter speed settings can also be changed to work using the older system based around 1/50th of a second instead of 1/60th.
The next item in the menu allows the user to change how the meter reads between a constant reading (the default) and a locking reading. In the constant reading mode, the meter is updating the readout all the time. Int he locking reading mode, the button needs to be pressed to update the reading. Releasing the button locks the reading in. Which works best is down to the user. I get on fine with either mode.

The final option in the menu is for setting the calibration. It can be calibrated seemingly in 1/10ths of stops up to 9 stops in either direction. I haven’t needed this calibration as the meter is spot on out of the box. Useful though, I think.
In use
Just like the first Lime One, the Hedeco Lime Two feels very quick to use. In fact, I think it’s the quickest of all the meters I have tried. Skimming through the settings using the wheel is effortless, and unlike the Doomo Meter S which seems to skip about a bit when you turn the wheel quickly, the Hedeco Lime Two feels responsive and accurate when spinning the wheel. Getting used to the button and wheel control doesn’t take long either. Of course I knew what to expect having used the original version, but I haven’t used it for ages and still picking the Lime Two up felt immediately intuitive. The only things that are slightly fiddly are having to press and hold the button whilst turning the dial and the double click to enter and exit the menu, but it doesn’t take long to get used to it.
A Note on the Manual Mode
I don’t have a cameras that use the EV mode, and I’m used to the aperture and shutter priority modes from other meters, so whilst playing with the Hedeco Lime Two, I have mostly been using it in manual mode. I have to say, I didn’t try this when I tried the first version, and I’ve found it to be a bit of a revelation. It’s a little fiddly having to press the button and spin the wheel to change aperture, but when using a totally manual camera it just feels quite logical. Keep the settings matches to that on the camera and it lets you assess the scene. By moving the camera around you get to see the amount of exposure differential within the scene. Of course, it’s not particularly precise – with its 35 degree metering, it’s no spot meter – but it does give an idea. Walking around in and out of the cover of trees etc, you also get a mixed feel for how much the exposure of the environment changes too in a very visual way that certainly made me feel more prepared for my next shot when using a manual camera.
Anyway, as I say, I only really used the one mode, but in combination with the others available, it feels like it offers a really comprehensive set of metering modes. In fact, I now sort of feel like my Keks KM02 is missing something now…
Specs
These are taken out of the manual:
size: 43,5x30x15,5 mm
weight: 23 g
battery :3V CR2032
aperture: f0.7 -> f1024 (3rd, 1/2, full stops)
shutter speed 1/8000s – > 8 hours 20 minutes (3rd, 1/2, full stops with both modern and traditional “base 50” shutter speeds available)
ISO 0.5 ->12800
Range -3 -> 20 EV (with a warning that below 0 EV: there’s a lower resolution and more noisy signal)
Battery
The Hedeco Lime Two runs off a CR2032 button cell. Not the most common, but fairly readily found in watch shops and online. I have gotten used to my rechargeable Keks KM02 meter now, but I think a replaceable battery will appeal more to some. Especially those who worry about the longevity of a rechargeable battery.
Updates and Comparisons
The main update over the original Lime One meter is definitely the build quality. The CNC’d casing is a distinct upgrade to the feel, despite it not being noticeably heavier. This upgrade in build quality brings the Hedeco Lime Two much more in line with the meters that come from the far east such as the Doomo and Keks range, though the weight of the Keks does give it a slight edge in terms of quality feel, the Hedeco now comes very close. The ability to move the foot on the bottom is also a big plus for camera compatibility, as is the bearing on the bottom of the foot which should make it reasonably universal without having the change the foot for a different sized one.
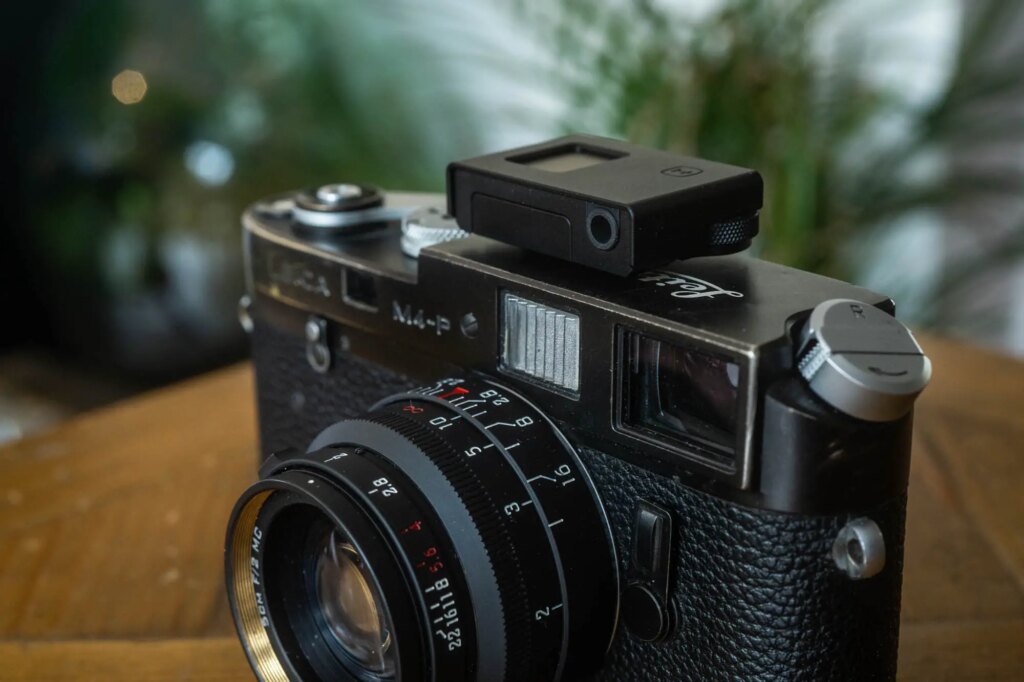
Out of all the shoe mount meters, the Hedeco Lime Two is also the lowest profile, which now it feels better made, definitely gives it a slight edge over the competition – it just looks better on the cameras I have mounted it on I think. Though as I say, I just find the light weight a little off putting somehow. Your mileage may vary.
And then there’s the manual mode which in addition to the lower profile design, feels like this camera’s unique selling point. This isn’t a mode found on the other meters (unless my memory is deceiving me), and honestly with a fully manual camera such as my M4-P, I’ve found it to be a subtly new way of approaching metering which I have definitely enjoyed.
Compared to the Keks KM02 which has some slightly superfluous functionality, I have also enjoyed the simplicity of the Hedeco Lime Two. But honestly, I feel like I am splitting hairs between them.
Finally the battery. Replaceable vs rechargeable. I can’t tell you which is better. I’m neither here nor there really. Though I have got used to my Keks which I feel less worried about taking on holiday knowing I could just charge it off a charger that I would definitely have with me. On the flip side, I could just take a spare CR2032…
You can read my comparison post that details the other shoe mount meters on the market here
Final Thoughts
The Hedeco Lime Two doesn’t entirely feel like a new meter, so to me it doesn’t make the crowded market place feel any more full. It is simply an upgraded version of a meter that already existed. With that said, this new version feels a lot more compelling to me. I’ve loved shooting it in manual mode, I found it very easy to use, it entirely lacks any superfluous functions or features (which always appeals to me), it looks great on the camera and feels really nicely made. All in all, if you asked me to say which was my favourite shoe mount meter OLED meter, I’d now be stumped to answer. It is true that the Hedeco Lime Two comes at a premium price point, but for the money, it is still a very compelling option!
You can find out more about the Hedeco Lime Two on the website here
Share this post:


Comments
Hedeco Lime Two attachable light meter and one of its ancestors on Hedeco Lime Two Low Profile Shoe Mount Light Meter Review
Comment posted: 20/02/2023
Mark Y on Hedeco Lime Two Low Profile Shoe Mount Light Meter Review
Comment posted: 23/04/2023
Which brings me to my second question. The original version's wheel was very loose and the indent clicks were extremely insubstantial. If the meter hadn't shutoff after 10s or so and I let it return to hanging around my neck, the wheel would hit against my body and settings changed. Johannes said he's aware of this and it's annoying and that he was working on some sort of settings lock or a more substantial mechanism for the wheel clicks.
How has your experience been so far in that regard?
Comment posted: 23/04/2023