In the last post in this series I talked bout how viable it is to use an unmodified Jupiter-8 on a Leica rangefinder – following on from that, I thought I might like to find out a little more about the process of modifying a Jupiter-8 for technically accurate focusing on a Leica rangefinder. Whilst the outcome of this process is not exactly the success I might have liked, I have seen some success, and to a certain degree it seems that the success I’ve had also seems seems to have come with a little less trouble than others might have found. As such I figured it would still be worth documenting my process and findings…
The credit
First off, let me just point out that I have been very lucky when it’s come to “re-shimming” one of my Jupiter-8 lenses for use on a Leica rangefinder. I also can’t take any credit for the knowledge or knowhow when it comes to doing it. As such, I feel I need to apportion credit before I get stuck into this. If you read anything about Sonnar lenses online, you will probably have guessed that the basis of this information has filtered down to me from Brian Sweeney. But, whilst I am talking to him about the work he is doing on another Jupiter-8 for me, I didn’t get this information directly from him.
After posting about the Jupiter-8 on Instagram Alex got in touch to talk to me about the problem of shims (I’ll get to that in a second). At the time, I hadn’t properly explored how to do this modification and as such hadn’t found any useful info on how to do it. We chatted a little and he linked me to a very useful bit of content on ‘Helino-Photo‘
The post he linked to – “Jupiter-8 vs Jupiter-8 (vs Carl Zeiss Planar 50mm F2 ZM ) on a Leica M6” gives you all the information you need to conduct this process “properly”. So short of duplicating it entirely I thought for the large part a link to it here with a bit of further explanation from me about how I have worked with that information would probably be all that was required.
What’s especially useful about that post is that it links to a series of other bits of content online that detail the specific information. Those bits of content are largely written by – you’ve guessed it – Brian Sweeney.
A foreword about Russian manufacturing
As we all know, Jupiter-8 lenses were made by the Russians. And, as every website that has ever mentioned Russian manufacture of cameras and lenses will tell you, this means quality control and precision weren’t always up to the standards of the likes of their German neighbours. I mention this now, as it appears that this variance is what worked in my favour during this process.
Breaking the Jupiter-8 in half
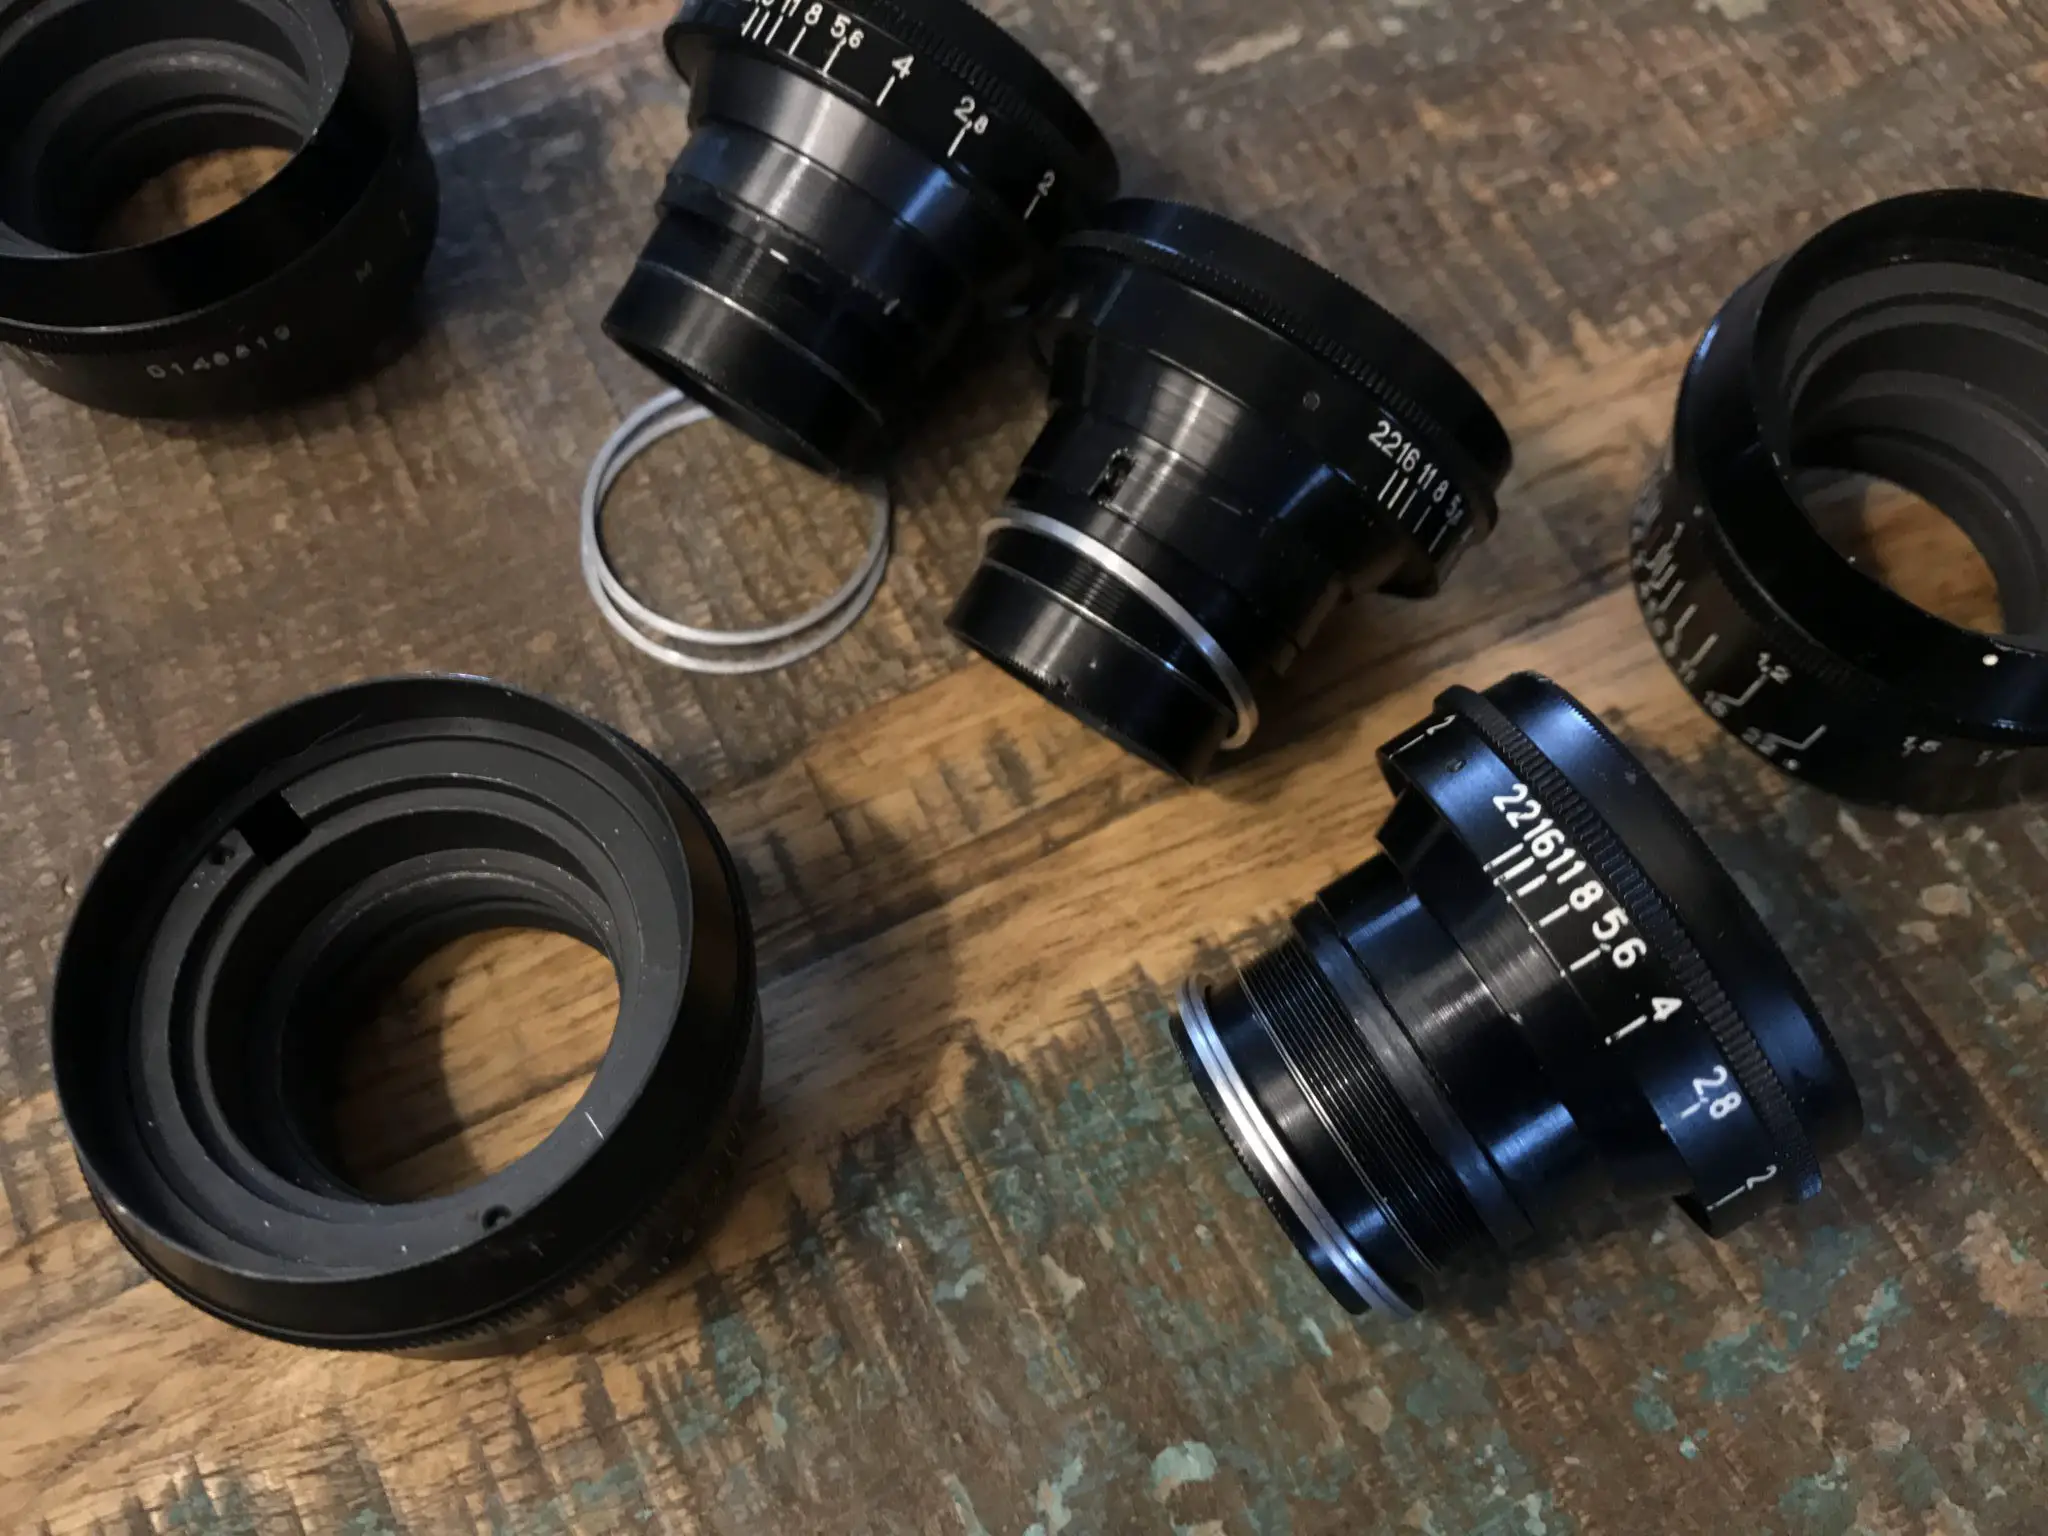
The first part of this process is to split the lens into two assembled parts. I am making some assumptions here, as I only have access to my three late model Jupiter-8s, but looking at the above referenced post, it seems to be the case for all of these lenses that they very easily split. The optical part with the aperture makes up one assembly, with the other assembly making up the outer shell of most of the lens as well as the focusing helicoid.
Splitting the Jupiter-8 lens into these two assemblies is all you need to know to experiment as I have. There’s no need for screwdrivers, or any of those other fancy lens disassembly tools.
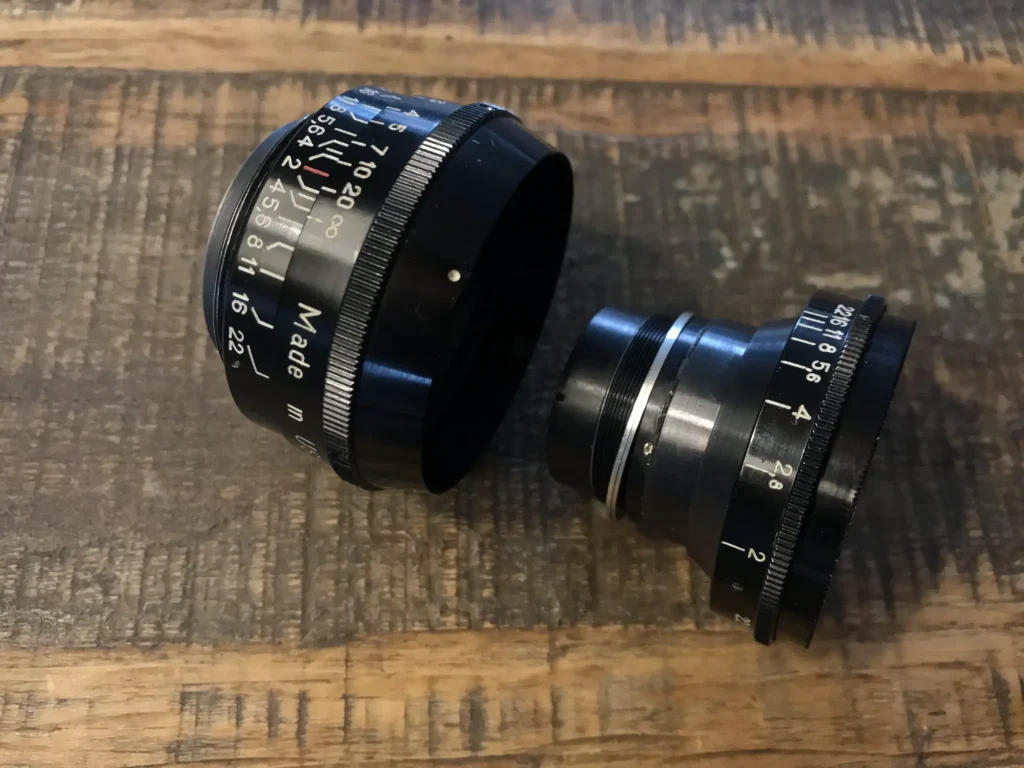
To split the lens you just need to take a firm hold of the focusing ring in one hand and a firm hold of the aperture ring in the other and unscrew it – just as if it’s a small jam jar.
The “Shimming”
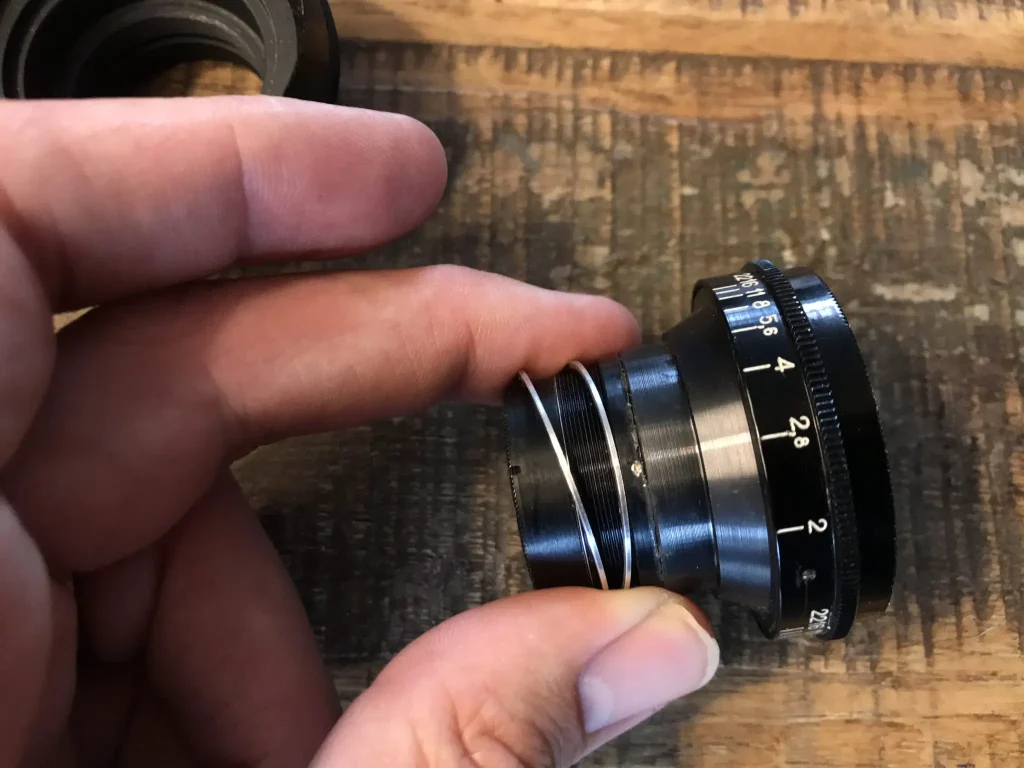
Once you have the two assemblies separated you will find there are one or two spacer rings in place within the lens. These will either be around the outside of the optical part of the lens, or sat lose inside the focusing part. These spacer rings are located within the lens so the original manufacturer could – I guess – finely adjust the lenses for accurate focus.
As detailed on Helino Photo, since the register distance of a Leica camera is ever so slightly longer than that of a Russian RF, by increasing the thickness of these spacers, thus increasing the focal length slightly, it is possible to correct the minor back focusing that’s visible when close focusing at f/2. When I say “ever so slightly” – at least according to the above referenced resources – We are talking about 0.1-0.15mm thicker; that’s about the thickness of a lighter weight sheet of paper. Adding this 0.1-0.15mm to these spacer rings is what people are talking about when they suggest “shimming” the Jupiter-8. Unfortunately, this bit is not as easy as might sound, and the outcome isn’t always 100% positive either…
The problem of the “shim”
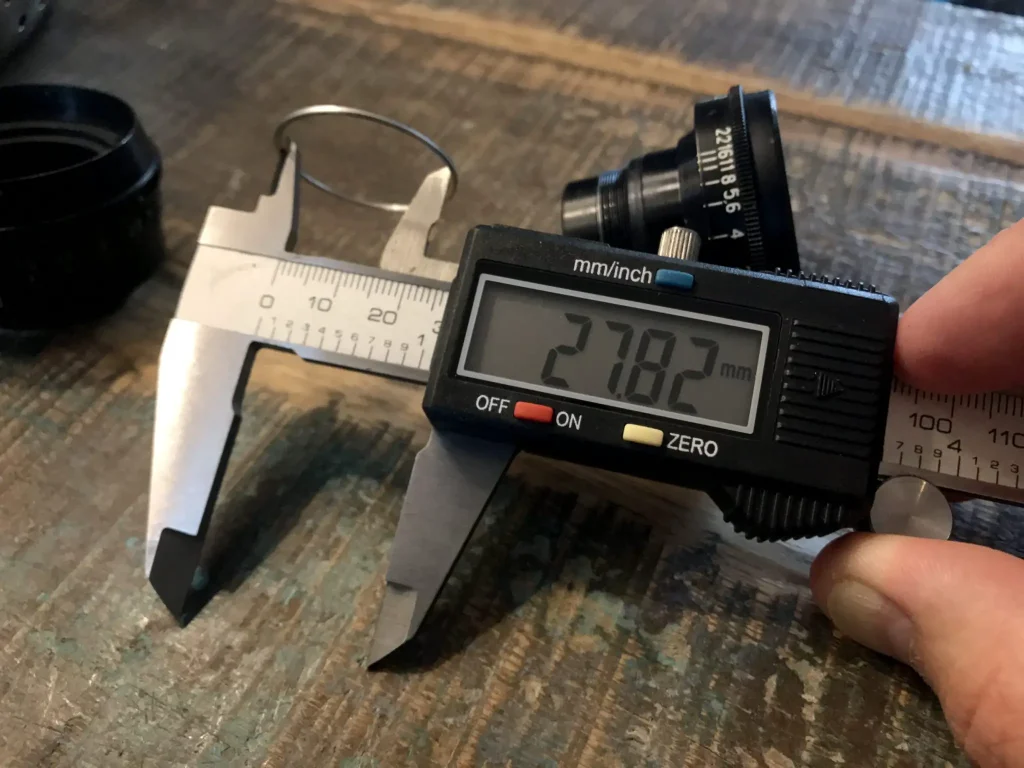
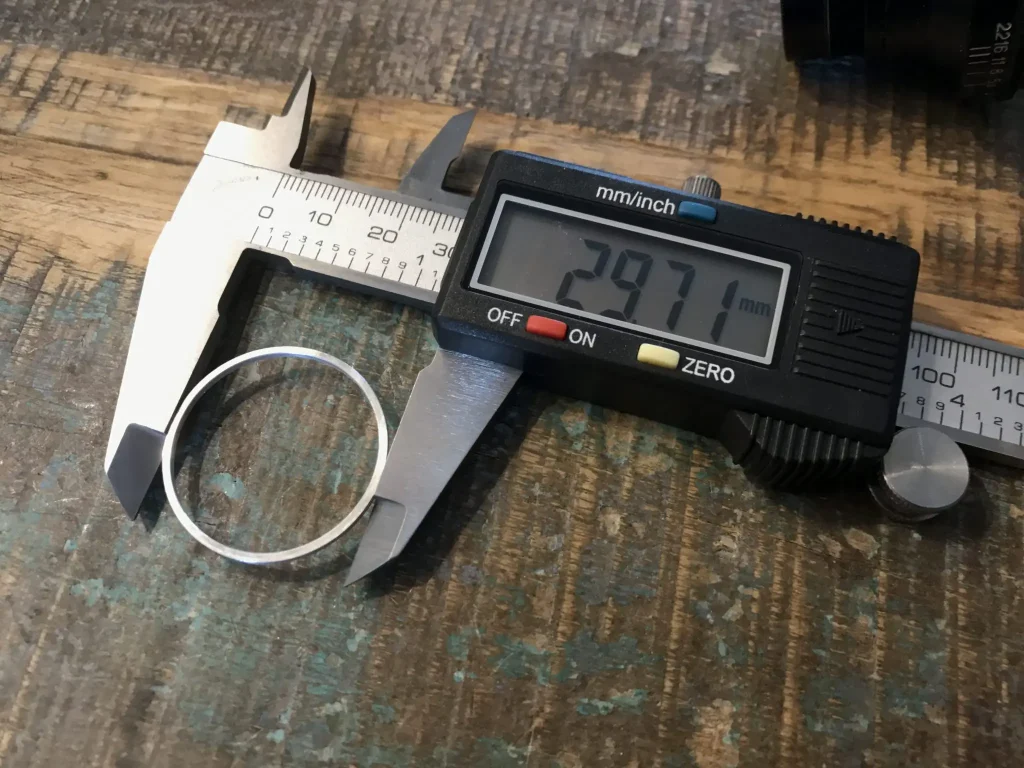
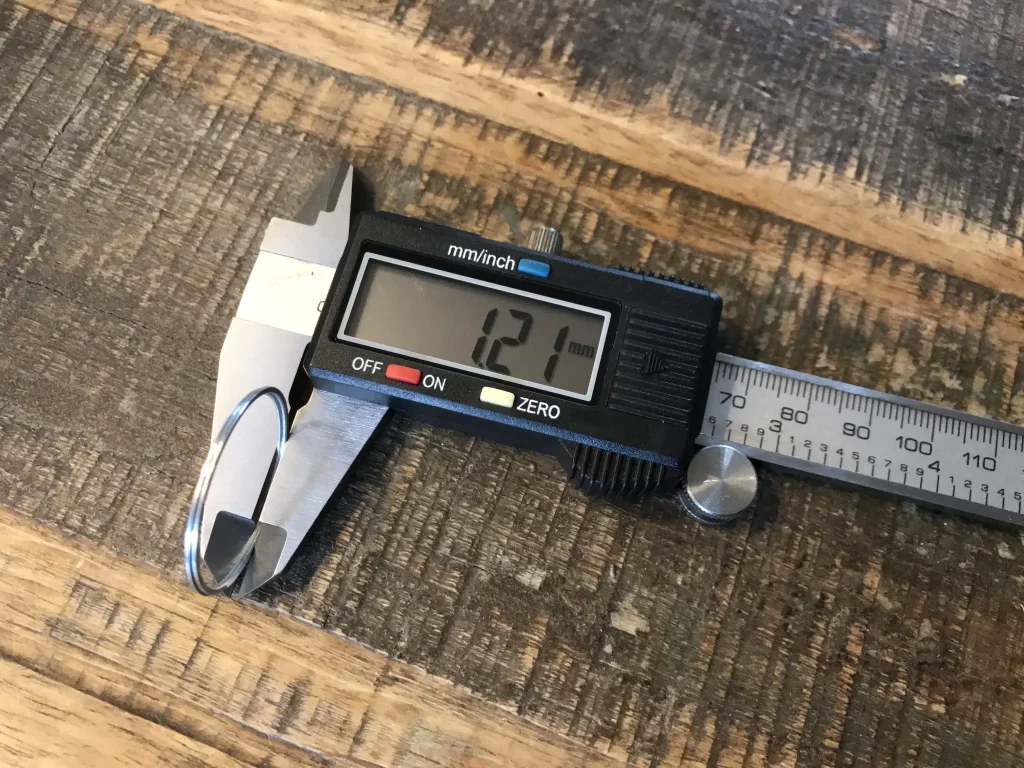
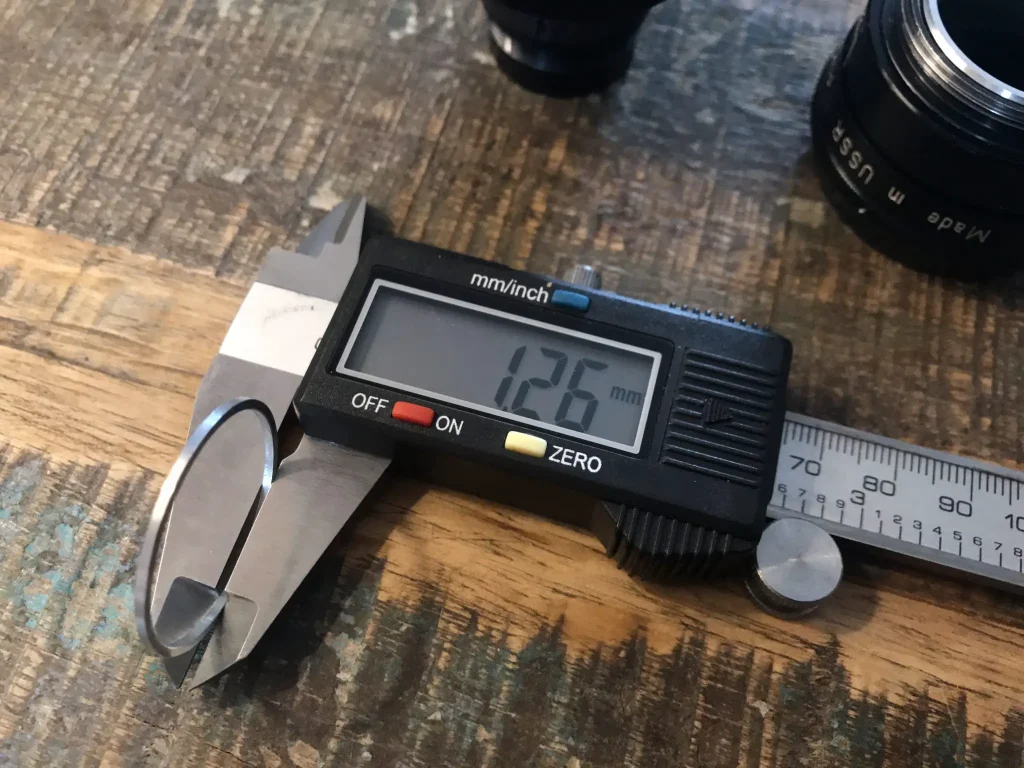
My first instinct was to search eBay for shim washers. There are plenty available at between 0.1 and 0.15mm thicknesses. What isn’t available off the shelf is this thickness at the approx 27.75mm internal diameter and 29.75mm outer diameter that’s needed. I spoke to my engineer mate Tom about this and he informed me that this wasn’t a standard size so I’d have to make something myself, cut something down or have something made.
I tried making shim washers out of tin foil. Some swear words later I gave up. Paper, same deal. Cutting stuff that’s this thin to this size is harder than I thought. The next idea was to have something made. I spoke to a local-to-me company that specialises in such things. They informed me that to make it a viable job for them I’d need to order at least 100 units at approximately £4 a go, this was starting to look like a no go.
I then figured out that I didn’t know the exact thickness of shim I needed. I could have a few thicknesses made of course, but I could see a somewhat excessive bill just to fix part of the problem that causes a minor focusing issue in a lens that cost me £5! The only option seemed to be to buy a bigger shim or two and trim them down. That was until I realised I might well have the solution staring at me in the face.
Salvaged spacer rings
As I’ve said, I don’t have one Jupiter-8, I have three. Having unscrewed them all I discovered something that I felt possibly alluded to the oft quoted variable manufacturing tolerances in Russian manufacturing, and more interestingly, how it might work out well for me. Two of my Jupiter-8 lenses had two spacer rings, and one of them only had one. Looking closely I could see there was a not particularly significant, but nonetheless evident difference in thickness between all of these rings. If I was lucky, I could just use a different combination of rings inside the lens I wanted to modify until I found myself with a better results focusing the lens.
A fluked result
What’s interesting about my process and initial results was that I didn’t have the vernier callipers you can see in the pictures at the time of experimenting with this modification. As such, I just used a process of trial and error. It was this process of trial and error that lead me to the positive result I now have. I must admit, I only “tested” the lens with a few shots, and whilst it’s fair to say that it still didn’t appear completely “fixed” for Leica rangefinder shooting, it did appear a lot “better” than it had been. At close distances I seemed to be getting almost perfect focus. And at far distances the problem of back focusing had been quite dramatically reduced.
The above is a crop – I focused on the middle of the M. If you compare this to the results I was getting before the mod here, you will see why I was so happy.
Collimation needed(?)
I was so pleased with what seemed like a positive result that I didn’t even notice the whole other section lower down in the post on Helino-photo (scroll way down) that talks about the necessity for further modifications. I just assumed that I’d happened upon a spacer ring that was just the right amount (somewhere between 0.1-015mm) bigger than what was in there, and that was the end of the story; it was all that was needed to “fix” the lens perfectly for shooting it on a Leica rangefinder. You can’t blame me for this mistake either – a whole load of people on the social medias had said to me – or at very least had alluded to the idea – that shimming was all that was required.
But, according to that post, shimming is only half the battle. The impact of the amount of shimming required to give perfect focus at 1m will also give the lens minor front focusing issues at distances. The chap who wrote the article talks about how he found this to be a problem after shooting his shimmed lens for a little while.
As he goes on to describe that, to achieve a Jupiter-8 lens that focuses perfectly on a Leica rangefinder, there is a potential requirement for removing elements and filing stuff down. It’s also apparently possible that even after undertaking this process, the lens – depending on variance in focal length – might not even be able to be perfectly modify for a Leica rangefinder. After finding what appeared to me to be a success myself, I read all this with a touch of bewilderment.
Looking back at the fluked result
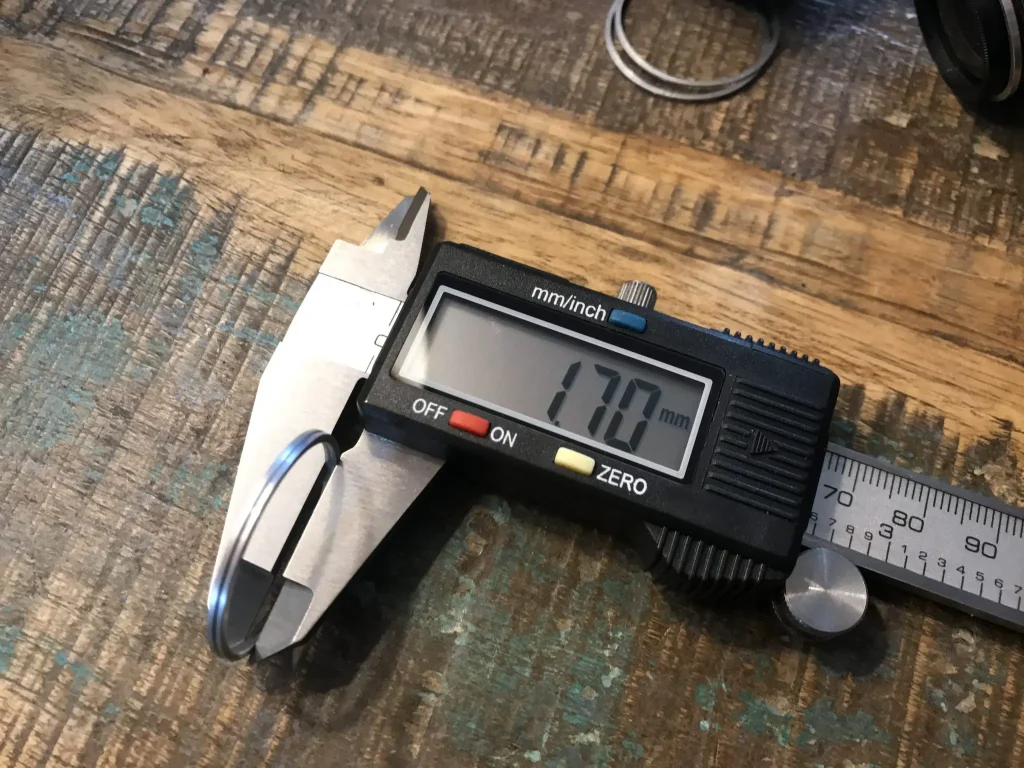
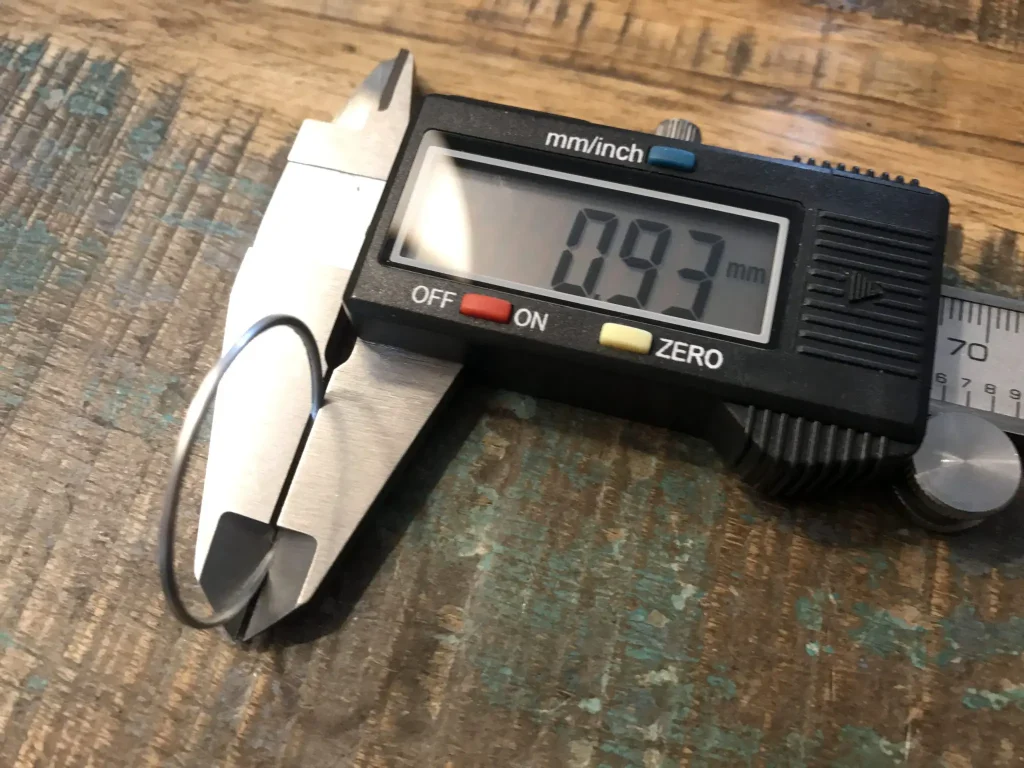
It was at this point I decided I’d quite like to buy myself a set of vernier callipers and try and work out what was going on. A few quid and a couple of days later with vernier in hand I was able to take accurate measurements. In measuring the original rings compared to the one I have in place, you can see that the difference between the original rings and the ring I am now using is actually only about 0.05mm.
What it seems I had I unwittingly managed to do was to adjust the lens by such a tiny amount that I hadn’t quite adjusted even as much as is technically required. That 0.05mm adjustment was enough to make a small but positive enough improvement to give me the impression that my close focus at 1m was true, and that distance focusing even at f/2 had improved enough to appear to be largely fixed too.
Have a look at Brian’s comment on my last post – as he says “depth of field” is subjective. If you have any notion of what “circle of confusion” means, you will understand this anyway. As I talk about in my previous post, the “sharpness” obtained from a Jupiter-8 lens when shot wide open is questionable by most standards anyway. As such, my very minor adjustment seems to simply have brought the lens closer to my expectations and subjective requirements throughout the range of focusing, rather than technically solving the issue. Which – to me at least – is both a satisfying and interesting outcome to the experiment. The best bit being, I achieved this outcome without having to do anything specifically difficult like filing down bits of metal….
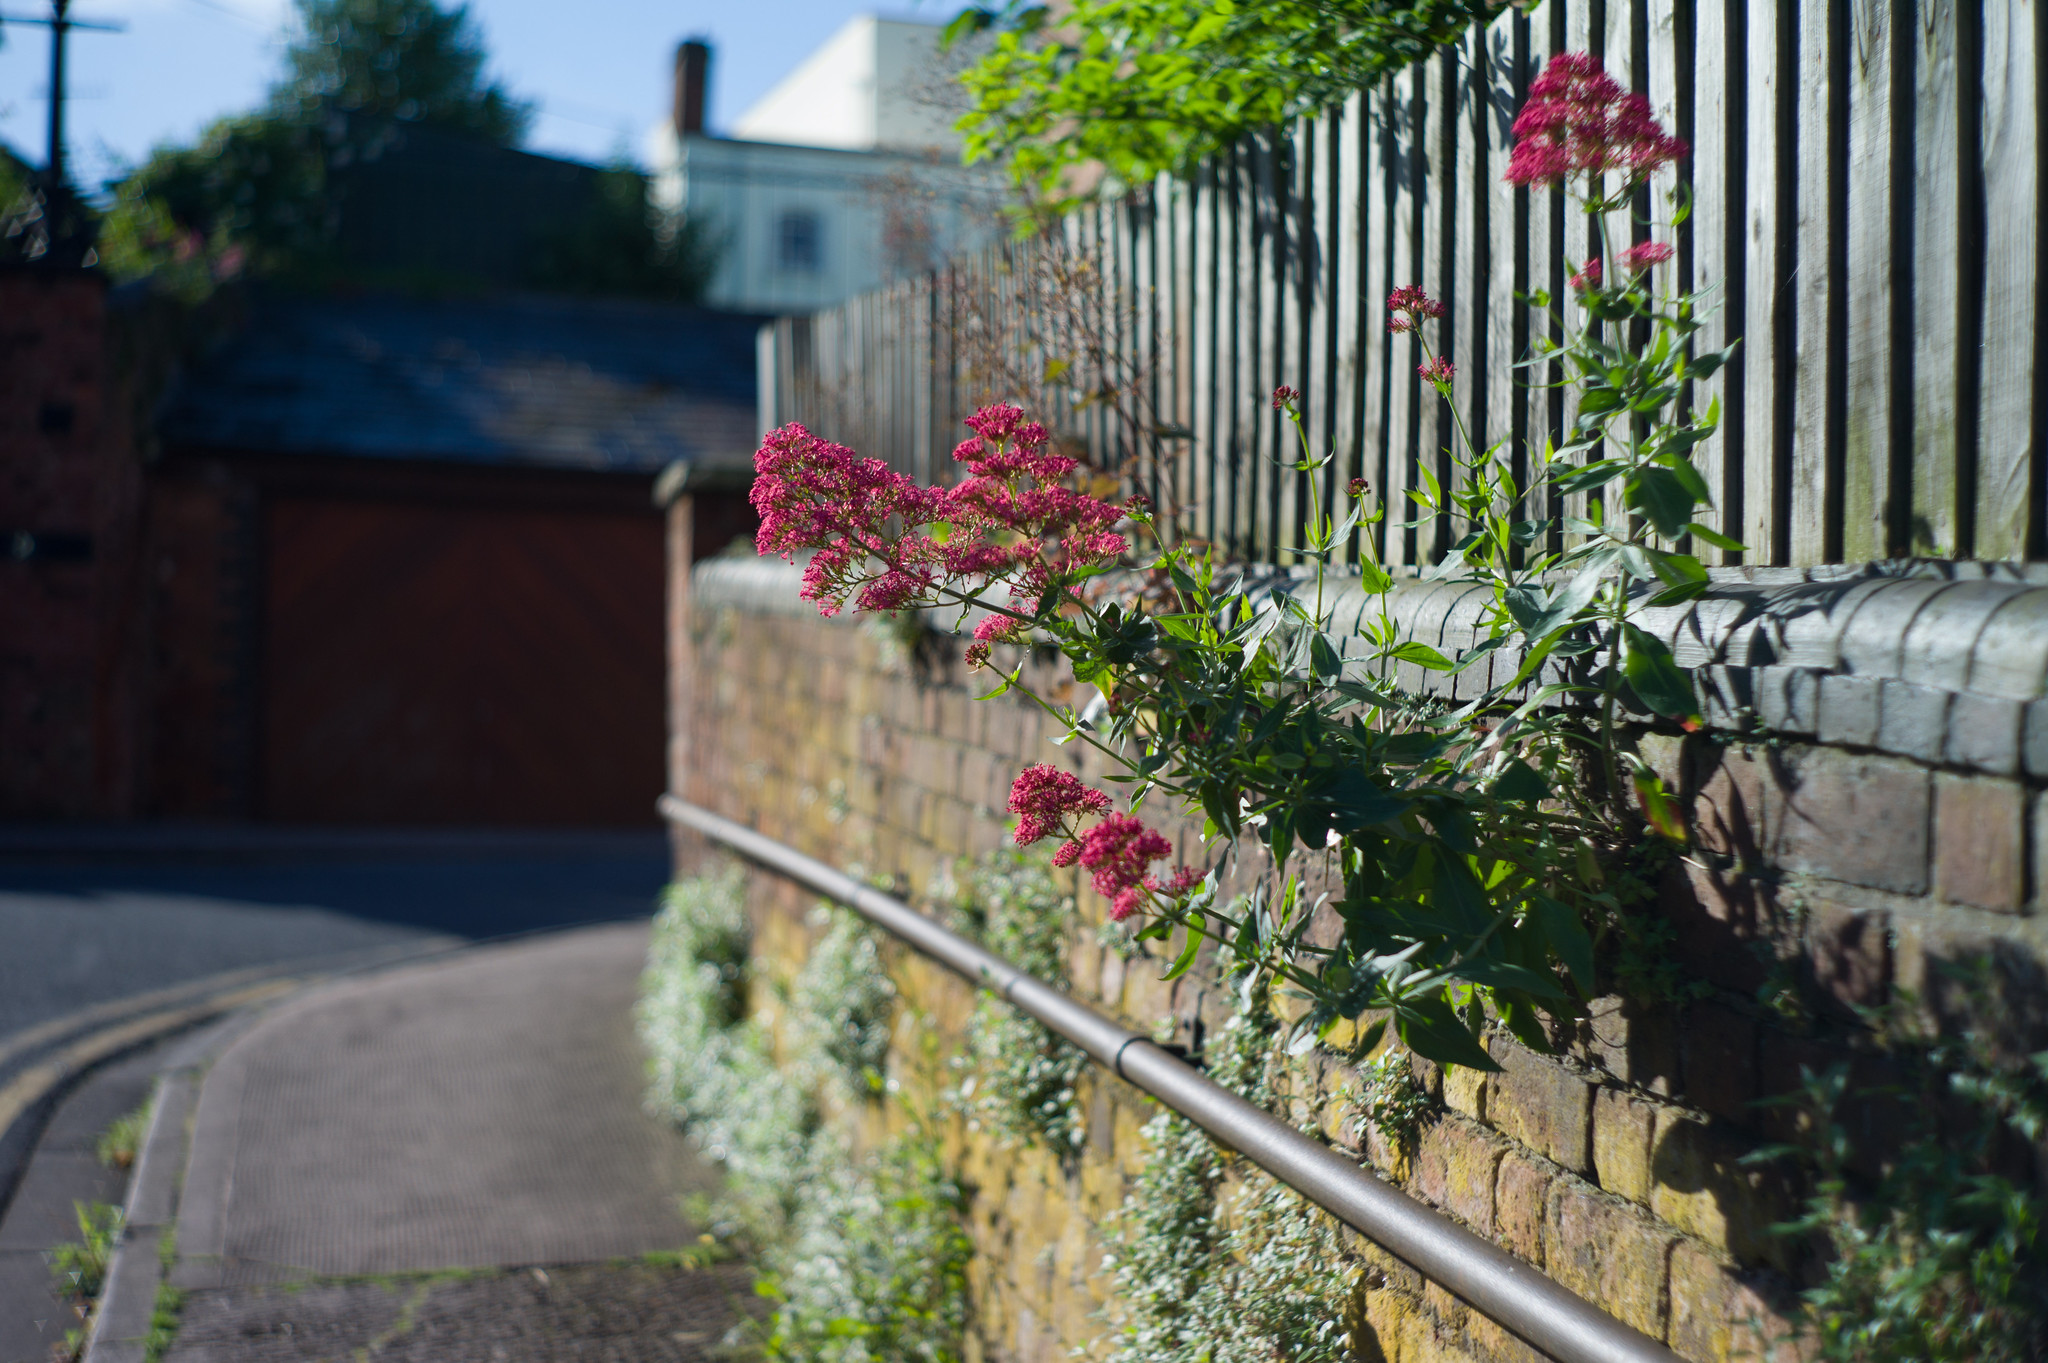
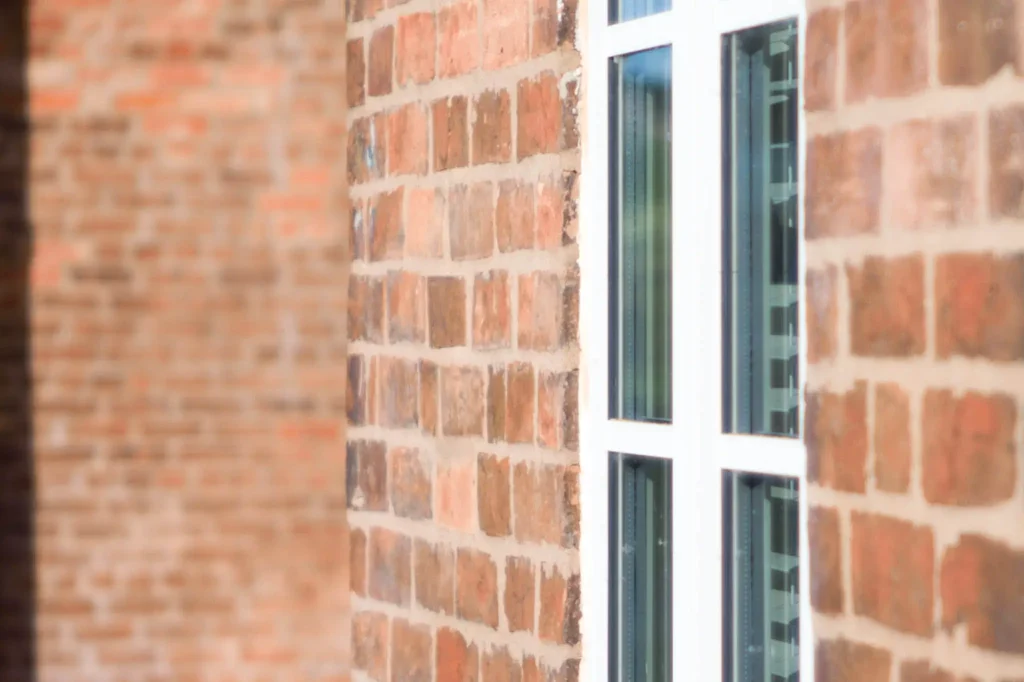
A few shots I have taken since the mod:


Of course, I have no real idea how repeatable any of this is – I suspect it was somewhat of a fluke me finding a spacer ring out of another lens that was such a tiny amount different. What I hope I have shown though is that even without going to the nth degree of perfectly modifying a Jupiter-8, some distinct “improvements” can be achieved – especially to the close focusing accuracy.
One tip – I’m not sure how relevant it is – but if you are looking to follow my path, the spacer I used to modify this lens was from another Jupiter-8 of exactly the same type; they were both late model black lenses with white text on them (rather than green). It’s probably also worth pointing out that this mod has the undesirable impact of the aperture scale not lining up with the marker properly – but again, there are some pointers on Helino-photo for fixing this issue too (I haven’t bothered).
Ultimately, I hope there is enough information contained in this post and the content I’ve linked to shed a little more light on the process of adjusting a Jupiter-8 for use on a Leica rangefinder. The outcome isn’t exactly as I anticipated, but it’s been a very interesting learning curve nonetheless!
So what next? Well, I’ve just bought a Jupiter-3 from the 1960’s that appears to already focus quite well on my Leica. I am also awaiting the arrival of the Jupiter-8M the Brian has modified for me – which is looking very promising from the images he has sent me…
Share this post:


Comments
jeremy north on Jupiter-8 – fluked success at modification – Finding my Perfect Classic Sonnar – PT6
Comment posted: 03/06/2017
Brian on Jupiter-8 – fluked success at modification – Finding my Perfect Classic Sonnar – PT6
Comment posted: 07/06/2017
I've used paper for shims, use a thick one for tracing then cut them down. You can also use the variable stand-off ring that also keeps the aperture ring in place. Just undo the set screw, figure a full rotation is 0.5mm. This is very useful for correcting under 0.04mm when you cannot find a good combination of shims, and a paper shim is too thick.
Fernando Ruiz on Jupiter-8 – fluked success at modification – Finding my Perfect Classic Sonnar – PT6
Comment posted: 17/06/2017
This series on Classical Sonnar Lenses is becoming something like a photographical novel, much like those old serial stories that were published weekly in newspapers. I completely agree on the refusal of this crazy search of ultimate optical perfection that has invaded most amateur photographers, and your well argued articles are making me to appreciate more my set of old lenses, both for their originals film cameras and for using on digital mirrorless cameras.
Since Episode One I was caught by the argument because I own an old Sonnar: a beautiful Jupiter-8M, attached to a Kiev 4 with shutter problems. With this camera completely dissasembled and still in troubles, I bought a second one to start making photos. So, my point is, Have you ever used a Contax II/III, or its sovietic Kiev siblings? Maybe this is a lot more easy and funny way of acquiring -in film- the special characteristics of sonnar or biogon classical lenses, that if I am right, were designed specifically for this Cameras and the Contax Mount.
Thank you again very much for all the effort in sharing your thoughts and experiences. Waiting for the nest Episode on Sonnar Saga...
Comment posted: 17/06/2017
Helino on Jupiter-8 – fluked success at modification – Finding my Perfect Classic Sonnar – PT6
Comment posted: 30/01/2021
I am very glad you were able to adjust yours with a simple shimming-procedure, that outcome is always the best and the quickest. :)
I see that my original text is missing some information on why I decided to go ahead and sand down the fixture itself (and then sand down the metal shims as well, to recalibrate the lens).
When doing tests at f2 - f2.4, I found the lens to be front-focusing, increasingly, from between 1 meter at around 8 meter distance and worsening the further away I got, not really being able to hit infinity focus.
Since I use most of my equipment for portraiture and often with big apertures, it was important to get this sorted.
Besides, dabbling with these old Ruskies is rather a fun challenge. :)
The sanding-part isn't really that difficult, like mentioned, I use wet sandpaper, to avoid the dust and then do some test shots.
- I wish I had a digital camera for that part, because it was a lot of back and fourth shooting, developing, scanning and inspecting.
After I had adjusted it by sanding it though, it is on target at every distance, which is a joy to use. :)
The worst experiences with these lenses, are lenses that are glued, you cannot take them apart anymore, no heat, force or chemicals will ever get them apart again. (experienced one J3 which was clued in the helicoid and a J8 which was clued, so it was impossible to split and re-shim. :D
Glad they are cheap! :D
Comment posted: 30/01/2021
George on Jupiter-8 – fluked success at modification – Finding my Perfect Classic Sonnar – PT6
Comment posted: 02/01/2023
Perhaps a bit of a stupid question, but I imagine the fact that you are freely opening and tinkering with these lenses means that the Jupiter 8 doesn't contain any radioactive thoriated glass?
Comment posted: 02/01/2023