After my first, recent experience of the 110 format I concluded that I wasn’t won over to the it despite the camera being so good to use. In fact, it made me more interested than I expected after subsequently reading and re-reading various articles on the subject here and elsewhere. Bob Janes’ posts (such as this one) and others sparked my interest, especially regarding fabricating 110 reels for film development.
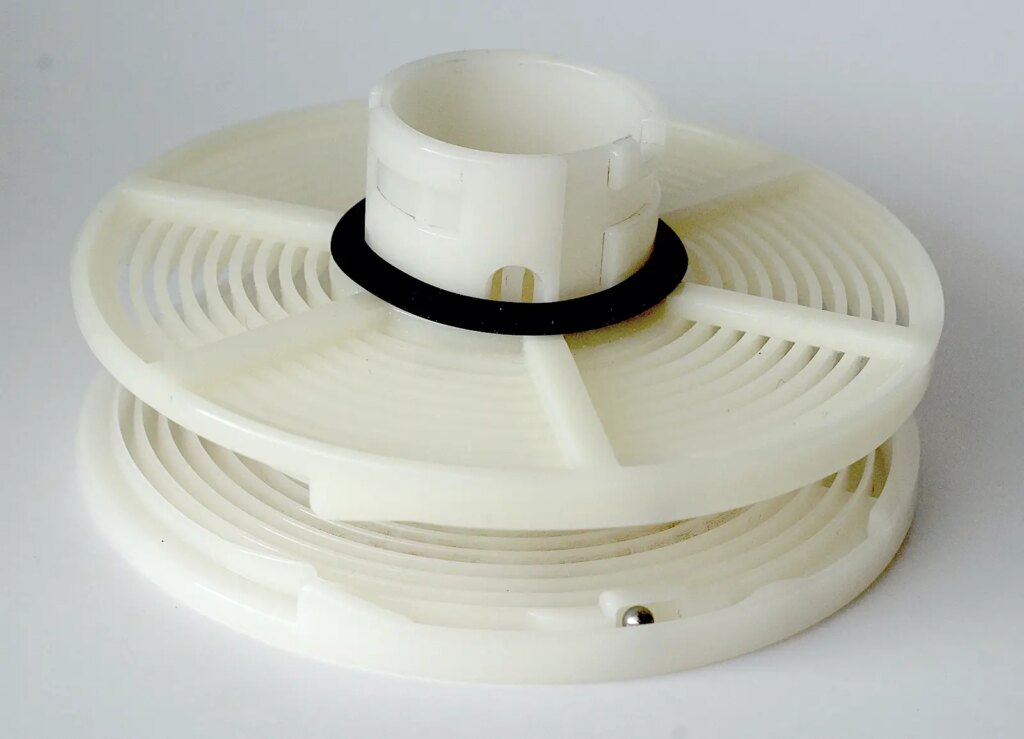
They reminded me that I had an orphan half of a development tank spiral that came from some forgotten source and which is almost identical to the Paterson System 4 spiral I use regularly. The inner core half of my System 4 spiral fits into it dimensionally, only the mating grooves have different mouldings at the end which prevent the two parts from sliding together. It is marked ‘Paterson’ though so is probably from one of their three earlier systems. It set me wondering if I could modify it to allow me to develop the 16mm wide 110 films myself and explore the format a little further.
The surgery
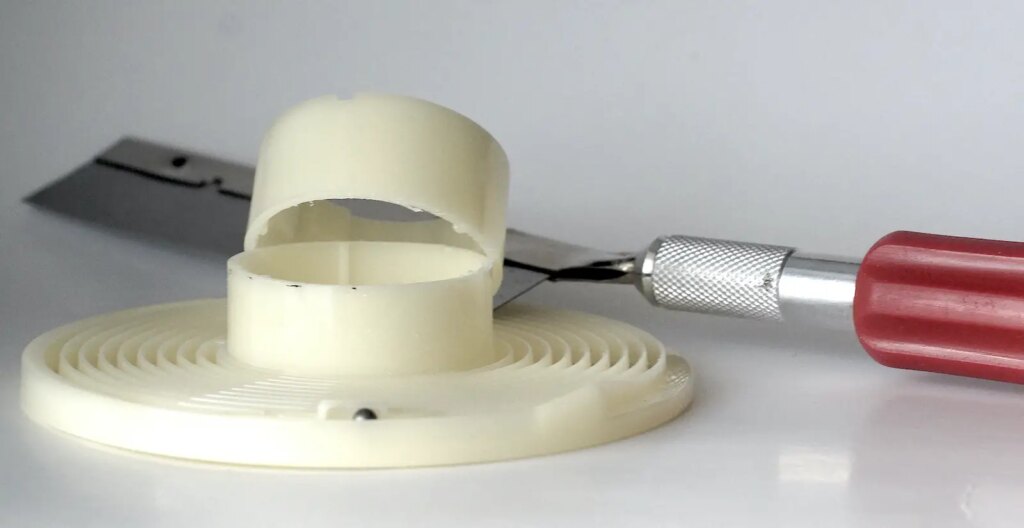
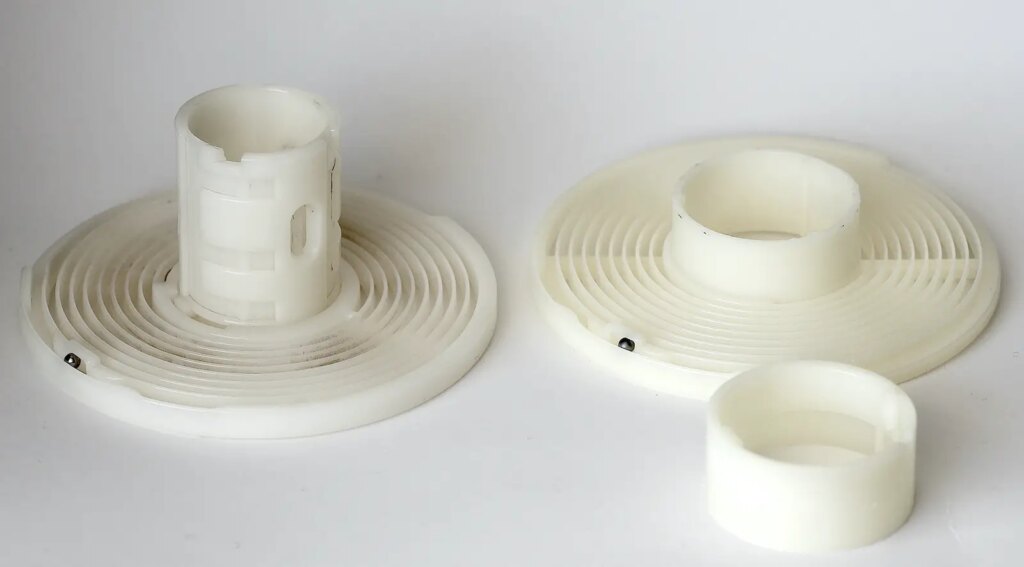
I really needed it to fit without requiring any modification to my solitary System 4 spiral so that I could continue to use the latter for larger film sizes. I was happy to cut down the orphaned half spiral to fit the film, however, which I did with the help of a razor saw. The surgery on the orphan half removed the projecting mouldings that were preventing mating and allowed it to slip snuggly over the System 4 half. The spiral grooves are about 2mm deep so I cut the core down to 13mm to give a 1mm tolerance to the fit of the film.
Another fortunate coincidence was that the inner System 4 half is the one that rotates back and forth for loading so I felt that holding them together with the loading slots and ball-bearings in alignment should keep this function working. Testing with a developed film confirmed that it was and the grooves and ball bearings all worked well together. So if you have the choice, cut down the outer core half to retain this feature.
Putting it together
If you have a spare spiral pair to dedicate to the job you could now fix them together permanently. Gluing the two haves together would be a simple task with a gap filling adhesive like one of the Gorilla products. Job done.
My need was for a non-permanent solution, however, and my first idea for holding the two halves together was a dead end. I planned to use an O-ring but I couldn’t find one the right size.
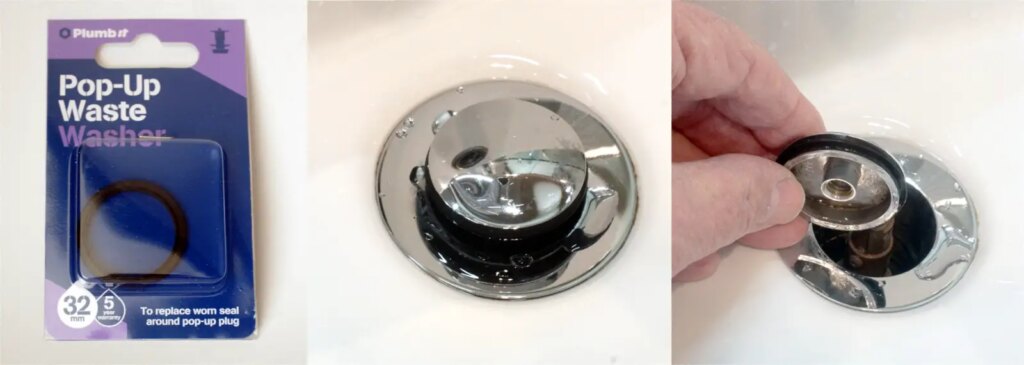
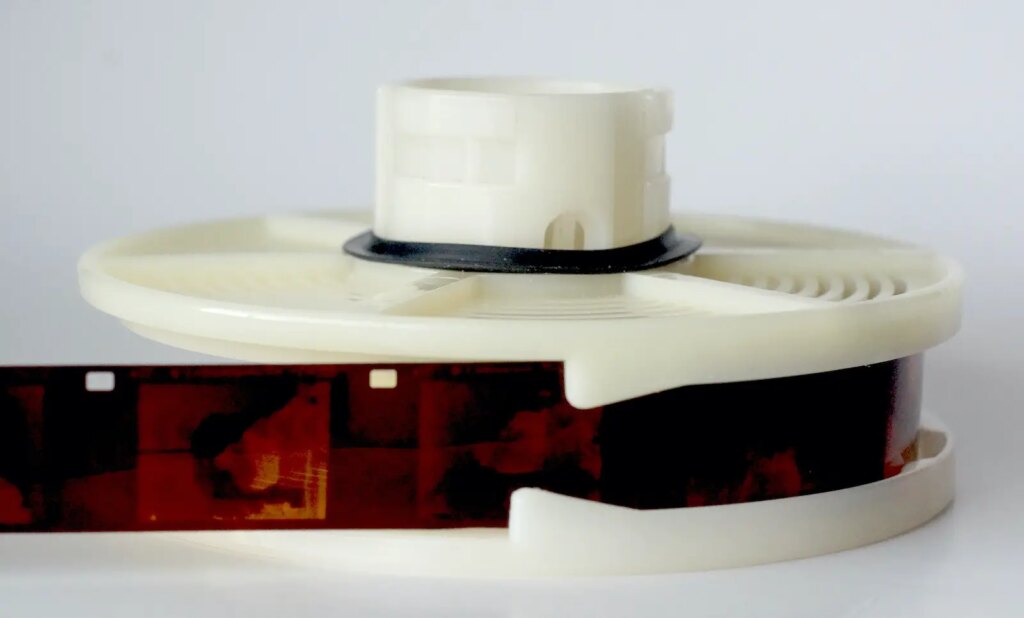
Then I came across a 32mm Pop-up Waste washer while browsing the local DIY store plumbing section, a snug fit to the diameter of the inner, System 4 core. The shape of the rubbery material grips nicely too, holding things in position well and the 5-year warranty suggests it would cope with the chemicals. I think inversion would be risky with this set-up though, the repeated sloshing and knocking might work it apart and allow the film to come out of the spiral.
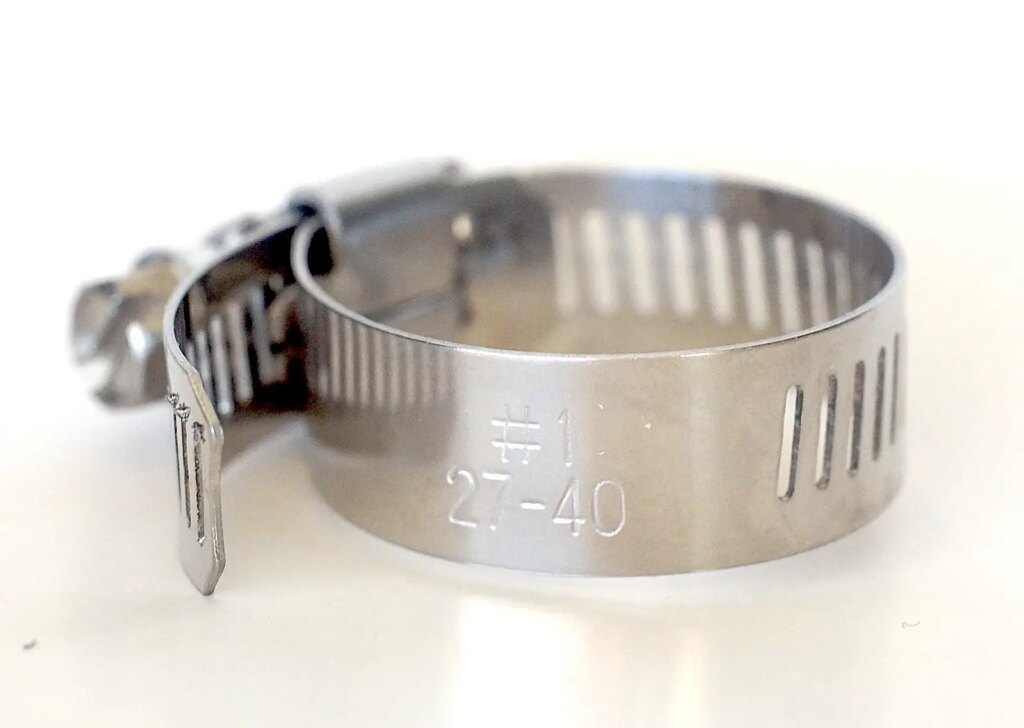
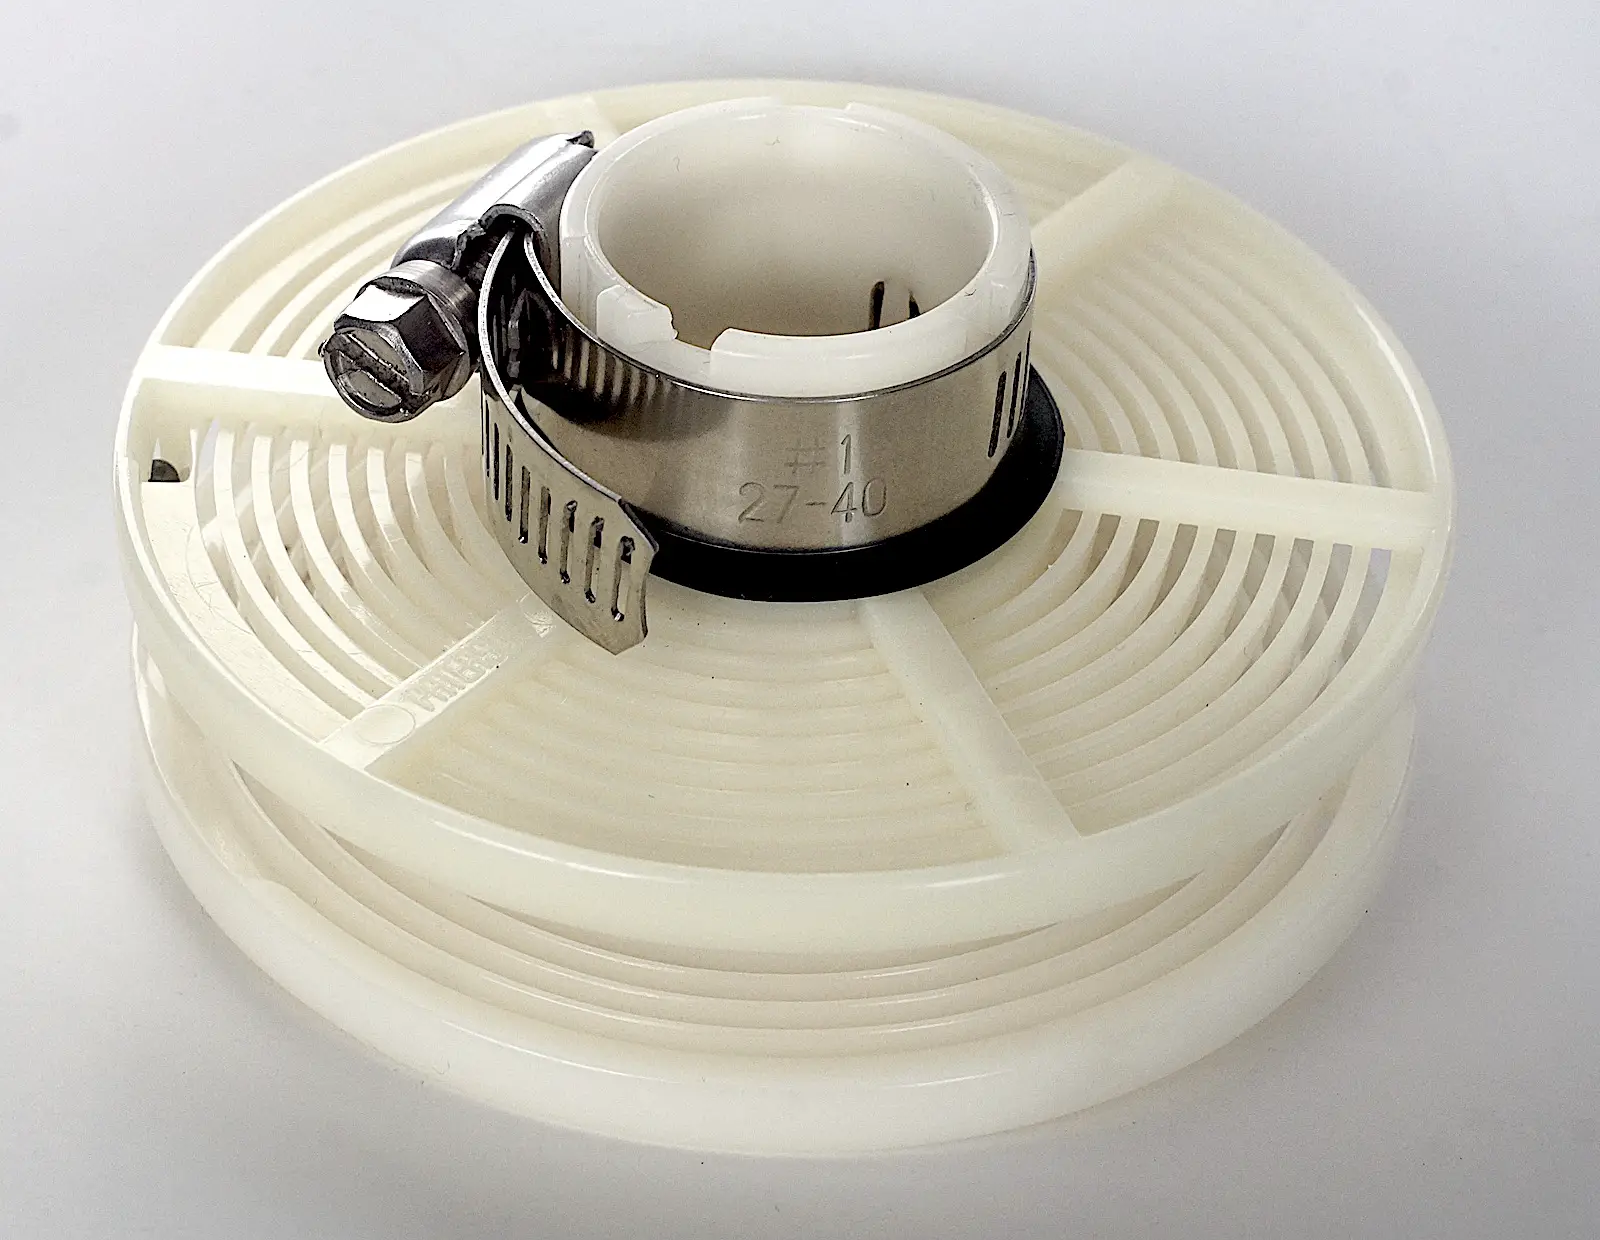
My next option was a small jubilee clip, giving a positive, secure fixing and being made from stainless steel would survive the chemical environment. It should also be strong enough for inversion agitation when required but it didn’t hold the two spiral halves in alignment to help with loading.
In the end I used the washer and the jubilee clip together which gave me positive alignment of the loading arrangement as well as secure connection between the two spiral sections for inversion agitation, which I would need to be tested out of course.
So with the arrival of some more film I was set to try developing C41 in Rodinal, something I felt would suit the format, to take advantage of the fine grain of C41 film, and be economical too to sit well with my Yorkshire up-bringing.
The proof of the pudding
After shooting off a Lomography Tiger colour print film, I teased out the end of the film and backing paper ready to load the spiral in the dark. This went surprisingly smoothly, pulling the backing paper brings the end of the film out enough to grip it and pull both out fully. Connections between film, backing and reel are not tightly secured so gentle tugs easily free things. Once I had managed to control the madly curling strip of film, the ball-bearing loading mechanism worked well and the film slid smoothly into the grooves.
I used “tri-stand” development (i.e. three agitations – 30 sec. at the start plus two more for 5 secs. 20 minutes apart) to maybe boost contrast a little to help overcome the base colour. Development was in 1:100 Rodinal for 1 hour at 20ºC after a 2 minute pre-soak. Not having tested out inversion I agitated with the rod.
After fixing, again agitating with the rod, I used inversion for the Ilford style wash stage which left the spiral firmly in position. So inversion should be safe for the other stages too.
The curling eased out after processing and drying I am pleased to say leaving the film nicely flat.
Conclusion
I haven’t seen this arrangement proposed elsewhere but there is nothing new under the sun as they say. It does provide another, mechanical way to convert spirals without connecting them permanently for occasional use if that is what you need like me. And, apart from needing some care when cutting down the spiral, is also easy to do and can be taken apart again after use.
Some of the results weren’t too bad though the grain was less fine than expected, noticeably in the thinner negatives. I have always found that exposure on the generous side always benefits colour negative emulsions anyway. There was some tramline scratching in places suggesting drawing the film out through the gate may be the cause so that needs looking at. And I still need to work on development times and exposure a bit more, contrast was a bit too heavy, so it looks like the 460 Tx will be getting a bit more action sooner than expected.
Share this post:


Comments
Graham Orbell on Never Say Never – My Approach to Spiral Modification for 110 Film
Comment posted: 06/08/2023
The standard recommended method back then was to hold each end of the film forming a U with the developer etc in 3 trays. Yo Yo the film up and down a second or so each up and each down. It worked very well. The film didn’t scratch but it’s best to have the emulsion side in. These days with health and safety etc, you’d wear rubber gloves of course. That’s the low tech method I’d use. PS I live at the other end of NZ.
Comment posted: 06/08/2023
Comment posted: 06/08/2023
Comment posted: 06/08/2023
BILL C WHITE on Never Say Never – My Approach to Spiral Modification for 110 Film
Comment posted: 06/08/2023
Comment posted: 06/08/2023
Bob Janes on Never Say Never – My Approach to Spiral Modification for 110 Film
Comment posted: 06/08/2023
Comment posted: 06/08/2023