If you’re thinking of dipping your toe into black-and-white film development but feel put off because it seems too expensive or too complicated, this post is for you. If you’re worried about cost, you can take heart from the “£25 or less”. If you’re not sure what to buy and feel overwhelmed by all the options you see online, jump to the TL;DR version of this post, and skip the rest if you like.
If you think developing is not for you, relax – I’m not out win converts! It does take time and effort, and you may well prefer to focus your energies elsewhere. All I’m saying is that if you’re shooting film, cost shouldn’t be a reason to not develop at home. Not only is home-developing cheaper than sending film to a lab, it’s also cheaper than most home-developing tutorials might suggest.
Introduction
Why I develop
Personally, I think developing is a lot of fun. I like knowing how things work, and I’m a bit of a control freak (only a bit). I’m also impatient (“So why do you shoot film?” I hear you ask), so I like being able to see the results soon after finishing a roll. If I get good results, it’s very satisfying. If I mess up, I can blame myself, which is better than seething with impotent rage against an indifferent professional lab.
Why I wrote this piece
A few months back, I wrote a series on darkroom printing technique, here on 35mmc. Part 1 turned out to be the most popular, although funnily enough, it wasn’t really about technique at all; it was a guide to setting up a darkroom in a limited space and on a tight budget – for £100 or less, to be precise.
I also develop black-and-white film at home, and my frugal approach extends to developing. It took me longer to write about developing, partly because I find it less exciting than darkroom printing (then again, can anything compare with printing?!)
On the other hand, there are more amateur photographers who develop than print. On various Facebook groups I’m in, I often see people asking what they need to buy for home developing. I have answered this question so many times that I thought that if nothing else, it would be helpful if I could just send them a link to this post.
For a beginner, setting up to develop can feel a bit overwhelming (I know I felt overwhelmed when I started out). What chemicals do I need? Which developer is the best? Darkroom or dark bag? Steel reels or plastic? There are too many options, which is a great thing in general, but can be confusing at first. And there are too many tutorials, often with conflicting advice. So – fully alive to the irony of trying to solve the “too many tutorials” problem by adding yet another one – here’s my guide to simple, inexpensive home development.
Two disclaimers
First, the “£25 or less” in the post title covers fixed costs of developing 35mm and medium-format black-and-white film. By “fixed costs”, I mean hardware as opposed to chemistry. But I’ve also included a chemistry checklist because I’m helpful like that, and as you’ll see below, the cost of chemistry for developing 25 rolls of 35mm film is just £1.05 per roll – and you’ll have some chemistry left over.
Second, this is a guide to buying equipment and chemistry, not a guide to the developing process itself. Which is to say, I won’t go through the actual steps involved – how to mix chemistry, load the tank, agitate and so on – since these are already covered on hundreds of other websites. But if you have any specific questions, just leave a comment and I’ll answer if I can.
The simple version

What follows is the simplest, shortest version of my black-and-white development checklist. Now I’m not saying that this is the best list. Someone else could come with a very different list which would be equally good – for them, it might even work better. There will always be someone who prefers some other developer, or a different kind of thermometer.
In this section, however, the idea is to keep it simple and specific. Therefore, I’m deliberately not setting out all available options and their various pros and cons. If you want to take a deep dive – and there’s nothing wrong with that – the internet is your friend. In the next section, if you’re interested, I’ve explained my reasons for some of the choices. But if you want the short version, I suggest you buy the following.
Hardware (fixed cost)
The website links and prices are for the UK, as that’s where I bought my stuff. But everything on the list is relatively common, so you should be able to source them (or close equivalents) in most other places too.
- AP Film Developing Tank for 35mm: £12.98 (or £17.99 for 120 film or 2 rolls of 35mm)
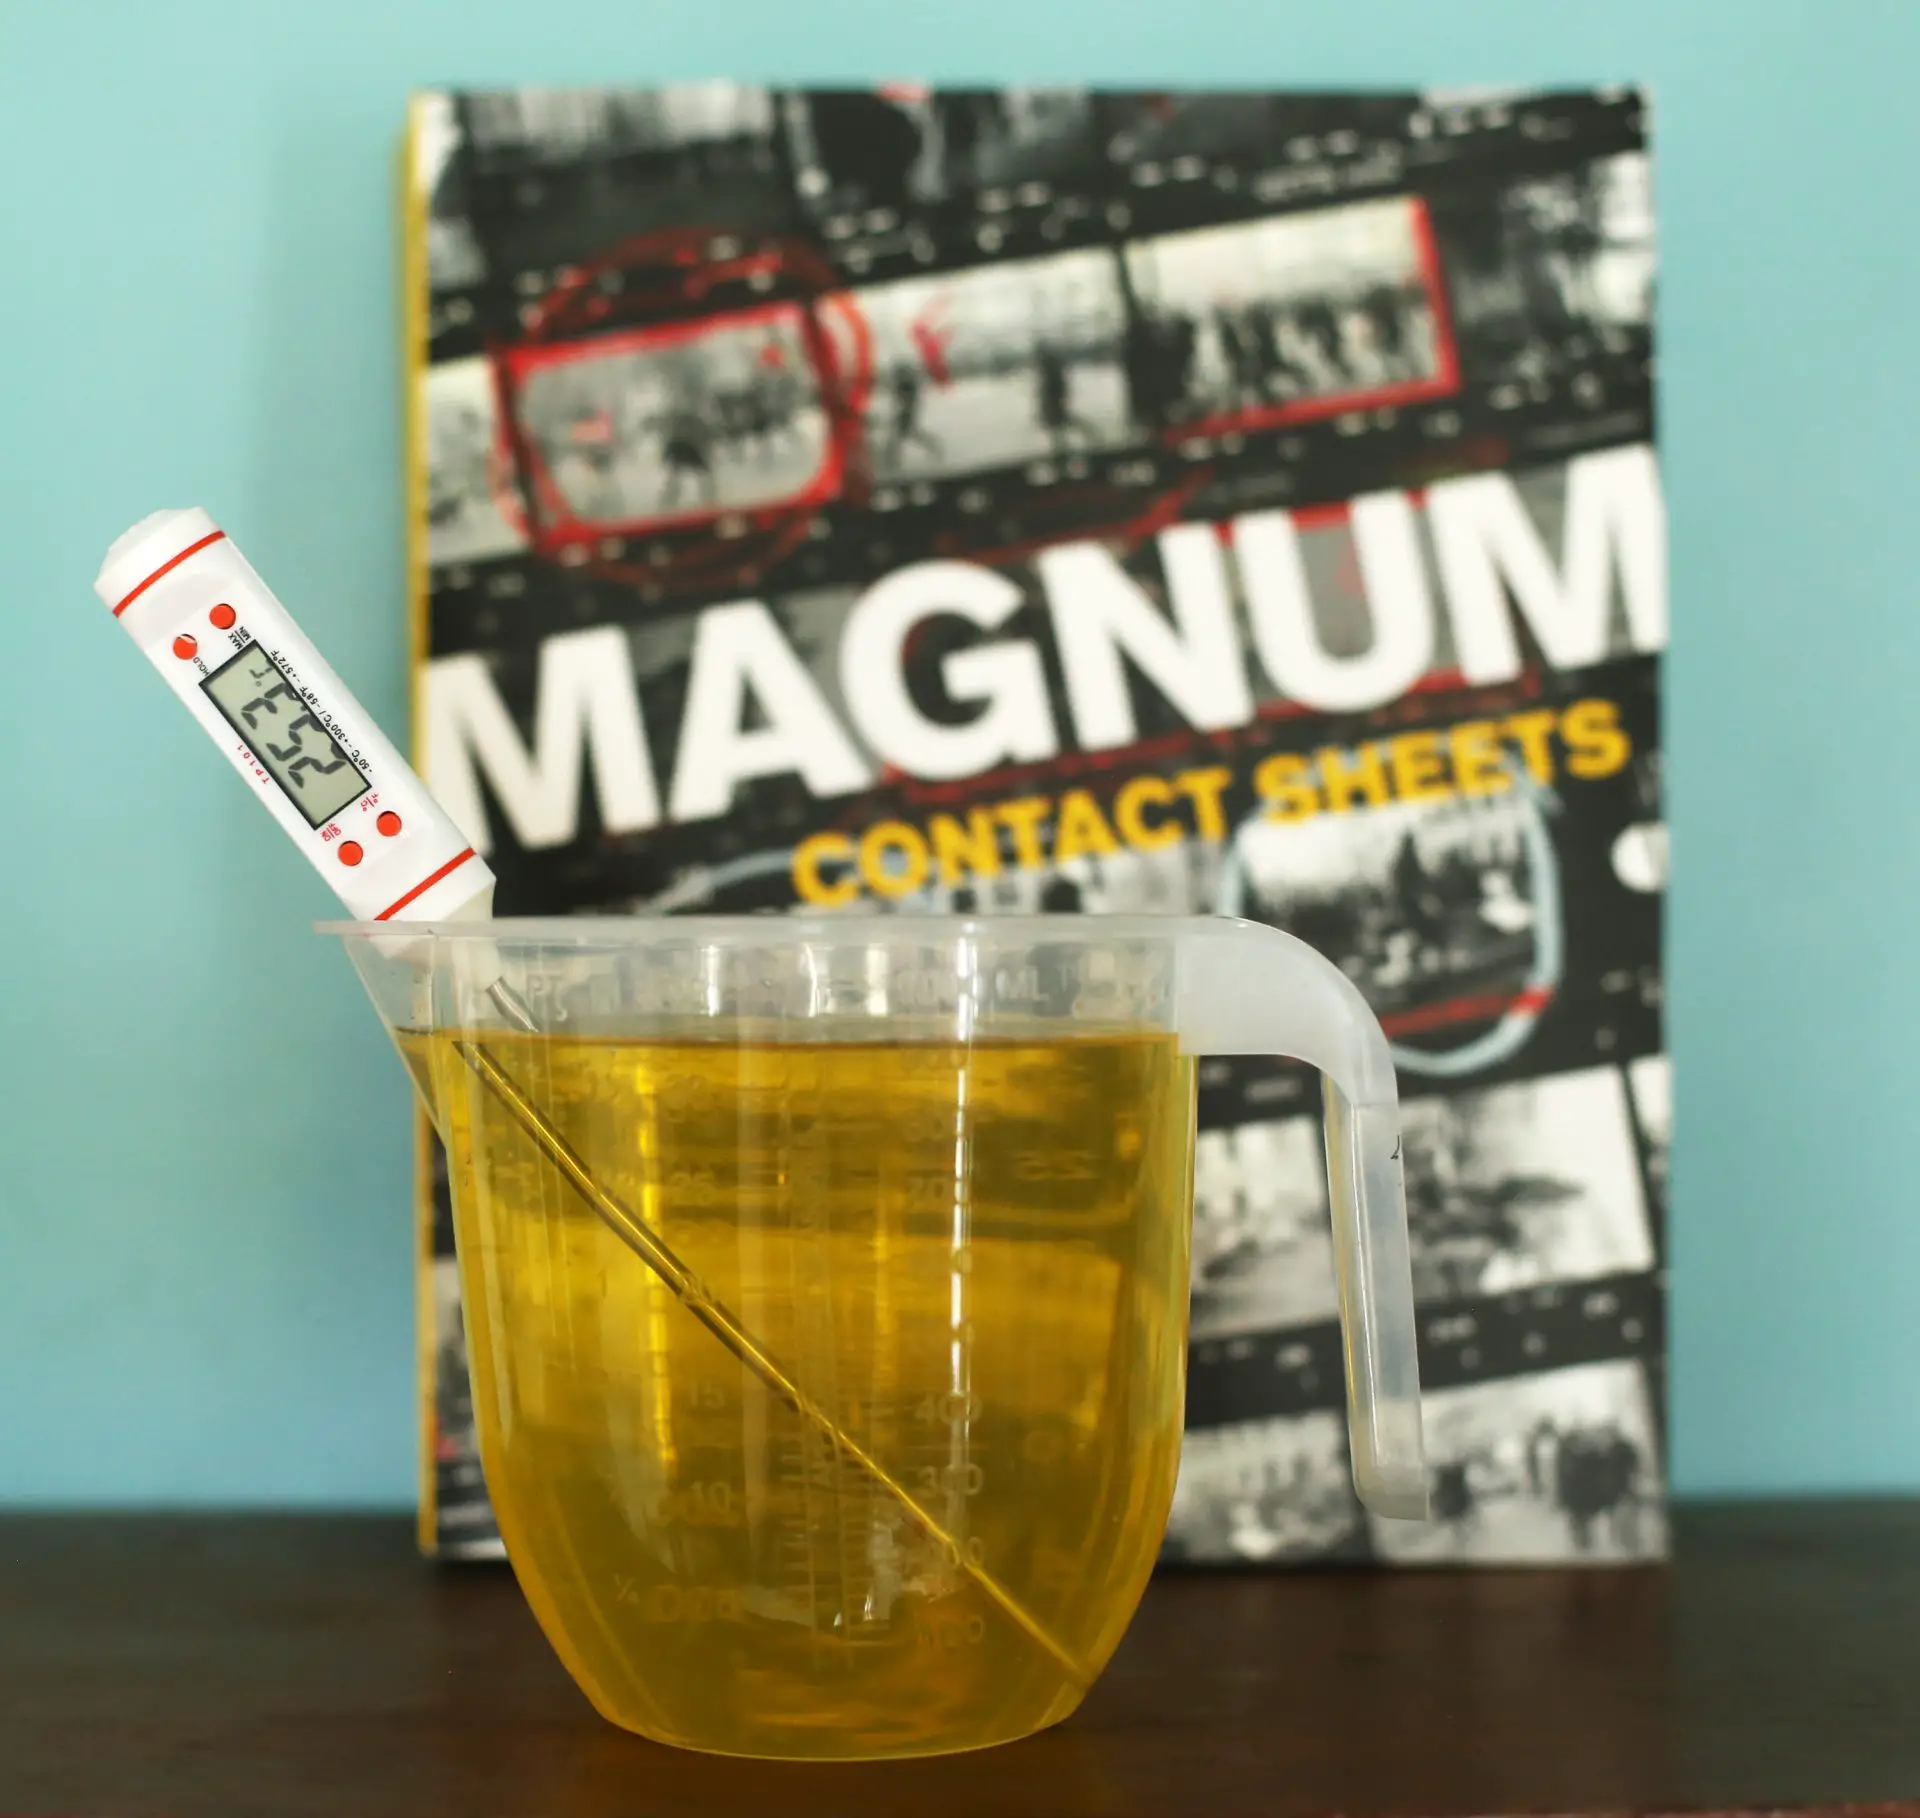
- Digital kitchen thermometer: £1.95
- Funnel: £1
- 2x 1 litre measuring jugs: £0.35 each
What, that’s it?! Yes, that’s it. Total cost: £16.63 (or £21.64 if you’re developing medium-format).
If you don’t have a darkroom, you will also need a dark bag (£20.99). But literally everywhere I’ve lived, I’ve been able to find or make a darkroom space. In fact, Holly recently wrote how she has a dark bag, but still prefers a coat cupboard. Of course for film developing, the darkroom must be truly dark, i.e. no safelight either (unless you’re working with orthochromatic film). Windowless bathrooms or closets are perfect, but windows can be lightproofed if needed with thick curtains, newspaper or bin bags. The space doesn’t have to be a big one. As long as it accommodates you with a bit of elbow room to spare, that’s all you need.

More hardware (no cost)
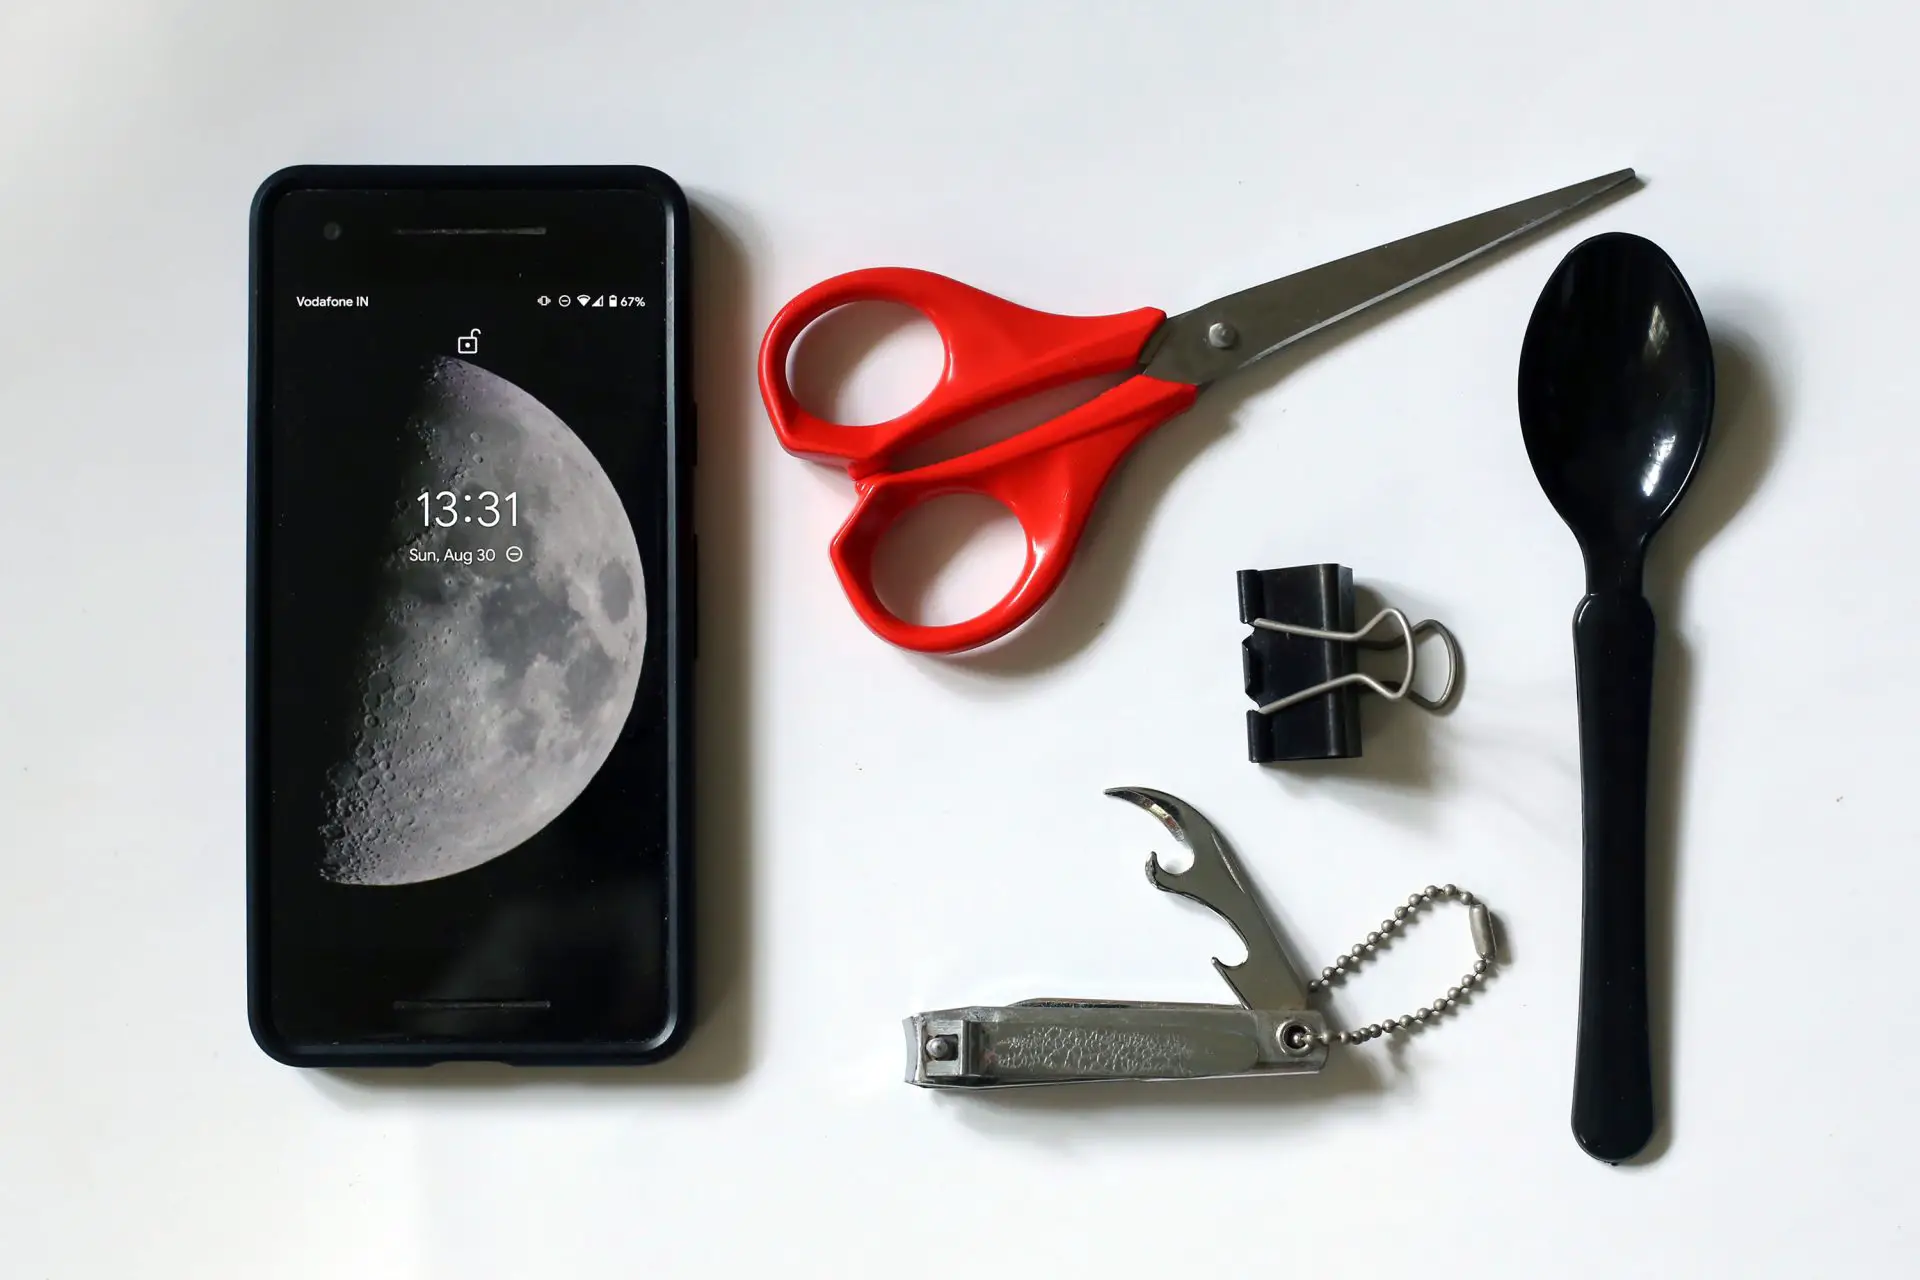
Everything else I need, I had at home – and you probably do too. So these are free.
- Empty wine bottles or plastic drinking-water bottles to store chemicals
- Plastic spoon or any long plastic thing as a stirrer
- Bottle-opener to pry open the film cartridge
- Scissors to snip off the film leader
- Smartphone to serve as timer
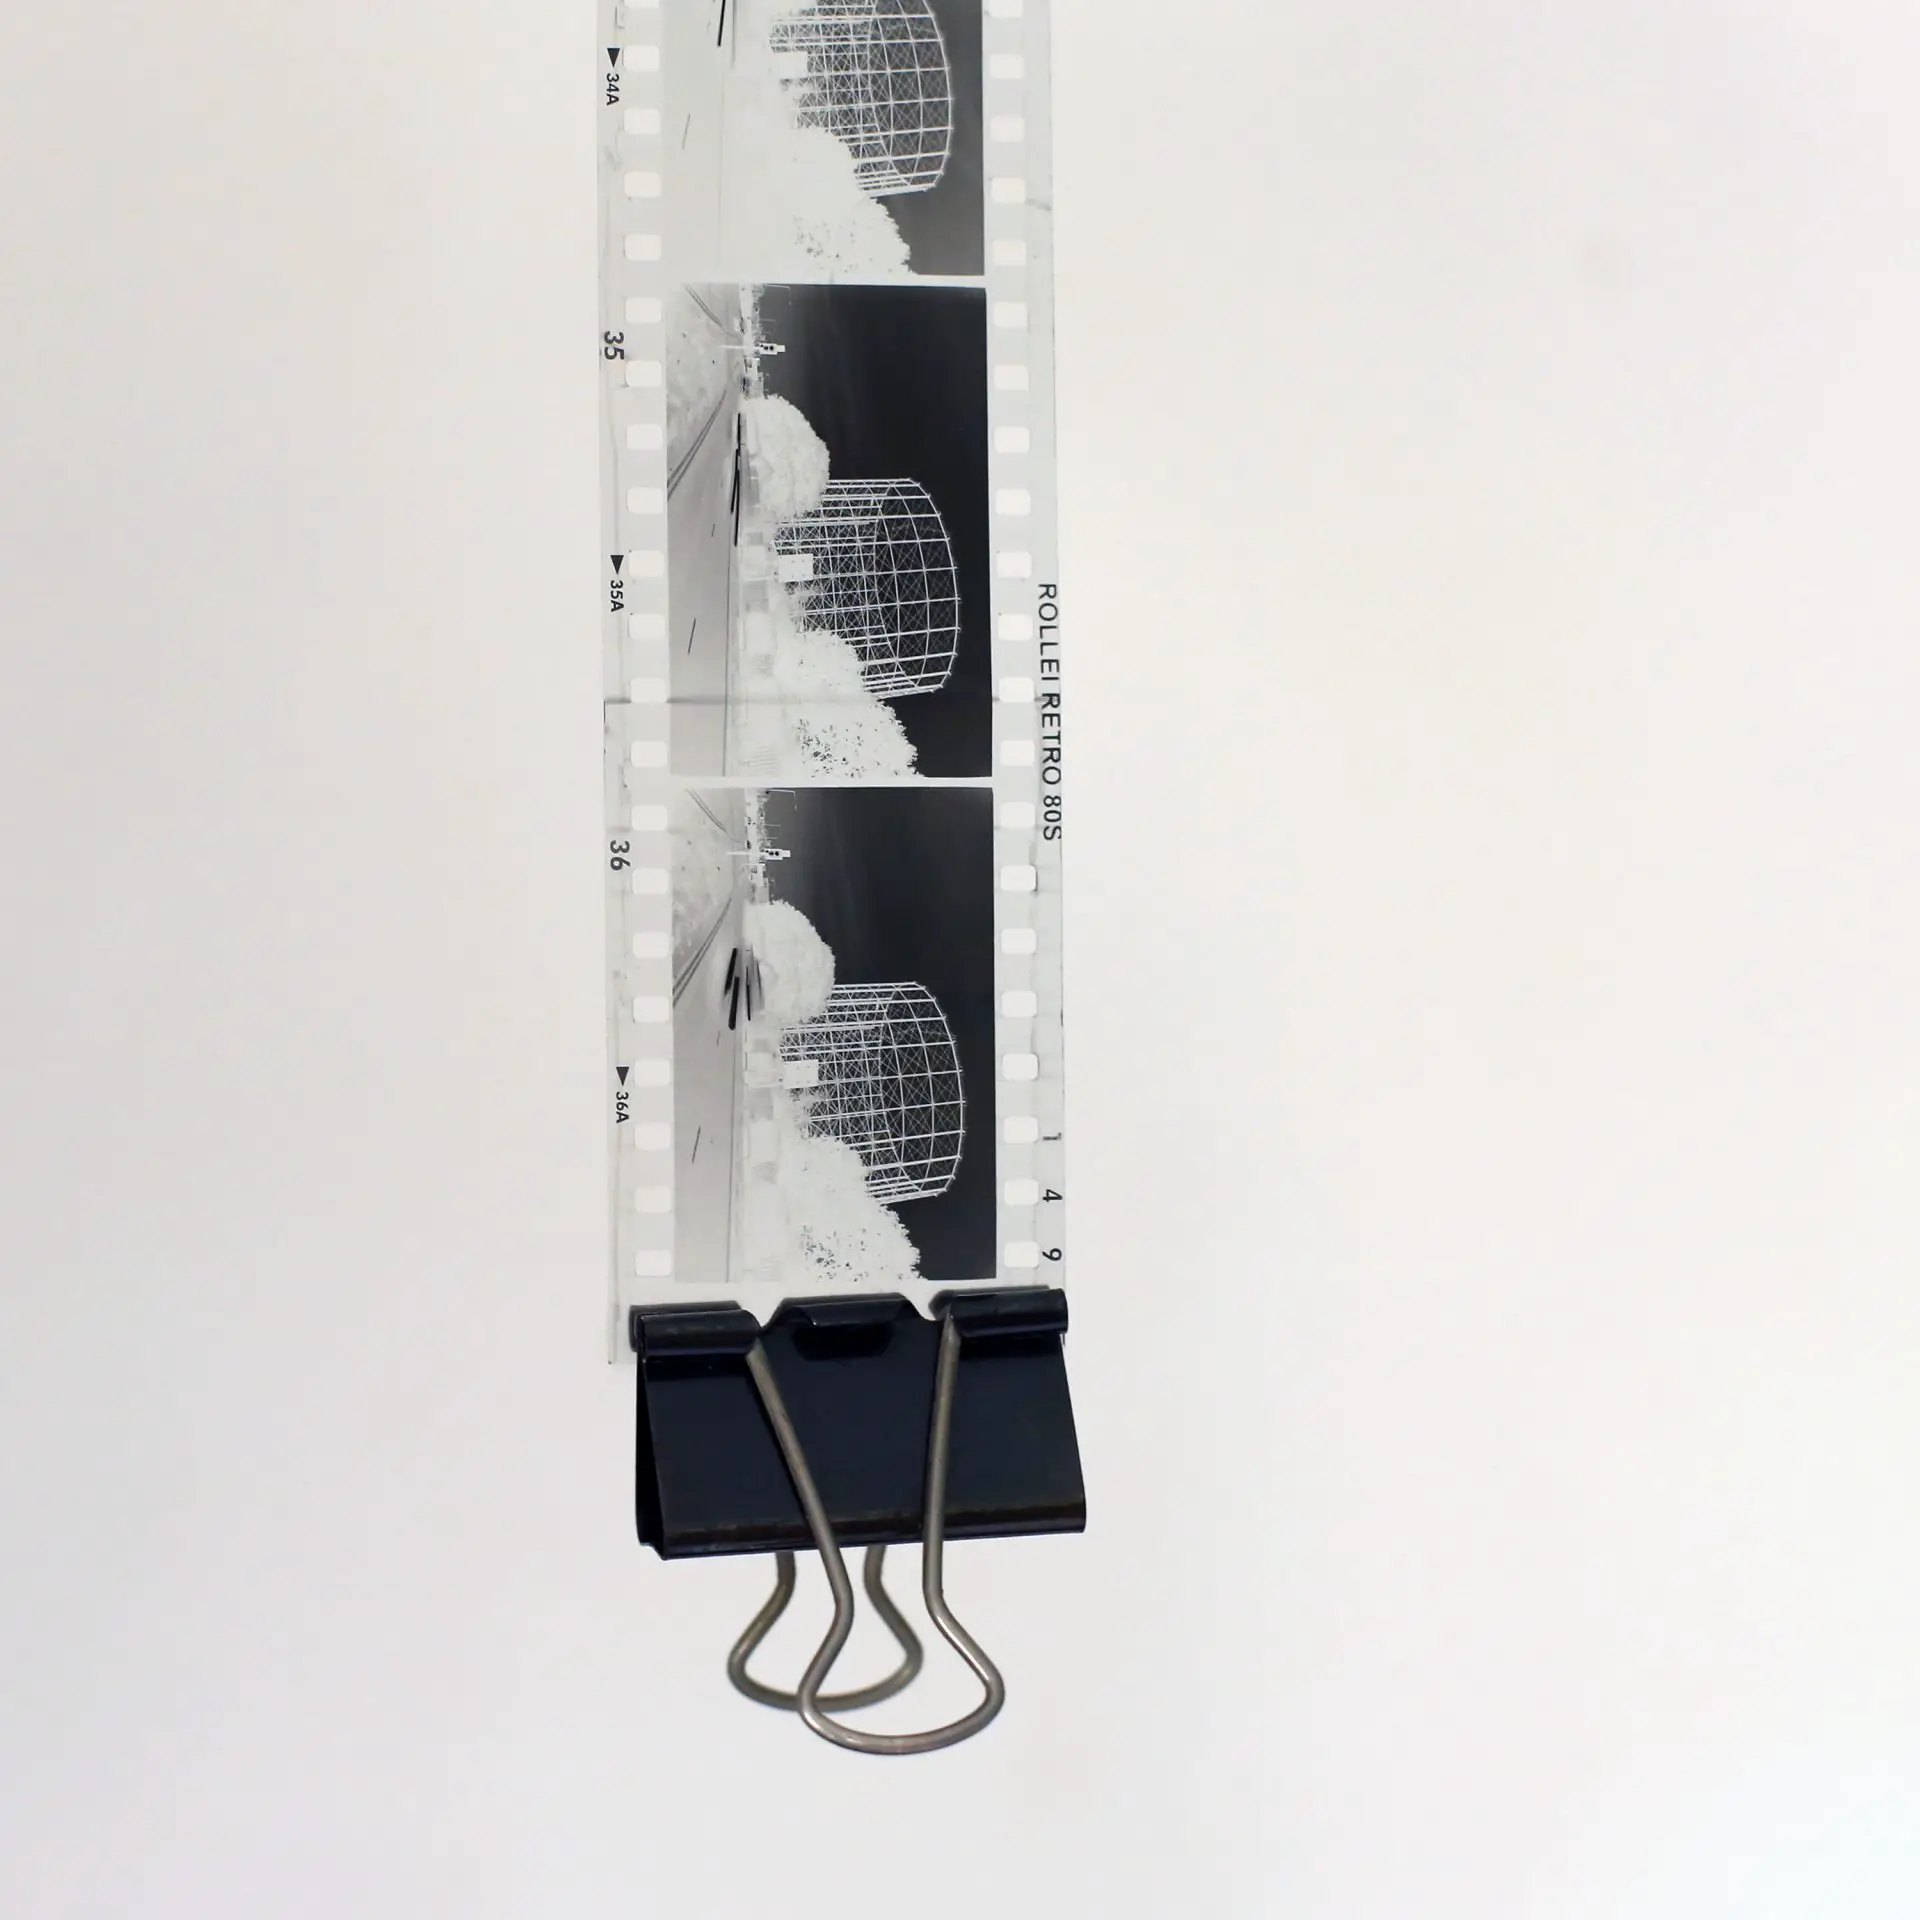
- A pair of paper clips to hang-dry negatives (add a small weight to the lower one to reduce curling)
Chemistry (variable cost)
Chemistry can be even more confusing than hardware. Researching the options, or brewing your own, can be fun, but we’re keeping it simple for now. So here’s my list.
- Kodak D-76 1 litre: £5
- Ilford Ilfostop 500ml: £6.50
- Ilford Rapid Fixer: £9.76
- Dishwash as a wetting-agent substitute (free)
With this set – total cost: £21.26 – you can develop 6 rolls of 35mm film (1 litre of D-76 stock diluted with 1 litre of water produces 2 litres – enough for 6 rolls of 35mm film). That’s £3.54 per roll for the first 6 rolls, but we’re just getting started. In the long run, it gets even cheaper. If you shoot 25 rolls of film in a year, the cost of chemistry is just £1.05 per roll (you’ll want a 3.8 litre pack of D-76 (£10), but the stop bath and fixer will last you more than 25 rolls).
Explaining my choices
The focus of this post is to get up and running as simply and inexpensively as possible, and not fall prey to the paradox of choice. This is why I made a short list, with very specific recommendations. In many cases, other alternatives might work equally well. Nevertheless, rather than asking you to trust me blindly, I thought I’d briefly explain why I ended up with this list, and why it works for me.
Developing tank
Some photographers prefer plastic tanks, and some prefer steel. I’ve never actually used a steel tank, but from forum discussions I’ve gathered that (a) this can be a contentious issue, and (b) plastic and steel both have pros and cons. I went for plastic simply because it’s cheaper.
Among plastic tanks, the two most common seem to be AP (which I use) and Paterson. I chose AP because (you’re starting to see a pattern here) it’s cheaper. I’m comfortable recommending an AP plastic tank, based on the fact that I’ve been using mine for two years and developed dozens of 35mm and 120 rolls without any problems. There was one roll which I scratched quite badly while loading, but that was my own fault.
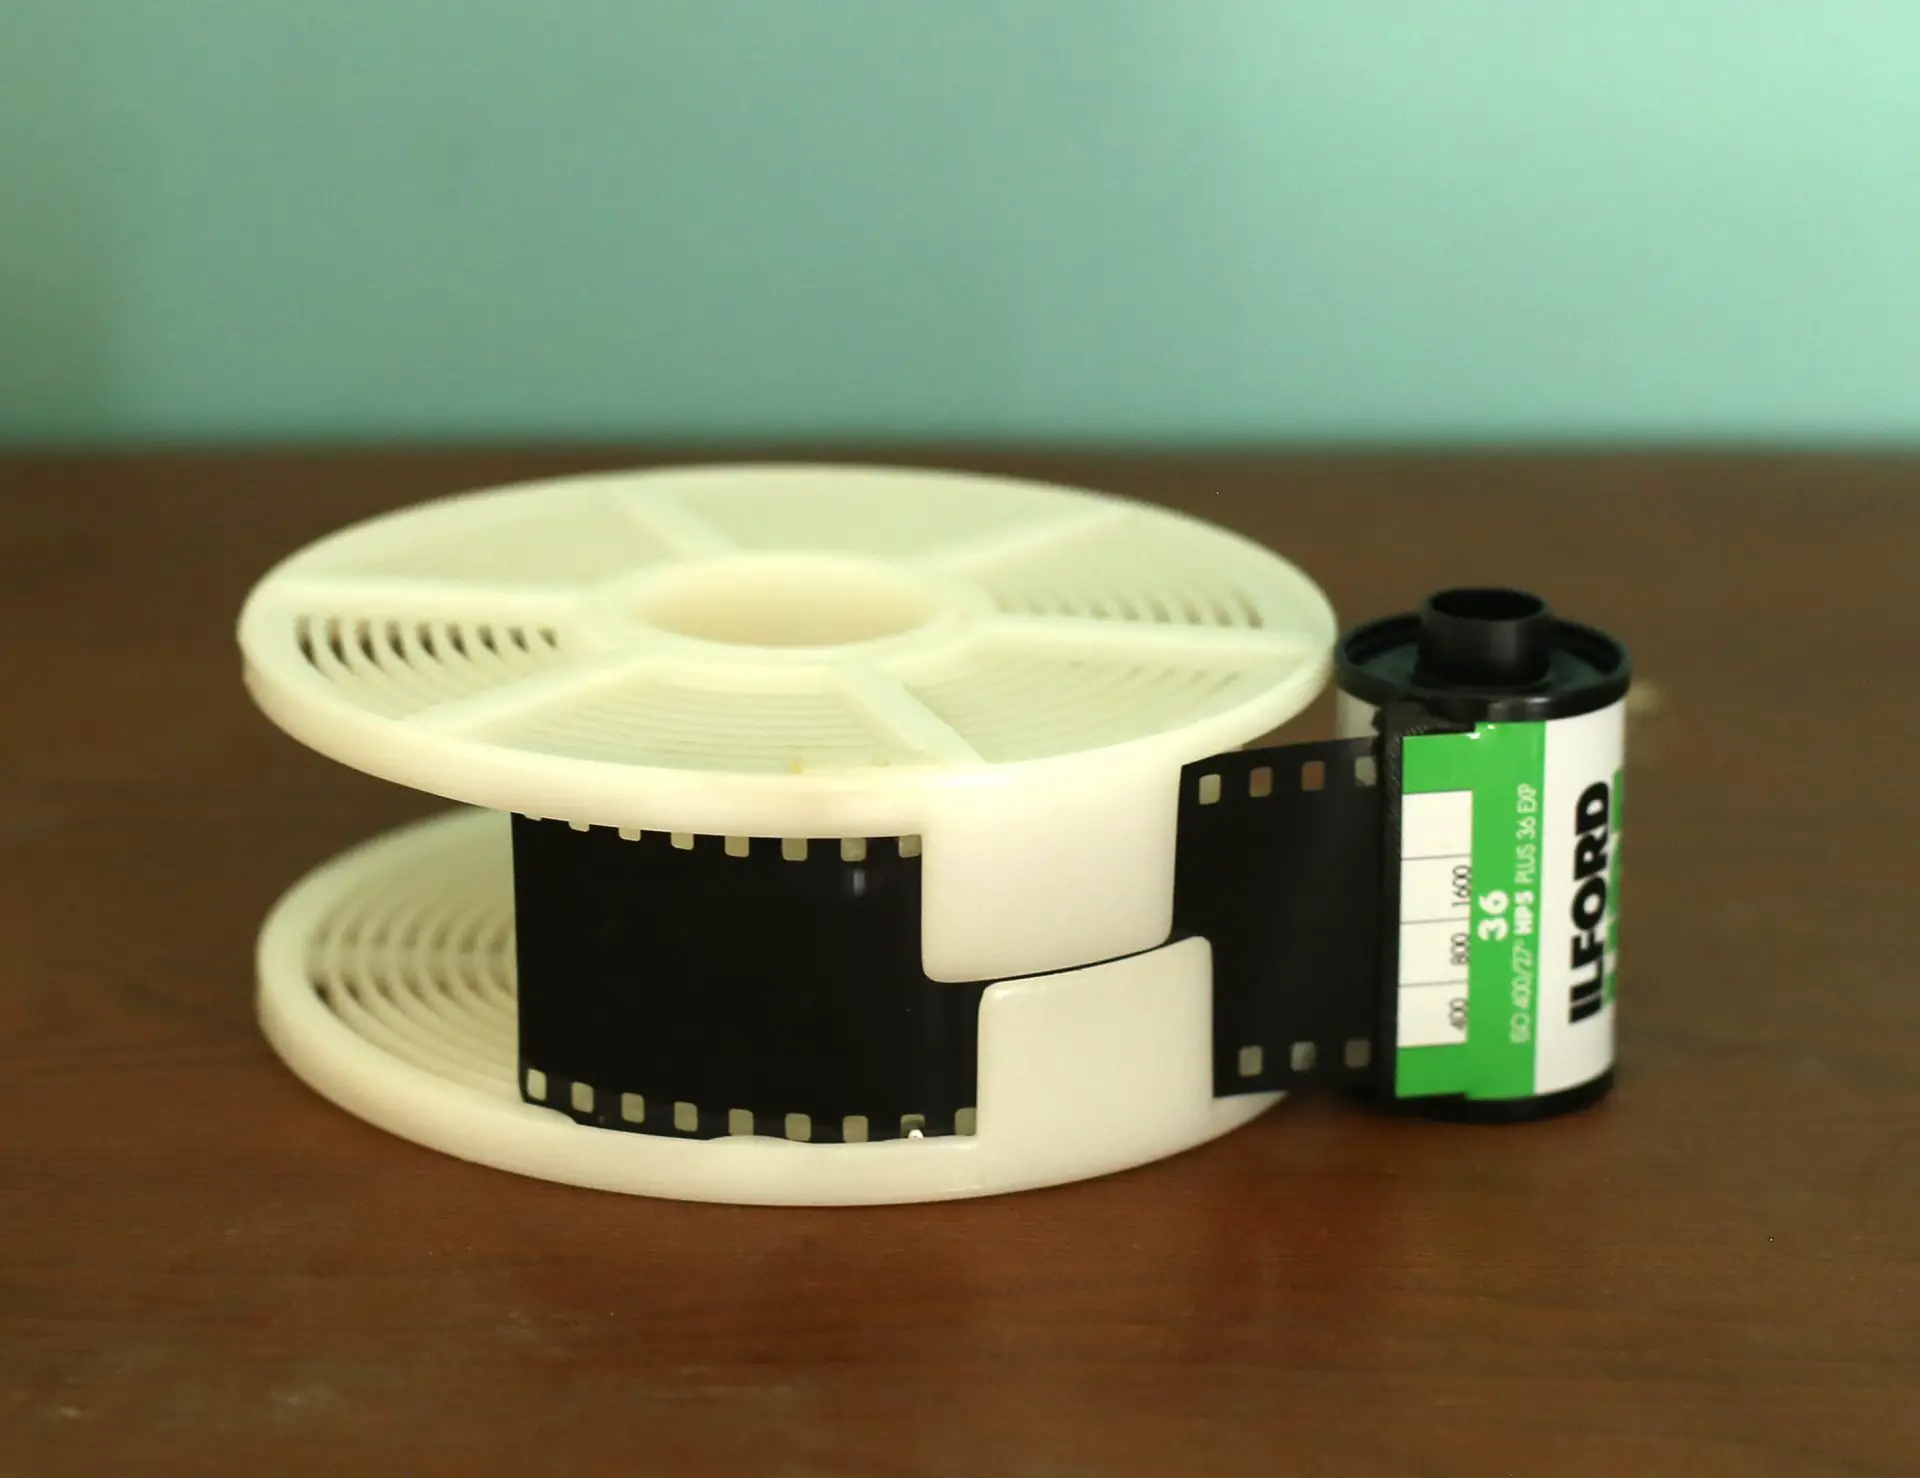
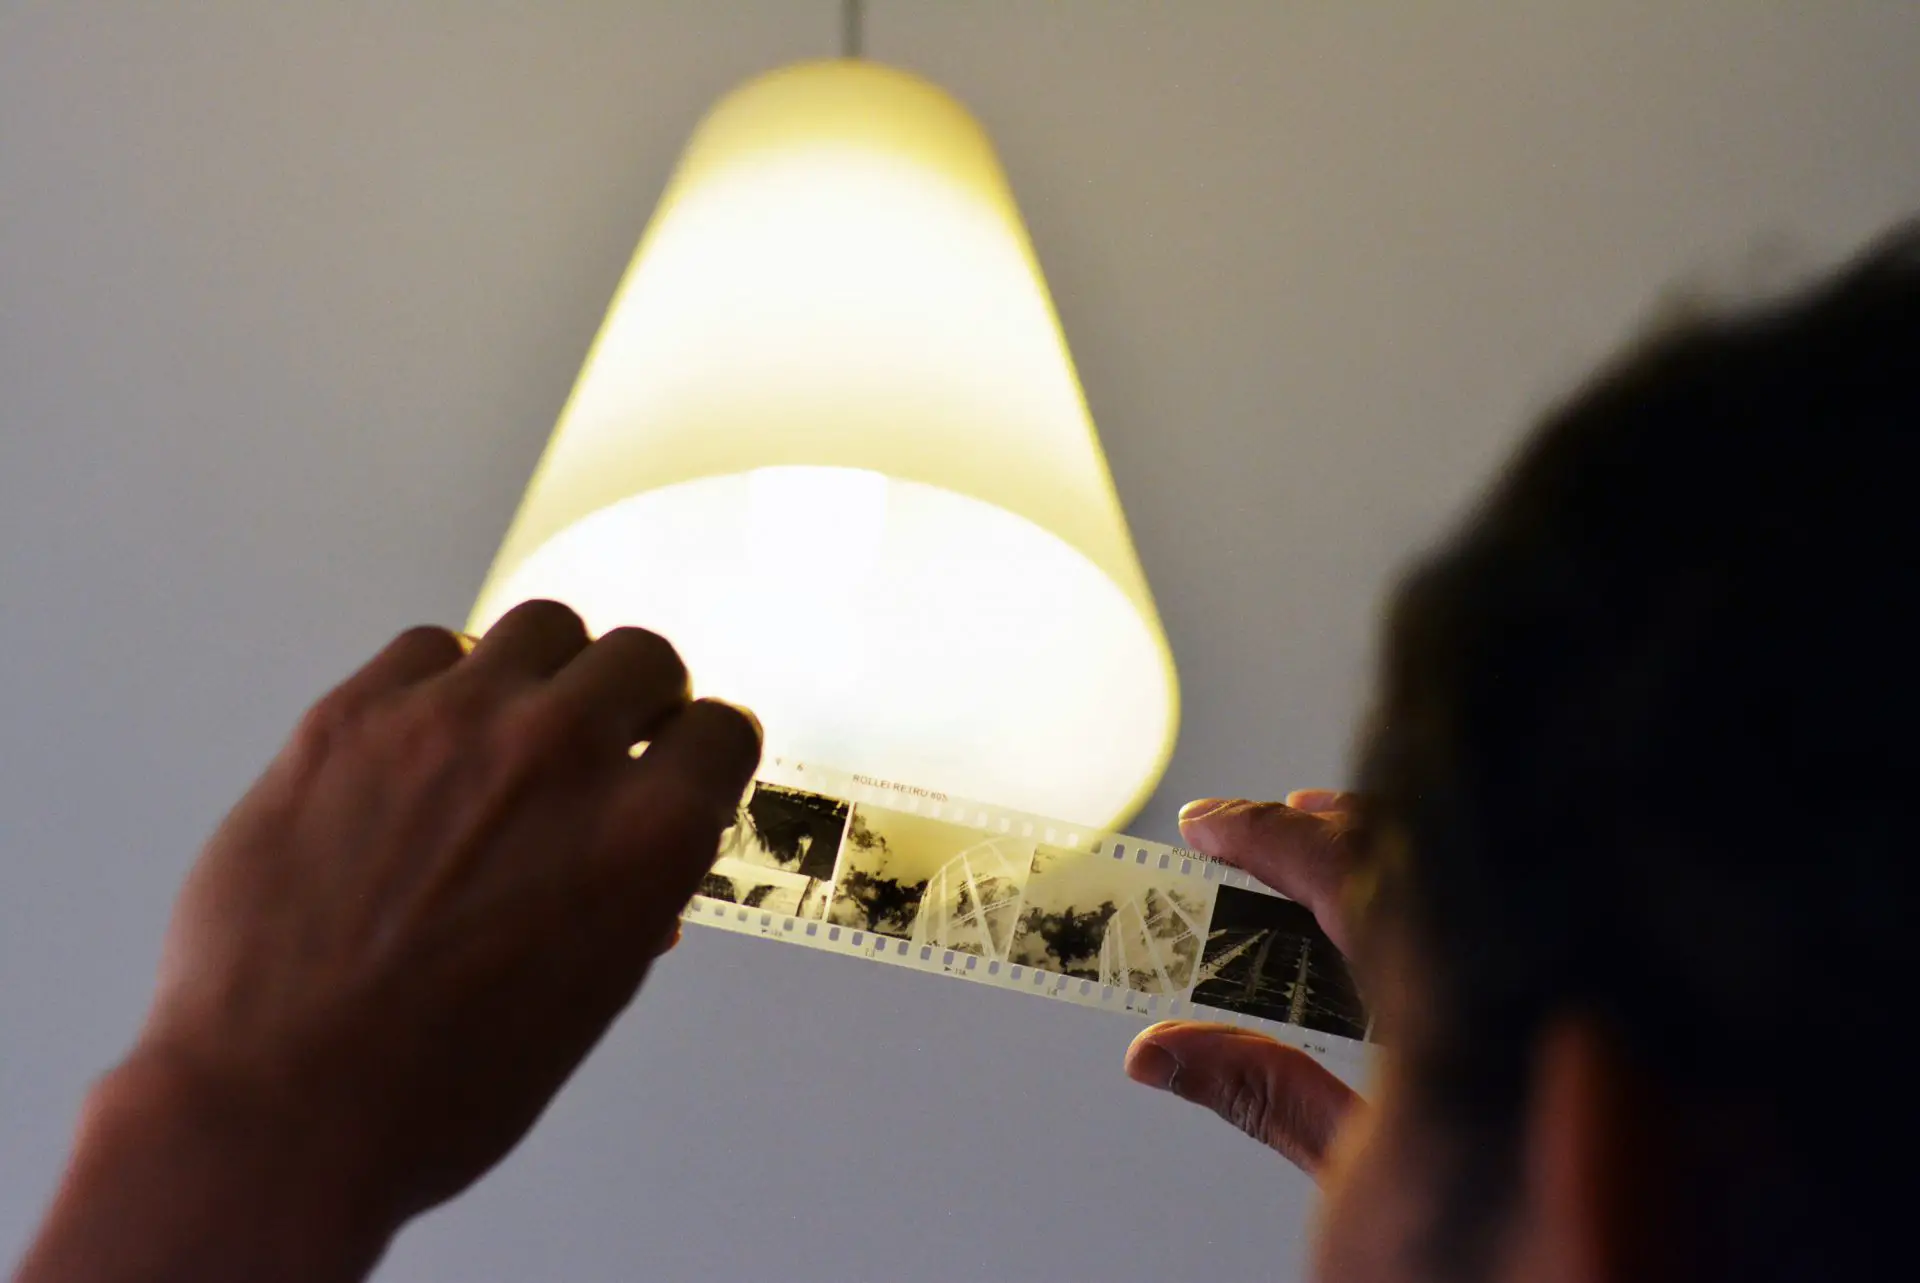
John Szarkowski once said, “The hard part isn’t the decisive moment or anything like that – it’s getting the film on the reel.” But it becomes a lot easier if you leave the film leader out when rewinding. This way, you can load the first inch or so of film in daylight as shown above (that part of the film was already exposed to light when loading the camera). Then switch to a darkroom or dark bag to load the rest of the film.
Cheap measuring devices
A £1.95 kitchen thermometer and a 35p plastic jug from Asda may not be the stuff that family heirlooms are made of, but mine have served me well for two years now. They also may not be accurate to 0.1°C or 10ml, but we’re not exactly home-brewing penicillin; we’re only developing black-and-white film which, by the way, is quite forgiving of minor discrepancies. Glass jugs look cooler than plastic ones, but they can be slippery when wet.
Squeegee
I originally bought a squeegee, but I no longer use it. The rubber can degrade with time or trap grit, which then scratches the negative. To remove excess water, I lightly hold the film between my index and middle fingers and simply run them down the film. This method is also recommended in Way Beyond Monochrome by Lambrecht and Woodhouse, who add that it is “better than any rubber squeegee, wiper, chamois leather, cellulose sponge or other contraptions proclaimed to be safe.” And of course, it’s free.
Storing chemicals
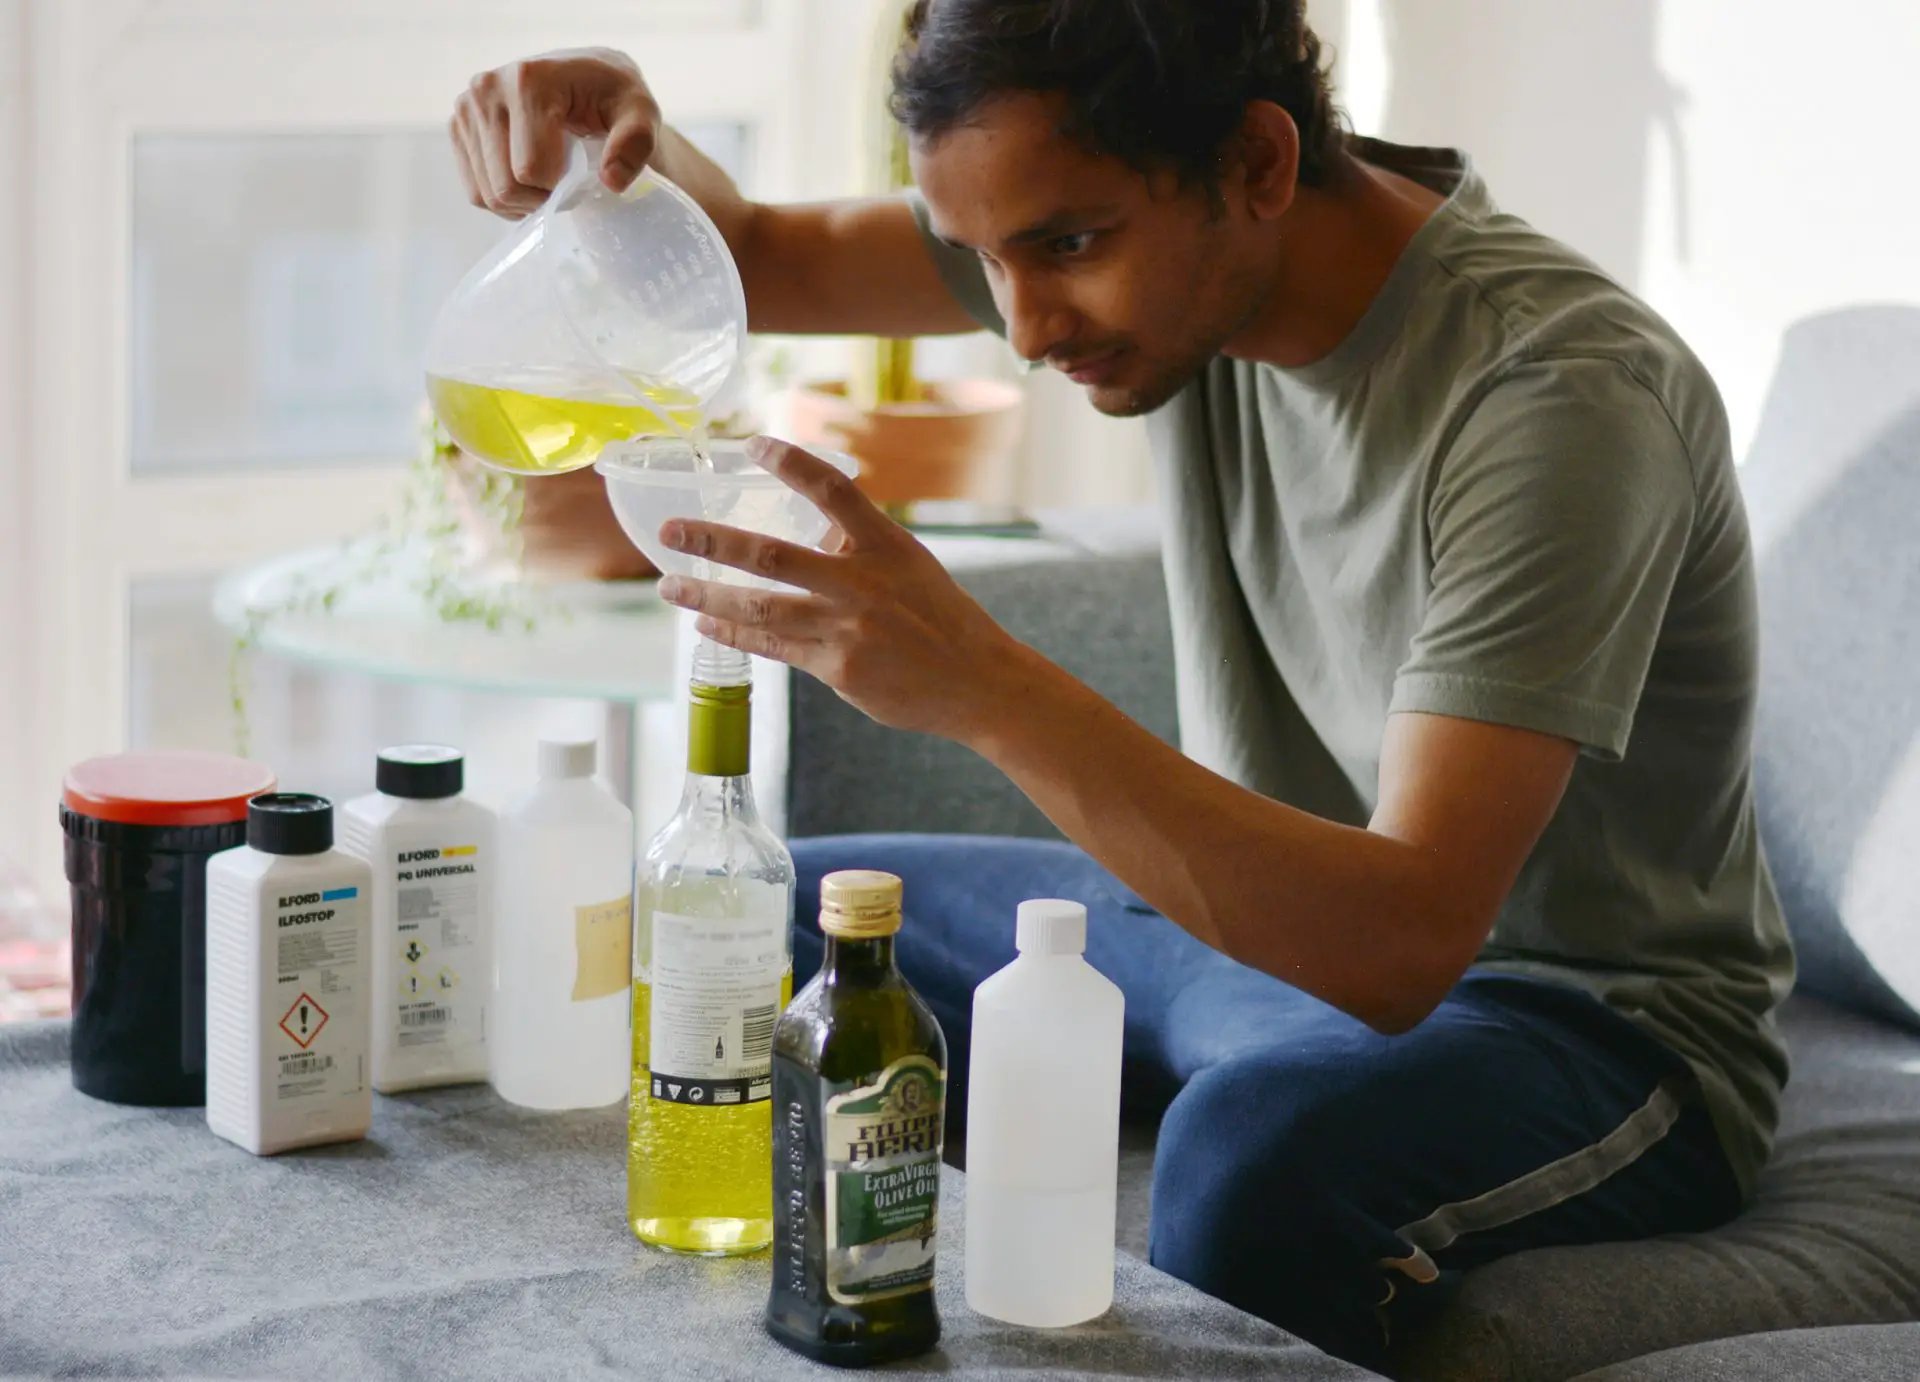
For longer shelf life, the main thing is to prevent chemicals from being exposed to light, air or extreme temperatures. This is especially true for the developer (stop bath and fixer are more tolerant). Photography stores sell various specialised containers – most are opaque and some have “accordion walls” which can be compressed to remove excess air. Instead, I just reuse ordinary plastic bottles.
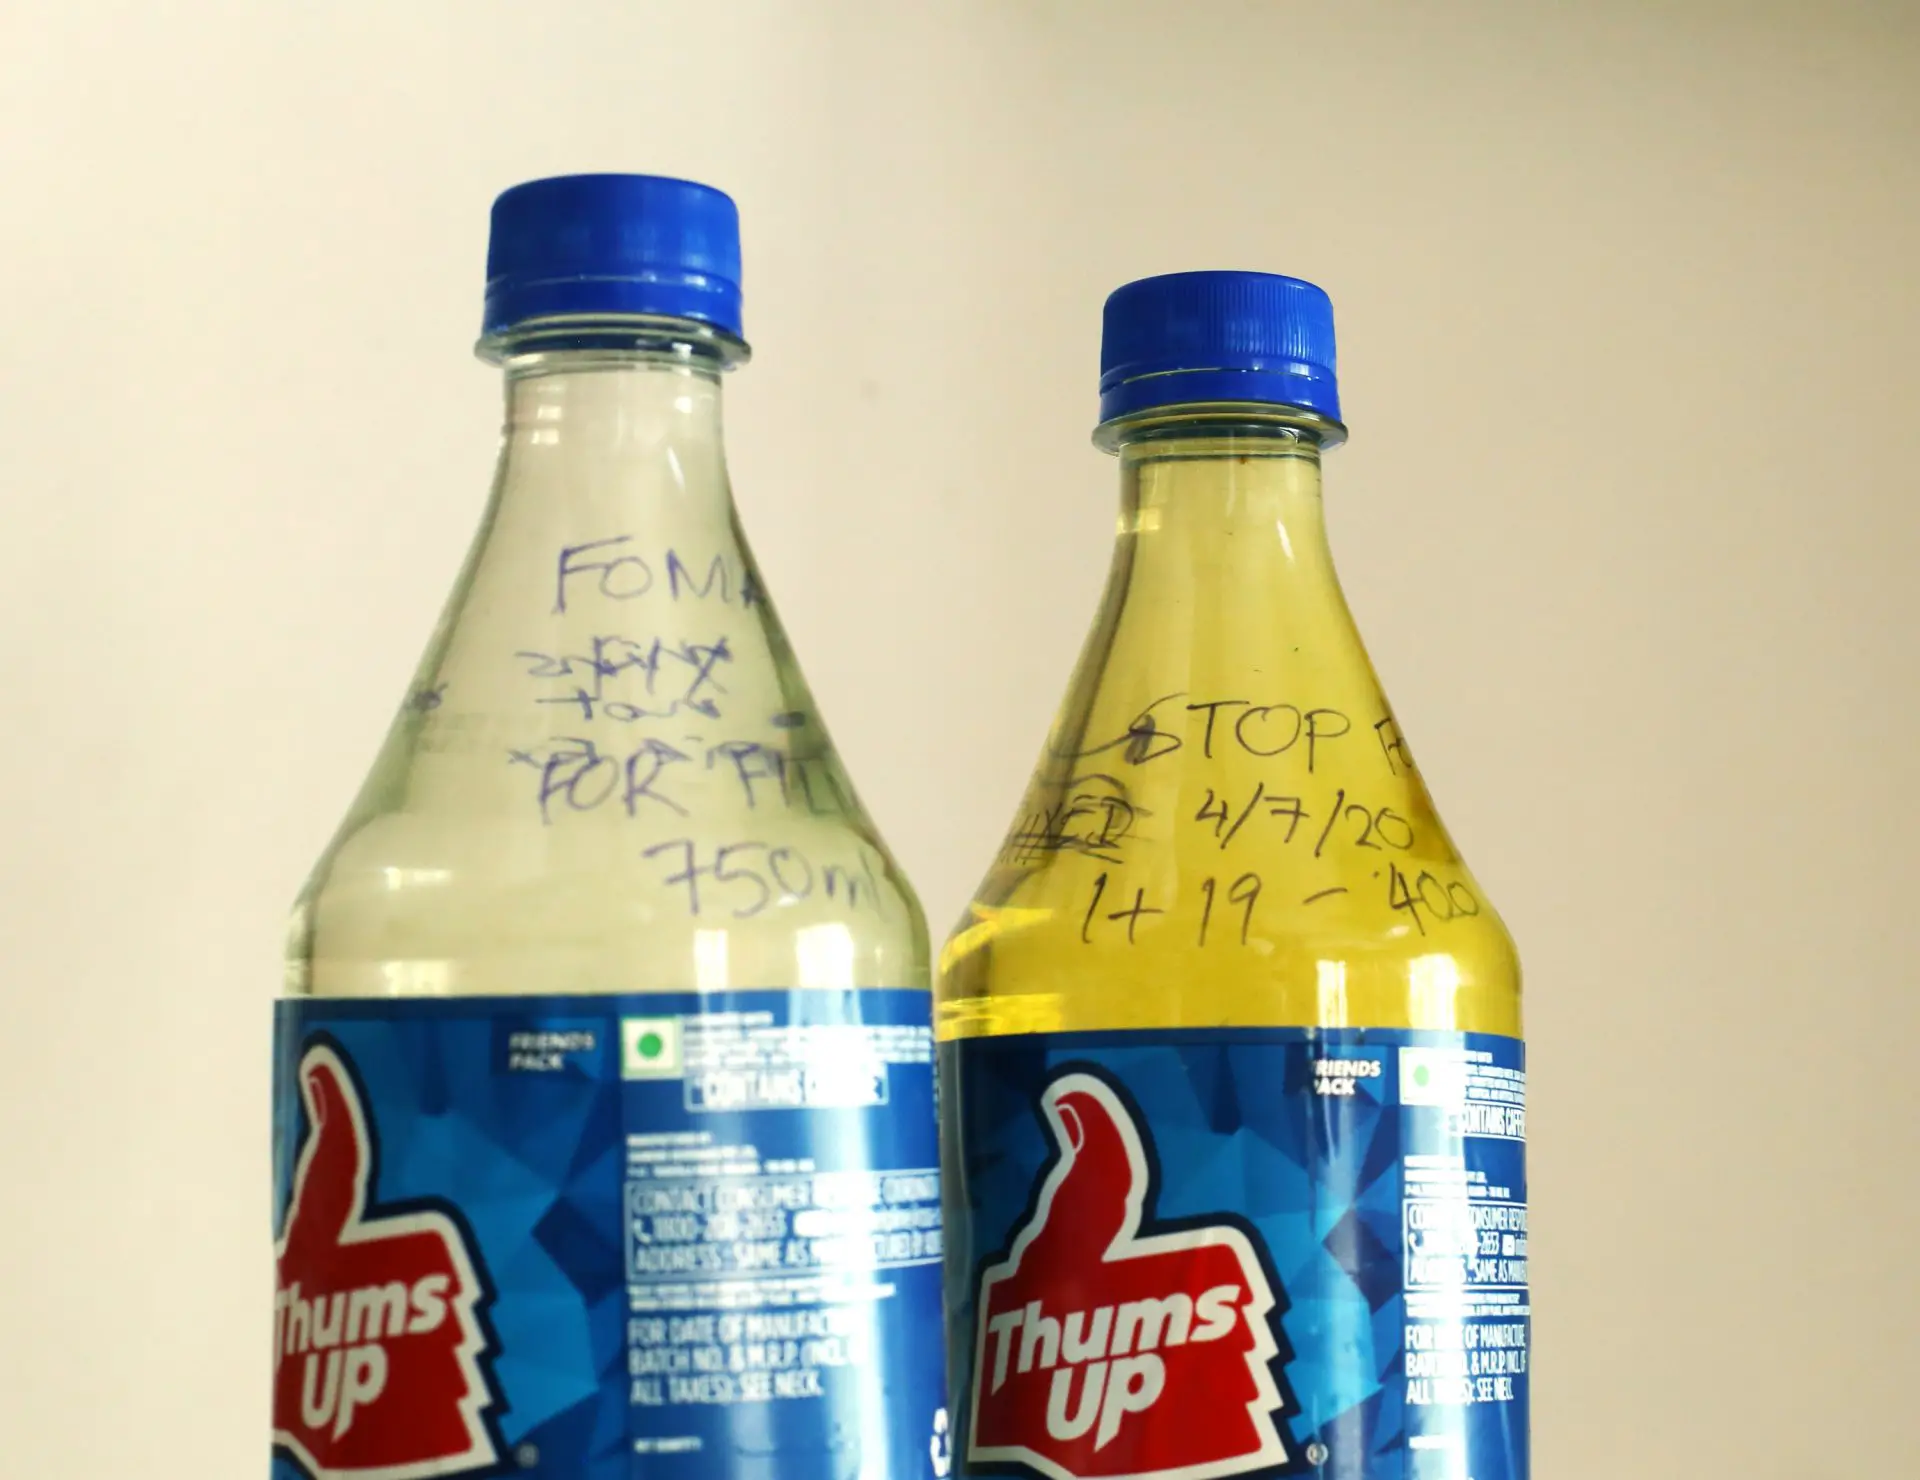
These are obviously not opaque, but I store them in a cupboard, which takes care of the light problem. To prevent oxidation, I’ve collected various sizes, and by picking bottles according to the volume of chemical I need to store, I can fill them right up to the brim. If needed, before capping the bottle, I squeeze it to remove excess air (you don’t need a fancy accordion bottle for this). As an added precaution, sometimes I’ll also exhale into it (without touching the lip, of course). CO2 is heavier than oxygen, and settles to form a protective inert layer above the liquid.
Developer
The narcissism of small differences
This is the big one. Whole books can be written – and have been written – on the subject. It’s easy to get lost in terminology and the mind-boggling array of choice: liquid versus powder, high-acutance versus fine grain, monobath versus two-bath, and all the rest. Ilford alone currently markets 10 different film developers (there’s a stat for you, next time someone says “Film is dead”). Michael A. Smith wrote a good overview of main chemical constituents of developers and what they do.
This can be a fun rabbit-hole to go down, but having tried a few different developers, I’ve picked one I like – Kodak D-76 – and stuck with it. As photojournalist Bob Schwalberg once said, “One developing agent is best, two is okay, three is very suspect, and four the guy is definitely a jerk.” I wouldn’t go as far as that; if you’d like to try all the developers on the market, go for it. But if you want to get up and running, D-76 is as good as any.
Furthermore – and this may be heresy to some – I am frankly not even sure if I could distinguish between different developers in a blind test. The differences are there, but they’re often more subtle than forum discussions might lead you to think – discussions which often have a whiff of the narcissism of small differences. If you don’t believe me, take a look at this amazing but little-known Norwegian website: here is my favourite film, Ilford HP5, in various developers. Same scene, lighting conditions, camera, lens and scanner – now that’s what I call a scientific comparison!
Love letter to D-76
I recommended Kodak D-76 (or the Ilford equivalent, ID-11). I like D-76 for a number of reasons. First, it’s versatile and dependable. As Steve Anchell says in The Darkroom Cookbook, D-76 has become “the standard by which to judge all other developers. It was not that D-76 was the best developer ever formulated. It was more that a standard was needed and D-76 had the best all-around compromise of sharpness to grain with a full tonal range from black to white.” Enough said!

Second, it’s widely available and extremely popular. Popularity means that development data are available for a wide range of films. Shooting 30-year-old expired Soviet film, two stops below its native ISO? Chances are, someone somewhere has developed it in D-76 and posted about it on a forum. D-76, by the way, is functionally identical to Ilford ID-11, which is also very popular. So if you can find ID-11 data, that works for D-76 too.
Third – and here we return to a familiar theme – it’s cheap. Many websites recommend that beginners start with Ilfosol (a liquid developer), later “graduating” to powder developers. I too followed this advice, but in hindsight I would just start with D-76. There’s nothing wrong with Ilfosol, but D-76 is almost equally easy to mix (see next point), lasts indefinitely in powder form, and is slightly cheaper. 500 ml of Ilfosol currently costs £10.74 (16 rolls of 35mm film at 64p per roll). A 3.8 litre pack of D-76 currently costs £12.98 (25 rolls of 35mm film at 52p per roll). Most, if not all other commercially-available developers are more expensive.

Fourth, it’s easy to mix. Just pour the contents of the whole pack into warm water, stir to dissolve, and voilà, you have your stock solution. For developing, I generally dilute it with water in a 1:1 ratio and use it “one-shot”. You can also use the stock itself, or dilute 1:3. Each has pros and cons.
Fifth, D-76 has relatively fine grain, which I happen to like. It’s subjective. If you like Rodinal for coarse grain, or Ilford Perceptol for ultra-fine grain, we can still be friends.

jump out at you, which is how I like it.
Anyway, these are my personal reasons for liking D-76; you could probably draw up a similar list of merits for any other developer of your choice. So if your friend, or a photographer you admire, recommended something else, that’s fine too.
Stop bath
Some people recommend plain water or white vinegar instead of stopper. Both of these will do the job, but a commercial stop bath has certain advantages. It stops developer action immediately, reduces fixer contamination, and saves water because you can reuse it many times (the purple indicator tells you when it’s exhausted). Now I am all for saving money (as is probably clear by now!) but stop bath really is ridiculously cheap. The 500ml bottle of Ilfostop (£6.50) which I recommended, diluted 1:19, will last over 300 rolls. At approx. 2p per roll, I say it’s worth it.
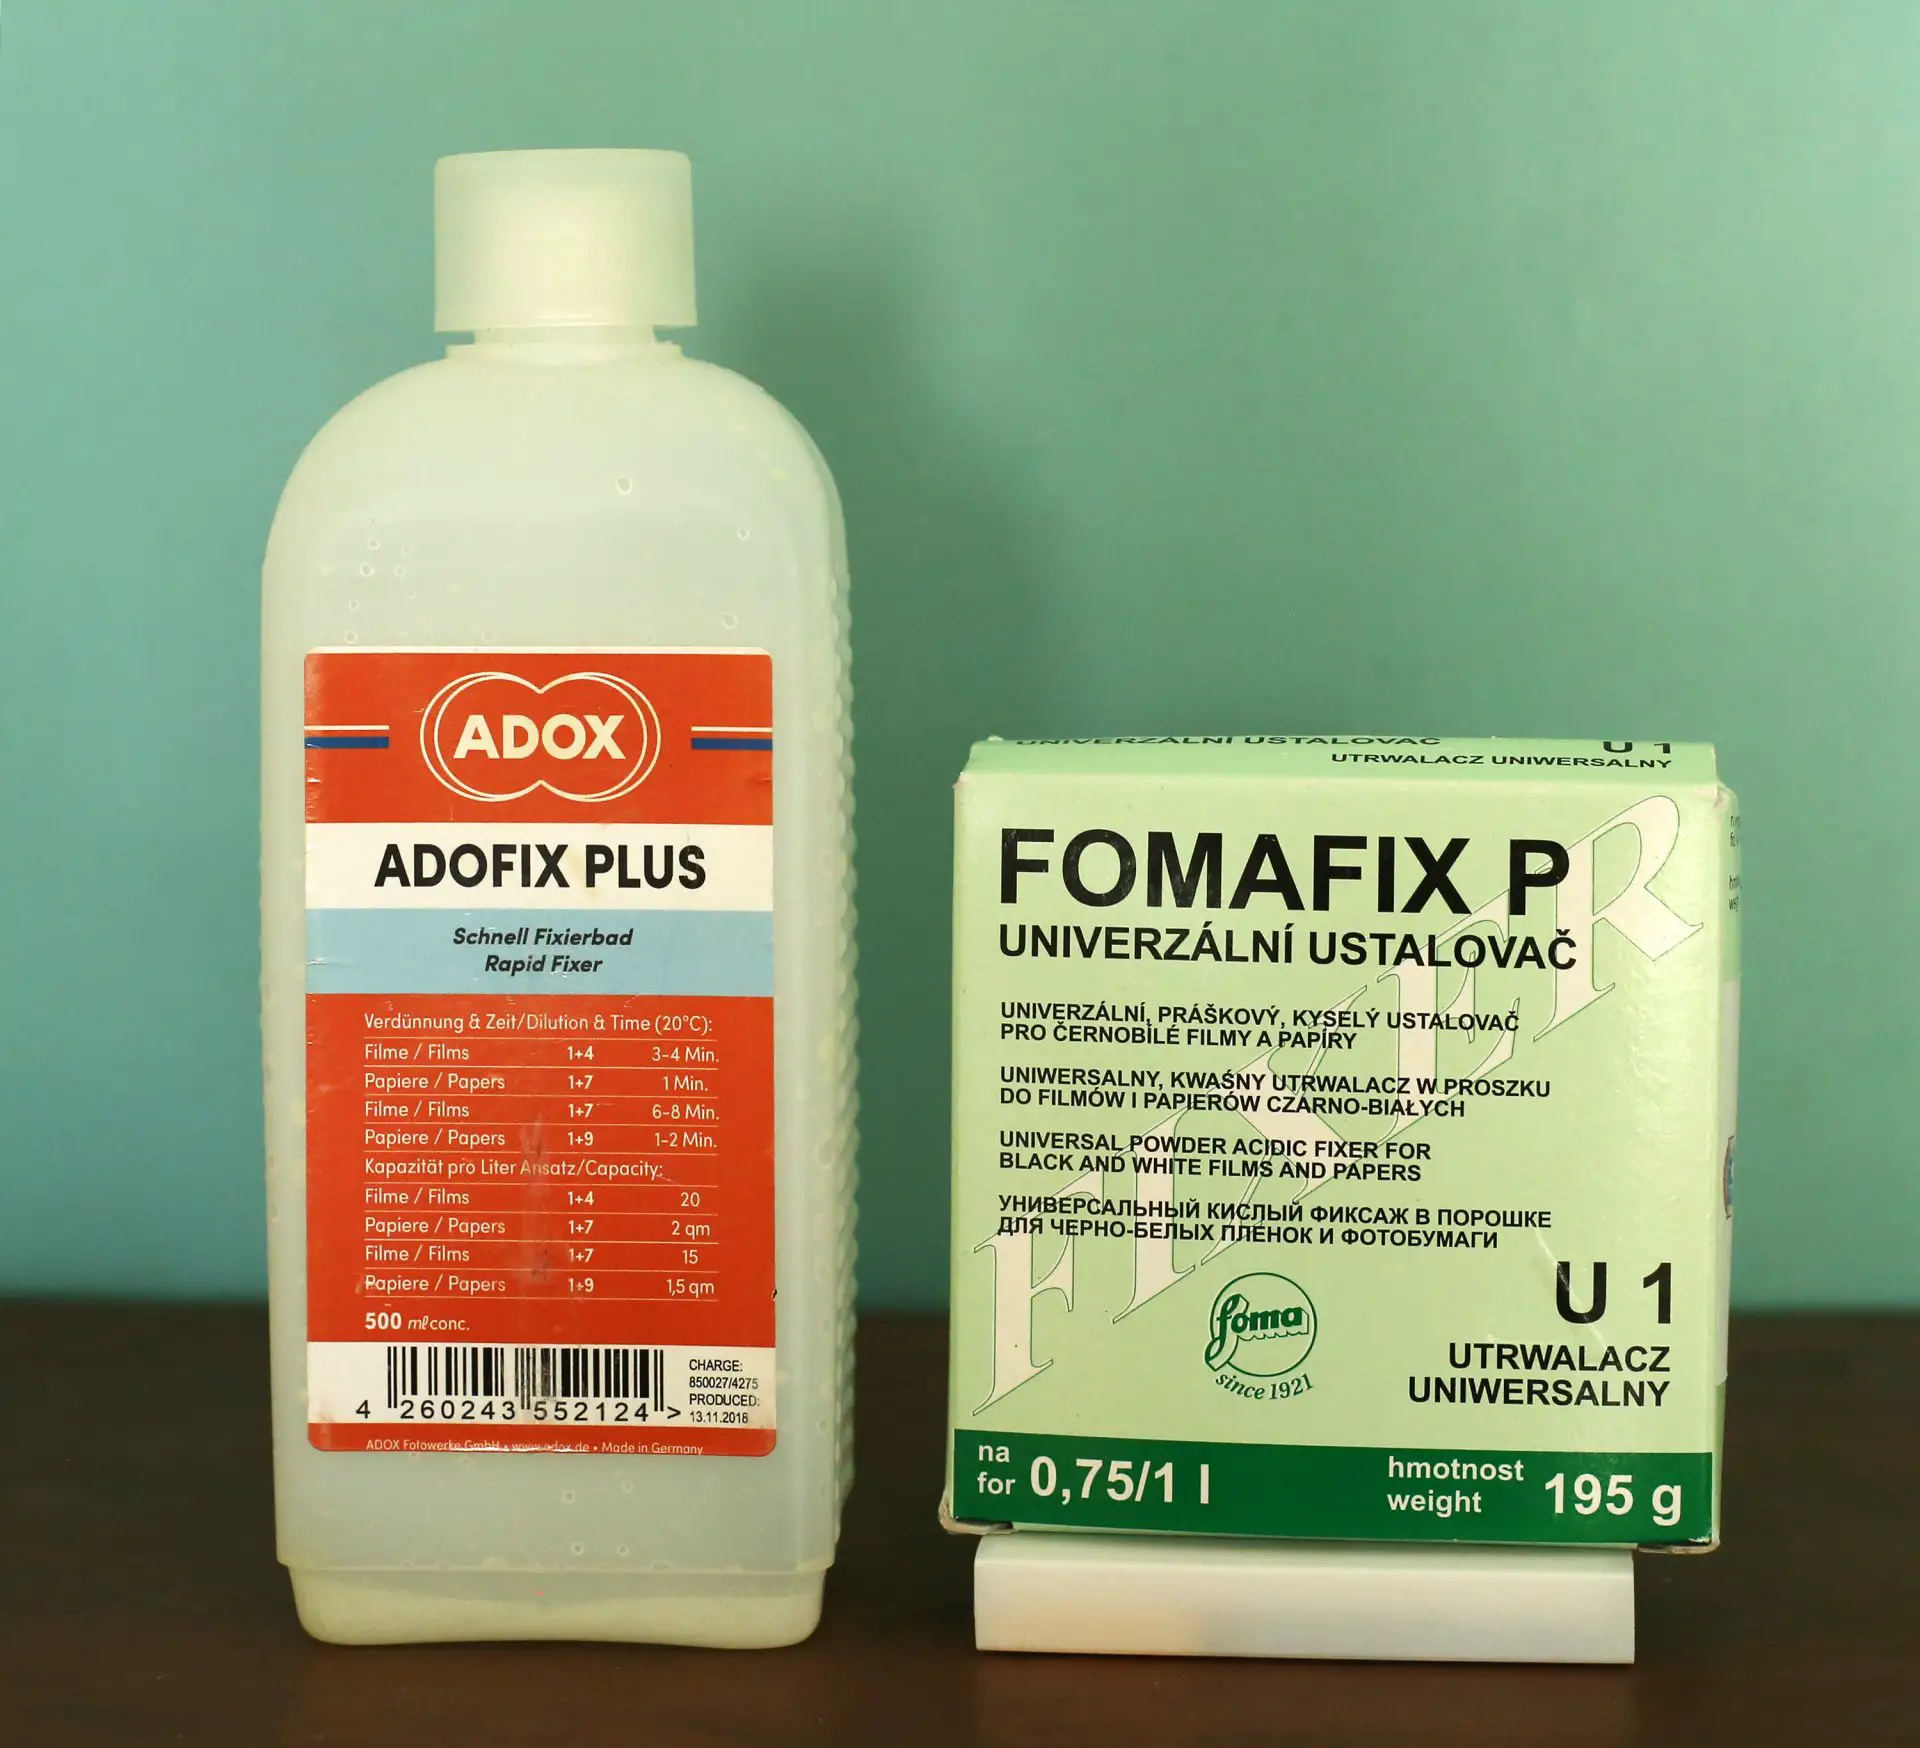
Fixer
As far as I can tell, the commonly available fixers, whether powder or liquid, are all essentially identical. Most are “rapid fixers”, which I like. However, I recently got caught out when I bought some Fomafix P. It’s not a rapid fixer, so it takes 10 minutes instead of the usual 3 minutes. I’m hoping to finish it soon and return to life in the fast lane.
Dishwash
Dishwash is used at the washing stage, to prevent water-droplet marks on the negative. You can buy special chemicals for this, like Kodak Photo-Flo. I’ve always used dishwash and never had any problems. On the other hand, Photo-Flo is cheap and you only need a few drops at a time, so if you want to buy some, it doesn’t add much to the cost.
Mistakes
If you got this far, perhaps you’re new to developing, so it’s only fair to warn you that the road ahead is not wholly free of bumps. Sooner or later, you’ll open the dev tank by mistake, or pour fixer before developer, or… let’s just say that developing is easy, but mistakes have been known to happen. That’s easy to forget, not least because people mostly share their successes on social media and not their failures. Holly’s article, which I mentioned earlier, is an exception, and in the same spirit I thought I’d share some of my own mistakes as a warning to the unwary.
My very first home-developed roll was a great success, but one of the photos had a dark patch on it. I guess the film must have somehow stuck to itself inside the dev tank, and the chemistry couldn’t reach it. The rest of the roll was fine, and I’ve never had this problem since then. Have you experienced something similar?

So far, I’ve had only two catastrophic failures. One time, my friend and I were trying to process black-and-white transparencies, which is a different process from processing negatives. It was our first attempt at reversal processing, and unwisely, we were doing it in the kitchen while there was a party going on in our living-room. Thus distracted, we poured fixer before the secondary developing step. We realised our mistake and poured it out immediately, but the film came out almost entirely blank. That roll had some good images; I am still sad about it. The lesson, I guess, is not to try new processes while hosting a party and drinking beer.
My other failure was also down to operator error. I was struggling to load a roll onto the developing reel. This sometimes happens, but I must have been in a bad mood, because instead of taking a few deep breaths and making a fresh start, I tried to force the issue. As a result, the film got deep scratches all the way through.
Having said all that, failures are relatively rare. When it works, which it mostly does, it’s a pure delight. You finish processing, hold your breath in anticipation as you open the tank, unroll the negatives from the reel and bask in the joy of perfectly-developed pictures.
Conclusion
So that’s my simple, low-cost developing checklist, and miscellaneous thoughts. I’m thinking of writing a couple more posts on black-and-white developing, so if there’s any particular topic you’d like me to cover, please let me know in the comments and I’ll see what I can do. You can also check out my Instagram for more photography and darkroom-related content. Thanks for reading, and I hope you found it useful!
Share this post:


Comments
MIchael J on How to Get Started Developing Black & White Film for £25 (or Less) – by Sroyon Mukherjee
Comment posted: 07/09/2020
I've done this all in a very similar manner, and can add a few points. I bought the Paterson big-box-of-fun that came with film clips and graduates and a Paterson thermometer as well as the black-and-red tank. This obviously cost a lot more, but this was during early-stage heavy-duty lockdown and I wasn't sure of the availability of anything in the pound shop. Or even the poundshop itself. Mixing ID-11 stock in a graduate needs two plastic forks stuck together with duct tape. You can also open 35mm cans with your fingernails- not that I don't have a bottle opener handy, especially when processing film of an evening. I would factor in a box of nitrile gloves as well- I've reached the conclusion that despite the dev chemicals being a bit nasty, I'm not doing big volumes of work and when highly dilute it's less alarming, but decent gloves aren't a huge outlay.
I wish I'd bought the chemicals separately to start with- I think that's the only thing I'd change. I got (again) a pack of 'everything you need' from Tetenal. I have enough stop bath to pass on to my heirs, which is nice, but I didn't get on with the 'Paranol S' Rodinal analogue that was bundled in. It gave ridiculously contrasty negatives which were hard to tame in the enlarger, and ID-11 is much better. Although I'm going to try and semi-stand some film in the Paranol at some point.
This stuff is SO much fun...
Comment posted: 07/09/2020
Daniel Castelli on How to Get Started Developing Black & White Film for £25 (or Less) – by Sroyon Mukherjee
Comment posted: 07/09/2020
You are remiss, however, in pointing out a very dangerous flaw in using a changing bag (dark bag.) Your companion may take the time to mercilessly tickle you or exact some sort of "torture" while your arms are in the bag. I detected a bit of a devilish smirk on the face of your friend in the photo you posted. I'd keep an eye on her!
Seriously, the most important factor in developing film is not cost savings, it's to control the process and produce negs that work for you.
-Dan Castelli
flickr.com/photos/dcastelli9574
Comment posted: 07/09/2020
Neil on How to Get Started Developing Black & White Film for £25 (or Less) – by Sroyon Mukherjee
Comment posted: 07/09/2020
Comment posted: 07/09/2020
Philip Lambert on How to Get Started Developing Black & White Film for £25 (or Less) – by Sroyon Mukherjee
Comment posted: 07/09/2020
I really enjoyed your article.
Phil
Comment posted: 07/09/2020
Terry B on How to Get Started Developing Black & White Film for £25 (or Less) – by Sroyon Mukherjee
Comment posted: 07/09/2020
Whilst I'm not putting this forward as an alternative today, as the chemicals I used during 42 years of d&p are mostly no longer available. But I do agree about D76/ID11. I found it an extremely versatilve developer, especially shooting MF and LF Tri-X.
I never used a stop bath. Now readers will find much discussion over its advantages but I simply washed the film in two or three changes of water as I used acid fixers which almost stop development in its tracks. I appreciate that there are arguments for and against acid fixers, so it it perhaps a good idea to check out more modern films with the manufacturers.
Now about re-using fixer, there is a very simple trick to test if the solution is still active enough to fix film. Keep the ends of the film and use these for testing. Simple dunk them in the fixer from time to time and see how long the emulsion takes to clear. This is a more secure test than going by the colour of the fixer.
Comment posted: 07/09/2020
Kevin on How to Get Started Developing Black & White Film for £25 (or Less) – by Sroyon Mukherjee
Comment posted: 07/09/2020
Comment posted: 07/09/2020
CHRISTOF RAMPITSCH on How to Get Started Developing Black & White Film for £25 (or Less) – by Sroyon Mukherjee
Comment posted: 07/09/2020
Chris
Comment posted: 07/09/2020
Graham Orbell on How to Get Started Developing Black & White Film for £25 (or Less) – by Sroyon Mukherjee
Comment posted: 07/09/2020
I absolutely agree that D76 is an excellent developer giving a great tonal range with reasonably fine grain. I used it a great deal.
I personally prefer stainless steel developing spirals. There is less tendency for the film to stick and they are very easily dried for reuse.
Very good results can be obtained using a mono bath developer. Temperature and developing time are not at all critical. Mono bath gives very consistent results although it’s not possible to push the film for different contrast and speed. Mono bath is a good simple way to get started. I used to use it a great deal on assignments in locations away from a darkroom, where speed was essential. I used an Agfa daylight loading tank and after developing in mono bath and quick wash, I would rinse the film in 50 / 50 water and isopropyl alcohol and a drop of wetting agent, then squeegee and dry for a minute or 2 using a hair dryer. Isopropyl alcohol removes the water and does not leave a residue. I still have some of those negatives from almost 50 years ago and they have not faded.
I don’t know if daylight loading tanks are still available, but I still have my Agfa daylight tank, as well as a couple of stainless tanks.
If you don’t have a changing bag or a room that can be darkened, to load your film, just dive under the blankets in your bed at night, with the lights turned off.
I never kept my chemicals after a developing session as they do oxidise, and most consistent results are obtained with fresh chemicals.
But if you do store chemicals in wine bottles make absolutely sure to cross out the wine label with a felt tip so there won’t be a nasty accident, if you happen to have a party in progress during a film developing session.
Comment posted: 07/09/2020
Comment posted: 07/09/2020
ERIC on How to Get Started Developing Black & White Film for £25 (or Less) – by Sroyon Mukherjee
Comment posted: 08/09/2020
one more great useful article and like every time very pedagogic: bravo
I really love to read your articles because there IS a great spirit of sharing and helping others, and they are totally easy to apply.
So: THANK YOU VERY MUCH ONE MORE TIME.
Comment posted: 08/09/2020
Comment posted: 08/09/2020
Ken Rowin on How to Get Started Developing Black & White Film for £25 (or Less) – by Sroyon Mukherjee
Comment posted: 08/09/2020
Comment posted: 08/09/2020
davesurrey on How to Get Started Developing Black & White Film for £25 (or Less) – by Sroyon Mukherjee
Comment posted: 08/09/2020
There are plenty of useful articles on this web site but yours stands out as the very best I have ever read. Not only was it informative and an interesting read but it has enthused me into starting developing again, after a very long gap.
You mention there are loads of tutorials delving further into the process of developing. Care to mention a couple that you feel are worth looking at?
Many thanks
Dave
Comment posted: 08/09/2020
davesurrey on How to Get Started Developing Black & White Film for £25 (or Less) – by Sroyon Mukherjee
Comment posted: 08/09/2020
Brian nicholls on How to Get Started Developing Black & White Film for £25 (or Less) – by Sroyon Mukherjee
Comment posted: 08/09/2020
Comment posted: 08/09/2020
Holly on How to Get Started Developing Black & White Film for £25 (or Less) – by Sroyon Mukherjee
Comment posted: 08/09/2020
Also I absolutely love all the quotes you have in there, absolutely brilliant!
Comment posted: 08/09/2020
Peter Ryan on How to Get Started Developing Black & White Film for £25 (or Less) – by Sroyon Mukherjee
Comment posted: 09/09/2020
By the way i quite like the scratched shot!
Comment posted: 09/09/2020
TXP220 on How to Get Started Developing Black & White Film for £25 (or Less) – by Sroyon Mukherjee
Comment posted: 12/09/2020
I'm a professional photographer with over 30 years professional experience with BW darkrooms, so I wanted to add a few notes for you:
1. Not sure about the pictures illustrating the article, but for safety sakes, try and keep away from storing chem in bottles used for food and drink. Especially the guy pouring the yellow looking liquid in the white wine bottle! Scraping the labels off can help a bit, but otherwise caution needed.
2. In the same pic, there was a bottle that looked like an olive oil bottle? Avoid at all costs any containers that have had anything "greasy", such as oils. creams, shampoo conditioner etc. This may cause contamination especially if used for Dev, and cause what looks like "holes" in processed negs. Generally if you are after good bottles for reusing, go for sparking plain mineral bottles, plastic fine, but if you get your hands on the fancier glass ones (Pellegrino etc), perfect! Or else, photolabs (the few remaining) usually happy to give you their old chem bottles. Stay on the right side of the chem, if poss, as in re-use Dev bottles for Dev side (Alkaline) and Fix bottles for FIX/Stop side ( Acid). Needless to say, wash and rinse well prior to use!
3. D76 is a fantastic Dev, been using it regularly since starting out in 1985.... If you after economy and good looking negs, try D23 recipe, very easy to mix up. Only 2 ingredients, Metol and Sodium Sulfite. (7.5g Metol 100g Sodium Sulfite into 1 lit stock, can dilute further). I'm sure you can find more expansive info out there, but keeping it short.
4. Instead of metal clips, wooden clothes pegs are great, cheap and don't rust.
All the best with your BW adventures and happy processing!
Comment posted: 12/09/2020
Winmacher on How to Get Started Developing Black & White Film for £25 (or Less) – by Sroyon Mukherjee
Comment posted: 13/09/2020
Developing black and white film is not all that hard. I love your low cost approach. People who are excited to try developing should just do it. Keep safety in the back of your mind, no splashes or drops, for example, but just do it. Maybe you make a mistake on your first roll? So then on to roll number two.
Regards - Sam
Comment posted: 13/09/2020
Daniel Lobo on How to Get Started Developing Black & White Film for £25 (or Less) – by Sroyon Mukherjee
Comment posted: 15/09/2020
Jon on How to Get Started Developing Black & White Film for £25 (or Less) – by Sroyon Mukherjee
Comment posted: 15/01/2023
"Some people recommend plain water or white vinegar instead of fixer." Did you intentionally type fixer or was that a typo for 'stop bath'?
Thanks,
Jon
Comment posted: 15/01/2023