I have received some very kind comments on the tonality I achieve in my monochrome images. After so many years of self criticism in my darkroom, sadly no more, they are almost like muscle memory these days. However, it has spurred me on to set out, from a purely practical standpoint, and as briefly as I can, how I came to this point.
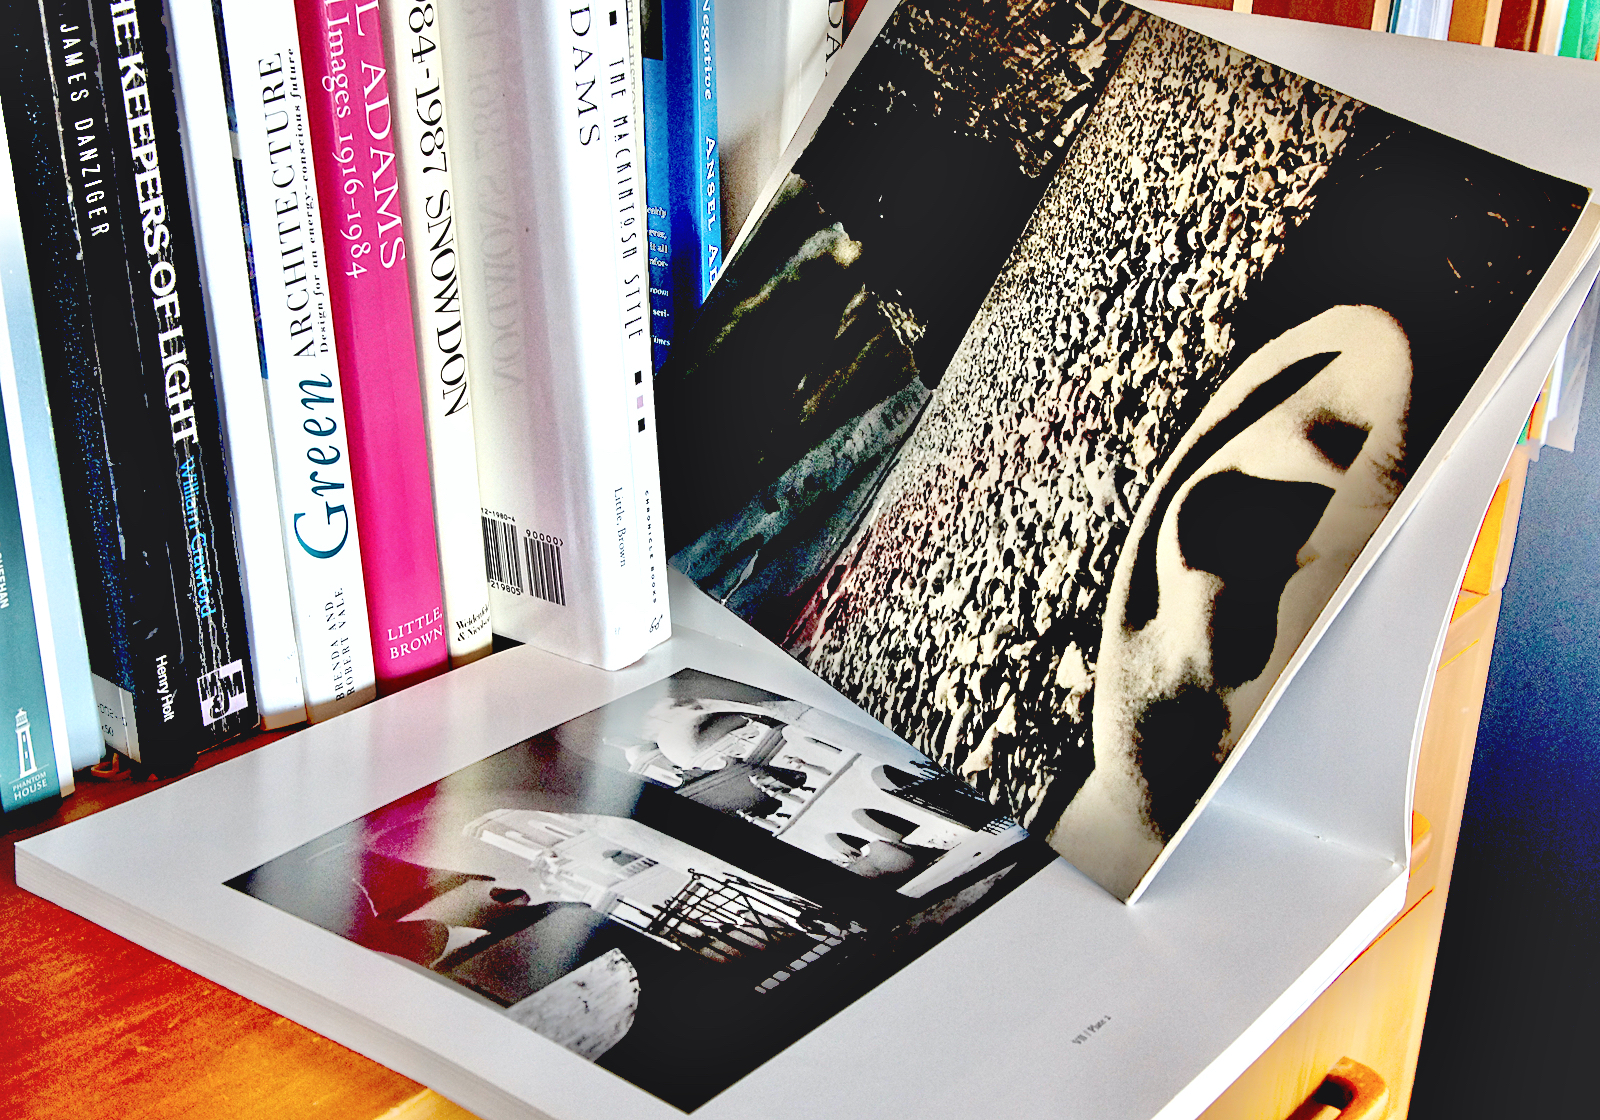
I guess it all started with the two photographers who influenced me greatly in the early days, Ansel Adams and Bill Brandt. They had widely differing styles but both employed very telling tonal control to achieve them. Brandt’s artistry and Adams simply amazing tonal management captivated me. This in turn led to my studying, and struggling, with the Zone System, seriously boosting Ilford’s profits on their film, chemicals and bromide paper no end in the process!
I must confess that, in these digital days, I am all for the simplest solution to any problem. I don’t bother with spot metering, detail testing and all the other things advocated by the Zone Systems authors, Ansel Adams and Fred Archer. They devised the system as a teaching aid to help students understand exposure and development while they were teaching at the Art Centre School in Los Angeles in the early 1930’s. I did try to follow it to the letter at first, however, and that seems to have helped me recognise what needs to be achieved, its original objective of course.
Its essential message is how to match a subject’s tonal range to a film’s recording capability, adjusted to match the result the photographer visualised for the final image. Materials and equipment were very different to today’s of course and exposure in particular as well as emulsions are worlds away from those days.
‘Visualisation’ was another thing Adams preached when talking about his photography in his other writings as well. He encouraged giving thought to how the eventual image would be presented and to tailor exposure and processing to suit.
What has proved useful?
What it has left me with is that, when I really need to allow for a subject that an average exposure won’t cover, I call on the Zones as set out in “The Negative” by Ansel Adams, which I apply to adjust an incident light reading.
You can Google it but basically the zones cover 11 steps, equally spaced one stop apart and go from pure black (film base plus fog in the negative) to pure white (paper white or maximum screen brightness). The steps in between are arranged evenly either side of Zone V (Roman five and 18% grey in the subject). III to VIII are the most useful zones being the darkest or lightest that begin to show detail. So if you have an important subject on one of these values you need to adjust exposure up or down so that they are recorded well for reproduction. For instance, an incident reading will record 18% grey as exactly that but if you have an important part of the subject that would then fall on IX, X or higher than exposure must be reduced to prevent it burning out which sacrifices some shadow detail.
Measuring exposure.
I mostly use a Sekonic Studio Deluxe L-398 light meter for hand held use which is principally an incident meter but also allows reflected measurements and other refinements particularly for a studio environment. It has one useful feature that fits with Adams method, the needle indicates a foot candles value rather than an arbitrary set of numbers.
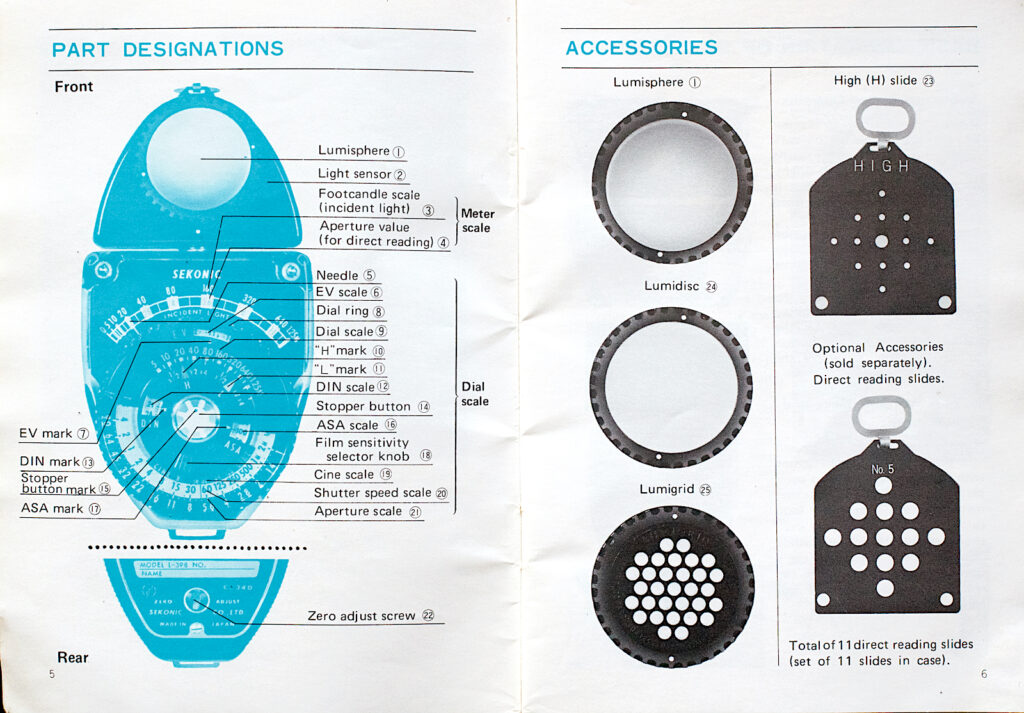
Adams provides a formula for working out settings from a meter that gives a reading in foot candles. The square root of the film speed is that films ‘key aperture’ as he calls it. The reciprocal of the c/sq ft reading becomes the shutter speed. Easier than it seems, e.g. ISO 200 (√ 15 approx.) so f16, ISO 64 (√ 8) so f8. With a deflection of 5 for f8 gives 1/5 at f8. It saves time fiddling with calculator dials. A coupled EV shutter is great here. pre-setting the key aperture and then setting the indicated speed allows any other combination to be set but still giving the correct exposure, in the f8 case, 1/100 at f2 instead of 1/5 at f8 for example.
I rarely modify an average reading in this digital age, the limited tone range of film will usually fall inside the wider digital range. When I do, there is usually a very obvious need to do so and exceeds the much wider tone range a digital sensor can embrace.
Having imported the negative into the computer all the tonal information is captured comfortably and the file will normally allow quite a bit more adjustment than a bromide print would be able to produce without major adjustment to the film’s development time and risking losing some quality in the process.
Developing the film.
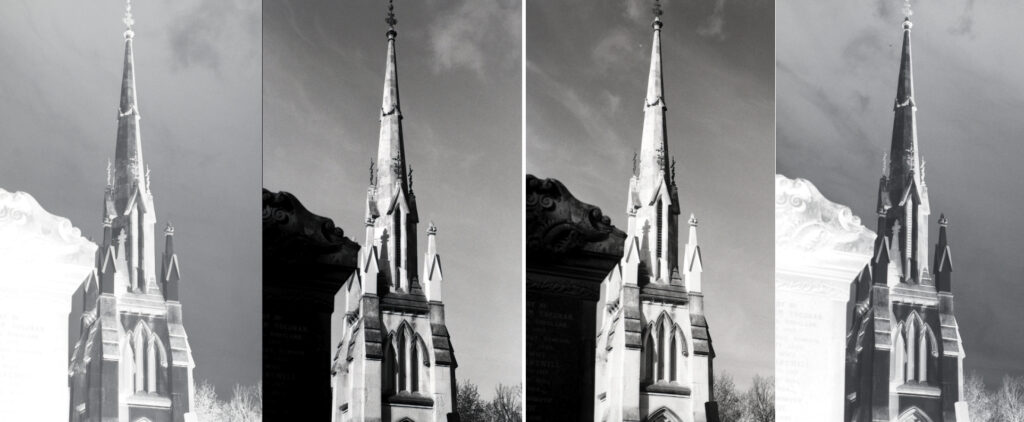
The next stage that has a bearing is development of the exposed film. The thing I aim for here is consistency, as advocated by the system. Yes it is possible to influence tonal response quite dramatically at this stage, the system covering what we now call push and pull, and I do sometimes vary things when unavoidable. Mainly though I aim for a negative density that is evenly toned and covering the whole tone range as much as possible. This way, the steps I use as a first look at a film when digitising gives me reasonable results, often not needing much further attention.
If you use a trade processor this will be out of your control. However, they tend to use automated equipment so there is a good chance you won’t have any major variations and can adjust your procedures to match. Here I would use levels to expand the range so that shadow and highlight point are at the ends of the scale.
Digitising.
Digital sensors have tone responses in the region of 12 to 14 stops, way more than the 8 or 9 useful ones for film. This usually leads to what can appear to be a rather weak negative once on screen.
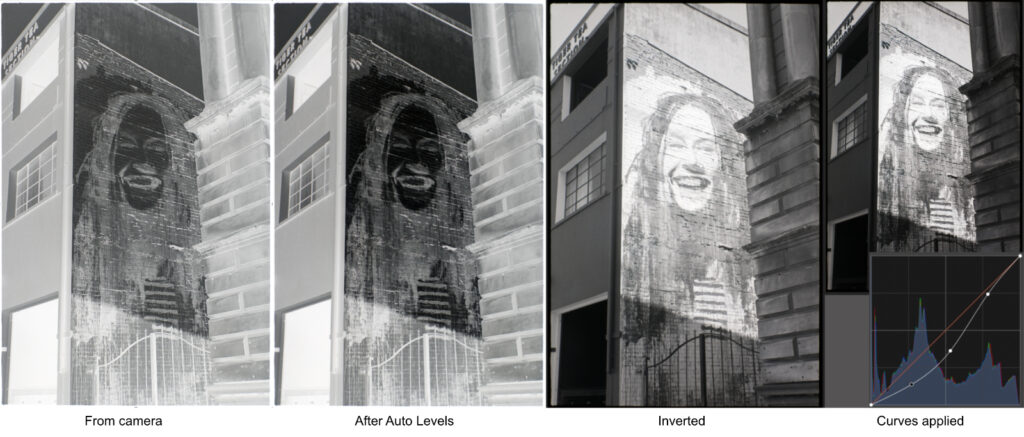
I open the original file in RAW and crop and level the neg to leave a sliver of margin showing, but, importantly, no sprocket holes. This file is then developed with no other adjustments and saved as a jpeg. The original file is not saved so that I can go back to it if another go is needed.
The file then has auto levels applied which can punch up the contrast appreciably. The auto levels step nicely places the tones within a transparent maximum white, the film margin and film base plus fog, and a maximum black, the lightest highlight. It also ‘stretches’ the tones out for the software and allows much more flexibility in post.
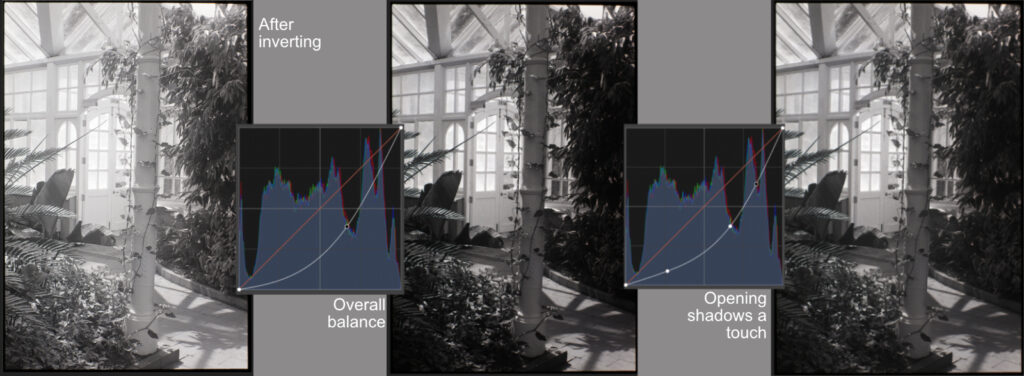
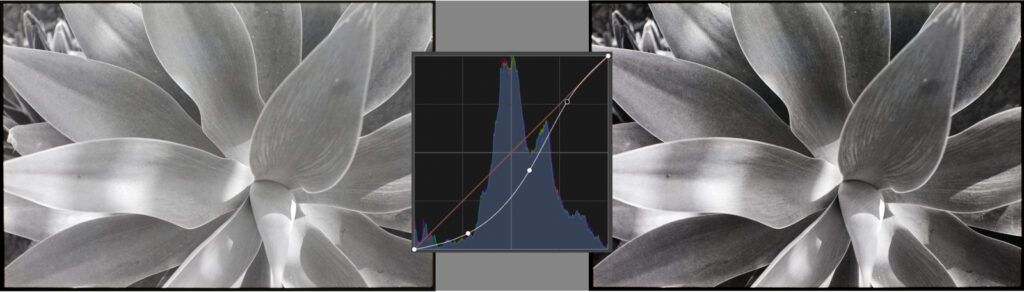
After inverting, which quite often is pretty acceptable. I will apply curves to balance tones if necessary and introduce an S-curve to give things a photographic modelled look, using the mid point to set overall brightness, as needed. The foot and shoulder of the curve enhance contrast as much as you require. This can be done with levels but curves gives better results.
If you have an sRGB file it can look more photographic if it is converted to grayscale. This takes out any faint tint that is sometimes present, and takes up less space too.
And…
Well that’s it really. I leave sharpening to last. I once read that applying USM in small steps avoids some of the more unsightly effects that can appear at light/dark edges. So I usually give 2 or 3 passes with a just perceptible setting in Affinity Photo of 0.3 pixels radius / 0.9 factor / 0 threshold.
There doesn’t seem to be that much of the Zone System in all that but my point is that, as a teaching aid, and in my case in particular, I think it did its job. So I hope my scribbling may be of interest and, possibly, helpful.
Share this post:


Comments
Ibraar Hussain on My approach to exposure and tone control with monochrome film
Comment posted: 13/06/2026
Your tones are probably the best I’ve seen on this site.
There’s one more thing people should bear in mind, tonal relationships between colours - how colours translate into tone in B&W.
Comment posted: 13/06/2026
Walter Reumkens on My approach to exposure and tone control with monochrome film
Comment posted: 13/06/2026
P.S. By the way, Bradford has been twinned for decades with my hometown, where I now live again: Mönchengladbach.
Comment posted: 13/06/2026
Nick Rogers on My approach to exposure and tone control with monochrome film
Comment posted: 13/06/2026
Comment posted: 13/06/2026
Erik Brammer on My approach to exposure and tone control with monochrome film
Comment posted: 13/06/2026
Comment posted: 13/06/2026
Bill Brown on My approach to exposure and tone control with monochrome film
Comment posted: 13/06/2026
Comment posted: 13/06/2026
Jeffery Luhn on My approach to exposure and tone control with monochrome film
Comment posted: 13/06/2026
Thanks for the article! Like many of us old timers that went through a period of strictly following Ansel's directions using sheet film, I know a FULL SCALE image when I see one. Your stuff fits the bill.
I was lucky to have taken a week long workshop in Yosemite from Ansel Adams way back last century. 1968 I think. It involved shooting, processing, and printing. Fellow students and I stood exactly where Ansel had stood for some of his classic images. He led us through metering. We tried our best to compose exactly like his. All of us agreed that we produced our best results under his direction. When we compared our prints to his originals in the gallery....there was a significant difference. No surprise. Later in the week, he shared some pragmatic approaches to a simplified way to shoot roll film. Bracketing. Stand development in compensating developer, etc. These days I use that simplified system of accessing the scene brightness range and making a series of exposures, often beginning with 2 under and ending with 2 over. Within that 5 stop range, and a consistent development process, we can get close(r) to zone system results. As good as Ansel? I would never claim that!
Comment posted: 13/06/2026
Gary Smith on My approach to exposure and tone control with monochrome film
Comment posted: 13/06/2026
https://www.youtube.com/watch?v=THlVigKEO7A
Comment posted: 13/06/2026
Alexander Seidler on My approach to exposure and tone control with monochrome film
Comment posted: 14/06/2026
Comment posted: 14/06/2026