Argenti is a European film consortium which makes rare and unusual films available at affordable prices. My first encounter with Argenti film was in the bookshop of the Photographers’ Gallery in London. An unfamiliar but attractively-packaged B&W film caught my eye, and when I saw that it was (a) ISO 6, and (b) sensitive to blue light only, I knew I had to try it. The film turned out to be repackaged Eastman 2366 duplicating film. I could find very little information about it online, so I ended up writing a detailed review for Casual Photophile.
Since then, I’ve tried various Argenti products. I buy them from Foto R3 – a Gijon-based film-shop/lab who are Argenti’s distributor in Spain (they also ship internationally; my last order was from India). Occasionally, they also send me complimentary rolls to test and review, and this article is about one such film: Argenti Noa Noa.
Argenti Noa Noa: origin and availability
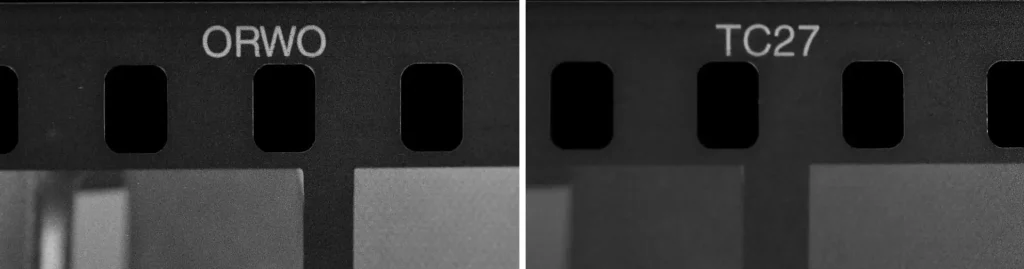
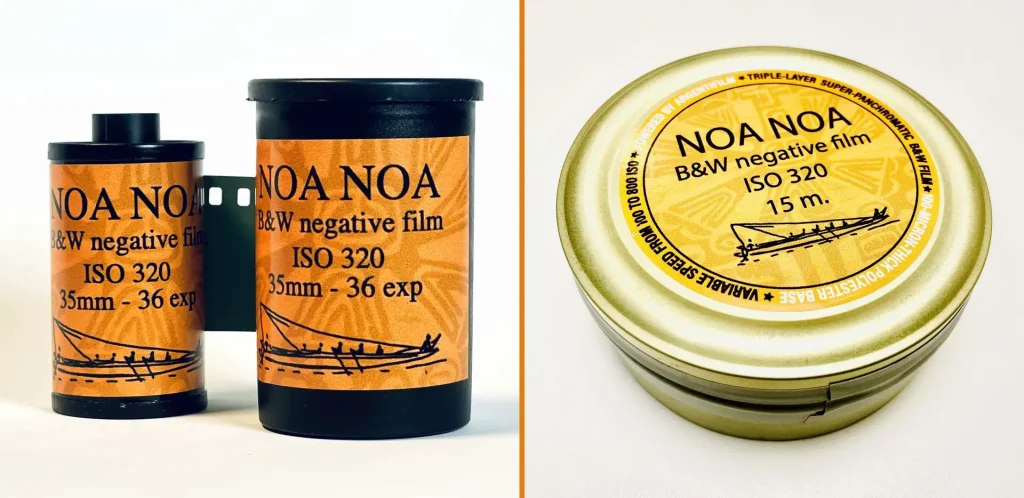
Argenti’s focus, as far as I know, is respooled/rebranded film; they do not make their own emulsions. But to me, that doesn’t make them any less interesting. Many of the original emulsions which their films are based on are hard-to-find, special-purpose or technical films. Argenti Noa Noa, for instance, is actually Orwo TC27, a B&W traffic-surveillance film (the TC stands for Traffic Control). The origin is not explicitly stated on the product page, but is clear from the film rebates.
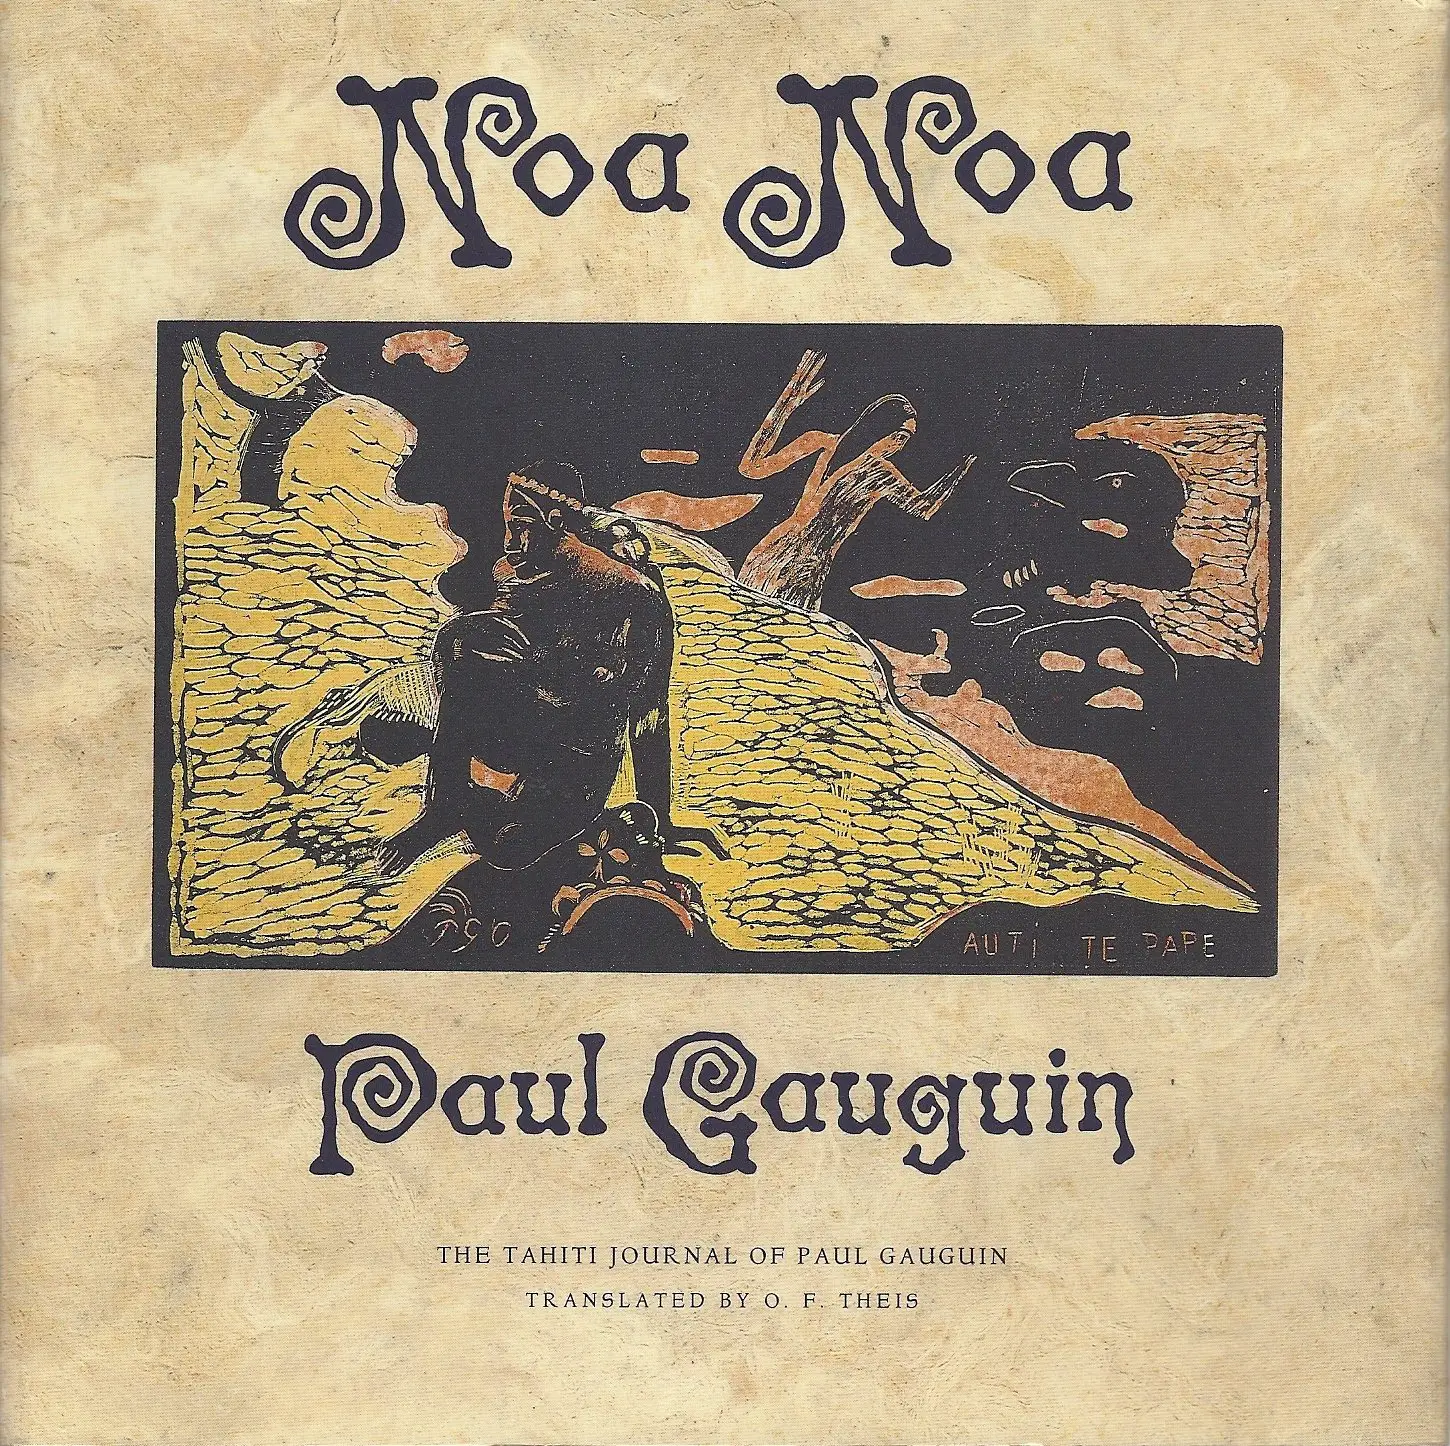
The name Noa Noa comes from the artist Paul Gauguin’s journal of his life in Tahiti. South Pacific island-life in the 1890s seems like a far cry from traffic-surveillance film – but hey, what’s in a name; film is what you make of it, right?
From my investigations (the most helpful sources were Filmphotography.eu and some 11-year-old forum posts by a Maco employee), it appears that Orwo TC27 was once sold as Maco Cube 400c. In 2004, when Maco switched over to the Rollei brand, the name was changed to Rollei R3; this film was eventually discontinued in 2014. Currently it’s available as Argenti Noa Noa. Foto-R3 told me that Noa Noa is fresh stock, “the absolute last production of TC27.” There is very little publicly-available information about this emulsion. Back in 2004, Roger Hicks wrote an article about MacoCube; this is the only detailed review that I’ve been able to find.
As far as I’m aware, Foto-R3 and CasanovaPhoto (another Spanish store) are currently the only retail outlets for Orwo TC27. At some point it was available on AliExpress (which incorrectly describes it as a “spy film”) and Hanalogital’s etsy shop, but it’s currently out of stock at both places. Foto-R3 sell 36-exposure rolls of Argenti Noa Noa, which is what I shot, as well as 15-metre bulk rolls.
Film speed and developing time
First up, the TL;DR version. I shot my first roll of Argenti Noa Noa at EI 200, and developed it in ID-11 at 1:1 dilution for 11 mins at 20°C. Based on my evaluation of this roll, I would probably shoot the next one at EI 125 and develop it for 12 mins.
Second, the datasheets for both Noa Noa and Maco Cube recommend prewashing for 30–60 seconds to dissolve the anti-halation layer and increase film speed. I missed this, so I developed without pre-washing. In the process, I found that the anti-halation layer stains the developer a rather fetching shade of teal. I use ID-11 1:1 one-shot, so the staining was not a problem for me, but it’s something to be aware of. Pre-washing is probably the way to go, especially if you reuse your developer solution.
Okay, now let’s get into the juicy details. The Noa Noa label says “ISO 320”. According to Foto-R3’s product page, it has a “variable speed rating from 100 to 800 ISO (nominal ISO: 320)”. I chose to rate it at EI 200. Why? Because in my experience, “true” film speed, as determined by Zone System tests or variants thereof, is often slightly lower than the box speed advertised by manufacturers. I shot the roll in my Minolta X-370s, relying on its (very accurate) centre-weighted TTL meter.
Now what should be my developing time? With a bit of digging, I was able to find datasheets not just for Noa Noa, but also for Orwo TC27 and Maco Cube. This sounds like a good thing, but sometimes, more research just breeds more confusion. The three films are supposedly identical, but when it comes to developing time, the datasheets don’t always agree. Moreover, my preferred developer is Ilford ID-11 or the functionally identical Kodak D-76, both diluted 1:1. The Noa Noa datasheet has times for D-76/ID-11 stock, while in the other two datasheets, the dilution is unspecified. I couldn’t see a time for 1:1 dilution.
In the end I went with ID-11 1:1 for 11 mins at 20°C. There is no real science to this; I relied partly on the Noa Noa datasheet’s suggested developing time for ID-11 stock (10 mins at 20°C for EI 200), and partly on experience and gut feeling.
The fun thing – or, depending on your perspective, the frustrating thing – about shooting obscure films is that there is very little information out there. Personally I think it’s fun, which is why I seek them out. If I want predictable results, I can always use a tried and tested film. For common films like FP4 or Tri-X, you can find developing times and sample photos for all manner of push, pull and developer combinations. But unusual films are exciting and unpredictable – each one is like a little voyage of discovery. And by sharing my test results, I feel like I’m adding to the existing pool of knowledge.
Shortcut Zone System test
The photos turned out alright. But for a more accurate assessment, there’s an additional test which I do when trying out a new film, and when I don’t want to do a full-fledged Zone System test. This is rather nerdy, so if it’s not for you, feel free to skip to the next section.
I’ll describe my process in more detail in a future article, but in short, here is what I do. I take two test photos of a neutral, evenly-lit surface – one at Zone 1 (4 stops under-exposed: this is the film-speed test) and another at Zone 8 (3 stops over-exposed: developing-time test). I then make darkroom prints from the two frames at MBMT and Grade 2 (normal contrast). MBMT stands for “minimum time to maximum black”, that is, the shortest enlarger exposure where the unexposed film (e.g. the rebates or the space between frames) prints as pure black.
If both exposure and development are spot on, this is what we should see on the print:
- The Zone 1 frame should print as nearly black, but barely distinguishable from the pure black produced by unexposed film.
- The Zone 8 frame should print as nearly white, but barely distinguishable from unexposed paper.
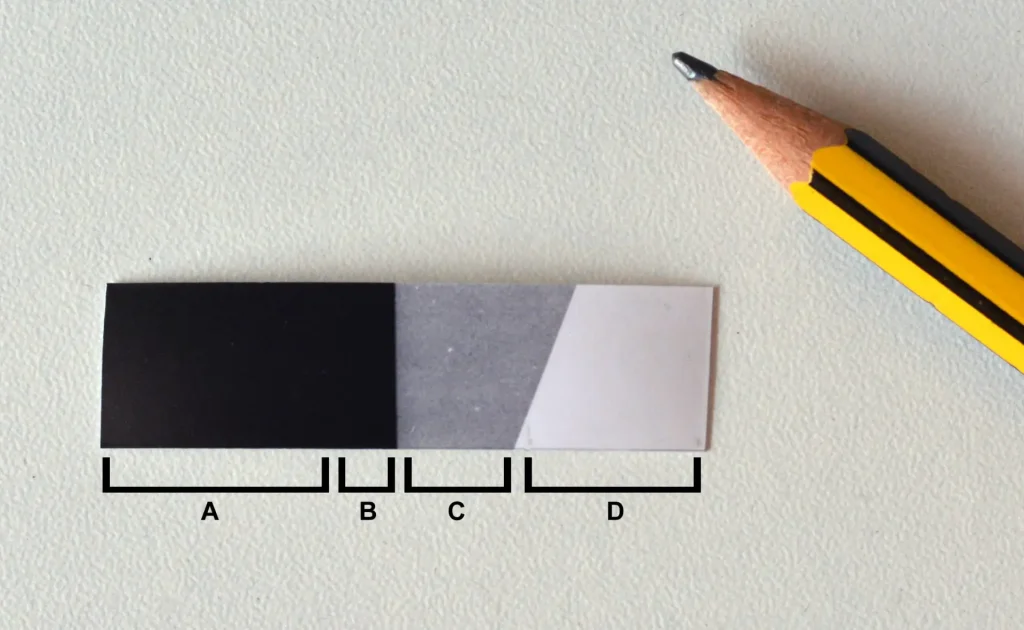
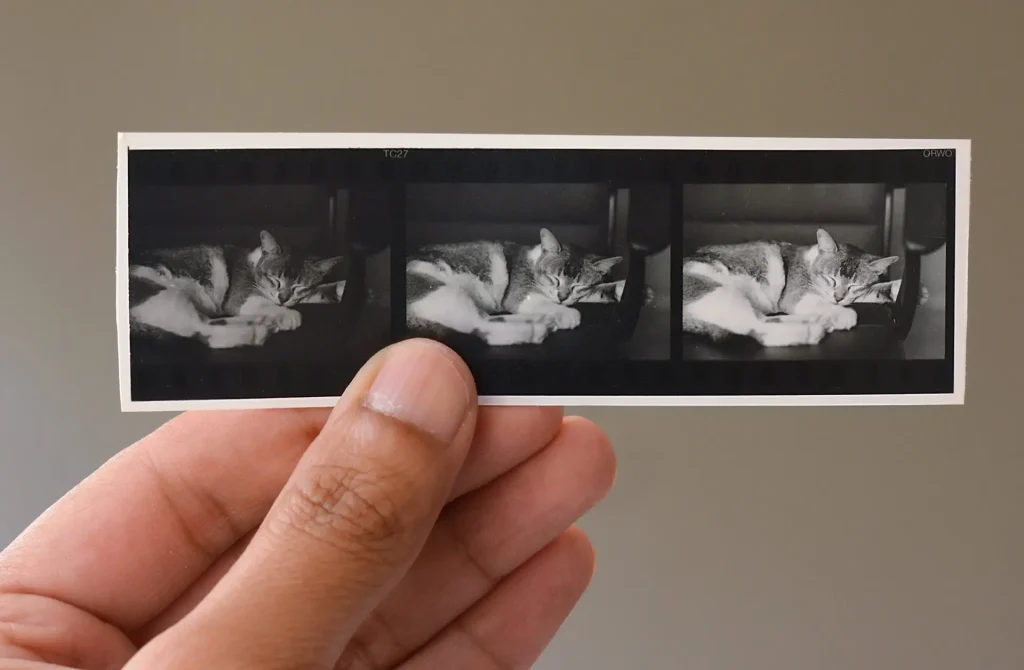
With my Noa Noa roll, the Zone 1 frame is barely distinguishable from the film base when looking at the negative, but indistinguishable on the MBMT print (no demarcating line between A and B in the strip above). This indicates that EI 200 was a bit too fast; I think EI 125 would be about right.
The Zone 8 frame is not dense enough. On the MBMT print it prints as grey, not near-white, indicating under-development. Zone 8 (C in the strip above) is clearly distinguishable from unexposed paper (D). Using a lower EI (125 rather than 200) would somewhat increase the density, but I suspect a longer developing time – around 12 minutes – would be ideal.

Of course, these are just my recommendations – a starting-point at best. Firstly, the test I just described assumes you want negatives with “normal contrast”. But there can be all sorts of reasons why you want higher or lower contrast. Even with films where I’ve done a few rounds of tests and worked out my “optimal” exposure and development times, I sometimes deviate when I feel it would suit the light, mood or subject matter.
Secondly, they’re based on my own development regime – ID-11 1:1 at 20°C, continuous agitation for the first 30 seconds, and for the first 10 seconds of each minute thereafter. Various seemingly minor things can affect the outcome. If you really care about accuracy, I recommend doing your own tests.
Latitude
You can do all the testing you like, but out in the field, things don’t always go to plan. So if you encounter an unusually high-contrast scene, or want to over- or under-expose for artistic effect, or simply make a mistake, it’s good to know how much leeway you have. Which brings us to the question of latitude. So here’s a routine test I do when trying out a new film. Six consecutive photos of a subject with both light and dark tonal values, dialing in exposure compensation of −2 to +3 stops.
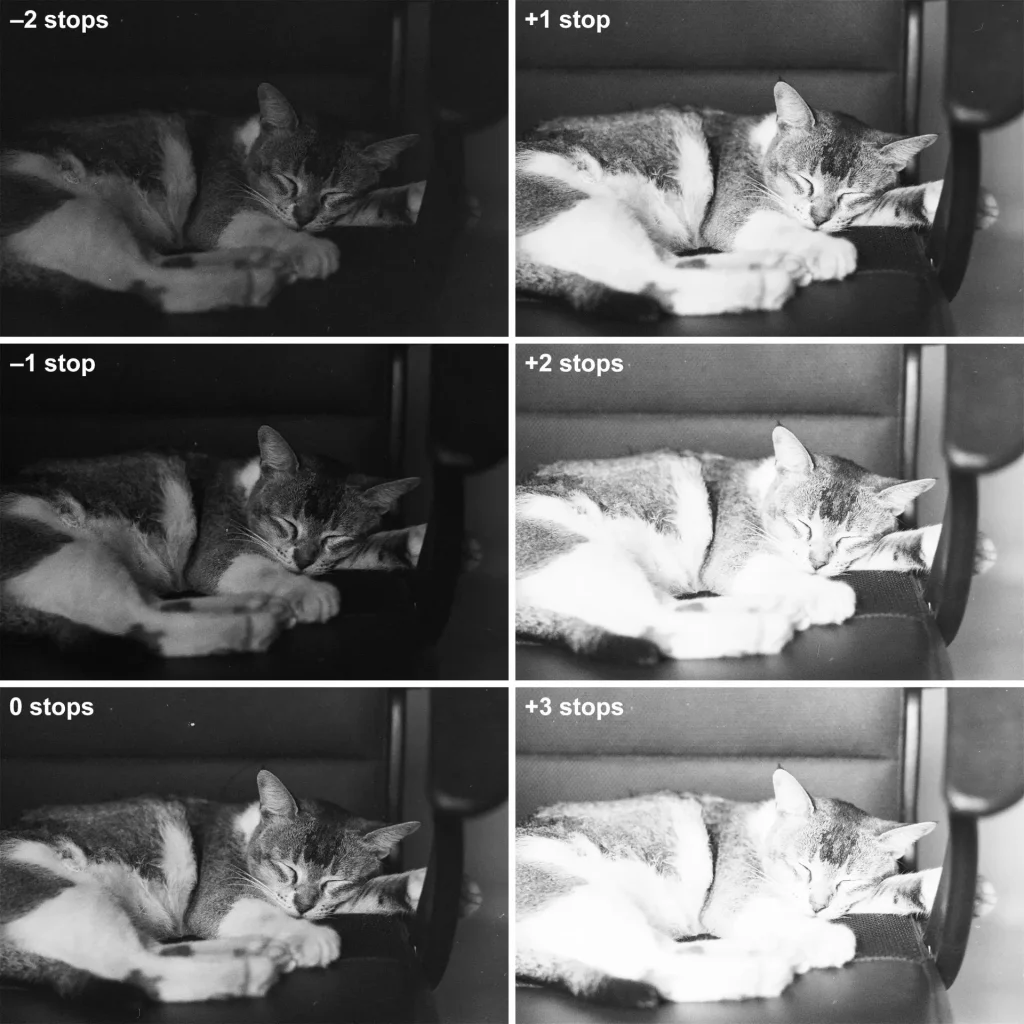
Recall that I rated the film at EI 200. So the six test shots, with exposure compensation of −2 to +3 stops, span a range from EI 800 to EI 25. That’s a whopping 6-stop difference. And of course, the frames are from the same roll, so they’ve been developed identically.
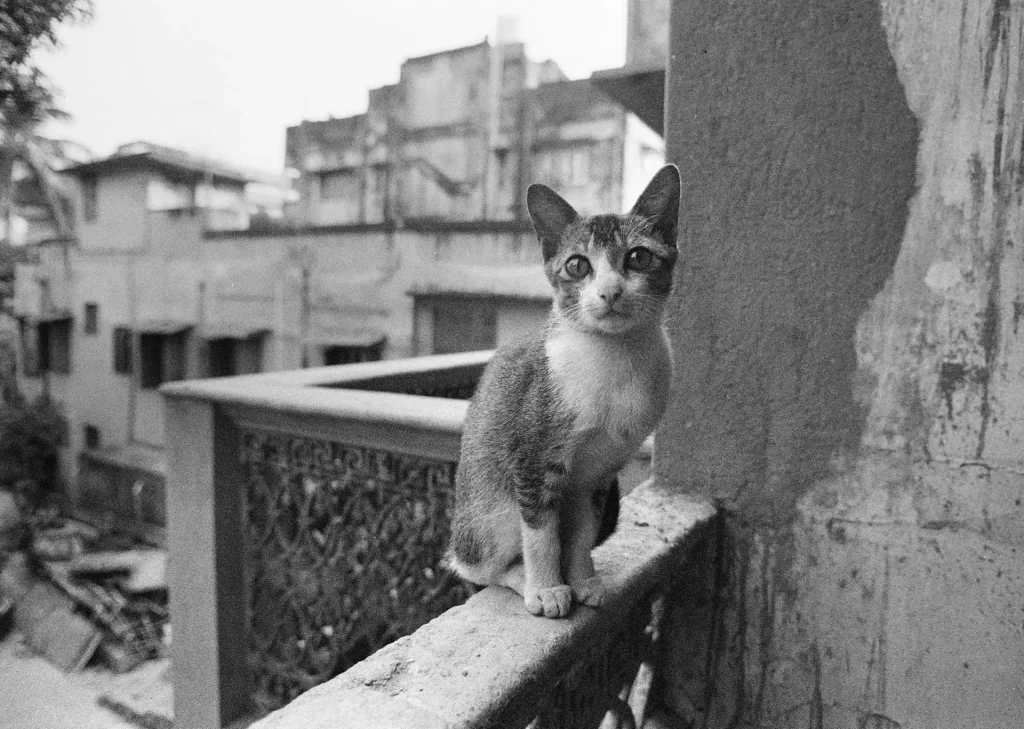
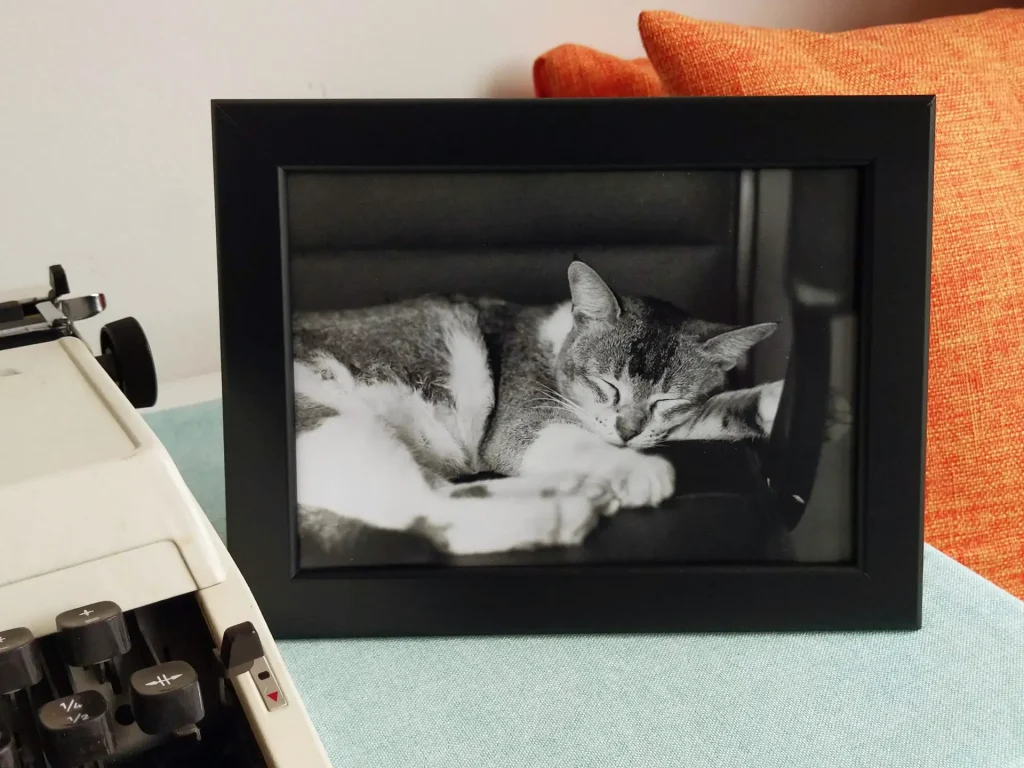
First, let’s take a moment to appreciate my cat who continued to snooze through the sound of an SLR shutter clacking away, two feet from her nose. If she moved, my test would have been ruined.
Now let’s talk shop. What do we see? Very little shadow detail at −2 stops. Blown highlights and even midtones at +3 stops. Nothing too surprising, right? But wait for it.
The six frames above were “scanned” with a DSLR at the same exposure settings. This is akin to a contact sheet, i.e. it makes no allowance for differences in negative density. The next photo shows the two extreme exposures (−2 and +3 stops), digitised at the optimal exposure setting for each frame. I only made global adjustments (levels and curves); no local adjustments such as dodging, burning or layer masks.
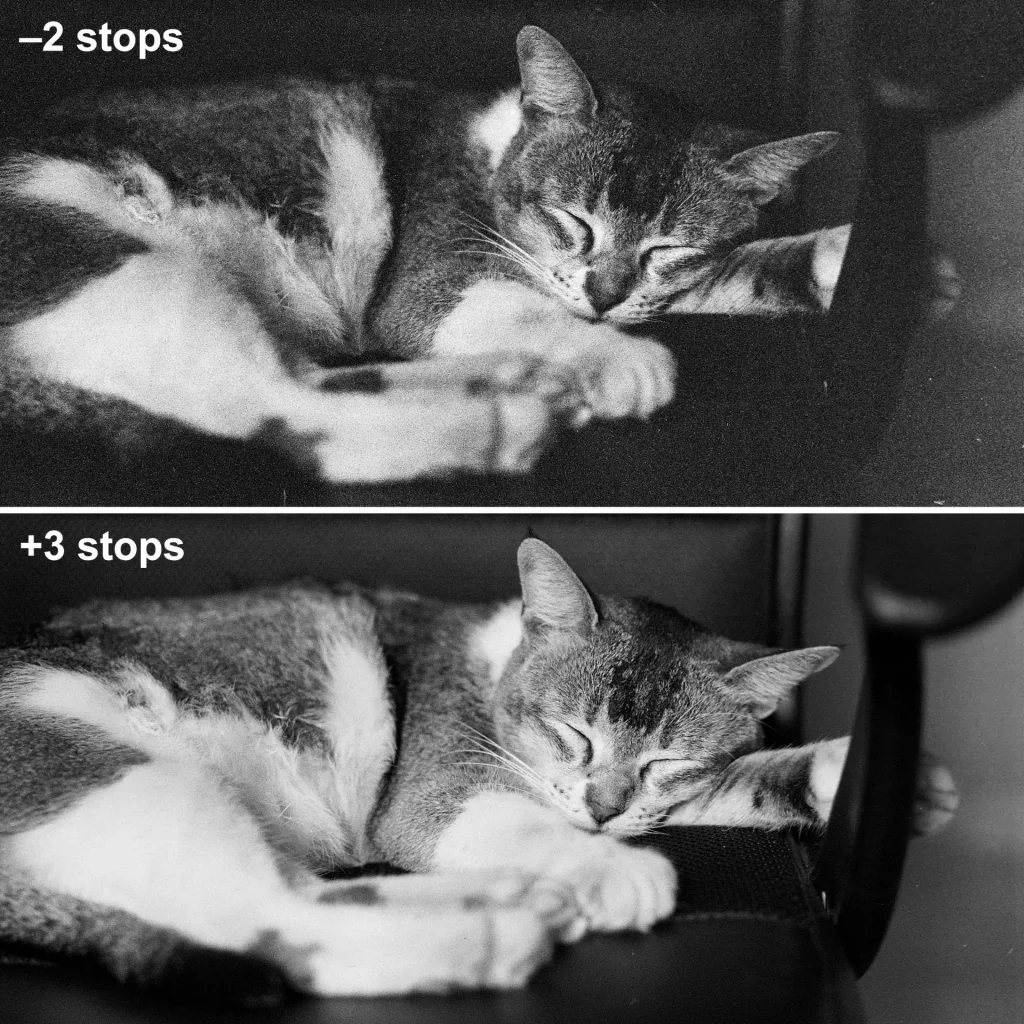
Are you surprised? I certainly was! Sure, −2 stops is rather grainy in the shadows, and +3 stops is missing some detail on her white fur. But essentially, they are both usable.
Take a moment to think about what we are looking at. Two frames rated at ISO 800 and ISO 25, developed identically, both producing acceptable results. Pretty cool, right? My guess is that the film is so forgiving because it was designed for traffic surveillance. Traffic cameras are not known for subtle exposure control, so the film must be capable of producing usable images in a range of lighting conditions.
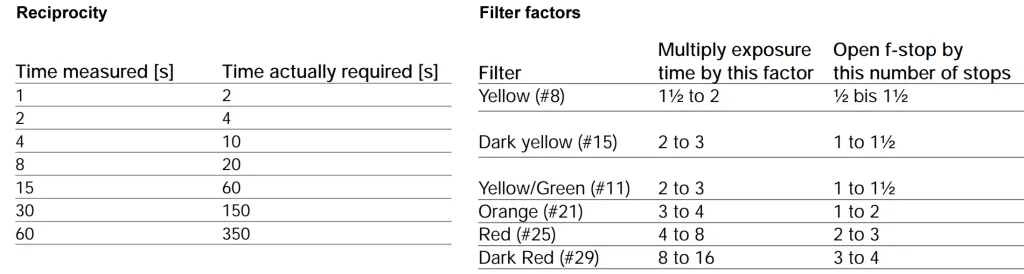
Reciprocity and filter factors
The Maco Cube datasheet has a reciprocity chart and filter factors, but I haven’t tested these for myself. I forgot to do a reciprocity test on this roll, nor did I experiment with filters (other than an IR filter, which I’ll come to later).
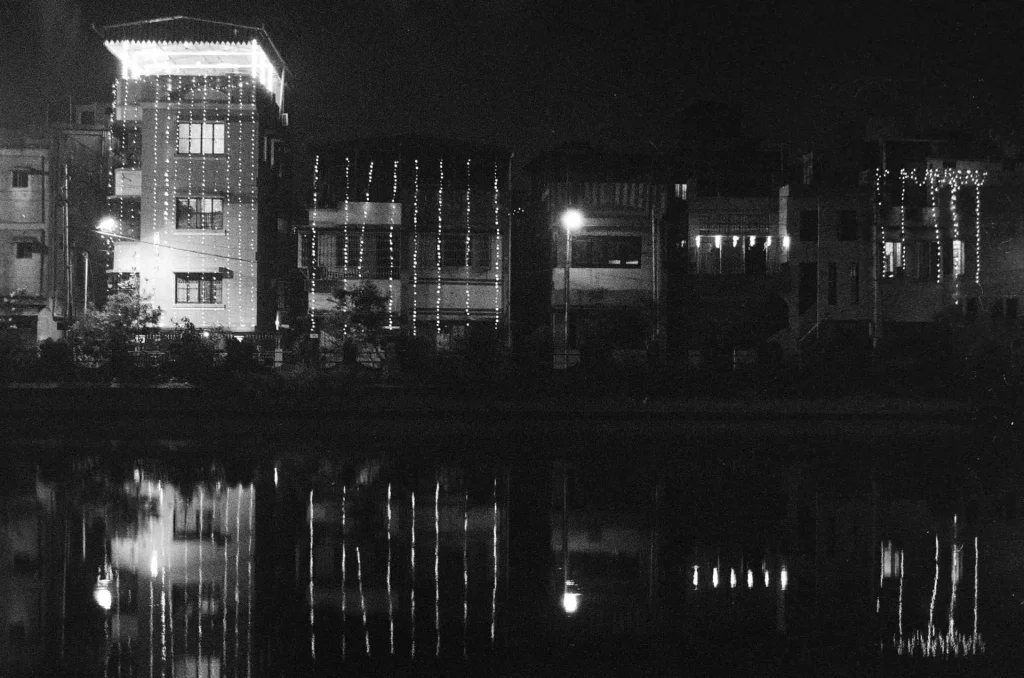
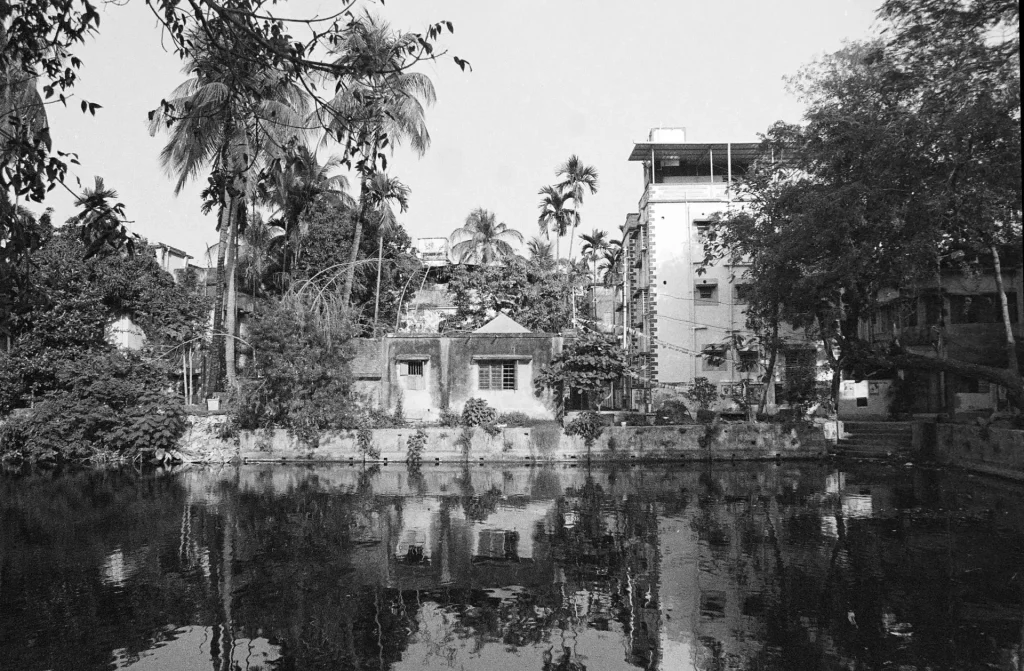
I did make a longish exposure (8 sec I think) of a pond at night-time, but it’s not much use as a reciprocity test because I just guessed the time. That is, I consulted neither a light-meter, which are not very reliable for such low-light situations, nor the reciprocity chart.
Darkroom prints
I printed a couple of photos in the darkroom. Here’s what I used, for anyone who’s interested:
- Paterson enlarger (it has a colour head which can be used to control contrast on multigrade BnW paper)
- El-Nikkor 50mm f/2.8 lens
- Ilford MG RC Deluxe paper
- Ilford Multigrade Developer.
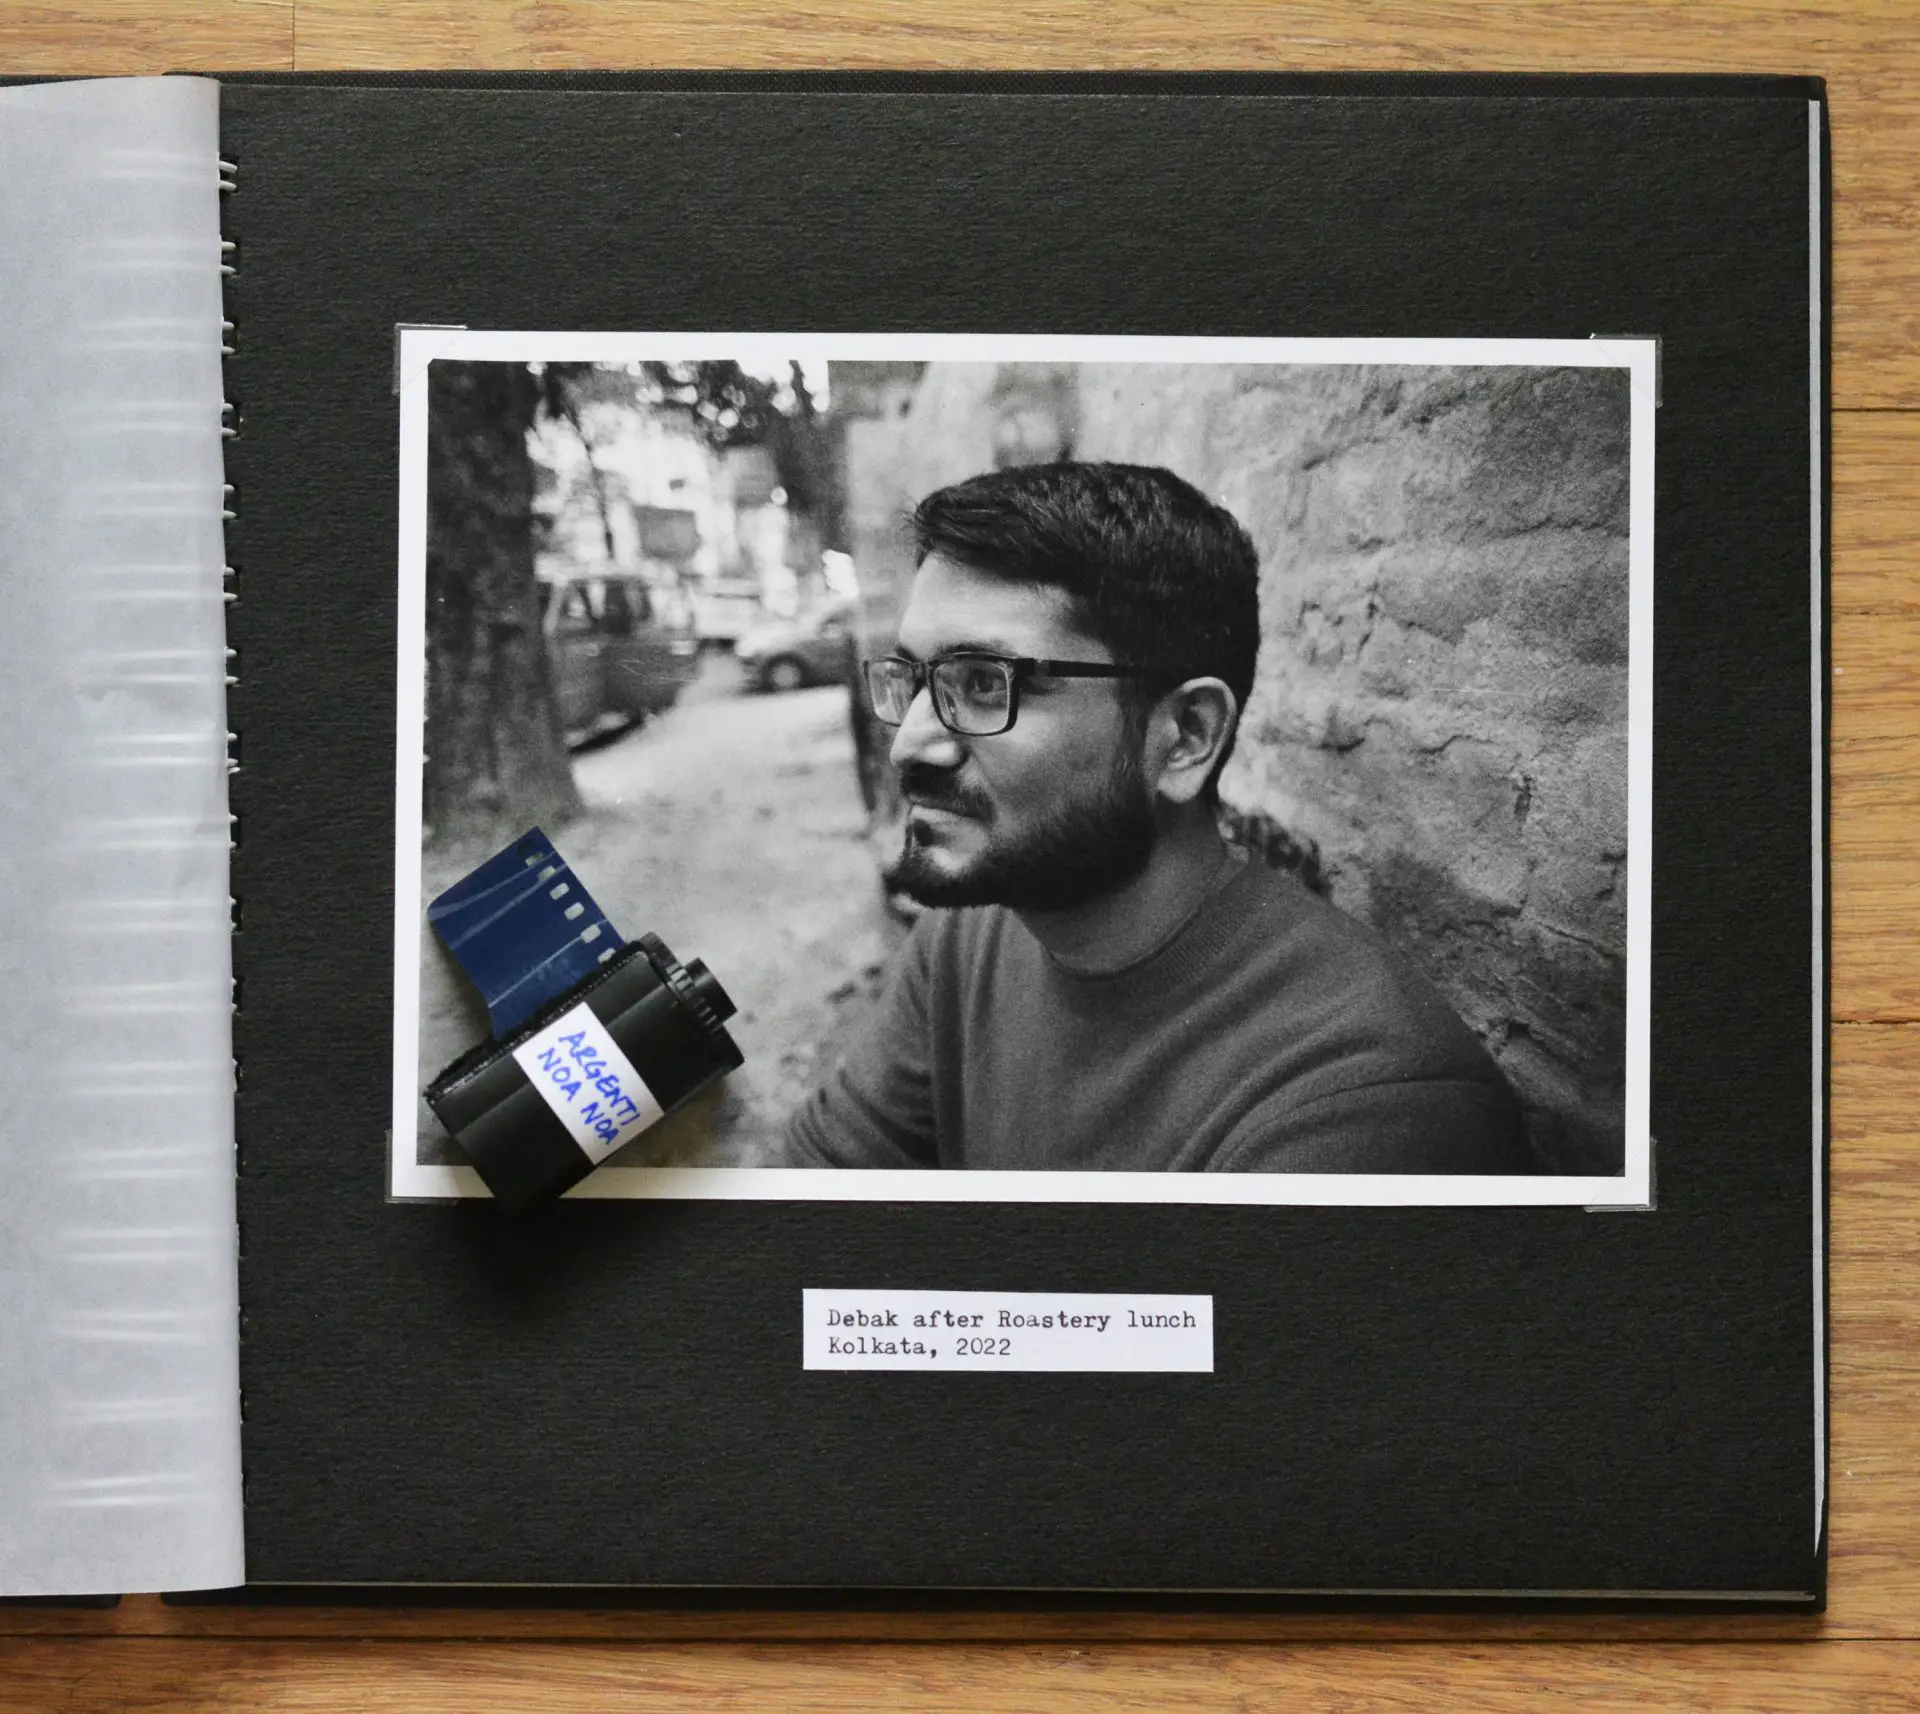
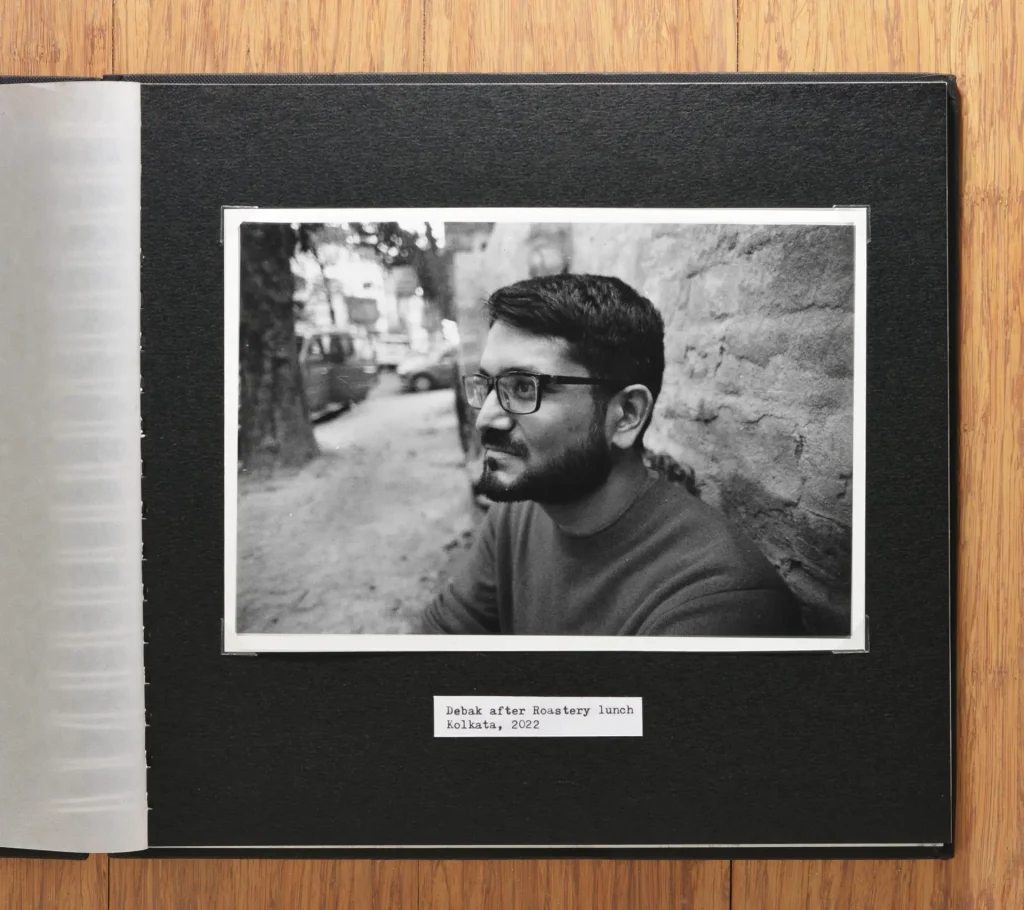
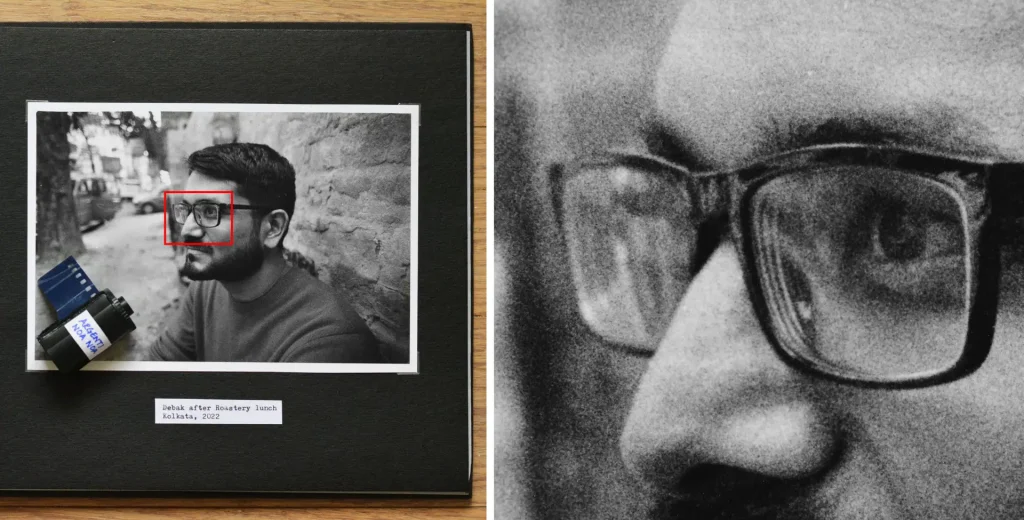
The portrait of my friend below was metered at EI 200. Judging from the proper proof – a contact print made at MBMT and Grade 2 (normal contrast) – the photo is a bit under-exposed. Rating the film at EI 125 and extending the developing time, as also suggested by my Zone System test described earlier, would probably produce an optimum exposure.
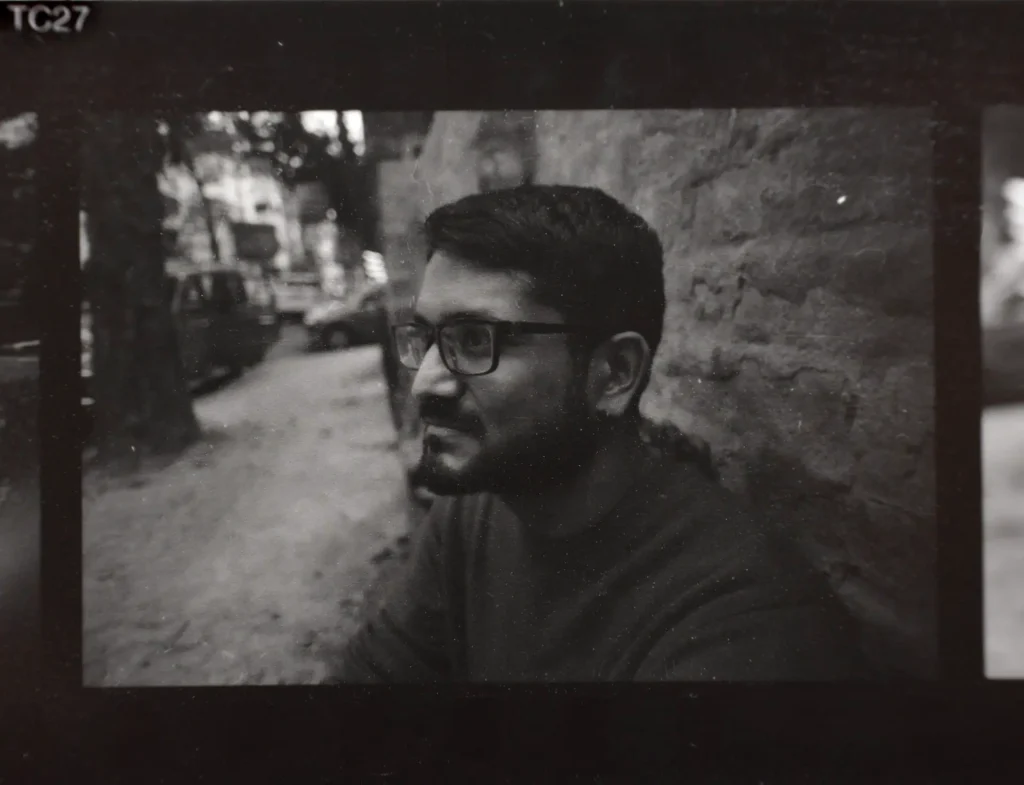
Under-exposure tends to reduce negative contrast. This is also what I saw from my test-strip made at normal contrast (no filtration). To compensate, I dialed in 40 units of magenta filtration, and was able to make a print which I was happy with.
The next photo that I printed is from my latitude test (see above), specifically the +1 exposure (EI 100), which seems to have the best range of tones – subjectively speaking, of course. The proper proof shows good shadow detail (indicating correct exposure) but slightly muddy highlights (indicating under-development). This corroborates my conclusion (based on the aforementioned shortcut Zone System test) that I should ideally rate Noa Noa at around EI 125 and slightly extend developing time.
Nevertheless, it looks fine when printed at normal contrast (no filtration). My enlarger is a condenser model, and these tend to have higher contrast than diffuser enlargers. So slightly low-contrast negatives actually print quite well.
Film base
As you can see in the header image, the unexposed film base is an unusual and rather cool-looking deep teal. After processing, it retains some of this colouration. Here’s a comparison with Kodak T-Max 100, which has a relatively clear and neutral film base. Of course, the colour doesn’t show up in a monochrome scan or darkroom print.
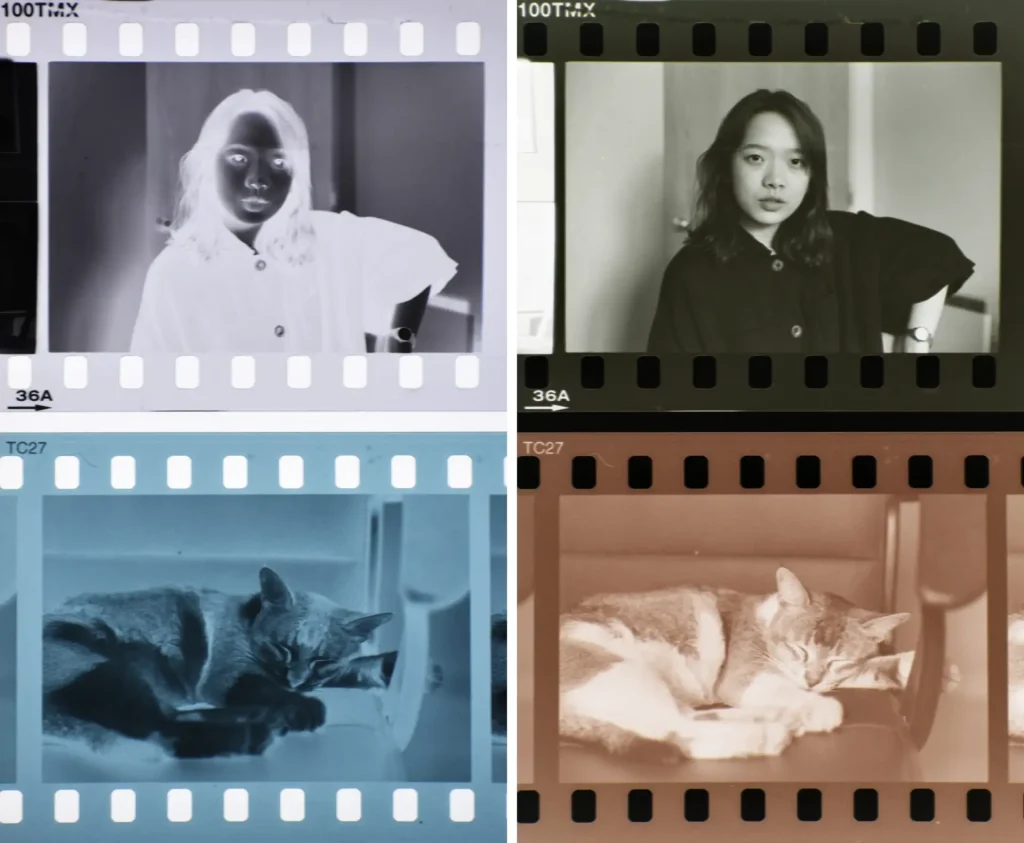
The edge markings, as I mentioned earlier, confirm that the emulsion is Orwo TC27. There is no frame numbering, as is often the case when 36-exposure canisters have been made from bulk rolls.
The Noa Noa product page says it has “a 100-micron-thick polyester base with a special supercoating that protects its three emulsion layers.” Most 35mm films for still photography have a triacetate base. Noa Noa has a polyester base, which is stronger, stabler and more durable (this article by Emanuel Hentes talks at length about the benefits of polyester film). But its strength can pose a practical problem: if the film-advance mechanism jams and you happen to force it, triacetate film will tear, whereas polyester film can damage the camera itself.
100 micron is fairly standard for a polyester-base film. For example, Rollei RPX 400, another polyester-base film, has a thickness of 102 micron. Triacetate-base films tend to be slightly thicker; Ilford HP5, for example, is 125 micron. To me, a few microns is neither here nor there. What I really care about is whether I’ll have problems loading it into my developing tank, and Noa Noa gave me no trouble in that regard. The film base is not too curly, which makes it easy to scan.
Grain
Noa Noa has cubic grain, similar to classic emulsions like Ilford HP5 and Kodak Tri-X (as opposed to tabular grain, which is what you get in more modern films such as the Kodak TMax or Ilford Delta series). Cubic and tabular grain films have different characteristics and look, which you may or may not care about. One is not inherently better than the other; it’s just a matter of taste.
The size and look of film grain depends not just on the emulsion but also on the processing. Developed in ID-11 1:1, my images exhibit grain which is a bit more prominent than, say, Tri-X. Some of the Noa Noa images I’ve seen online are even more grainy than mine; see for example this promo video, or the #ArgentiNoaNoa hashtag on Instagram. Of course, grain is not necessarily a bad thing. It all depends on the look you want.
Colour sensitivity
Film reviews tend to focus on grain and contrast, but these factors are heavily dependent on how a film is exposed and developed. Colour response, on the other hand, is rarely discussed. Nevertheless, it is an intrinsic feature of black-and-white film. Each emulsion has a distinct spectral sensitivity profile, which subtly defines its “look”.
Most modern black-and-white films are panchromatic, meaning they are sensitive to more or less the whole range of the visible spectrum. Noa Noa, according to the product page, is super-panchromatic, i.e. it is also sensitive to near-infrared light which ordinary panchromatic films can’t “see”. As such, Noa Noa should be loaded and unloaded in subdued light (with “true” infrared films like Kodak HIE, you need complete darkness).
Datasheets released by film companies often include spectral sensitivity curves, showing how the emulsion responds to different wavelengths of light. Unfortunately, different companies sometimes use different light sources for the tests, or in some cases, don’t even state what light source they used. The Y-axes in their graphs are also not consistent. All of this makes it difficult to meaningfully compare spectral sensitivity curves from different manufacturers. Nevertheless, I’ve taken a shot at it below, comparing Noa Noa with two other extended red sensitivity films: Ilford SFX and Rollei Retro 80S. I also added rainbow bands which show how the wavelengths correspond to various colours.
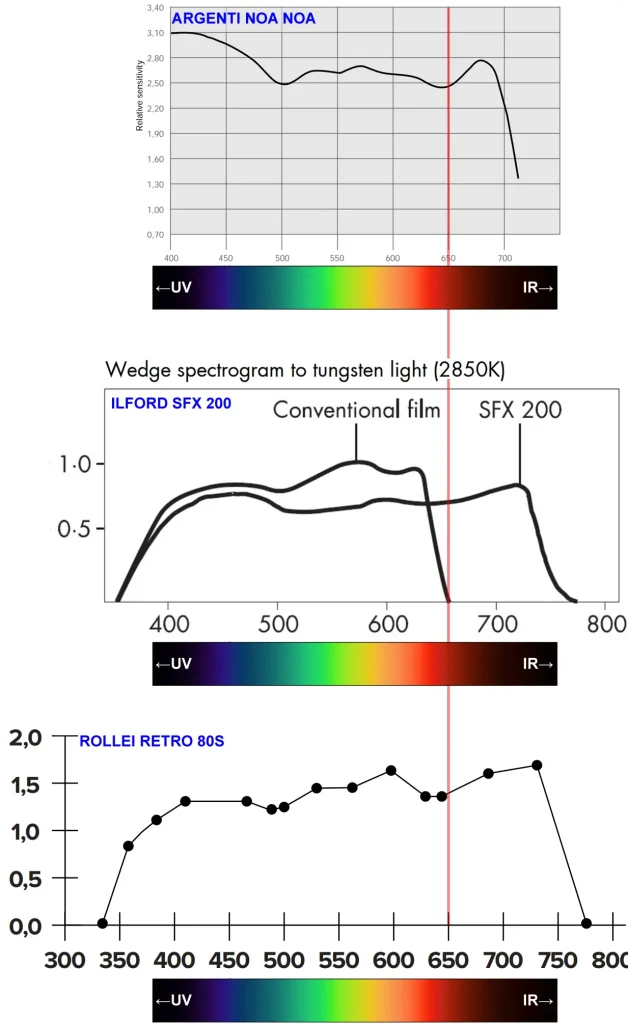
Panchromatic films are generally sensitive up to around 650nm (represented by the red vertical line). According to the datasheets, MacoCube (Noa Noa) is sensitive up to approximately 710 nm, Ilford SFX up to 740nm, and Rollei Retro 80S up to 750nm. So Noa Noa does have extended red sensitivity, but not as much as the other two films.
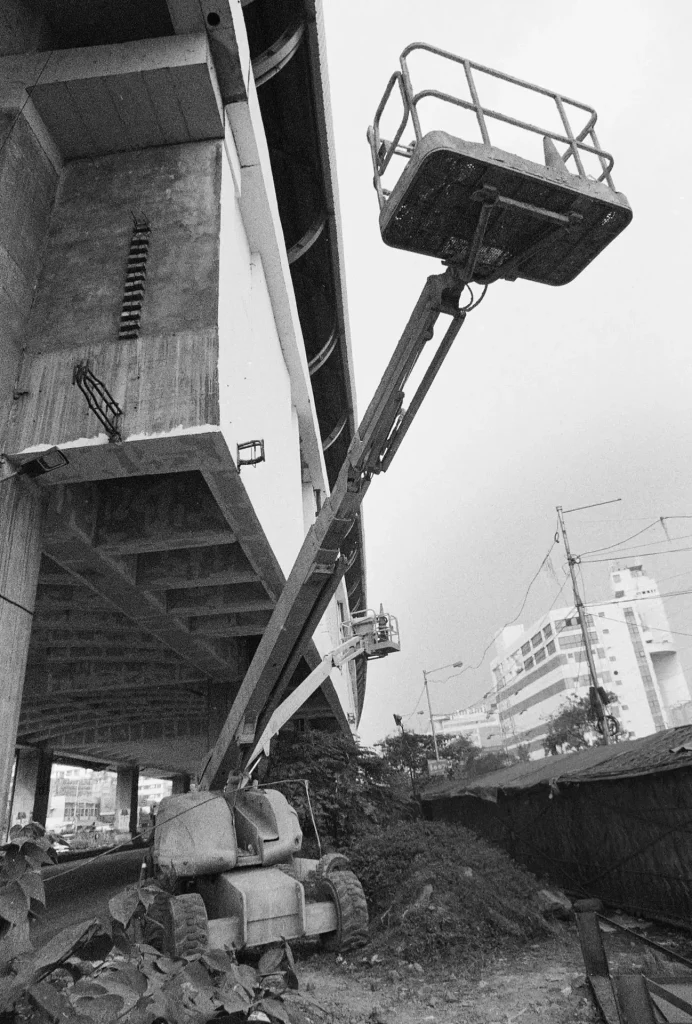
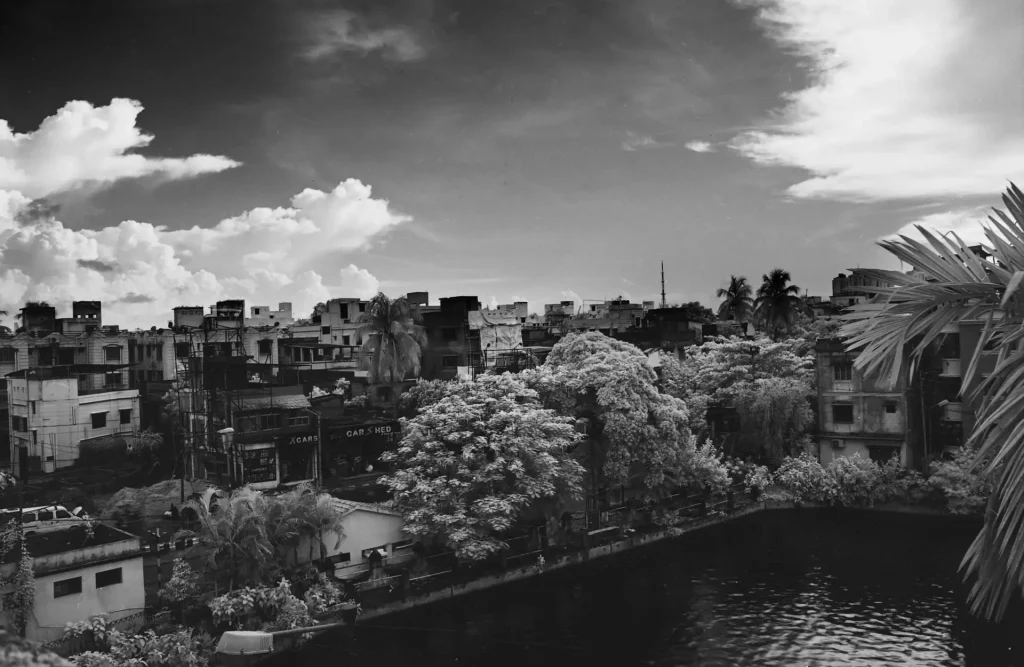
For IR tests, I generally use a 720nm filter (i.e. a filter which only passes wavelengths longer than 720nm). On conventional panchromatic film, such a filter blocks all the light which the film can “see”, so you would just get a blank image. But on Rollei Retro 80S, you get this:
However, when I tried the same trick with Noa Noa, I got a nearly blank image. The frame on the left (below) is without filter; the one on the right is with a 720nm filter and +5 stops exposure compensation. The film recorded a tiny amount of light reflecting off the buildings, but that’s about it.
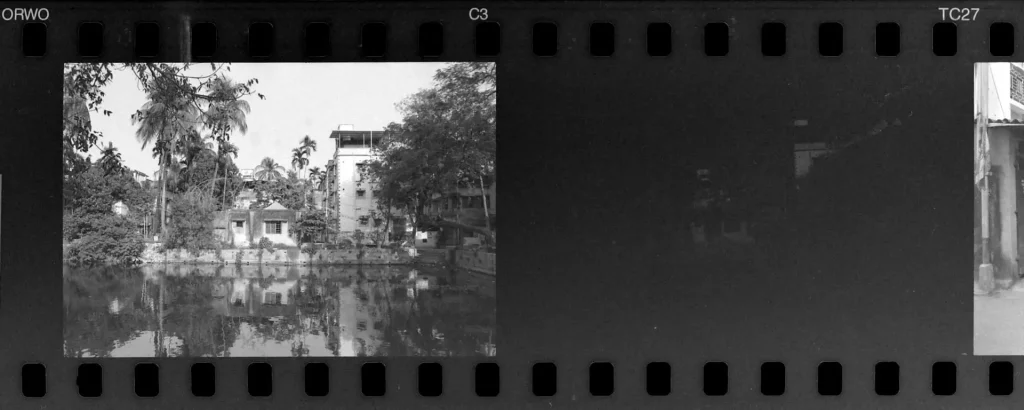
This makes sense; according to the datasheets, Noa Noa has more red sensitivity than panchromatic film, but not as much as Rollei Retro 80S or Ilford SFX. A 720nm filter is possibly a bridge too far, cutting off nearly all the light which the film can see. With a dark red filter (say 650nm or 690nm), it should be possible to produce IR-like effects on Noa Noa. But this is not something I have tested for myself.
The Maco Cube datasheet warns that due to the film’s extended red sensitivity, the effective speed may be slightly higher under tungsten light and when the sun is low. However, given the generous latitude which this film has (see above), I would just meter normally.
There’s also a basic home test which I do for spectral sensitivity. I won’t go into the details now (topic for a future article), but in short, using the film which I want to test (Noa Noa in this case), I take a test-shot of a colour chart under controlled conditions. I then compare it to the same test-shot on HP5, which is a classic panchromatic emulsion and therefore a good benchmark.
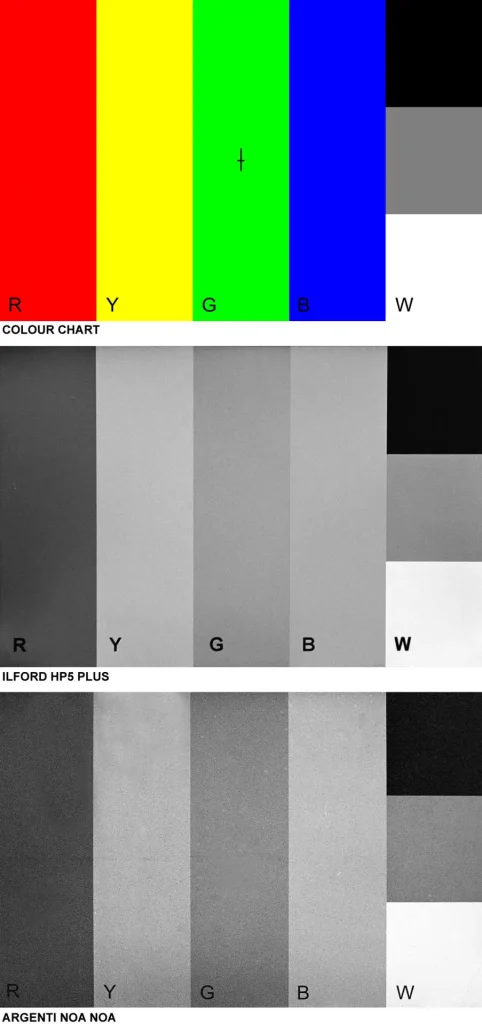
What I’m looking at is the order of the coloured bands from light to dark, as they appear on film. I’m less concerned with the fact that, say, blue looks only slightly lighter than green on HP5 and noticeably lighter on Noa Noa. These are differences in band contrast, which could be influenced by how I develop and scan the film. But developing and scanning won’t affect the band order, so that’s what I focus on. For example, if blue were lighter than green on one film and darker than green on the other – as was the case for another film I tested, Argenti Nanotomic-X – I would know that the difference must be down to spectral sensitivity, and not developing or scanning.
In this case, the band order for both films is the same (from light to dark: white, yellow, blue, green, grey, red, black). So other than the extended red sensitivity, which doesn’t show up in my test because I’m not using IR or near-IR light, Noa Noa’s spectral profile seems similar to that of Ilford HP5.
Final thoughts

If you’re into unusual and obscure films, Noa Noa is definitely worth trying. It has extended red sensitivity, plenty of latitude, and a gritty texture with prominent grain. Besides, it’s not every day that you get to try a discontinued East German traffic-surveillance film. It’s had a good run over the years, sold as Orwo TC27, Maco Cube 400c and Rollei R3 – but it’s current avatar, Argenti Noa Noa, may well be its swansong. Shoot it while you can!
Share this post:


Comments
John Fontana on Argenti Noa Noa B&W Traffic Surveillance Film Review – by Sroyon
Comment posted: 13/09/2022
Comment posted: 13/09/2022
Vlad Serebryany on Argenti Noa Noa B&W Traffic Surveillance Film Review – by Sroyon
Comment posted: 13/09/2022
Comment posted: 13/09/2022
Comment posted: 13/09/2022
Johan on Argenti Noa Noa B&W Traffic Surveillance Film Review – by Sroyon
Comment posted: 14/09/2022
Comment posted: 14/09/2022