I’m an Albuquerque-based photographer who has dabbled for years with not only film cameras but also paper negatives and pinhole cameras.
Going back to the mid-1990s, I had set up a darkroom in my garage and was beginning to explore the use of black and white photo paper as an in-camera film. After I had built several smaller box cameras from cardboard I wanted to build a larger pinhole camera with a format size of 8 inches square, exposed onto 8-by-10-inch photo paper.
I decided making my own camera would satisfy the urge for hands-on creativity, but at that time I lacked access to 8-by-10-inch sheet film holders, which I found to be excessively expensive. Yet I still wanted to have more than one sheet of paper available for use during my outings, and thought that having to reload such a large camera in a changing bag would be unworkable while out in the field. What was I to do? I spent months thinking about this problem.
What I wasn’t aware of at the time was that a solution to this problem had already been invented in the 19th century. Eventually I came up with my own version of a falling plate camera, that uses matte boards as film holders.

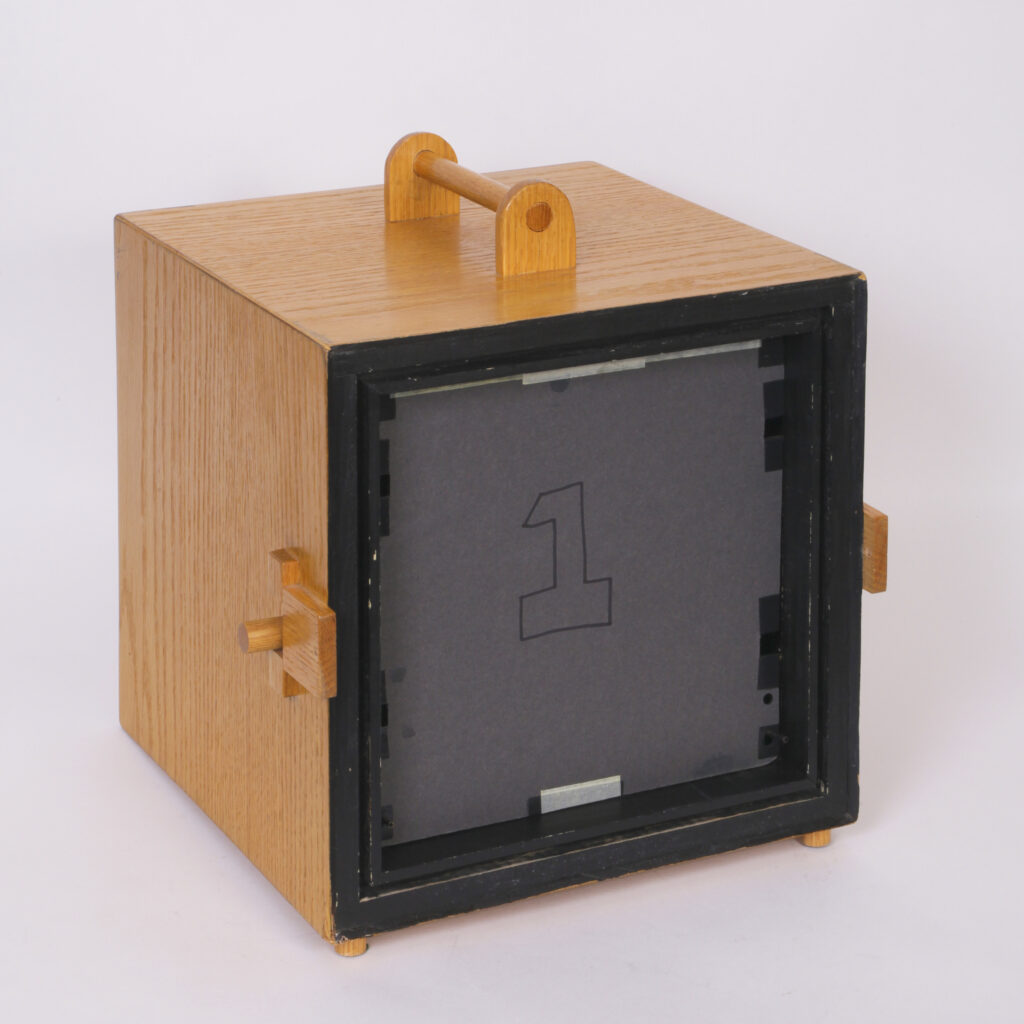
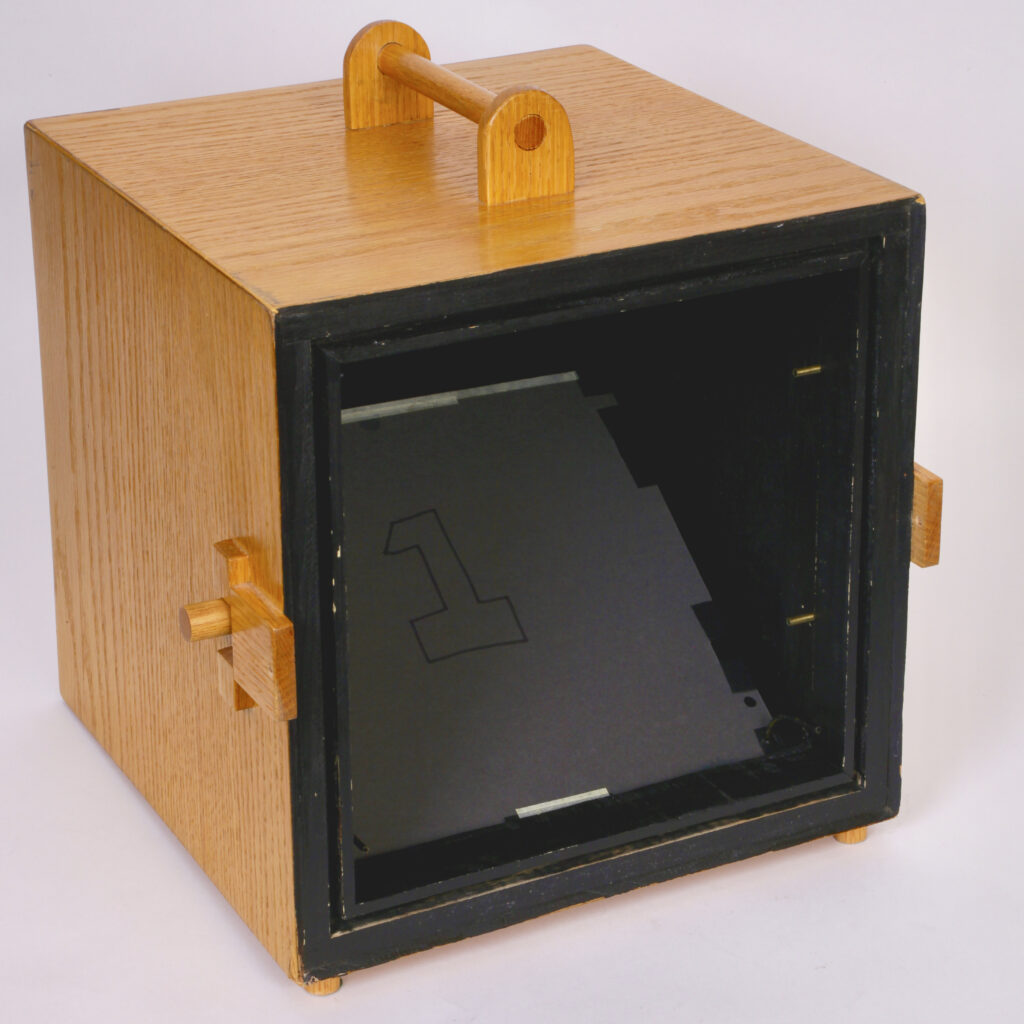
The camera was built around a frame of poplar, then sheathed in thin oak plywood veneer. The falling plate mechanism uses two knobs, one on each side, which operate a set of pins that serve to hold the front-most film holder in place.
A pair of notches in the sides of the film holders interact with the pins such that when it comes time to drop the front holder, the knobs are slid and the front-most holder falls face-down into the box, out of view of the pinhole, revealing the next film holder ready to be used. The camera is capable of holding up to eight of these film holders at a time.
In use, the camera is rather bulky and heavy, thus requiring a sturdy tripod. My Manfrotto was insufficient for the task, so I built a primitive but sturdy wooden tripod sufficient to use the camera in the field. Thus, the big box camera was ready, I only needed the courage to take it out into the scenic landscape of my home state of New Mexico.
To achieve successful exposures the effective photographic speed of the paper needed to be determined, which I found using empirical testing to be around ISO 3-6, depending on the light. At that time I was using Ilford resin-coated multigrade paper, whose image contrast varies depending on the color of light. I would eventually discover this to be a problem when making exposures in high contrast daylit scenes, with the blue and UV of daylight activating the high-contrast part of the emulsion; but at that time I was a novice and didn’t know the cause. Later, I would discover the use of fixed-grade paper, preflash exposures and dilute development to control excess image contrast. But at that time, my naivete led me to go out time and again to shoot more paper.
Once I figured out the speed of the paper, I had to determine how to meter the scene. The problem was that my camera had an aperture of F/456 but my light meter only went up to F/128. So I figured out how to apply a correction factor to the meter reading. I would measure the scene with the meter set to the paper’s ISO and reference the exposure time for F/128, then multiply that time by the correction factor to determine the actual exposure time.
Unlike sheet film, because photographic paper doesn’t have the problem of reciprocity failure I didn’t need to apply any further adjustments to the exposure. Typical exposure times in bright sunlit scenes were around 1 to 2 minutes, whereas under cloudy conditions exposures could extend to five or tens minutes, or even longer. I eventually learned that browns and reds don’t render as bright on paper, thus I would adjust the working ISO up or down as the subject color dictates.
Of course I also had to compose my images in order to have any chance of success, but these kinds of cameras lack any way to directly view the image. The solution I chose was to use the edges and corners of the box to work out the horizontal and vertical limits to the field of view. This method turned out to be sufficiently accurate despite how primitive it might seem. On later box cameras I would employ viewing dots, which work even more effectively.
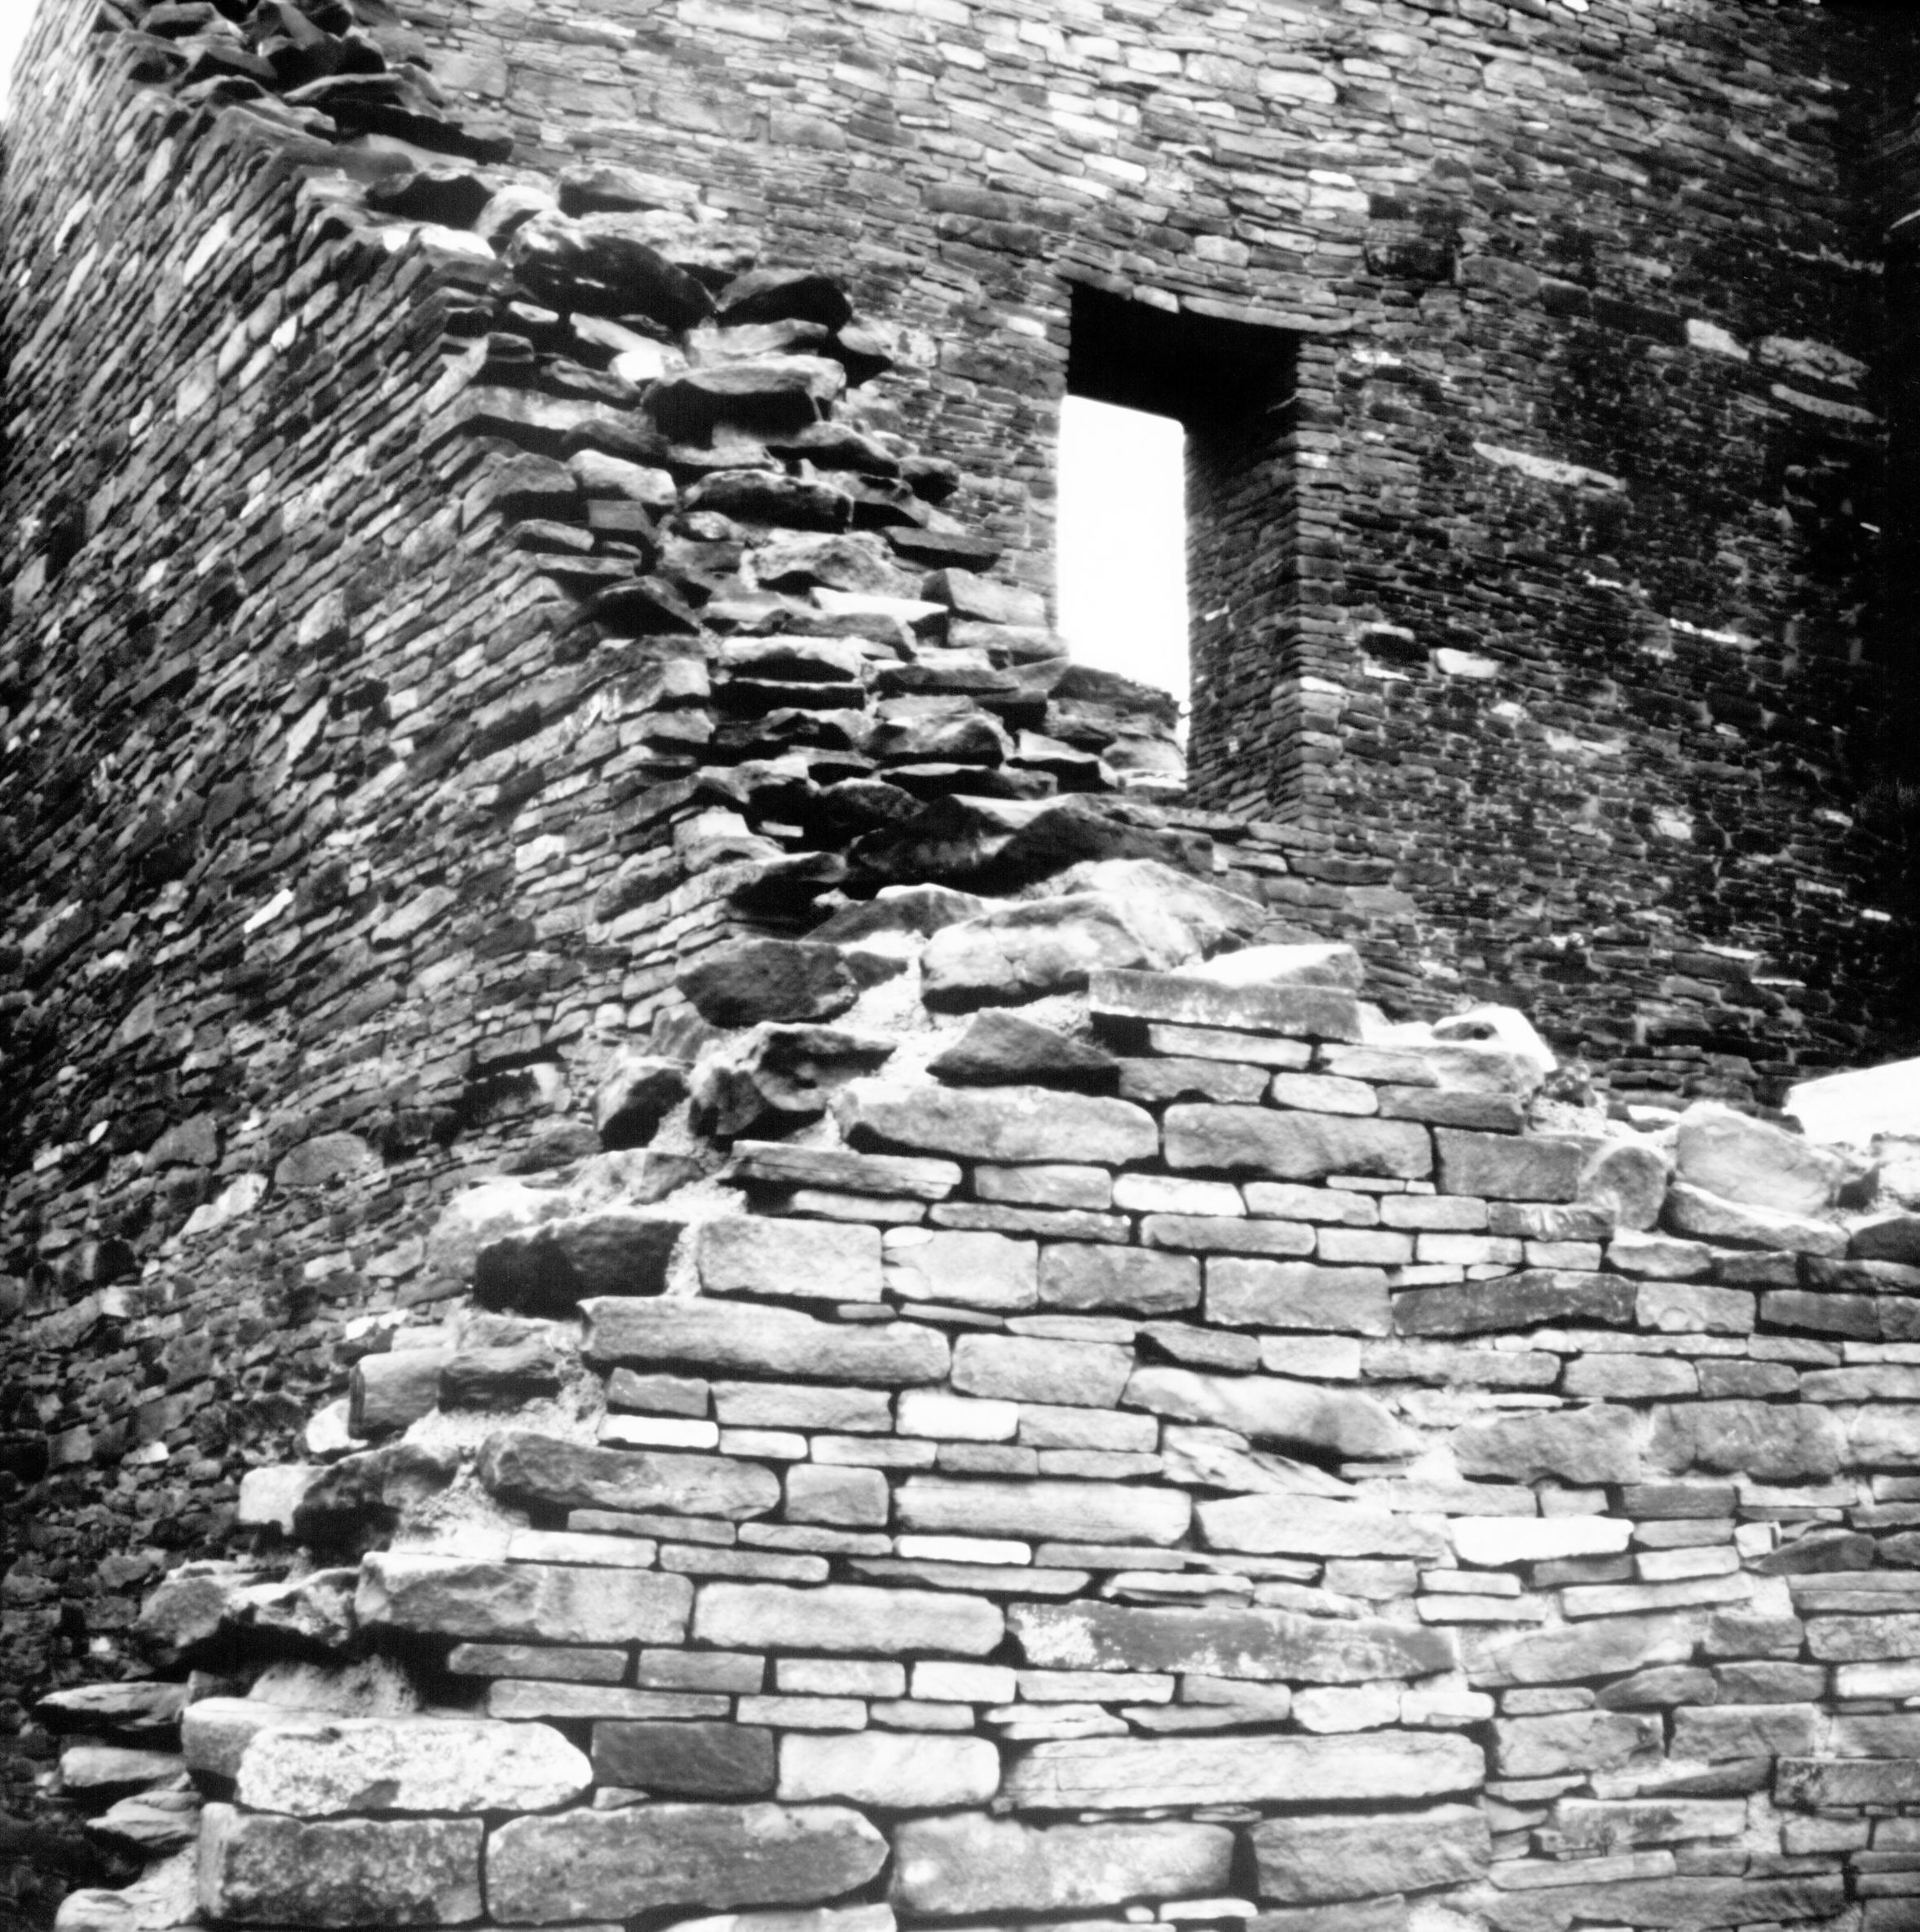
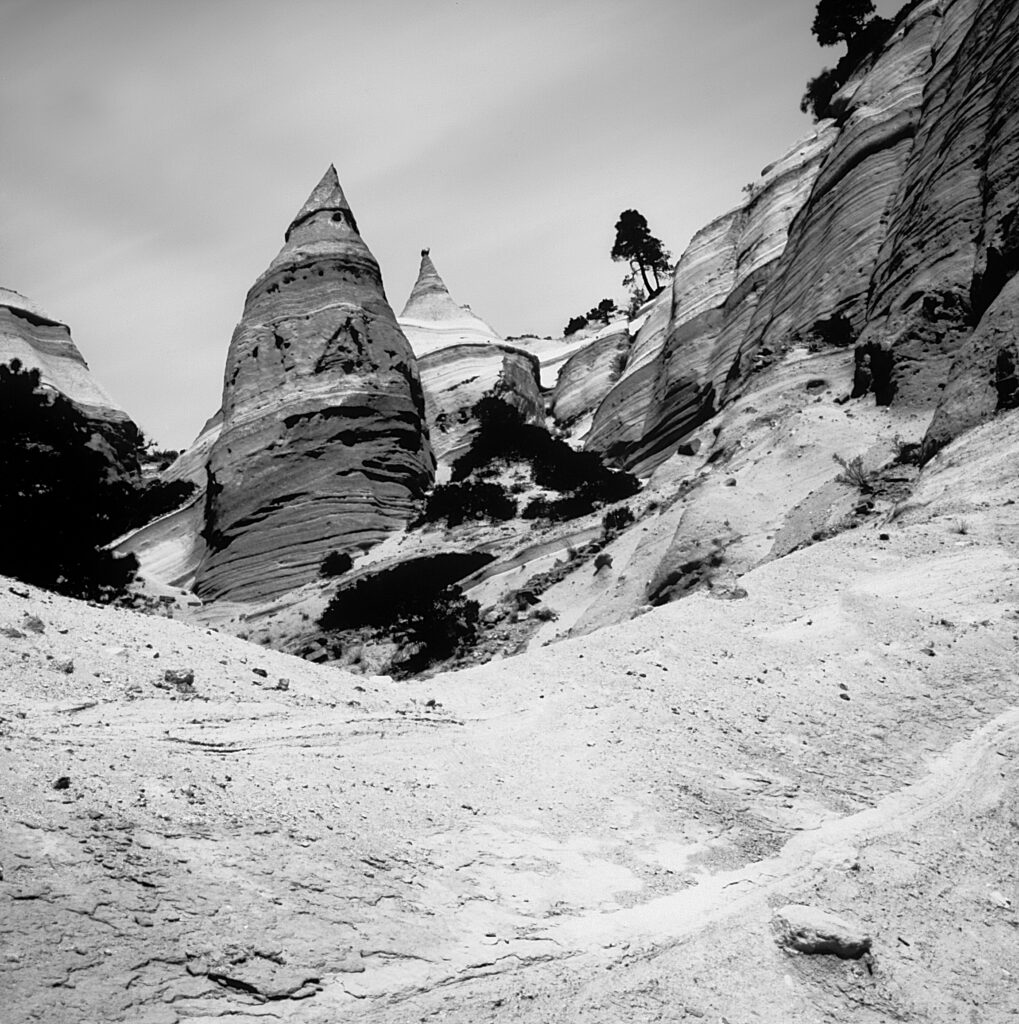
One day, sufficiently practiced with the big camera, I decided a day trip to Chaco Canyon would be in order. The drive traverses many miles of rough dirt roads to arrive at the remote site in northwestern New Mexico, awe-inspiring in its isolation and rugged beauty.
Chaco Culture National Historical Park is the site of a series of ancient structures that date back to between AD 950 and 1150, built by the predecessors to the Pueblo peoples. That day I made eight exposures with the camera, before making the long drive back home.

It wasn’t until the next day that I processed the negatives. When I saw this image come up in the developer tray, I was very pleased. Contact printed onto Forte fiber based paper, this image is of a view looking up at a window opening in the side of Casa Rinconada, the largest structure at Chaco.
Since making the big oak box camera I’ve dabbled with a number of other pinhole camera designs, including others with falling plate mechanisms. I’ve also refined my paper negative process in an attempt to better fit a wide scene brightness range onto the limited dynamic range of photo paper. Yet despite its rather primitive appearance, this print from Chaco Canyon remains one of my favorites, that I keep proudly on display, a constant reminder that I need to get out more often and do this once again.
Share this post:


Comments
Y on Pinhole Photography in Northwest New Mexico
Comment posted: 14/01/2026
Comment posted: 14/01/2026
Andrew on Pinhole Photography in Northwest New Mexico
Comment posted: 14/01/2026
Thank you so much for sharing.
P.s- how do you make the pinhole, and how small is it?
Comment posted: 14/01/2026
Charles Young on Pinhole Photography in Northwest New Mexico
Comment posted: 14/01/2026
I Made My favorite pinhole camera from a circular/cylindrical peanut can. Diameter about 9 inches, height about 4 inches. Pinhole is mounted in the side of the can. The pinhole itself is in metal from a soda can.
(Heat the metal first to soften it.) The "pin" is an acupuncture needle (.2 mm diameter) or a hypodermic needle (used for cat insulin). Diameter about .3 mm
Instead of "plate holders" I just make multiple cameras. Exposure is determined experimentally. I load the camera with generic enlarger paper. Typical exposure time in mid-day sun is about 15 seconds.
Next project will be to write this up for 35mmc.
Chuck
Comment posted: 14/01/2026
Art Meripol on Pinhole Photography in Northwest New Mexico
Comment posted: 14/01/2026
Comment posted: 14/01/2026
Ed Currie on Pinhole Photography in Northwest New Mexico
Comment posted: 14/01/2026
Comment posted: 14/01/2026
Alan Withington on Pinhole Photography in Northwest New Mexico
Comment posted: 14/01/2026
Comment posted: 14/01/2026
Zheng Li on Pinhole Photography in Northwest New Mexico
Comment posted: 14/01/2026
Dave Powell on Pinhole Photography in Northwest New Mexico
Comment posted: 14/01/2026
Comment posted: 14/01/2026
Alexander Seidler on Pinhole Photography in Northwest New Mexico
Comment posted: 15/01/2026
Gil Aegerter on Pinhole Photography in Northwest New Mexico
Comment posted: 15/01/2026
Bill Brown on Pinhole Photography in Northwest New Mexico
Comment posted: 15/01/2026
Christopher Collins on Pinhole Photography in Northwest New Mexico
Comment posted: 15/01/2026
Thank you Joe and love your stream on Flickr too.
Wishing you all the best
Christopher
Comment posted: 15/01/2026
Alexander K on Pinhole Photography in Northwest New Mexico
Comment posted: 15/01/2026
Comment posted: 15/01/2026
Paul Taylor on Pinhole Photography in Northwest New Mexico
Comment posted: 16/01/2026
Paul Quellin on Pinhole Photography in Northwest New Mexico
Comment posted: 09/04/2026