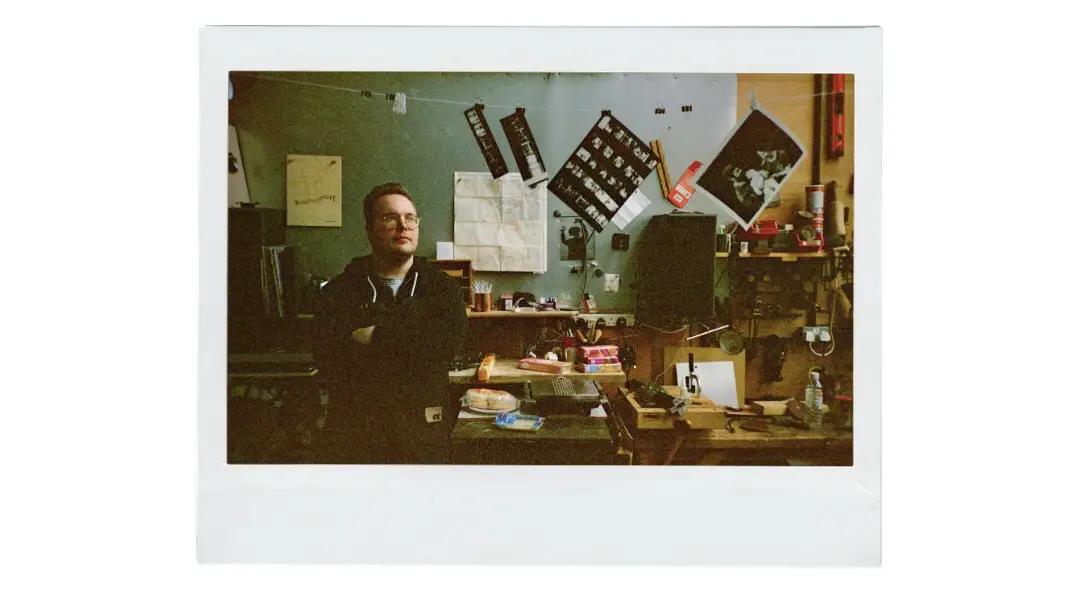
Well, it’s been quite a journey down the rabbit-hole of film photography! Can you believe it’s been over a year since I first started? I’ve gone from writing ‘5 Frames…’ articles about my early film experiences to exploring and comparing different film stocks. Along the way, I’ve shared my successes and failures, and now I’ve reached a significant milestone – I’ve finally tried darkroom printing! The whole process has always fascinated me, and thanks to my local film photography group – NWFP – I’ve had the chance to connect with a diverse group of people who are experienced in ‘the darkroom arts’.
My first introduction to the process of darkroom printing was via Ilford Photo’s YouTube channel, and the excellent series of videos they did during Covid-19 lockdown with Rachel at Little Vintage Photography. If you haven’t watched them, they’re worth a look as she’s very knowledgeable and a great teacher! I’d also had some fantastic chats with David Fulford of Black Hill Creative during our recent studio sessions and photo walk, and he was kind enough to invite me over to his place to introduce me to darkroom printing!
What was the plan?
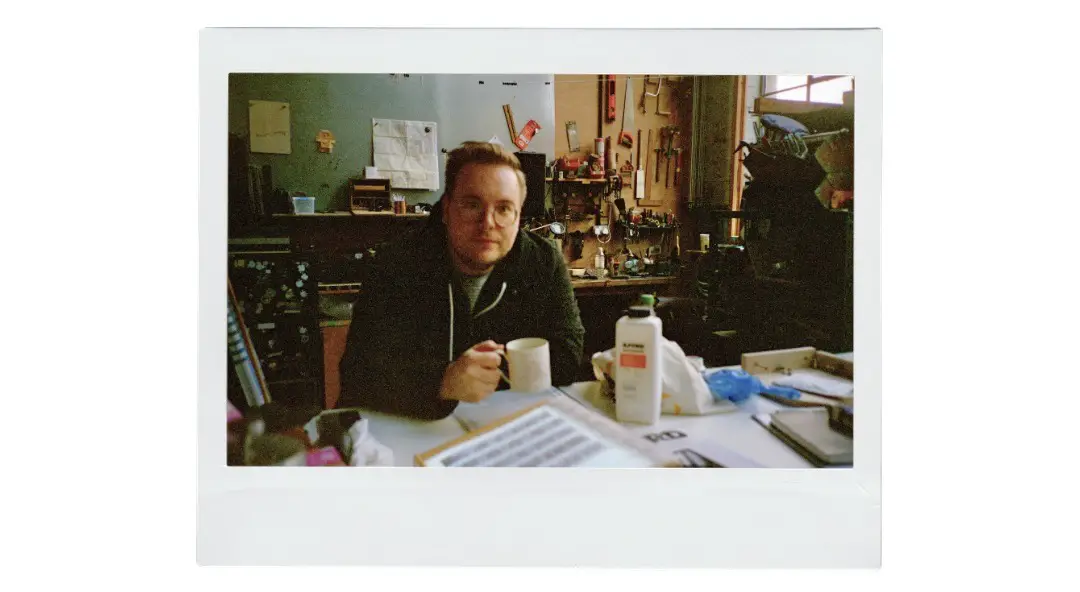
I took a day off work to drive over the Peaks to the studio at The Sculpture Lounge, Holmbridge Mill. It’s a lovely journey from Manchester, and it helped that on that day the Autumn sun was glowing over the forests, reservoirs, and hills nearby. When I pulled up to the old converted mill we went straight to the important stuff – coffee and a croissant! After a bit of a chat we talked about the format of the day, and what I’d like to get out of it.
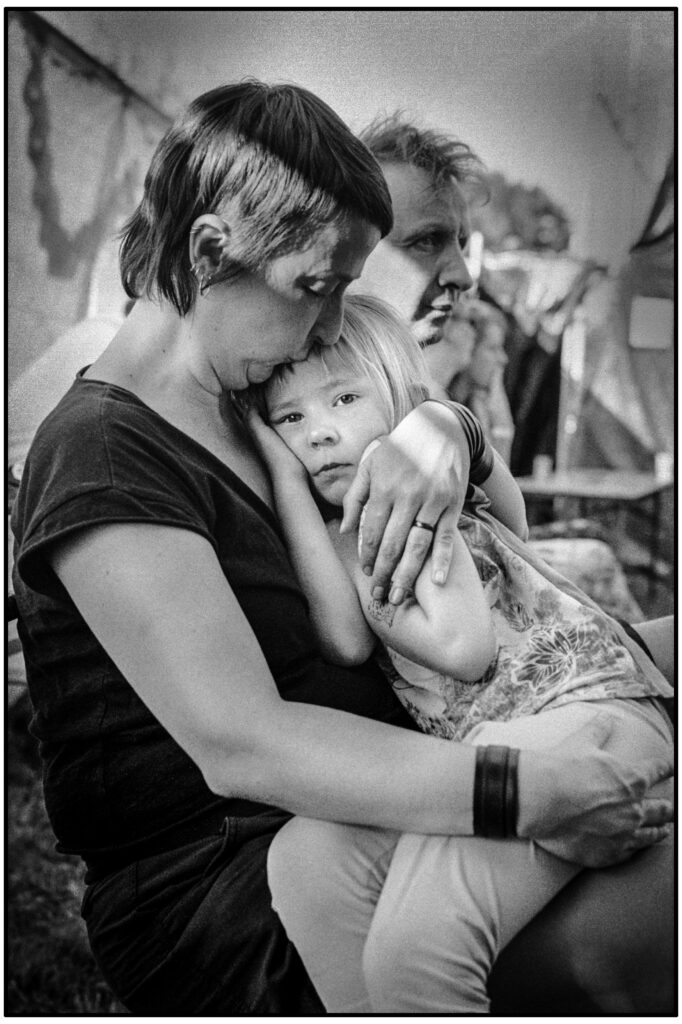
So, I’m actually a relative newbie to this whole film photography thing, but I’d still love to share my experience with you, especially to encourage those of you who are looking to take up this hobby. The plan we landed on was to aim to make one contact print, and a couple of full frame prints by the end of the day. I had brought a roll of Ilford Delta 100 I’d taken of my old school mate, his wife and their newborn daughter, as well as a roll of Ilford Ortho Plus that I’d taken during a recent trip up to the Lake District. For obvious reasons I won’t be sharing photos of the new family, but the process for both 35mm films were the same.
I felt ok about learning the basic darkroom printing method by doing a contact sheet, and that is something that you will also be able to do at your local community darkroom, but choosing just one or two images from each roll, that was hard! David was excellent in advising me which ‘exposure’ would be easiest to print, as we reviewed the negatives laid out on the lightbox. In the end I chose a cute picture of the new family, and one of a particularly majestic looking tree on a sunny autumn day. Then, it was time to venture into the darkroom…
Making a contact print.
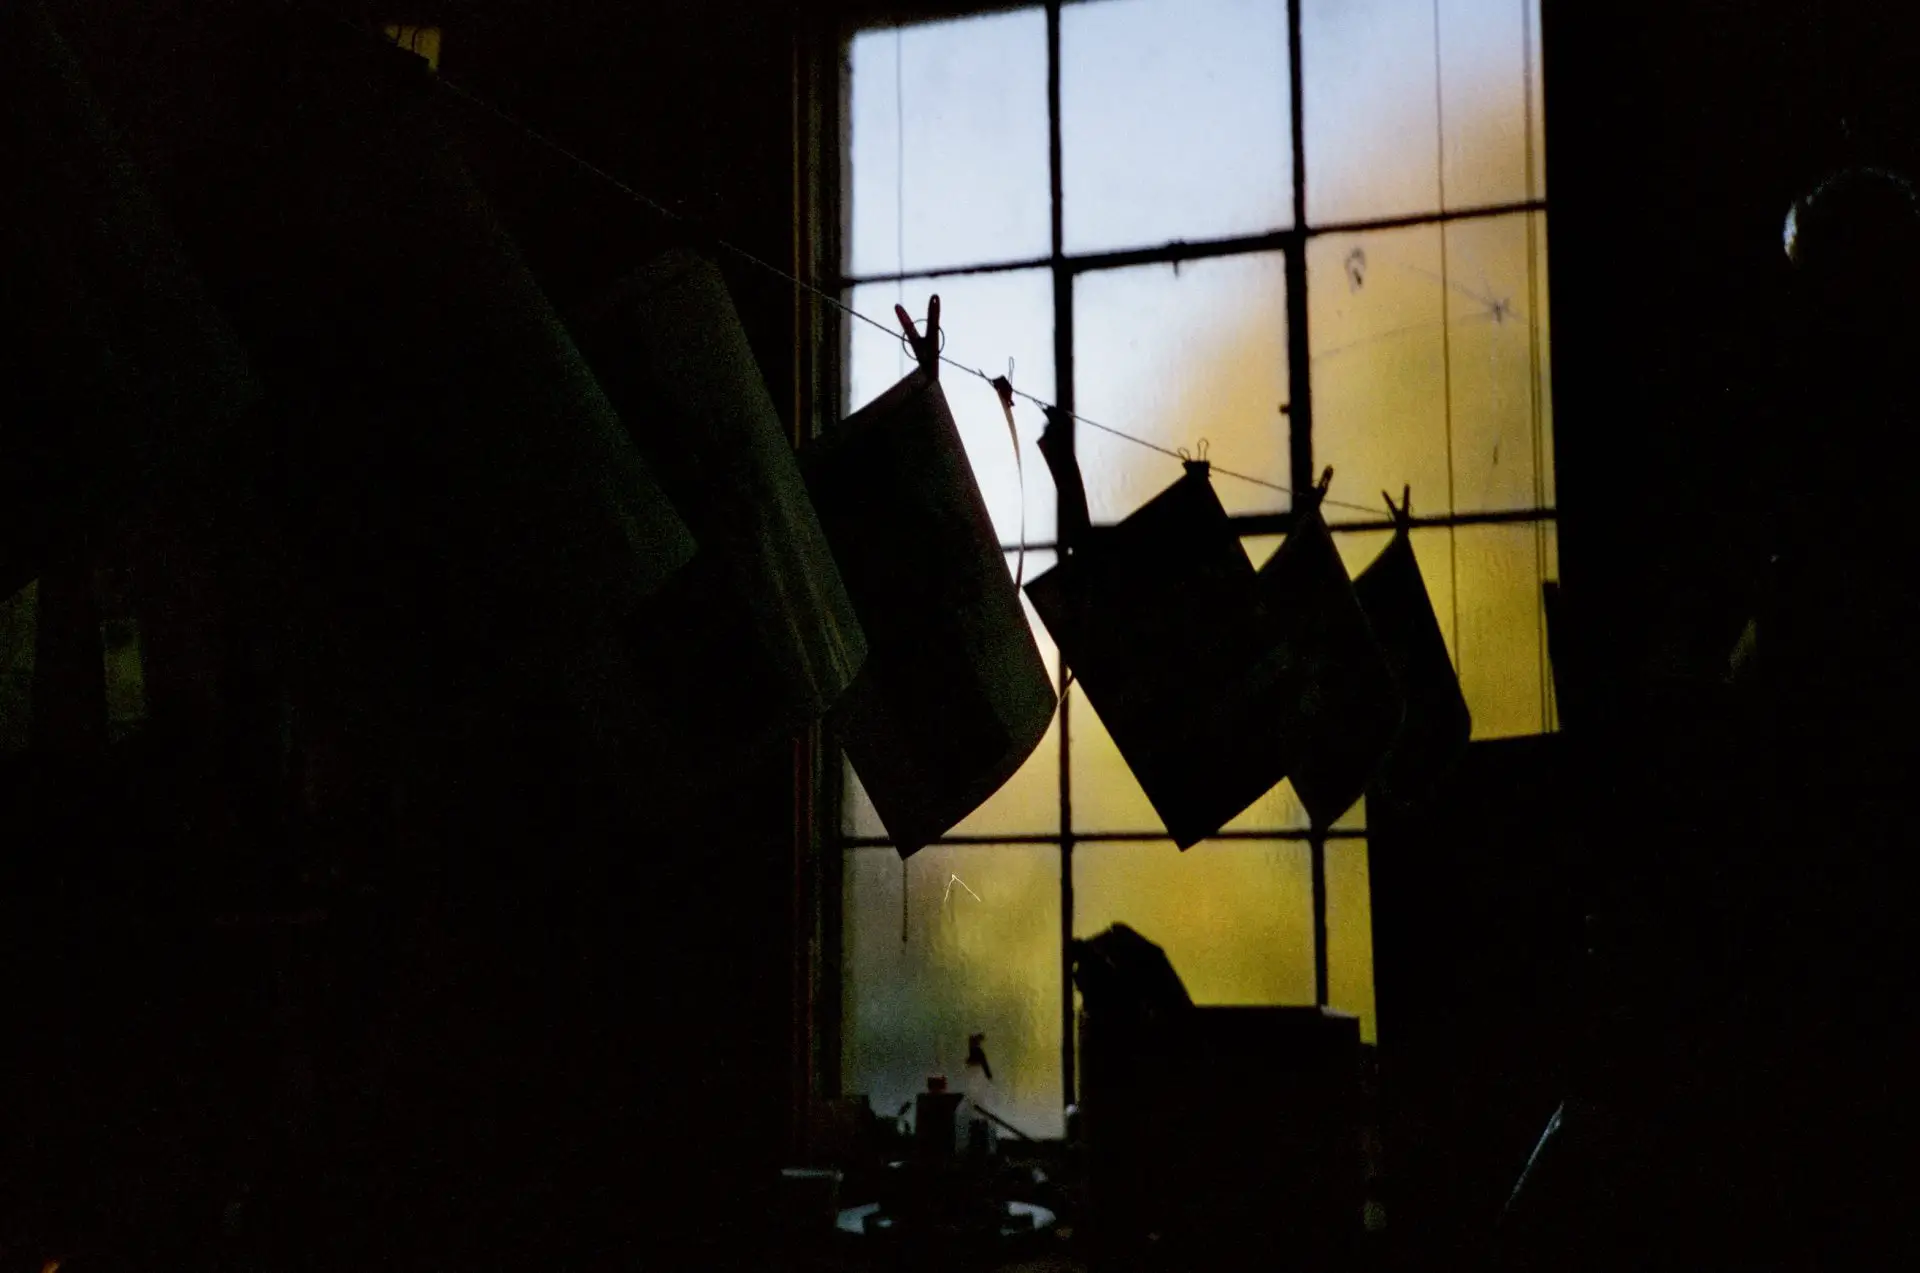
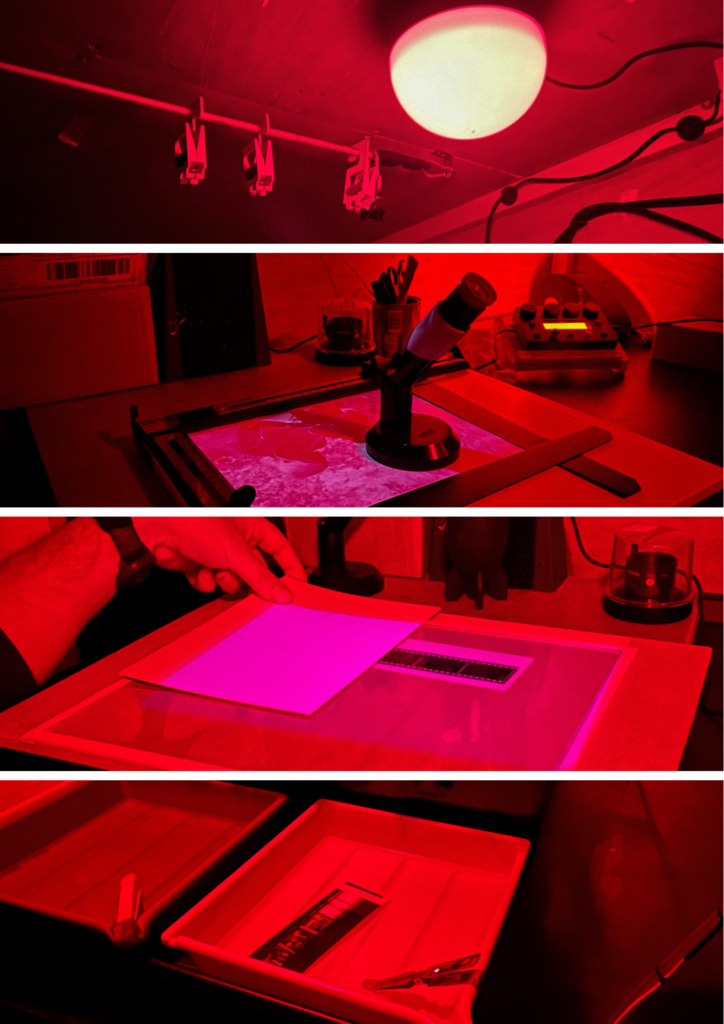
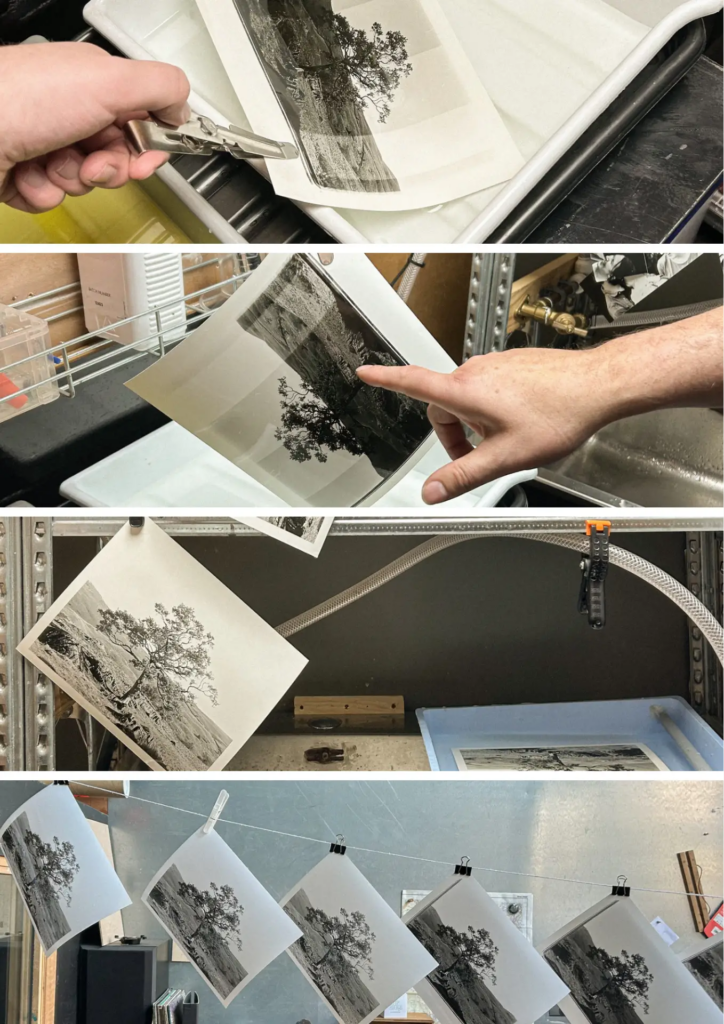
Darkroom Printing is sort of like bringing together the process of self-developing film and DSLR scanning into one. You combine the projection of your image, with developing the photographic paper. However, the first stage (and a great way to practice!) is to make a contact sheet. So first we made sure that our paper developer, stop bath, and fixer were all mixed and set up in trays to use. We then tested the chemicals and our exposure time using a test strip of darkroom paper. Using the Intrepid Compact Enlarger we made exposures of light in increments of 5s to see what length of time we needed to expose for. Then, for a contact print, we simply laid out the strips of cut film negative on top of a sheet of Ilford Multigrade FB darkroom paper, placed a clear glass mask over the whole thing to keep it flat, and exposed the negatives onto the paper. The development instructions came with the darkroom paper, and so we followed the times provided for each part of the process – developer, stop bath, fixer, and then finishing with a wash. It feels very odd to put paper into liquid! That was something that took some getting used to, let alone then hanging that paper up to dry.
Then finally there they were… image after image of my oldest mate, his wife and their newborn daughter. How surreal to see the whole roll on one sheet of photographic paper hung up on a washing line in the studio! However, seeing the whole collection of images you’ve made for the first time is such a great feeling! It’s incredible how going through each step of the photographic process adds so much fulfilment to finally seeing the finished product. Now that I’d got the hang of it, I was eager to make some single image prints for my friends and my family. So after a bit of lunch, another cup of coffee, and a chat – we delved back into the darkroom once again…
Printing a single image.
So, after practicing with contact printing we then chose the range of exposure that we felt suited and started to make my first single image prints in the darkroom. This meant picking individual frames to put in the enlarger holder, and so I chose a family picture to gift to my friend, and a single frame of a dramatic winter tree taken near Staveley in Cumbria. The first difference when printing a single image was that I had to work harder on finding focus before exposing the print. It’s really fascinating to use the ‘micro focus finder’ on top of the projected negative to identify the grain and truly understand what I’m searching for. It takes some getting used to, but once I was confident (having checked with David!) that I’d nailed focus, I did another test strip using the same technique as before. Once we had the test strip dry on the line, we looked at it under natural light and picked a couple of specific exposure times that we thought would work. Having two people in a darkroom is kind of like being in a kitchen and cooking together – you really get to know each other, haha! I must say that David was incredibly patient, encouraging, and truly supportive when it came to my mistakes. We even had a great discussion about the tonality I wanted for the final print, after going through some test prints.
Now feeling like I had the method in hand, David left me to try some single image prints on my own. I kept going through his advice and tips in my head, including even the most obvious such as to always put away anything light sensitive before turning on the main light! I was also being cautious not to accidentally drip stop bath into the developer, or fixer into the stop bath, because I definitely didn’t want to ruin all the precious chemicals I was working with. Saying that though, there’s definitely no need to rush – take your time and savour every moment of the process. On this day when I tried my hand at creating my own prints, we had Radio 3 playing ever so softly in the background. It was just the most delightful way to unwind and let my creativity flow.
Why try darkroom printing?
No matter if we’re immersing ourselves in Adobe Lightroom or Negative Lab Pro for hours or spending our time in the darkroom with various filters and chemicals, by embracing these additional learning experiences, we can truly enhance our skills and craftsmanship. There’s a distinct sense of fulfillment in the entire process, from capturing the image, developing it, and finally getting that print in our hands. It’s quite rewarding to dedicate ourselves to creating a photograph from start to finish, without relying on the instant gratification of seeing it on a screen. Working in a darkroom to produce prints is truly a labor of love. I couldn’t believe how deeply touched I was when I laid my eyes on the photographs of my dear old school mate embracing his newborn baby. I had a fantastic experience trying darkroom printing for the first time, and I am very grateful to David for allowing me into his studio. I really suggest that if you can, you should check out Black Hill Creative or find a local darkroom and give this awesome process a try!
Do you remember the first time you tried darkroom printing? If you haven’t tried it, what do you think is holding you back? Let me know in the comments.
Share this post:


Comments
Ian Whitney on Trying Darkroom Printing for the First Time
Comment posted: 16/02/2024
Roger on Trying Darkroom Printing for the First Time
Comment posted: 16/02/2024
Gary Smith on Trying Darkroom Printing for the First Time
Comment posted: 16/02/2024
I'm 70 y.o. and I first experienced using a darkroom in high school in the early 1970's. Following high school I saved up from early jobs (while still living with my parents) and set up my own darkroom for doing b&w film and prints in a basement bathroom. It was great to be cut loose from having to send my film out. It was also somewhat freeing to be able to say: I've only shot 10 exposures, but I want to develop/print RIGHT NOW. Over the last couple of years I've wandered back to shooting film but I doubt that at this point I'll bother with developing/printing. Mostly due to space availability. I've looked into shared/community/club darkrooms but so far they don't seem practical (for me).
Peter Kay on Trying Darkroom Printing for the First Time
Comment posted: 16/02/2024
Dan Castelli on Trying Darkroom Printing for the First Time
Comment posted: 17/02/2024
I only spent 4 hours in my basement darkroom last week. A pesky snowstorm dropped 12" of snow @ I had to cut one session short to run the snowblower.
Working in the darkroom is part magic & interpretation of what you want out of the negative (Ansel Adams has a quote floating out there in space about that) and adopting habits and methods that are repeatable and consistent. Darkroom work is like printing a copper etching: the art is in the creation, but the skill in in the printing of the plate.
Good luck,
Dan Castelli