This is part three in a series, you can find part two here
I had a work trip to the Tokyo area recently – which meant I brought along my Nikon F2S with 50mm mounted and a 28mm shoved in my pocket. Together with one roll each of Kentmere Pan 100 & 400 in the other pocket I did some photo-walkabouts in the muggy Tokyo summer evenings. This sensation, the excitement of going out in a new place for the purpose of taking photos was heightened even more by the fact that I was shooting film. There’s the distinct feel of “making something” with film that I never really felt with digital. The irreversibility of it – if I forget what I’m doing and open the back of this camera it’s all over – is perhaps one part of it. Film is definitive in a way digital cannot be.
Philosophizing aside, it was a fun walk in a new city – I shot through two rolls that night, easily. So what to do next?
Amazon takes a long time to ship to Okinawa and there are only four dedicated photography stores (which are 90% digital/copy services at this point – not particularly useful to people like us). So having successfully developed B&W, how to scan them was the next leap. I could have used one of those aforementioned locations to scan, but having done “the hard part” (development) myself, I figured I might as well do the rest as well. I looked into scanning options and came up with two that made sense in my space-limited apartment –
- Buy a scanner (a flatbed of some kind – I had developed medium format aspirations by this point)
- Buy a DSLR scanning rig
I am shocked at how expensive purpose-made DSLR scanning rigs are. Most of them are 3D printed (read: made at the cost of a few cents per part if you discount R&D) or are otherwise incredibly expensive for what they are. After adding up the costs, it looked like DSLR scanning would cost just about as much as a flatbed scanner. I decided to trust the big corporate world and go that way. I ordered an Epson V600 and waited, all the while shooting roll after roll and building a backlog.
After three weeks, the big box finally arrived. And to my immense frustration, it seemed to have a bug. No matter which cocktail of drivers of any number of versions, I continued to get a “device cannot connect” error. Support even provided me a tool that clears the registry of all Epson software (starting fresh) and still came up with nothing.
I then repeated these attempts using other USB cables and other computers (my other obscure hobby is collecting old Thinkpad laptops – so there were plenty around). Still no luck.
This left me thinking something was wrong with the scanner itself (bad firmware?). Either way, I was incredibly frustrated and had wasted a whole day sitting in front of computers watching progress bars go back and forth. I returned the expensive paperweight and got my money back. Looks like it was time to DSLR scan.
I came across a cheaper solution – the Digitaliza from Lomography. Order placed – and then it shipped UPS, instead of USPS (I find many websites now no longer give shipping options – they just provide a “standard shipping” which does not describe what method is used). UPS can’t ship to foreign post office (FPO) addresses like mine – so the package got turned around. The good news is, when I let Lomography know, they reshipped via USPS, no questions asked and at no additional cost (great customer service!).
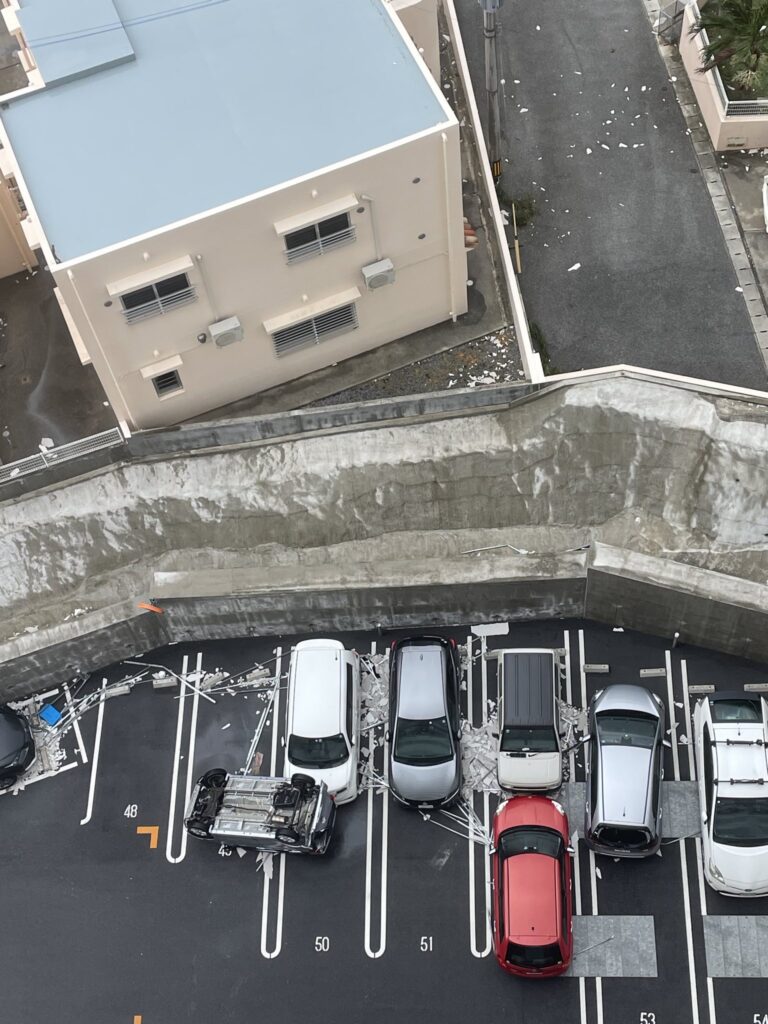
Then a typhoon hit a few days before the package was scheduled to arrive – delaying mail and throwing all sorts of things off. Like this small car:
But what this meant is that I have a growing number of home-developed negatives which are maddeningly unscannable. I had to know whether my development process was working, whether I was getting exposure right using my F2’s 50-year-old meter, etc.
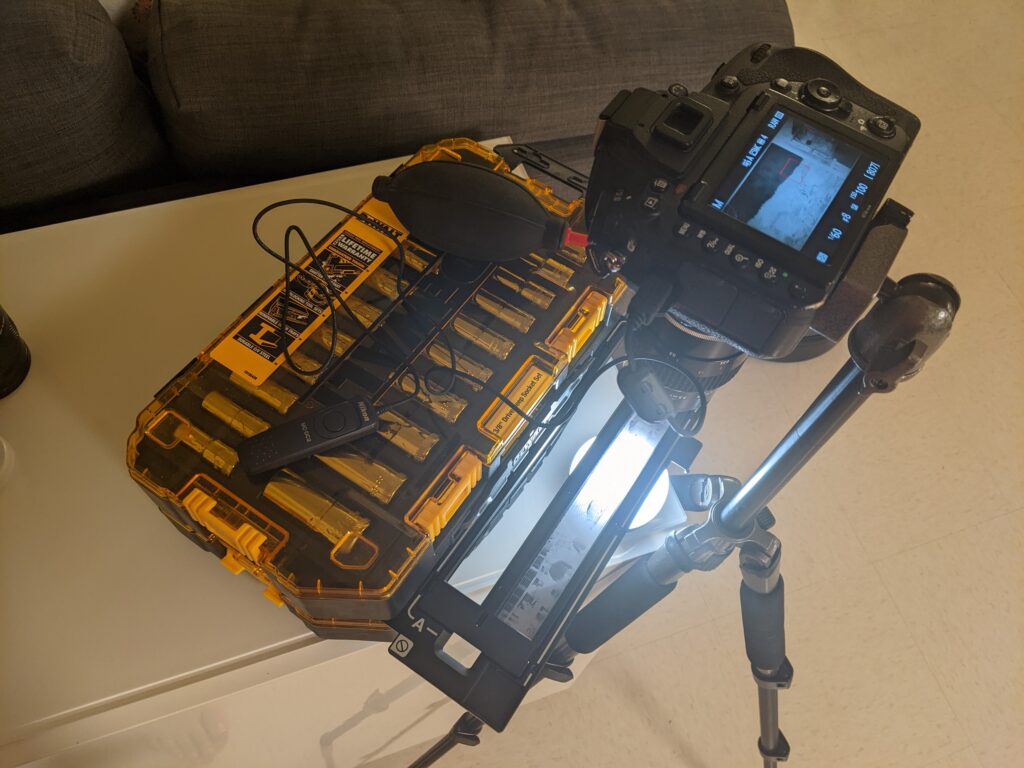
So I came up with a contraption.
I used an old laptop screen with a white background on maximum brightness as my backlight and tried taking photos with my DSLR on a tripod. I quickly found that without a diffuser, the laptop screen’s pixels are visible when photographed. So I had to improvise something. Regular printer paper was a bit too opaque, so, in desperation, I wandered through my house, looking for something that could serve.
Then I stared at the sheet of tissue-like paper that ironically came with the non-functional Epson scanner as part of the packing material. Onto the laptop screen it went.
And it kind of worked:
I’m still upset I didn’t quickly take a knee (or squat like a weirdo) to get the gentleman’s feet into frame. Candid shots of strangers is something I am not completely comfortable with. A few steps backward and I would be proud of this. But then I might have bumped into someone and caused a scene. Either way, opportunity missed.
Anyway, as far as my scanning contraption – the computer monitor screen shining through the fibrous tissue paper produced what could charitably be called “interesting” effects, that vary somewhere between looking like very expired film and/or water damage.
But you know what – I like them sometimes. The paper texture gives a moody, textured look to the photos.

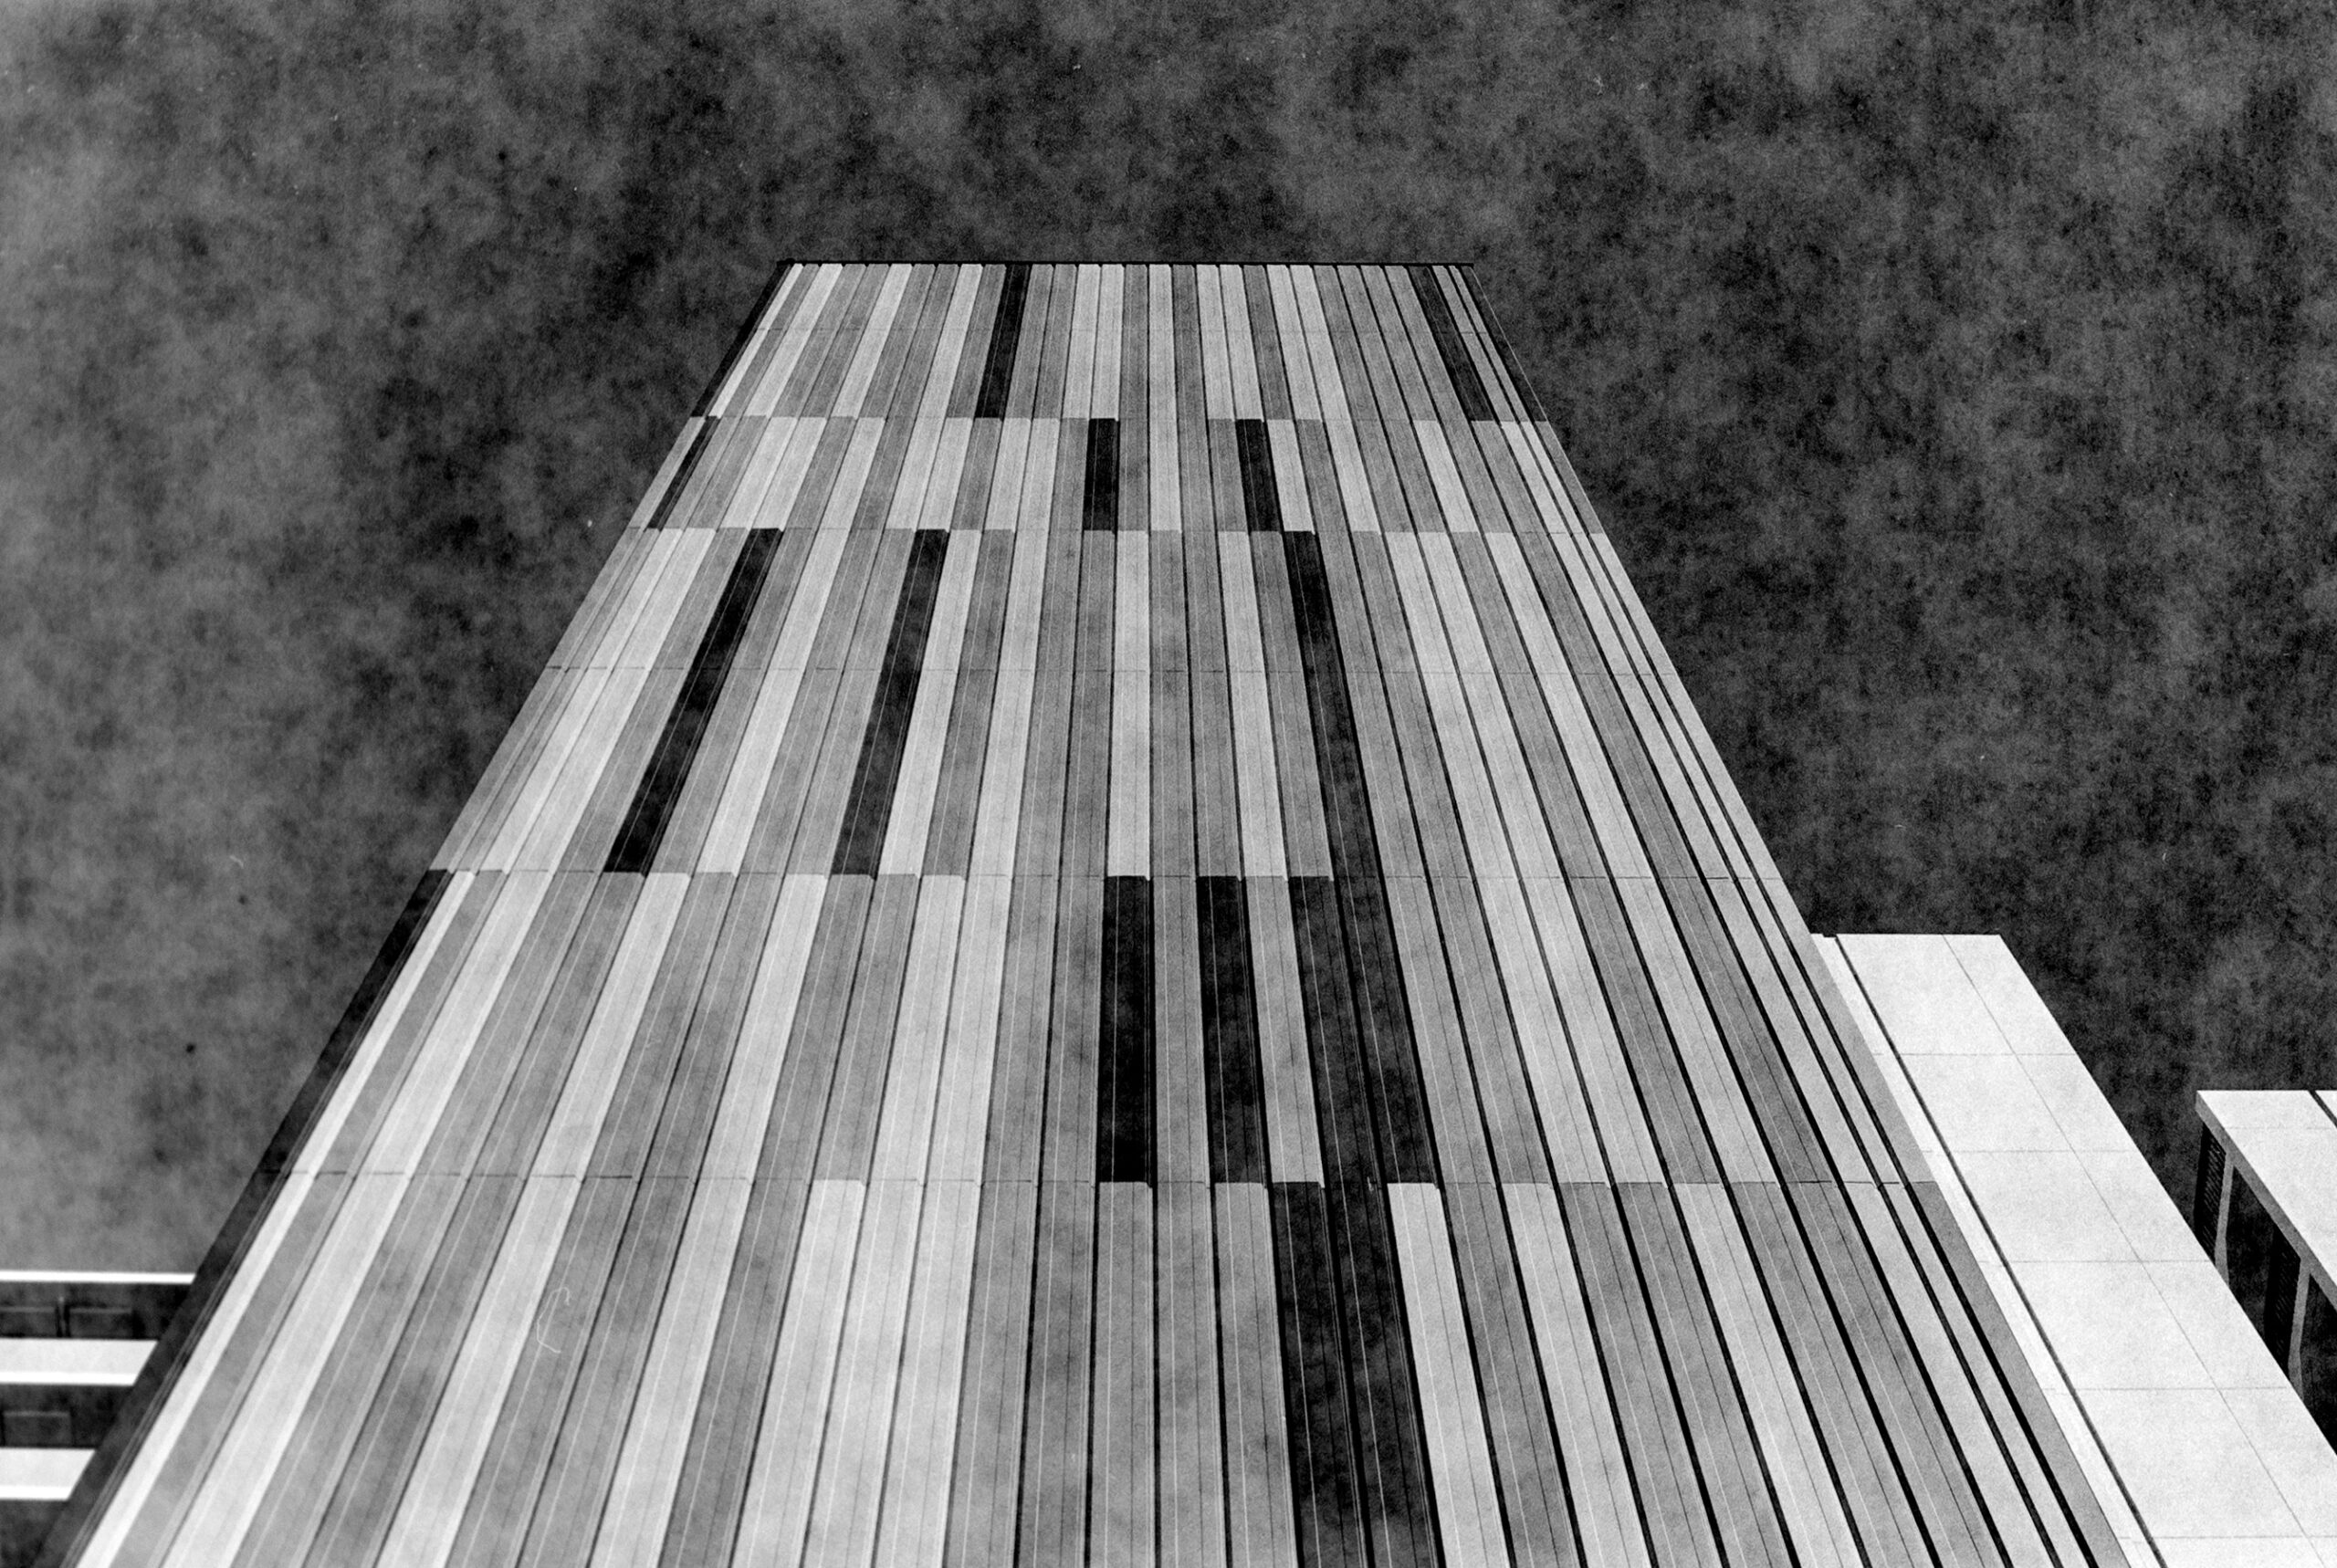
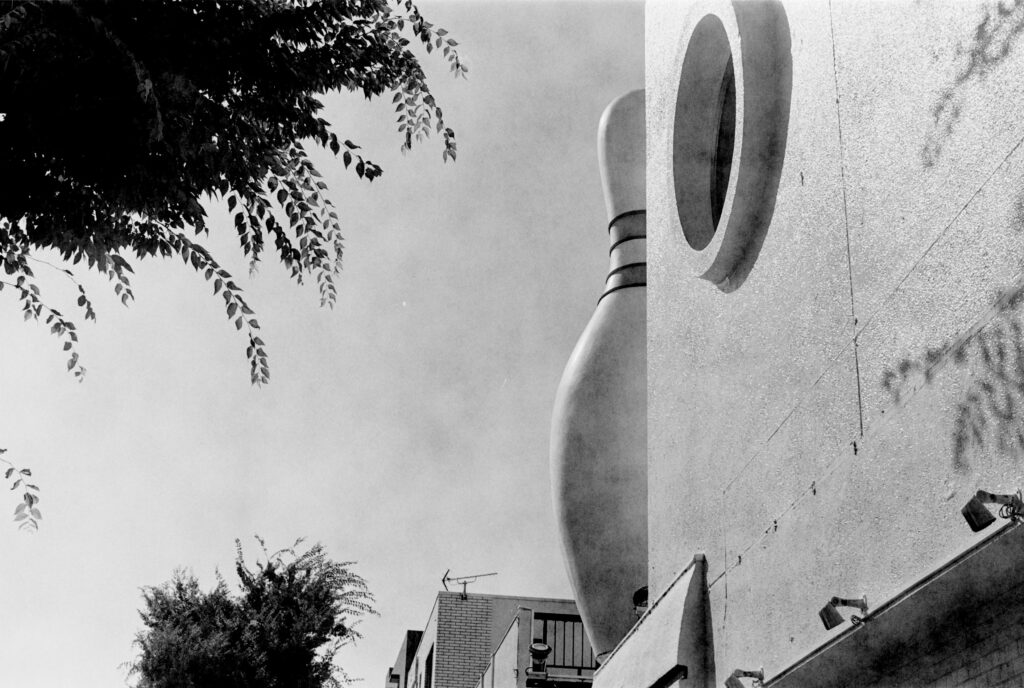
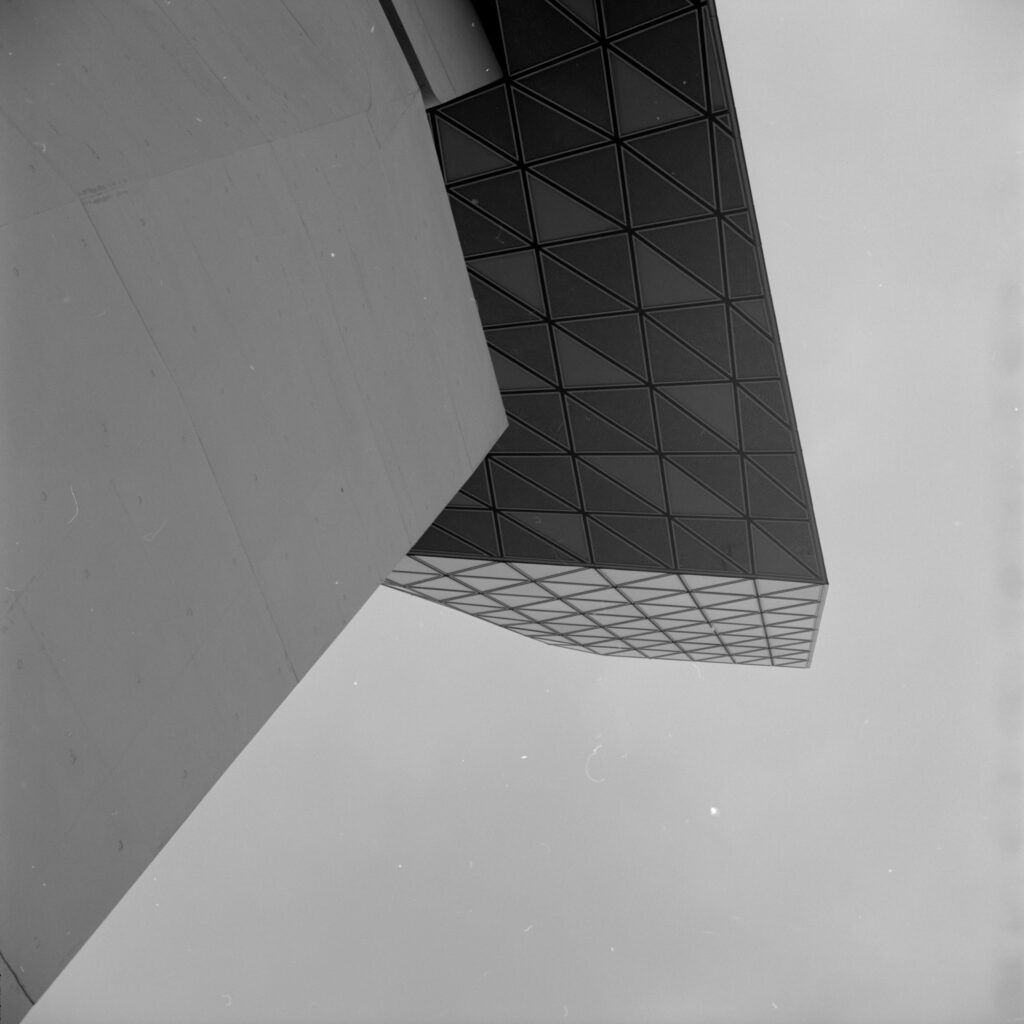
In this photo, the clear afternoon sky shows the paper texture very clearly. I can’t quite explain it – but I don’t hate it. It’s bad as a photograph – a representation of direct reality – but I find it interesting in an artistic way (does art have to be intentioned?). I picture a sort of spaceship entering a nebula. The latter interpretation is subjective and I don’t blame you if you’re not buying that.
I actually find this building fascinating, either way.
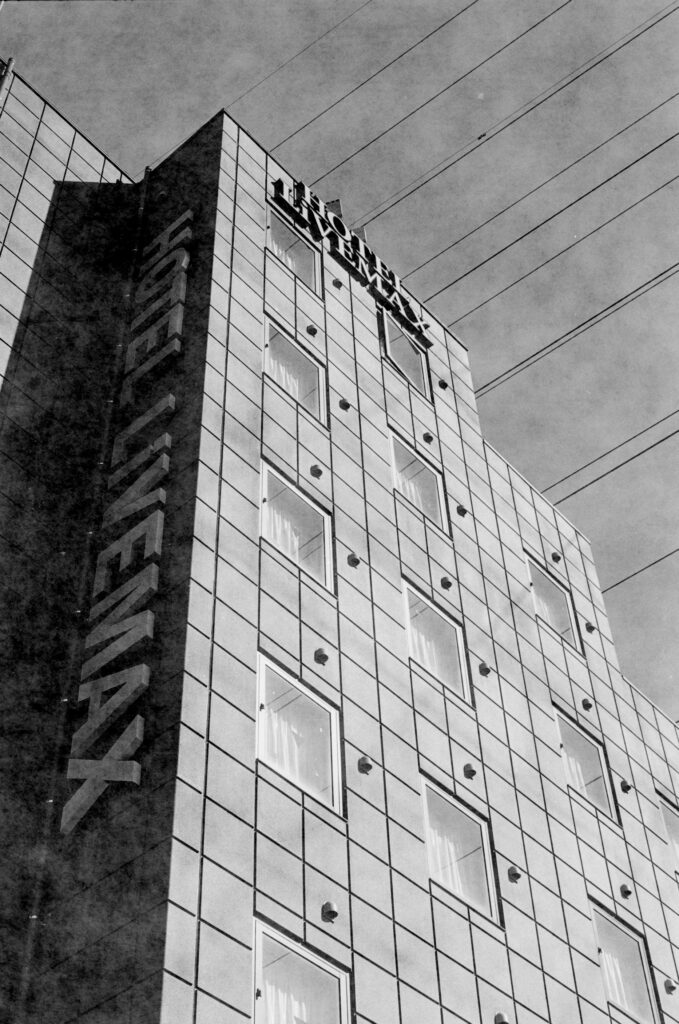
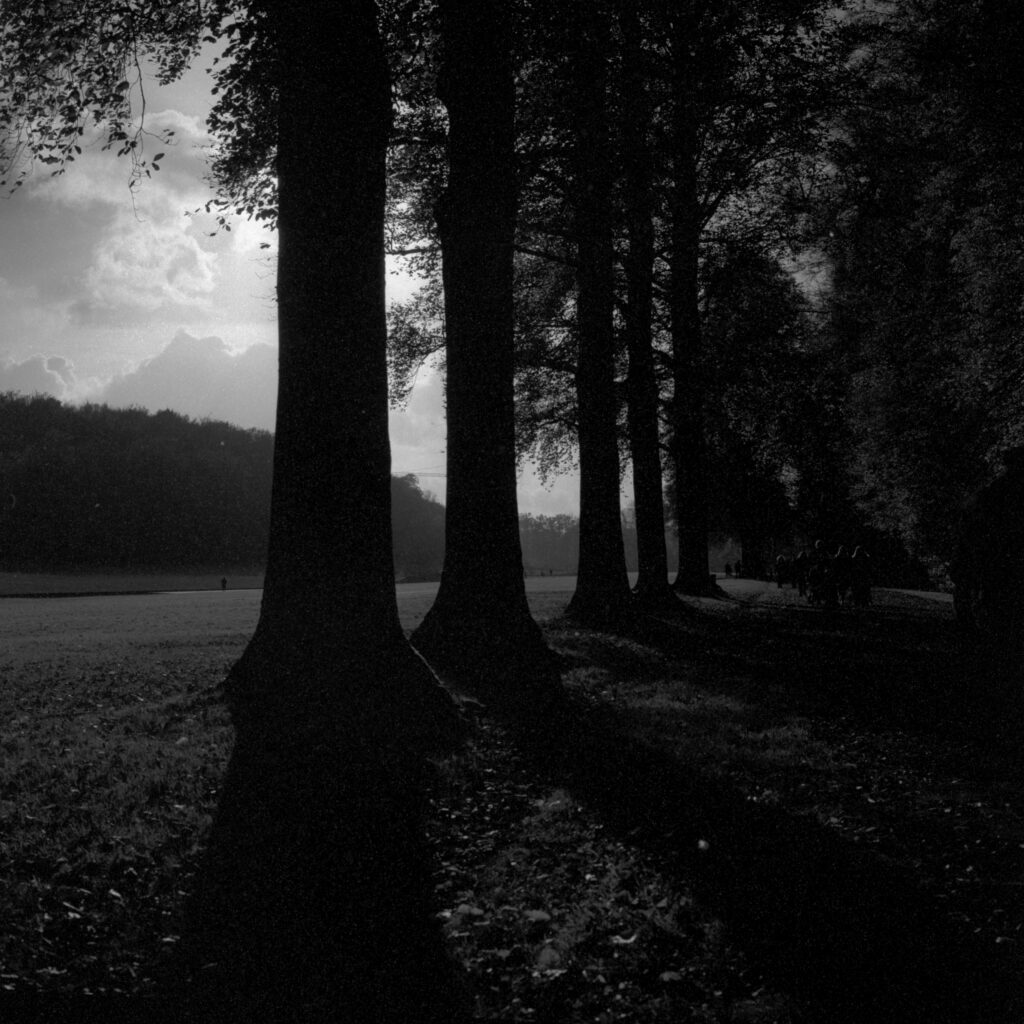
Another example of texture on a building, in shadow detail and in the sky. I really do enjoy the 50mm focal length for architecture – you can emphasize certain shapes and textures. In general the buildings loom overhead, giving them an ominous appearance that is to my taste.
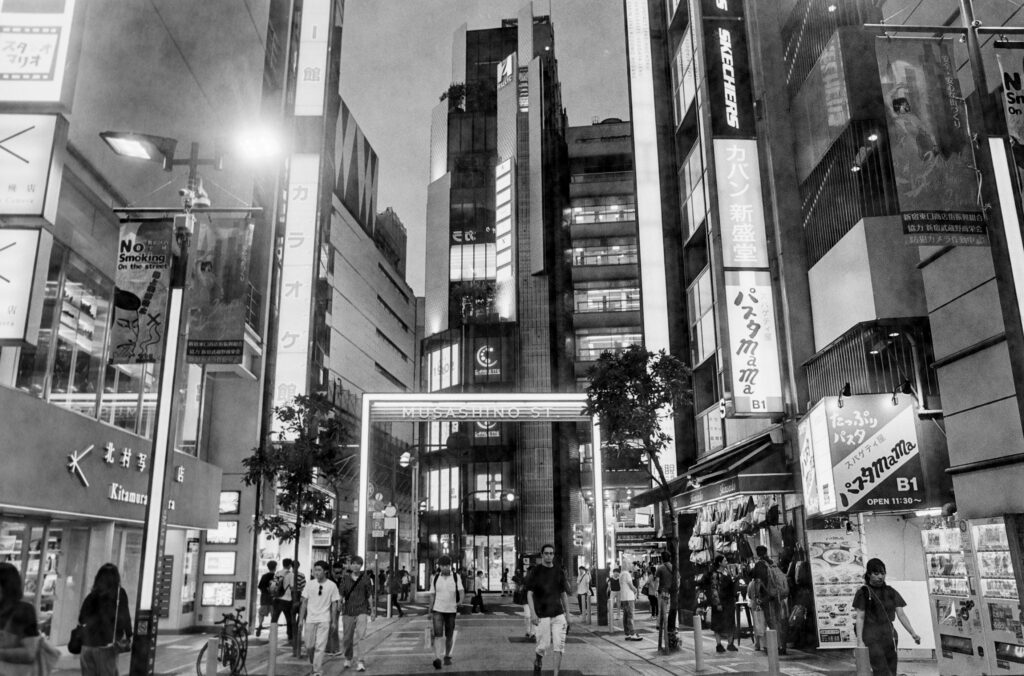
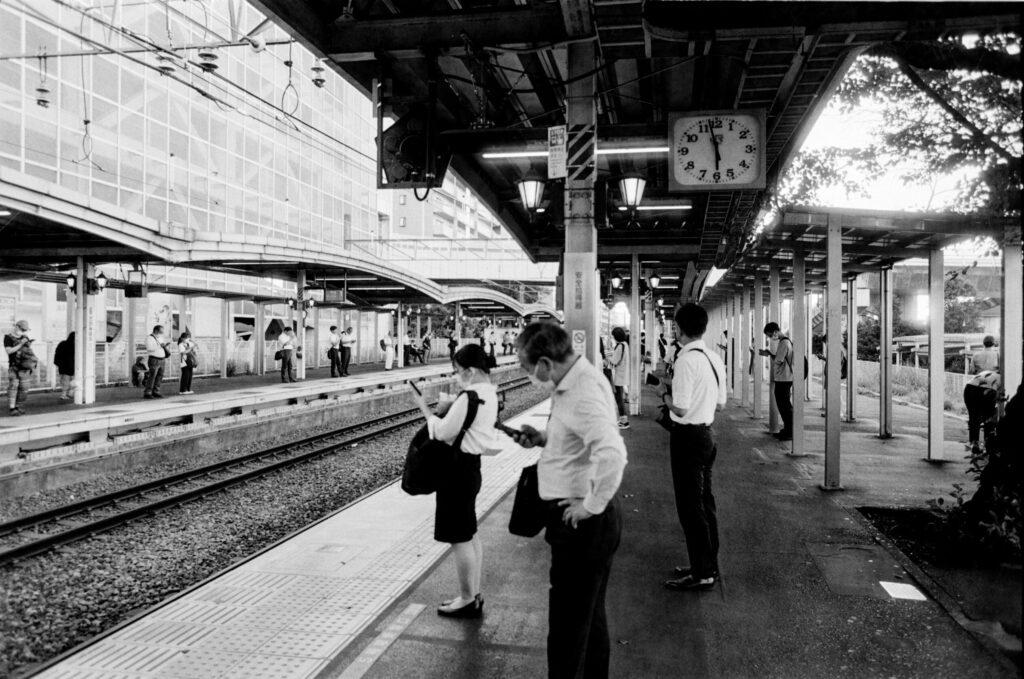
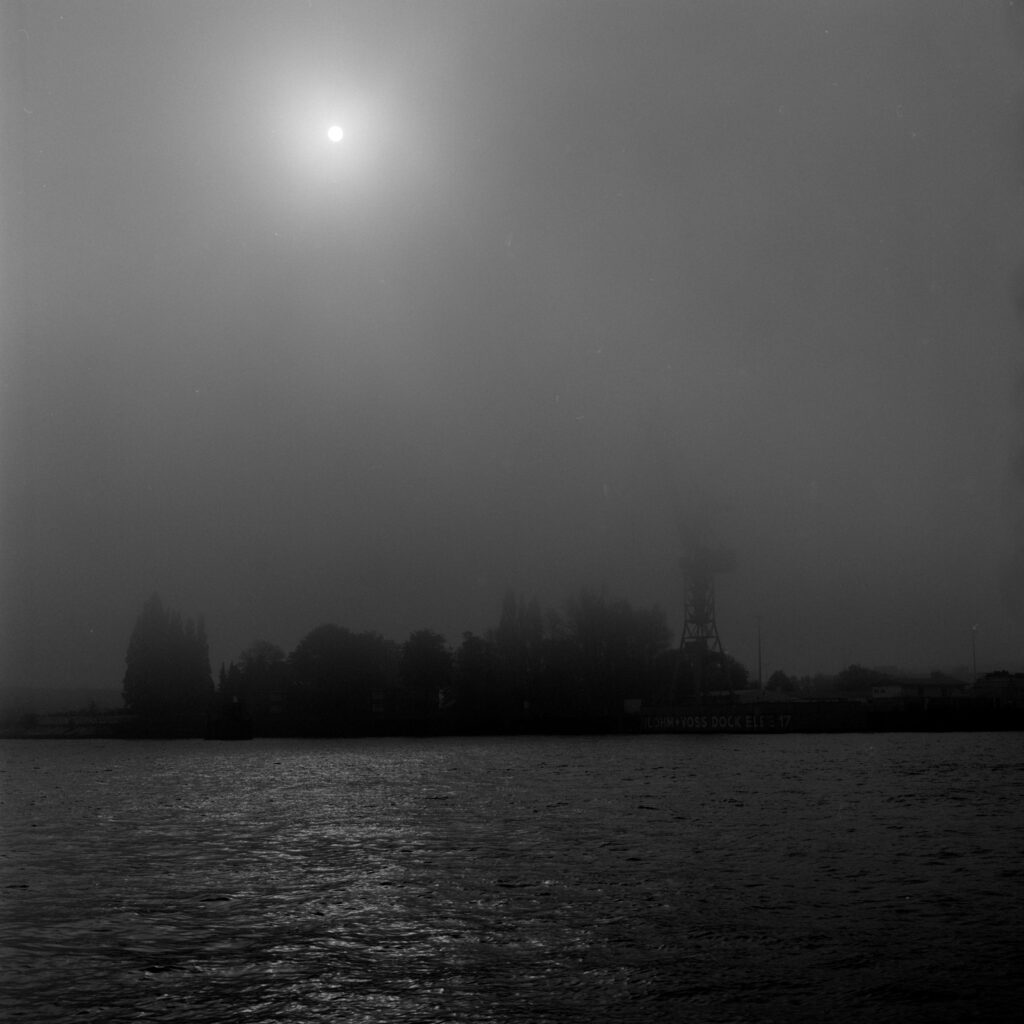
Compared to this shot near Shinjuku Station, without any large obvious untextured spaces, you hardly notice anything off about it when viewed on a screen.
So what did I get out of all this?
I enjoyed this process immensely – even the frustrations with trying to scan or digitize these at home without a [working] scanner or digitizer. The negatives are sitting safely in some archival sleeves, waiting for whatever day the digitizer shows up. And I’ve since gone out and shot and developed many more rolls. I’m not going to make prints or otherwise enlarge any of these laptop/paper scans. But I know my old F2S works and that my development technique is… passable at least.
One thing this shows about film as a medium – it is forgiving in some ways digital is not. Computers (or $400 scanners. Yes, I’m a little mad) either work or they don’t. And when they don’t work, they are generally beyond your ability to fix. In the case of the broken Epson scanner, I suspect faulty firmware, baked in at the factory, or any of thousands of quality control errors that slipped by. I’m sure many thousands of folks are using the V600 without complaint, and perhaps they plugged it in and it just worked… in which case, I’m jealous.
But analog technology just works, like the 50+ year old lightmeter in the F2S that took these pictures. The basic principles of black and white negatives, the chemistry of film, and the physics of light are what we rely on, not fickle software and tens of thousands (millions) of lines of code.
Next time – my actual scanning solution in Part IV next week (I promise it does not involve unrelated Dewalt tools or parts of a broken scanner).
My website:
https://ourbriefsojourn.substack.com/
Share this post:


Comments
Ibraar Hussain on Going Analog on Okinawa – Part III – Scanning Misadventures
Comment posted: 18/04/2024
I’m still using an ancient Epson 4990 I bought new in 2006 and it’s still as good as new.
I couldn’t be asked with vuescan unless scanning MF and the odd frame at that
I find it’s adequate for 35mm in the holders though curved negatives are always a problem
And I wish I could get hold of a glass holder or something
You’re brave with the scanning rig you made but ended up very well!
A Minolta 5400 will be arriving sometime in the next fortnight for me. Some bargains on eBay
Very nice photography my friend
Comment posted: 18/04/2024
Comment posted: 18/04/2024
Comment posted: 18/04/2024
John Furlong on Going Analog on Okinawa – Part III – Scanning Misadventures
Comment posted: 18/04/2024
Comment posted: 18/04/2024
Dr John Fontana on Going Analog on Okinawa – Part III – Scanning Misadventures
Comment posted: 18/04/2024
Comment posted: 18/04/2024
Bill Brown on Going Analog on Okinawa – Part III – Scanning Misadventures
Comment posted: 18/04/2024
My main client recently moved his scanning to a GFX100. We previously used an Imacon and this new method surpasses that because we shoot tethered straight into CP1. His archive goes back into the 1980's and his Nepal Kodachromes look beautiful. My personal scanning methods are definitely a big step down from his but it sure is fun getting to see what is capable if you have the funds. I'm a fan of DSLR/mirrorless scanning.
Comment posted: 18/04/2024
Geoff Chaplin on Going Analog on Okinawa – Part III – Scanning Misadventures
Comment posted: 18/04/2024
Comment posted: 18/04/2024
Paul Taylor on Going Analog on Okinawa – Part III – Scanning Misadventures
Comment posted: 19/04/2024
Gary Smith on Going Analog on Okinawa – Part III – Scanning Misadventures
Comment posted: 19/04/2024
Comment posted: 19/04/2024
Julian Tanase on Going Analog on Okinawa – Part III – Scanning Misadventures
Comment posted: 19/04/2024
I do not shoot much 120 these days, but what negatives I get in this format I scan using a 120 film holder (built in diffuser), set on a light pad at max brightness, and employ the use of a Nikon D3200 with a Nikkor 55/2.8 Micro. Works like a charm, for my needs.
Kudos to your efforts, really impressed by the Supermarket or spaceship photograph. That tissue gave the photograph a really great effect, very pleasant to my eyes.
Comment posted: 19/04/2024
Alexander Seidler on Going Analog on Okinawa – Part III – Scanning Misadventures
Comment posted: 19/04/2024
Comment posted: 19/04/2024
Daniel Castelli on Going Analog on Okinawa – Part III – Scanning Misadventures
Comment posted: 20/04/2024
I like your approach for location photography: a couple of rolls of film, lens in a pocket and a camera slung around your neck. Maybe not minimalist, but a manageable carry.
I taught photography for 35 years in a public high school. We were a low income school, and it was film photography until 2012 when I retired. I was able to secure a couple of Epson V500 scanners through generous donations from a bunch of sources. We developed film & made darkroom prints. We then scanned the negs(adjusted through P/Shop Elements) and ‘printed’ photo books using a Canon Pixma printer. The kids used the hybrid approach that combined traditional photo practices with a digital approach. I still am a strong advocate of this method. Film - develop - scan - print - bind. The equipment footprint is not that large so even small living spaces can accommodate the gear.
Comment posted: 20/04/2024
Comment posted: 20/04/2024
Comment posted: 20/04/2024
Sanj Maghera on Going Analog on Okinawa – Part III – Scanning Misadventures
Comment posted: 25/04/2024