Printable Parts for Olympus OM1-n Shoe 4

By Kevin Saruwatari

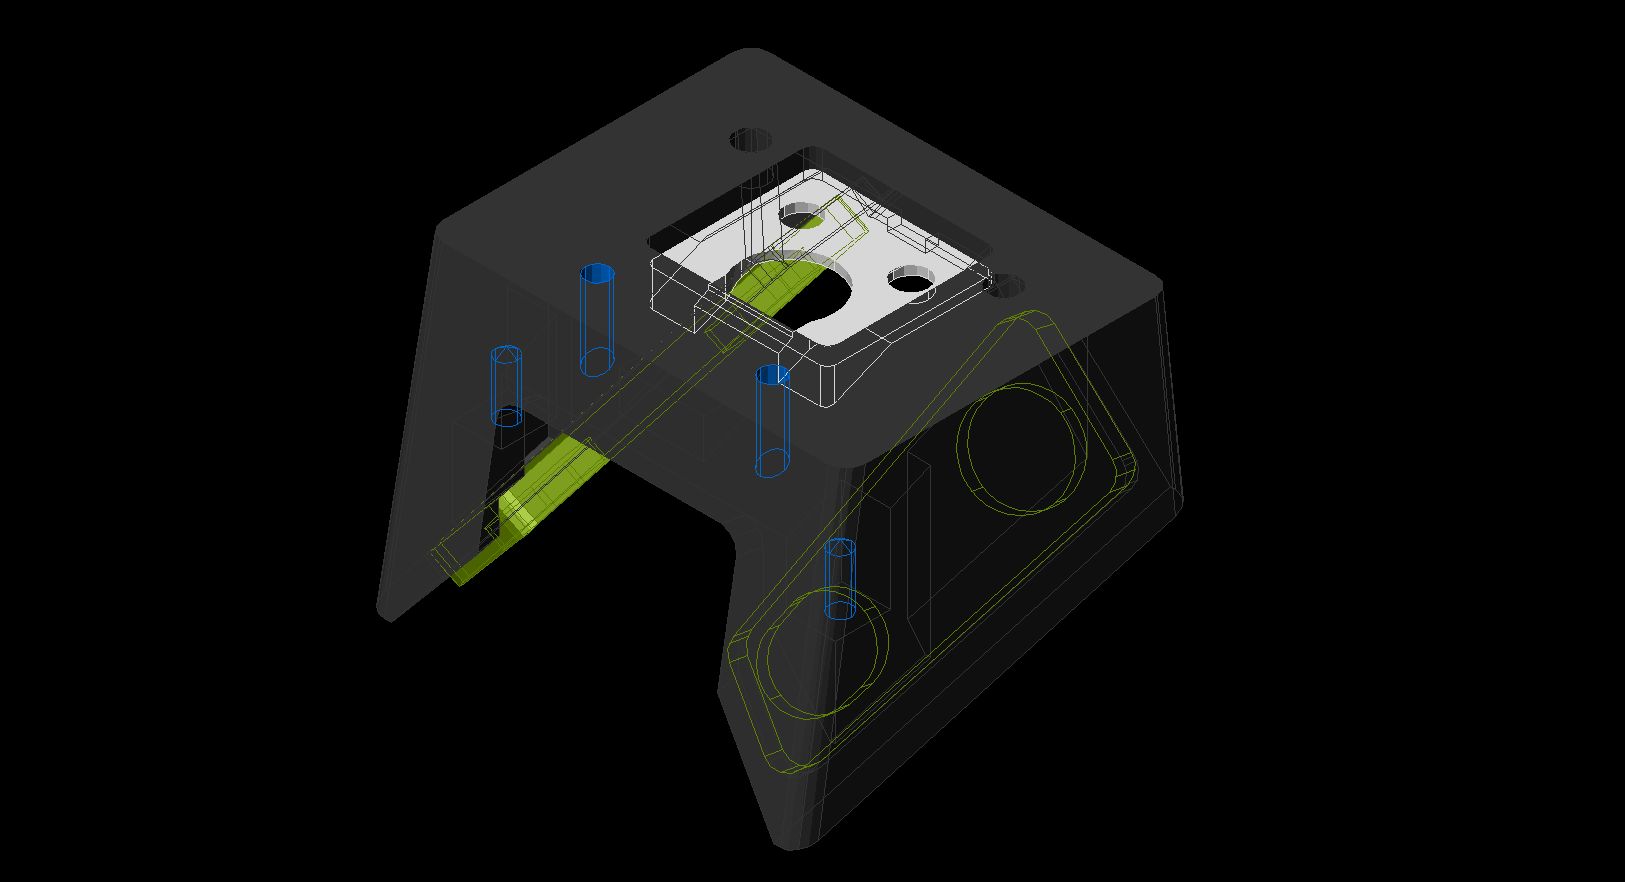
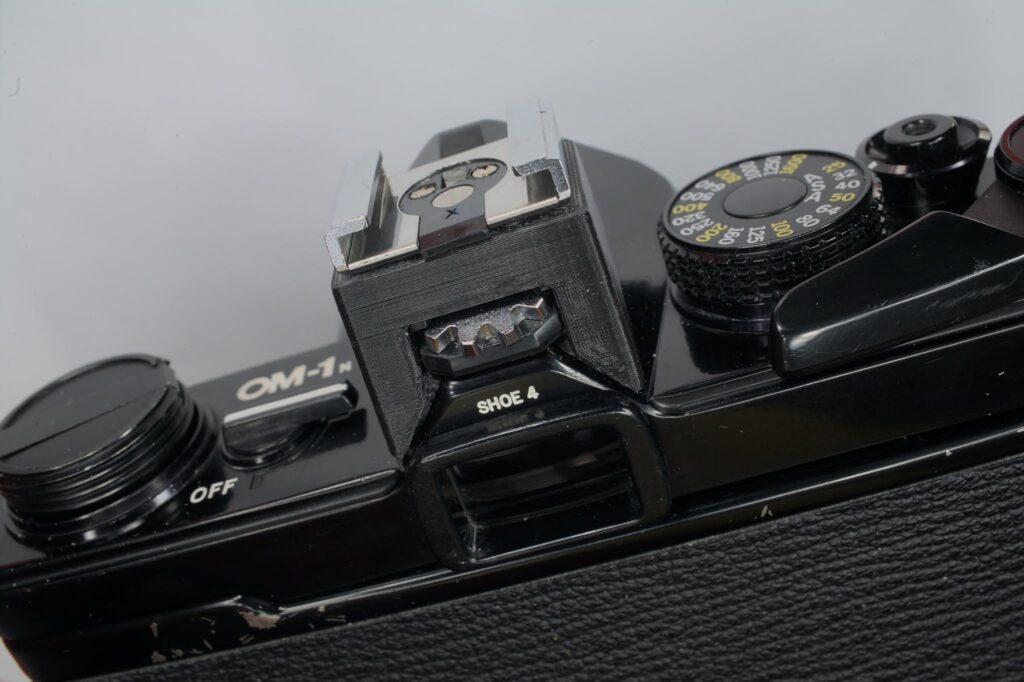
As far as I know, the 3D print community hasn’t created printable files for often broken, removable hot shoes on the old Olympus OM series cameras.  So I put up some files on GrabCAD here. I believe you can use Google and Facebook credentials to login so hopefully it is painless enough to download files.  If you are unfamiliar with GrabCAD and are worried about logging in I can say that I’ve been using the site since 2013 without incident.

Anyway if you have an OM camera and a Shoe 4 with broken plastic, the STL files should allow you to fix it with a 3D printer.  They won’t allow you to create a shoe from scratch because you need all of the metal bits from an original shoe.

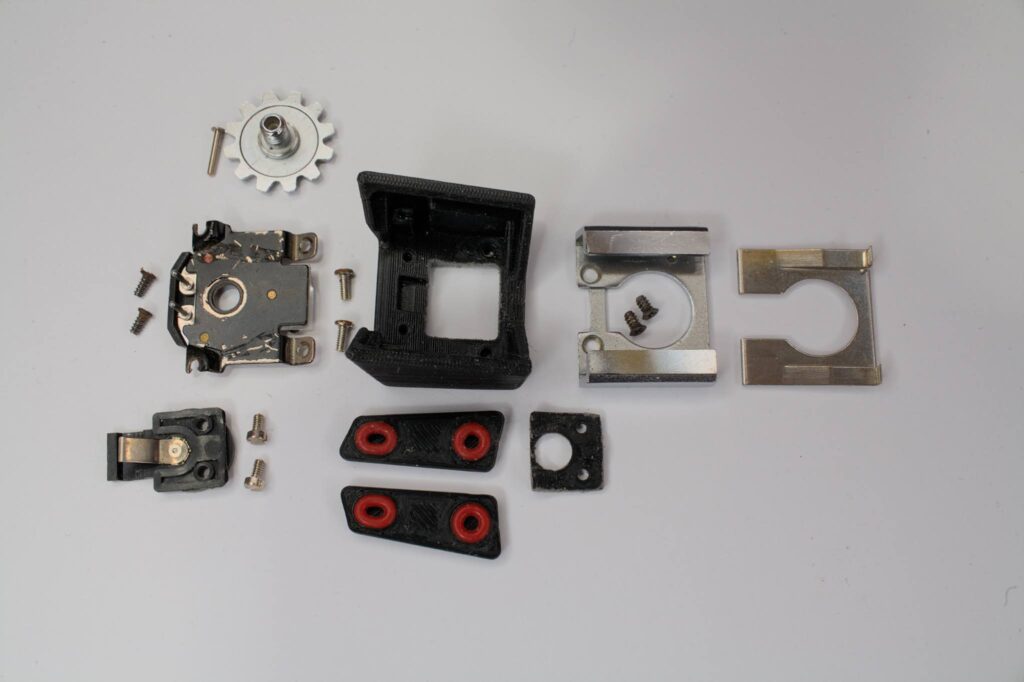
One difference is that the recess around the center and TTL pins in the original body did not print well so I made a separate part call TTL-Interface that just sits in the main body, no need to glue. Note that some sanding may be required depending on the accuracy you get from your printer.

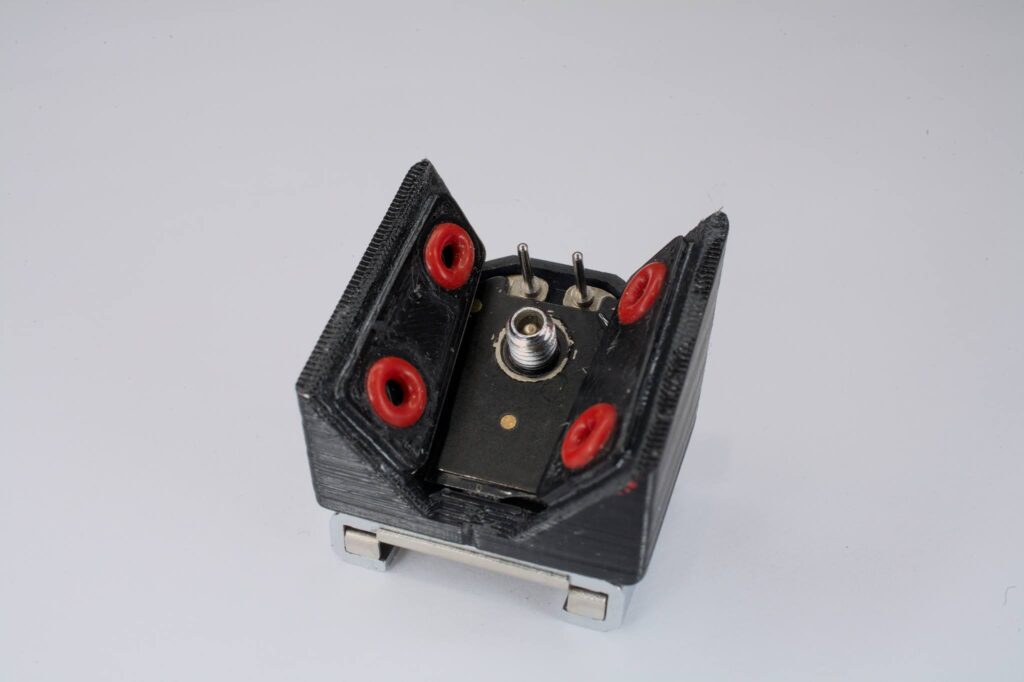
You will also need some sort of super glue like JB Weld or Sugru, etc. to glue in the side/cushion wings.  Four silicon 5x2x1.5 mm o-rings are used for cushioning the interface to the body and can be found on Amazon. If the 3D print edges are crisp enough, the o-rings will snap in and stay on their own, no glue required.

There is also a step file (in inches) on GrabCAD which may be useful or a starting point for other variations of the OM series removable hot shoes.  I think the files may work for Type 1 but for sure the TTL interface will not work for Type 2 but the rest might.

I don’t know if 3D printed PLA will last any longer than the phenolic parts Olympus made but at least with these files we can keep reprinting new ones if they do break.  I am happy with how firm my repaired shoe sits on the camera.

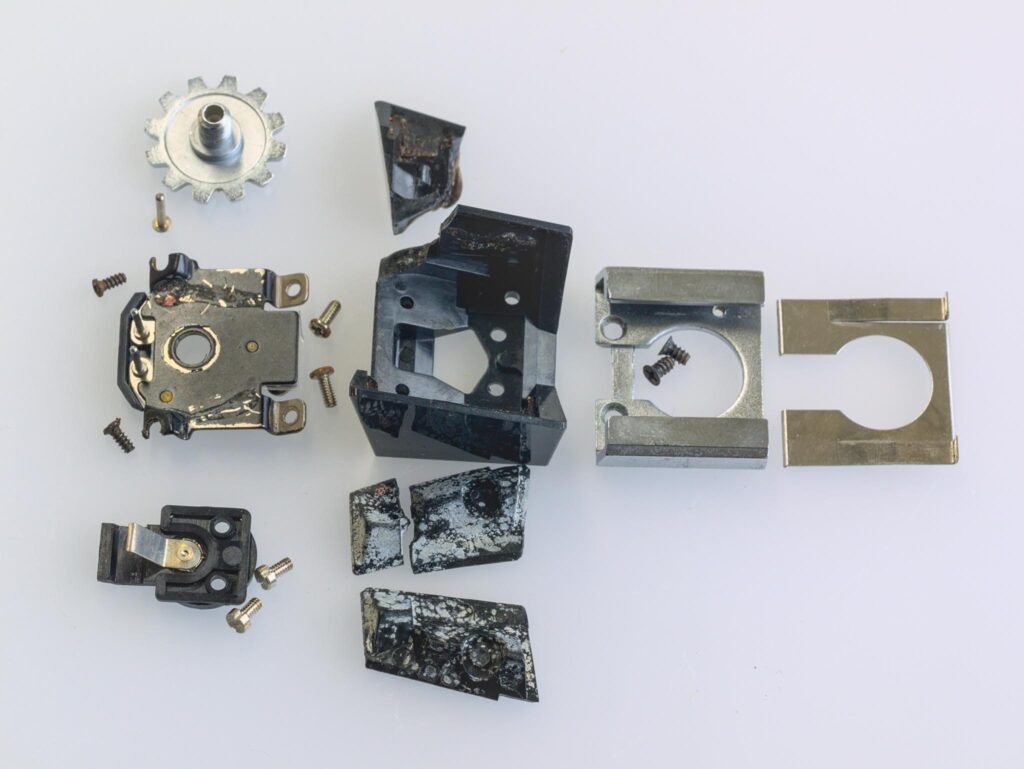
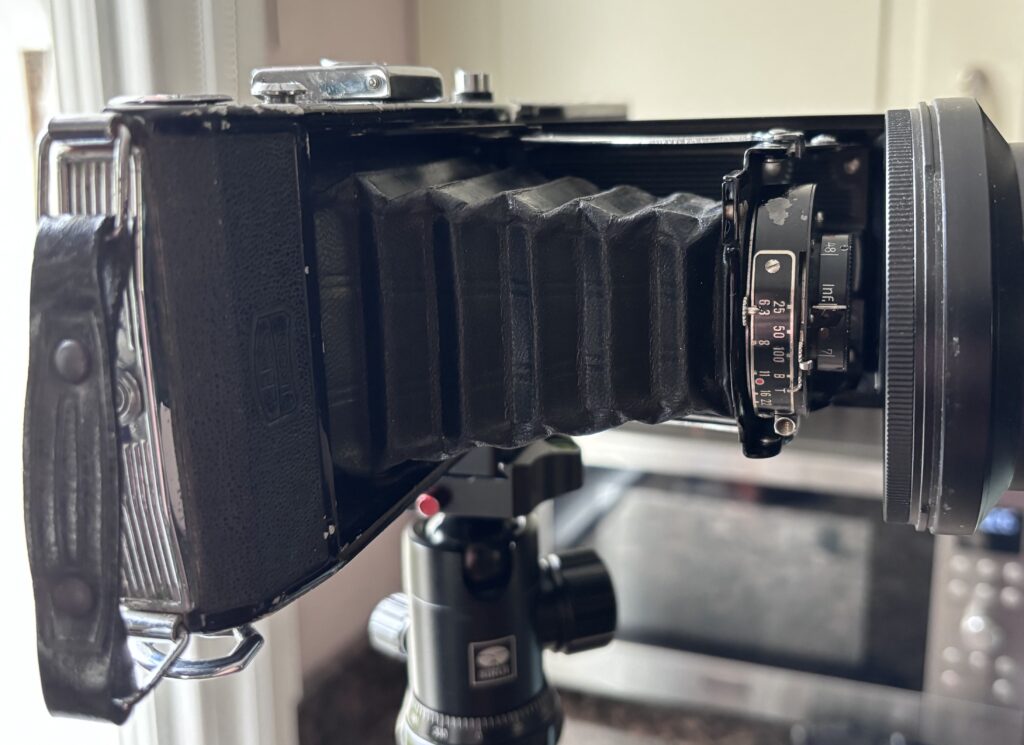
These are such a pain.  In my case, I bought a beater of a camera with a 50mm/f1.4 lens and a broken Shoe 4 off eBay and with shipping it cost less than any of the broken Shoe 4’s listed on their own.  It also seems that non-broken shoes are quite rare to find listed.  So I hope this is helpful to people.  Here’s a few photos that may help if you are considering doing a repair.

This is my original Olympus Shoe 4 with broken body and interior wing.  You will need small JIS screwdrivers and a fine, sharp nose tweezer to get this far.  The tweezers are needed to get the TTL pin/screws out.
Basically the same picture as the original but with the 3D printed parts.  Note the o-rings are not glued in.
This is the 3D printed parts assembled with the side wings epoxied in.  The TTL pin/screws are a bit fussy to get started, otherwise I found everything else went pretty smooth.
This is the repaired shoe installed.

Share this post:

About The Author

By Kevin Saruwatari
A semi-retired mechanical engineer that did product development, machining and welding since the 80's. Photography and darkroom started about the same time come to think about it. Took it all serious for awhile and now prefer to laugh and make light of things I do.
Read More Articles From Kevin Saruwatari

Find more similar content on 35mmc

Use the tags below to search for more posts on related topics:

Donate to the upkeep, or contribute to 35mmc for an ad-free experience.

There are two ways to contribute to 35mmc and experience it without the adverts:

Paid Subscription – £3.99 per month and you’ll never see an advert again! (Free 3-day trial).

Subscribe here.

Content contributor – become a part of the world’s biggest film and alternative photography community blog. All our Contributors have an ad-free experience for life.

Sign up here.

Make a donation – If you would simply like to support Hamish Gill and 35mmc financially, you can also do so via ko-fi

Donate to 35mmc here.

Comments

Bob Janes on Printable Parts for Olympus OM1-n Shoe 4

Comment posted: 21/04/2026

That's great! Have you looked to replace tips of wonders as well? The plastics that Olympus used back in the early 70s seems to wear quite badly...
Reply

Leave a Reply

Your email address will not be published. Required fields are marked *

Kevin Saruwatari replied:

Comment posted: 21/04/2026

Hi Bob, what are tips of wonders?

Reply

Leave a Reply

Your email address will not be published. Required fields are marked *

Jeffery Luhn on Printable Parts for Olympus OM1-n Shoe 4

Comment posted: 21/04/2026

I don't need this particular part, but the use of 3-D printers interests me. I've bought negative carriers, flash brackets, tripod repair parts, etc from home based workshops. Got a 4x5 camera from WillTravel company!! This trend is great! Thanks for the post!
Reply

Leave a Reply

Your email address will not be published. Required fields are marked *

Kevin Saruwatari replied:

Comment posted: 21/04/2026

Welcome!

Reply

Leave a Reply

Your email address will not be published. Required fields are marked *

lepolau on Printable Parts for Olympus OM1-n Shoe 4

Comment posted: 04/05/2026

Thanks for sharing—that's exactly what I needed!
Reply

Leave a Reply

Your email address will not be published. Required fields are marked *

Kevin Saruwatari replied:

Comment posted: 04/05/2026

Welcome!

Reply

Leave a Reply

Your email address will not be published. Required fields are marked *

Dennis on Printable Parts for Olympus OM1-n Shoe 4

Comment posted: 31/05/2026

Hi there! I stumbled on this just after my Hot Shoe 4 broke apart. This is very good work, thank you for it. May I ask if you have any brief guide/pointers on how to disassemble the shoe components? I got as far as removing the 4 corner screws uncovered when the brittle rubber has been cleared away, but haven't figured out how to go from there. Thank you again!
Reply

Leave a Reply

Your email address will not be published. Required fields are marked *

Kevin Saruwatari replied:

Comment posted: 31/05/2026

I'm guessing the TTL pins have you stuck. In the article I mention that fine nose tweezers are need to unscrew them. From the top you can see two very small notches 180 degrees apart on the outer diameter of each pin. These are spanner holes for driving them. Otherwise you will need to be specific on where you are stuck. You can refer to the first picture in the article that shows all of the individual components as a reference.

Reply

Leave a Reply

Your email address will not be published. Required fields are marked *

Dennis Khong replied:

Comment posted: 31/05/2026

Hello Kevin, thank you but I actually had no problems with the TTL pins - it was figuring out how to remove the internal shoe spring plate (the right-most piece in your photographs), but I finally figured it out with the help of a thin metal blade tool. Eagerly waiting to print the parts and pick up the silicone rings! Your design is really valuable as it addresses an all-too-common problem with the Hot Shoe, as you have pointed out. I was originally thinking of gluing a metal plate to reinforce mine after gluing back the broken side wall...

Reply

Leave a Reply

Your email address will not be published. Required fields are marked *

Kevin Saruwatari replied:

Comment posted: 31/05/2026

I see. Come to think of it I think I used sharp nose tweezers to get that out too. Or maybe an exacto-knife. You are welcome! I agree, it's been needed for a long time. Good luck with the repair!

Reply

Leave a Reply

Your email address will not be published. Required fields are marked *

Leave a Comment

Leave a Reply

Your email address will not be published. Required fields are marked *