There is no such thing as a failed experiment because you can always learn from them. Well that’s what they say on LinkedIn… but I hate failed experiments. Why can’t all my experiments be successful? I can learn from those too.
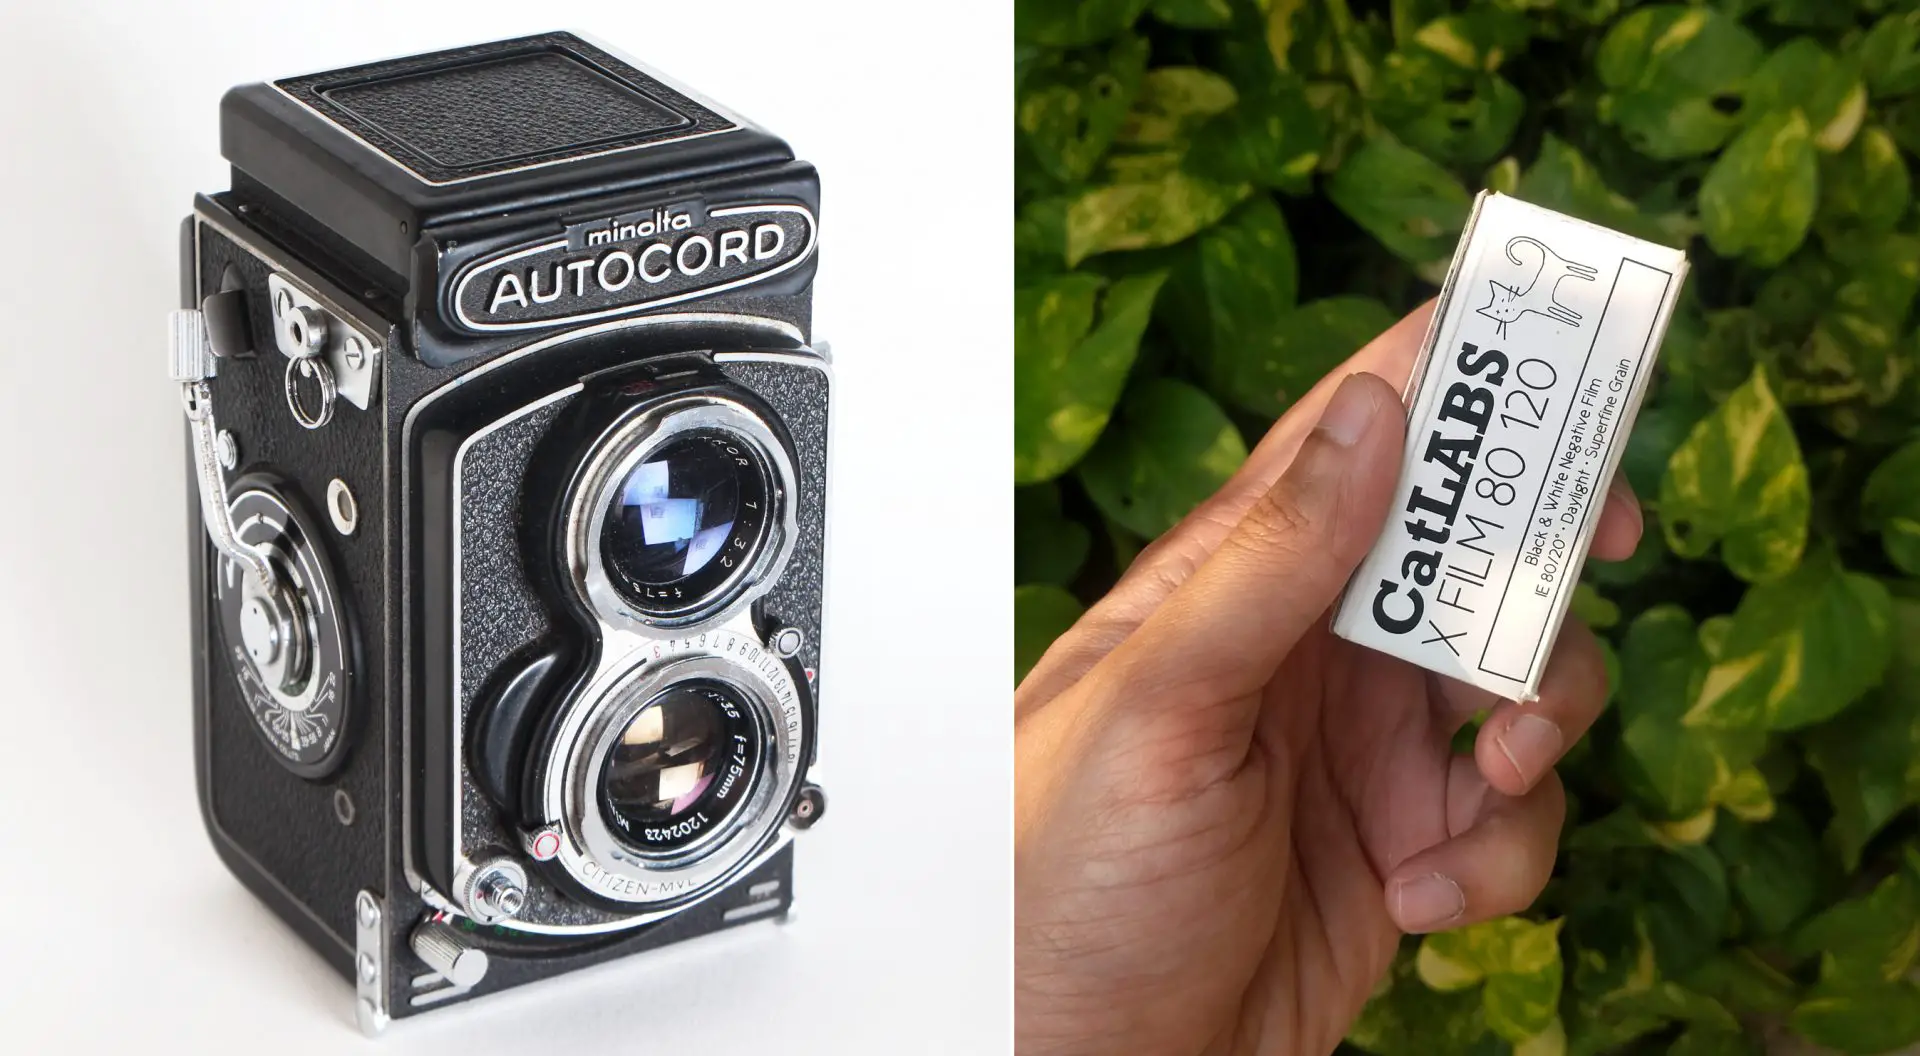
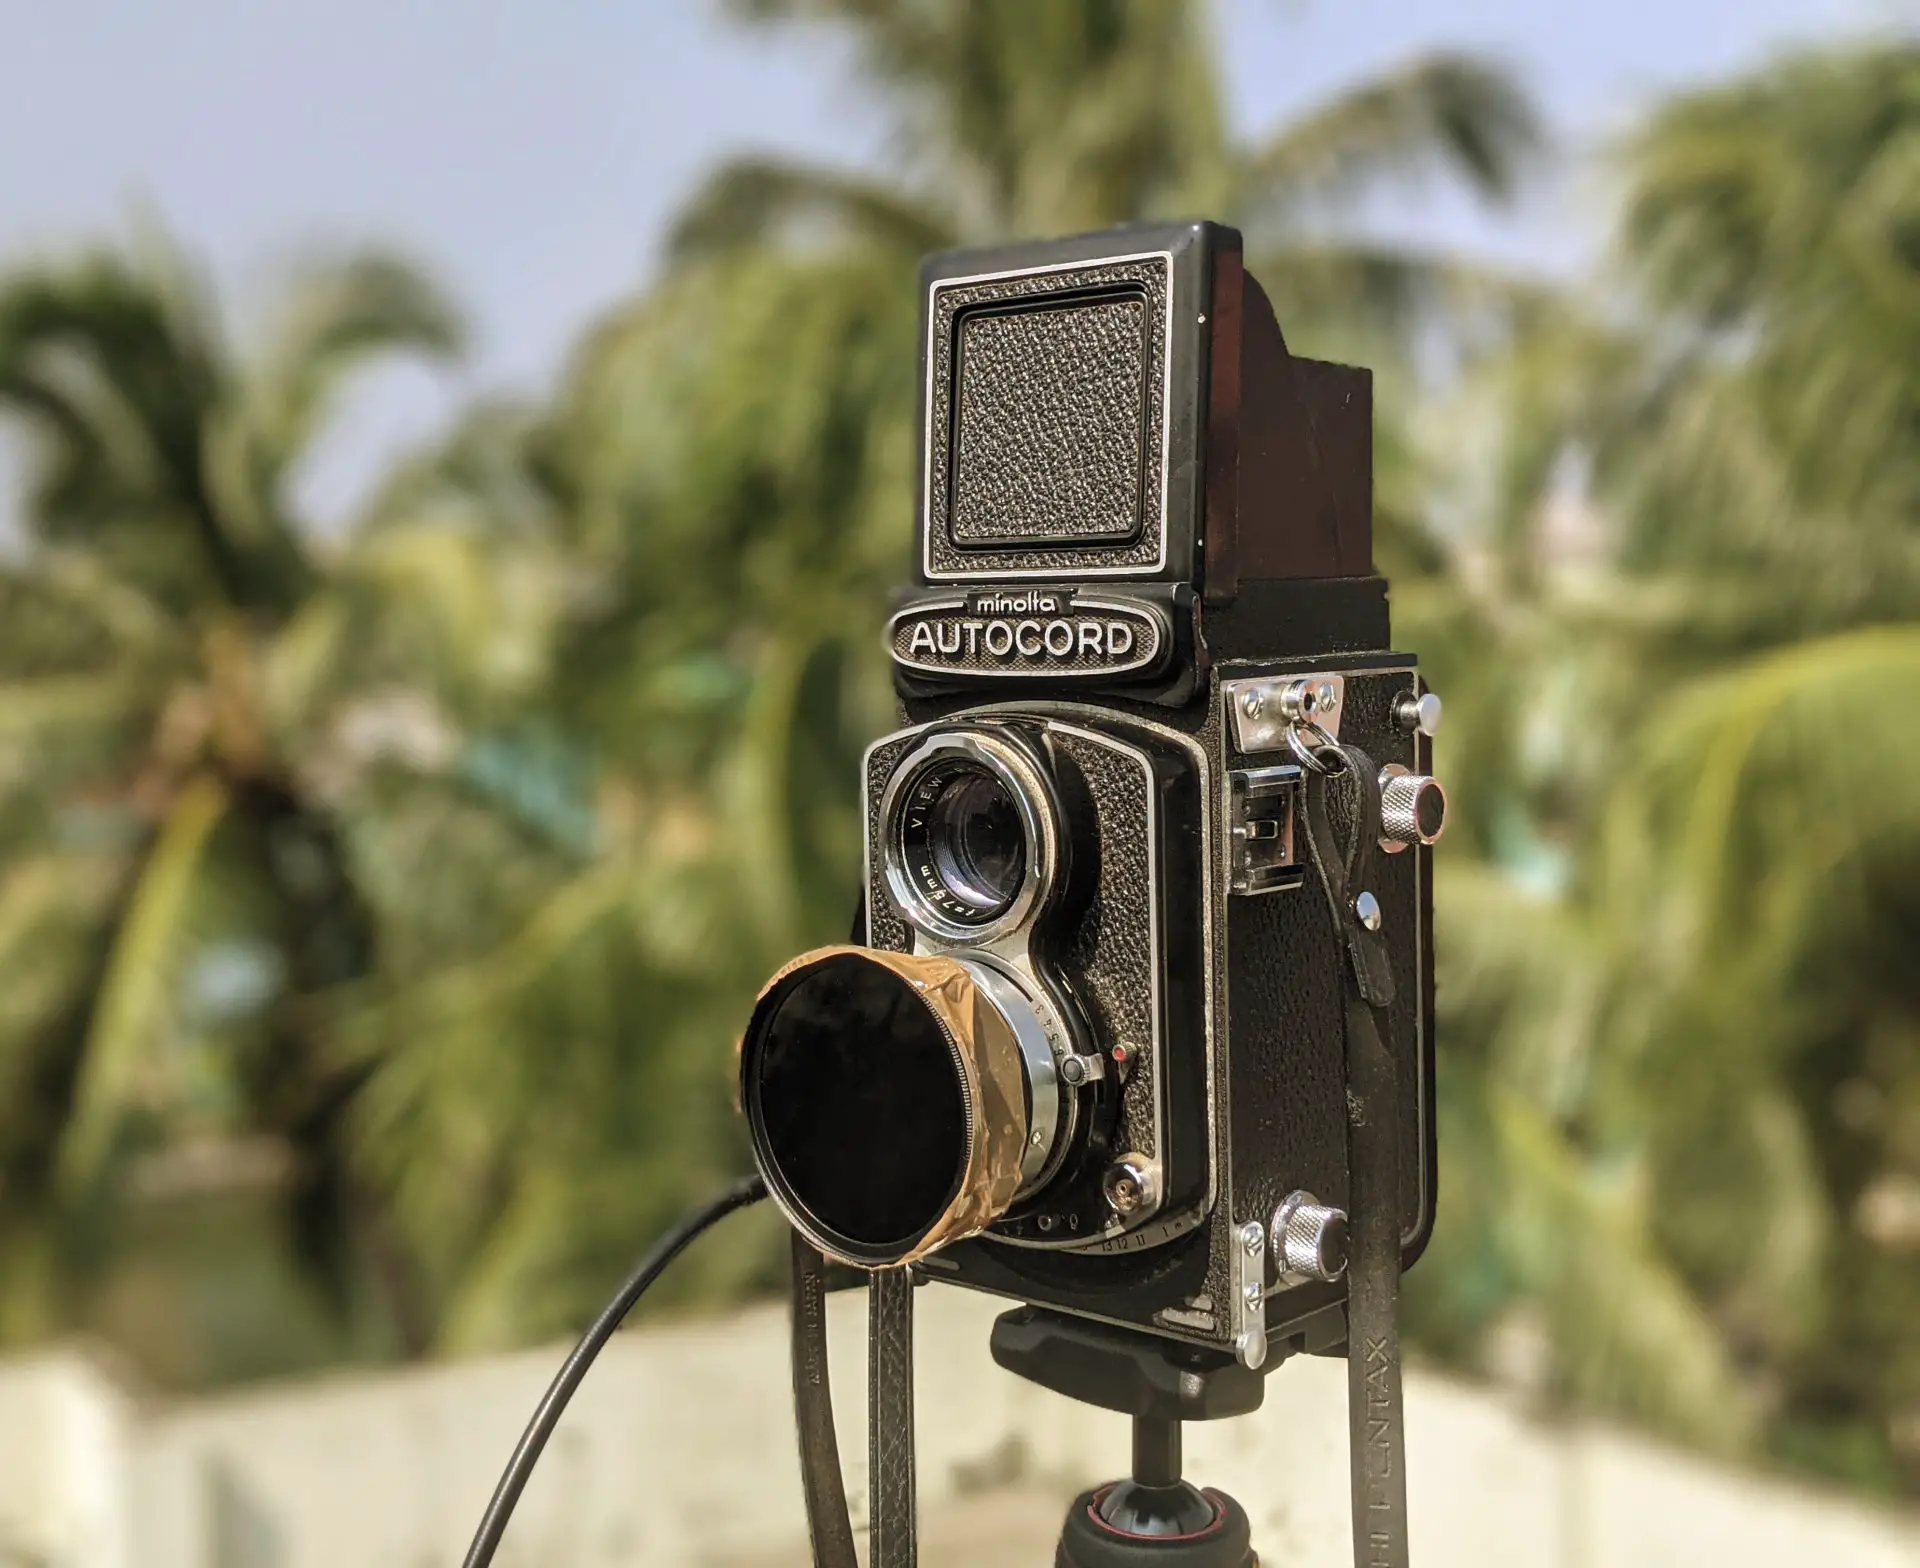
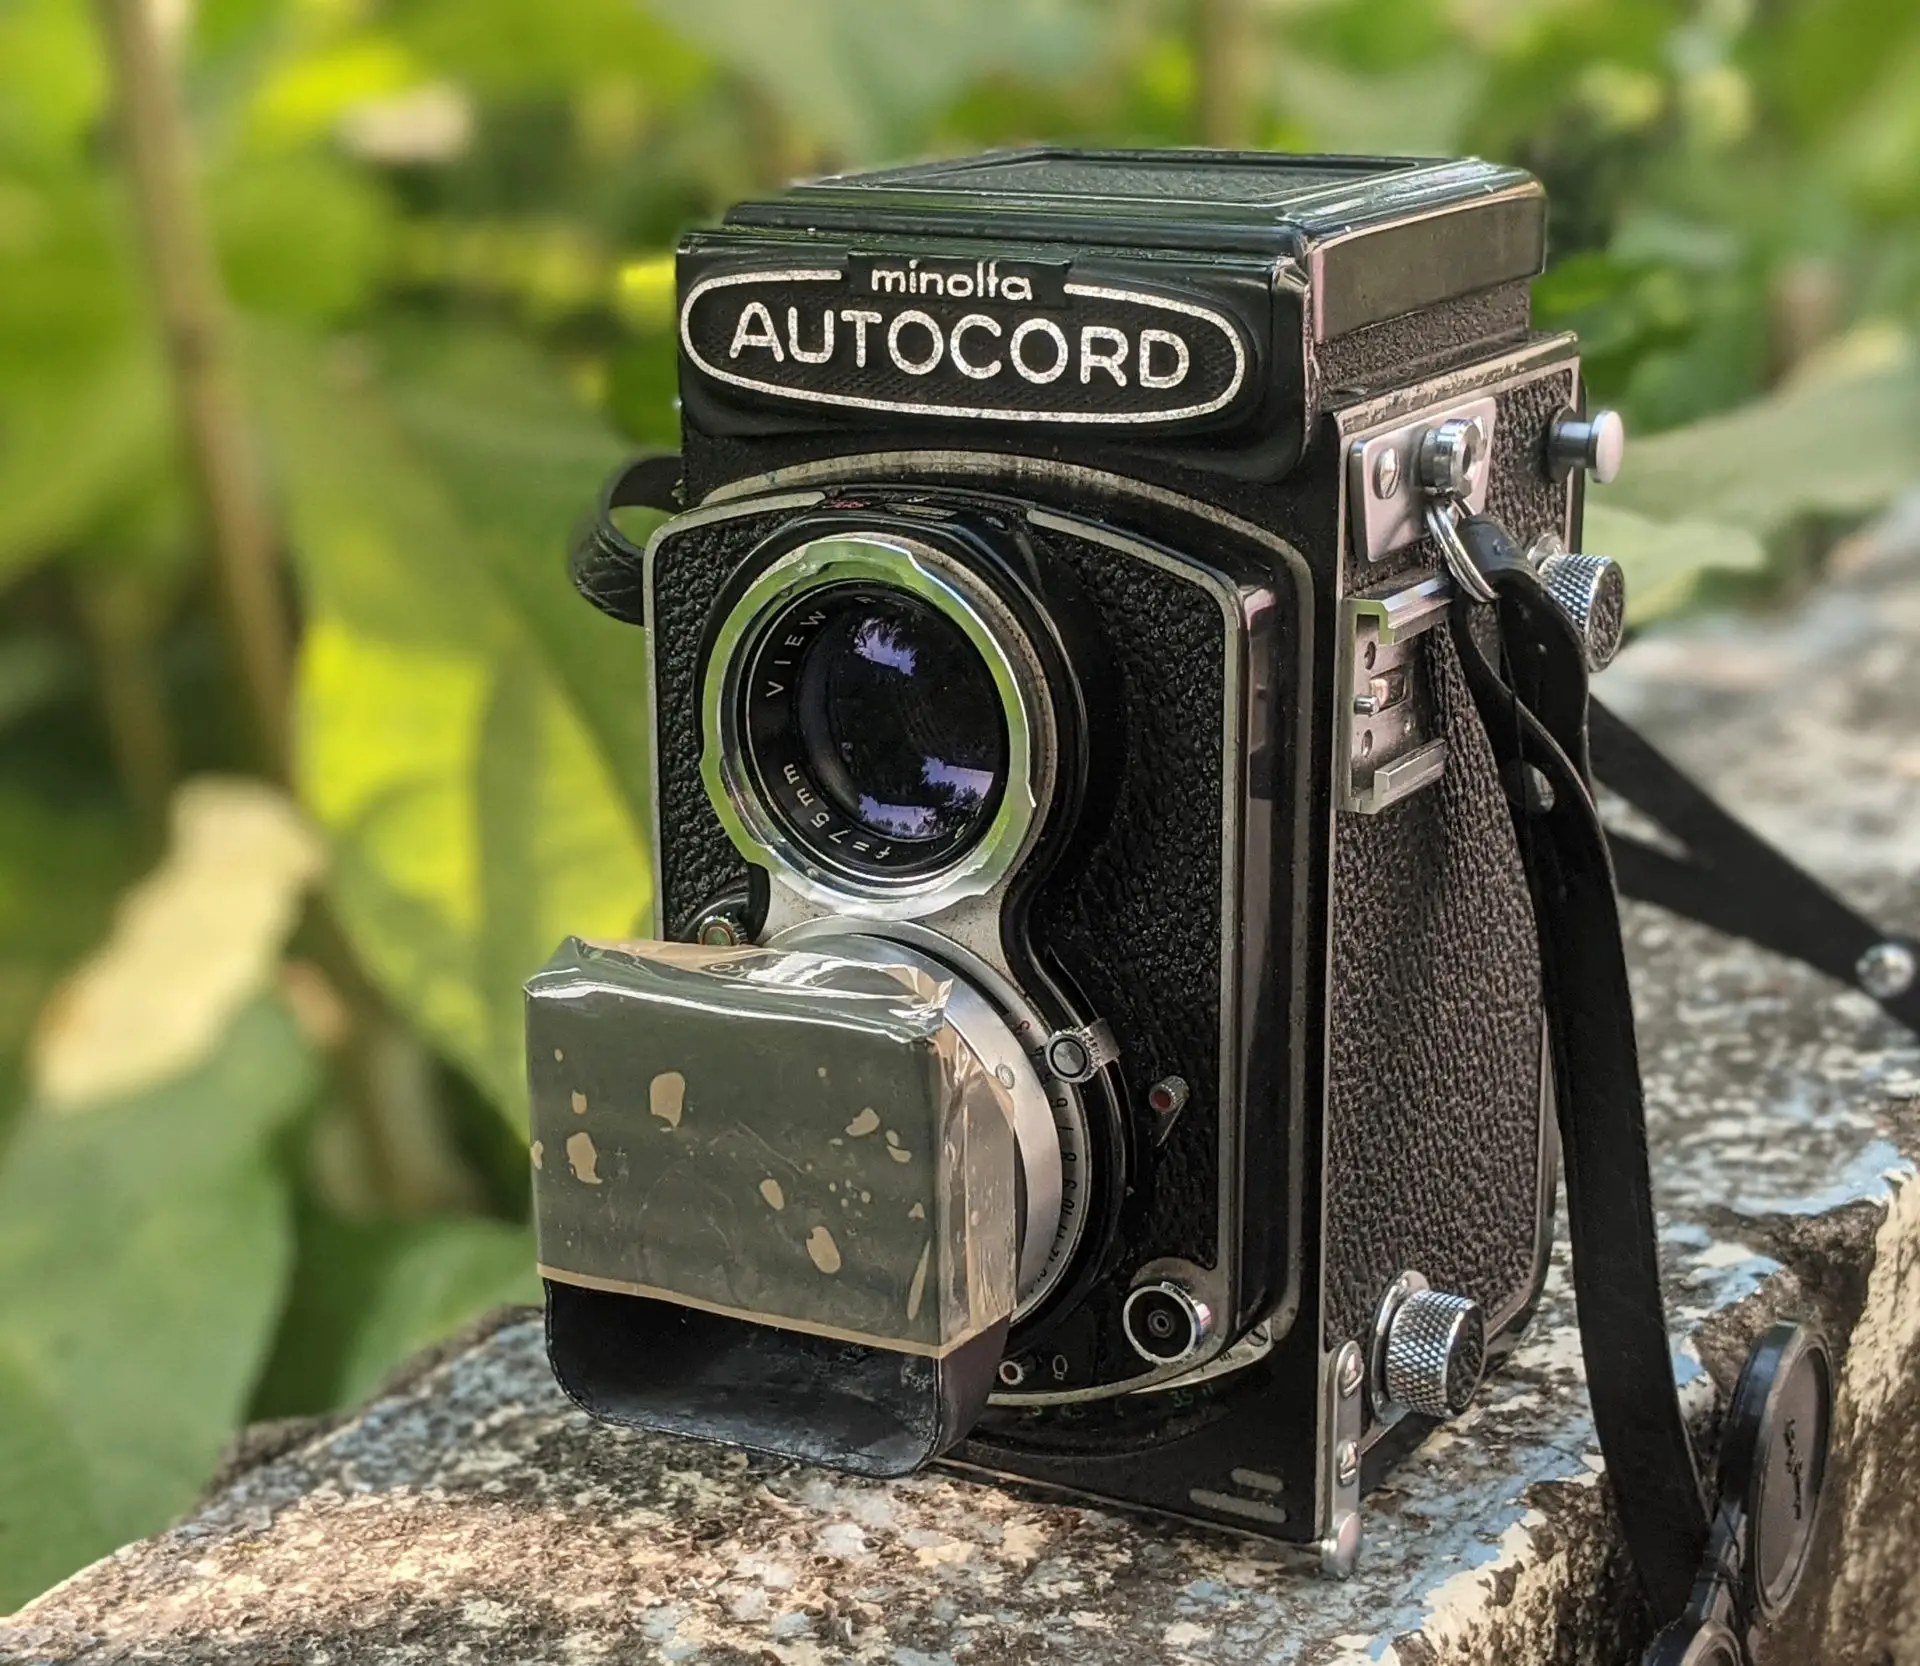
Earlier this year, I shared my initial impressions of the Minolta Autocord, a medium-format, twin-lens reflex camera from the 1960s. At the time, I had only shot one roll of film on the Autocord. For my second roll, I thought I would try to be a bit more experimental. Most of my experiments didn’t go to plan, but I thought it would make for a fun #FullRollFriday post.
While I was at it, I figured I should experiment with my choice of film too. Accordingly, I loaded a film I had not tried before: CatLABS X, an ISO 80 B&W film (more on this later). I developed it in good old Ilford ID-11 at 1+1 dilution: no experiments there.
The Minolta Autocord produces twelve 6×6 photos on a roll of 120 film, which I feel is a nice, manageable number for a full-roll post. For each photo, I have included two Verdicts (just my personal opinion, of course):
Verdict 1: Successful experiment?
For purposes of this post, success is defined as “when the technique I tried worked as intended.” Not this feel-good LinkedIn stuff.
Verdict 2: Interesting image?
This is hard to define and quite subjective. It’s also independent of Verdict 1. Failed experiments can be (but aren’t always) interesting, and even successful experiments can produce boring results.
Flash
For my first experiment I wanted to try flash. There was just one hitch: the Autocord has a coldshoe, not a hotshoe. It does have a PC sync port, but I don’t have a cable to connect the flash. I could of course buy a cable (£7), but where’s the fun in that? So I decided to improvise, using a technique called open flash. Basically, you use a long shutter-speed, and trigger the flash manually at some point while the shutter is open.
With my long-suffering dad as model, I set up the camera on a tripod. On our terrace at night, with 80 ISO film, even a one-second exposure would come out completely dark (I knew this from prior experiments with my digital camera), so the only illumination would be from the flash. And one second would give me enough time to manually fire the flash, handheld, pointed at a wall to my right for softer light (bounce flash).
There was one more problem to contend with, and it is this that would be my undoing. My flash is not super strong, and bouncing further reduces its intensity. With 80 ISO film, I would need to shoot wide open. At f/3.5 on a 6×6 camera, the depth-of-field is pretty shallow. And the terrace was dark, so I could barely see. I shone my phone flashlight on my dad with one hand while I focused with the other.
The focus, as you can see, is slightly behind where it should be. I’m annoyed with myself, because the exposure – which is the hard part for a photo like this – is spot on.
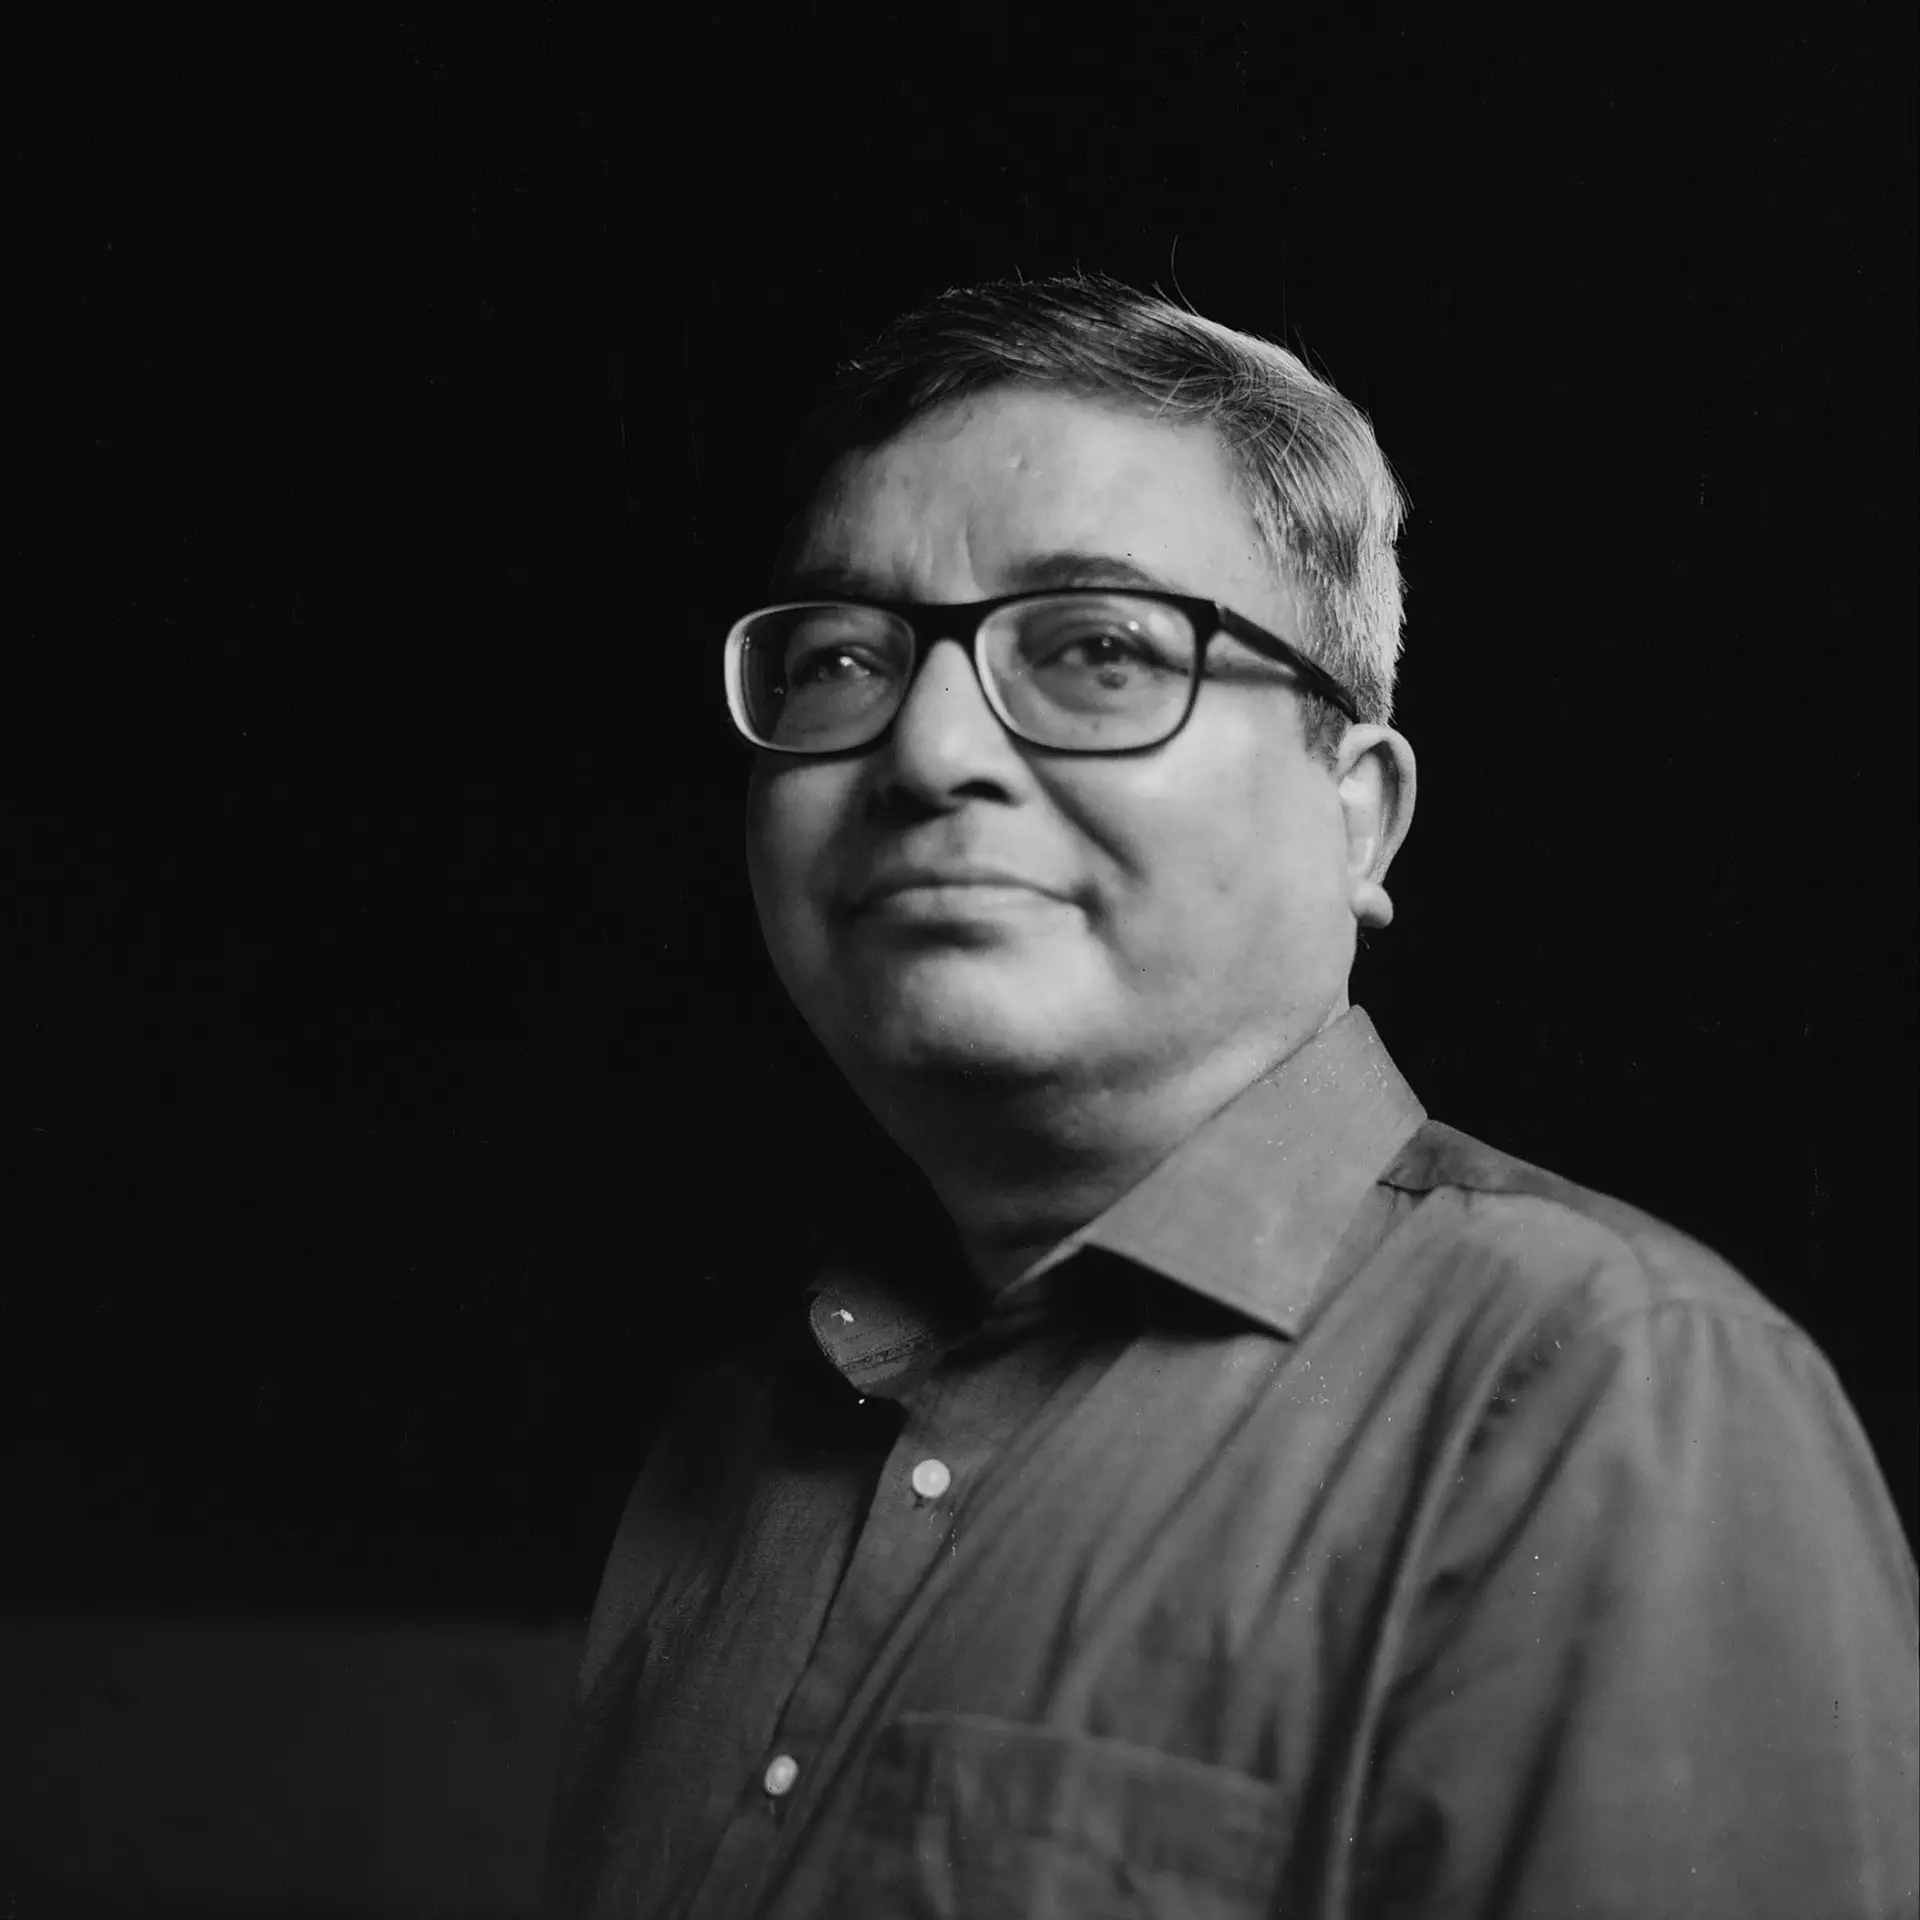
Photo 1
Verdict 1: Successful experiment?
Semi-successful. Exposure: yes; focus: no.
Verdict 2: Interesting image?
No.
For the next photo, I wanted to try a double exposure – one exposure similar to the last photo, and another similar but defocused, with the two being superimposed by the double exposure.
Even my in-focus attempt, like the previous photo, was out-of-focus – but of course I didn’t know this at the time. Then I asked my dad to hold still, defocused… and turned the crank the wrong way. To make a double exposure with the Autocord, you press a lever and turn the film advance crank backward to cock the shutter. Like an idiot, I had turned it forward, thereby advancing the film. And that, friends, is how I ended up with another near-identical photo, also out-of-focus.
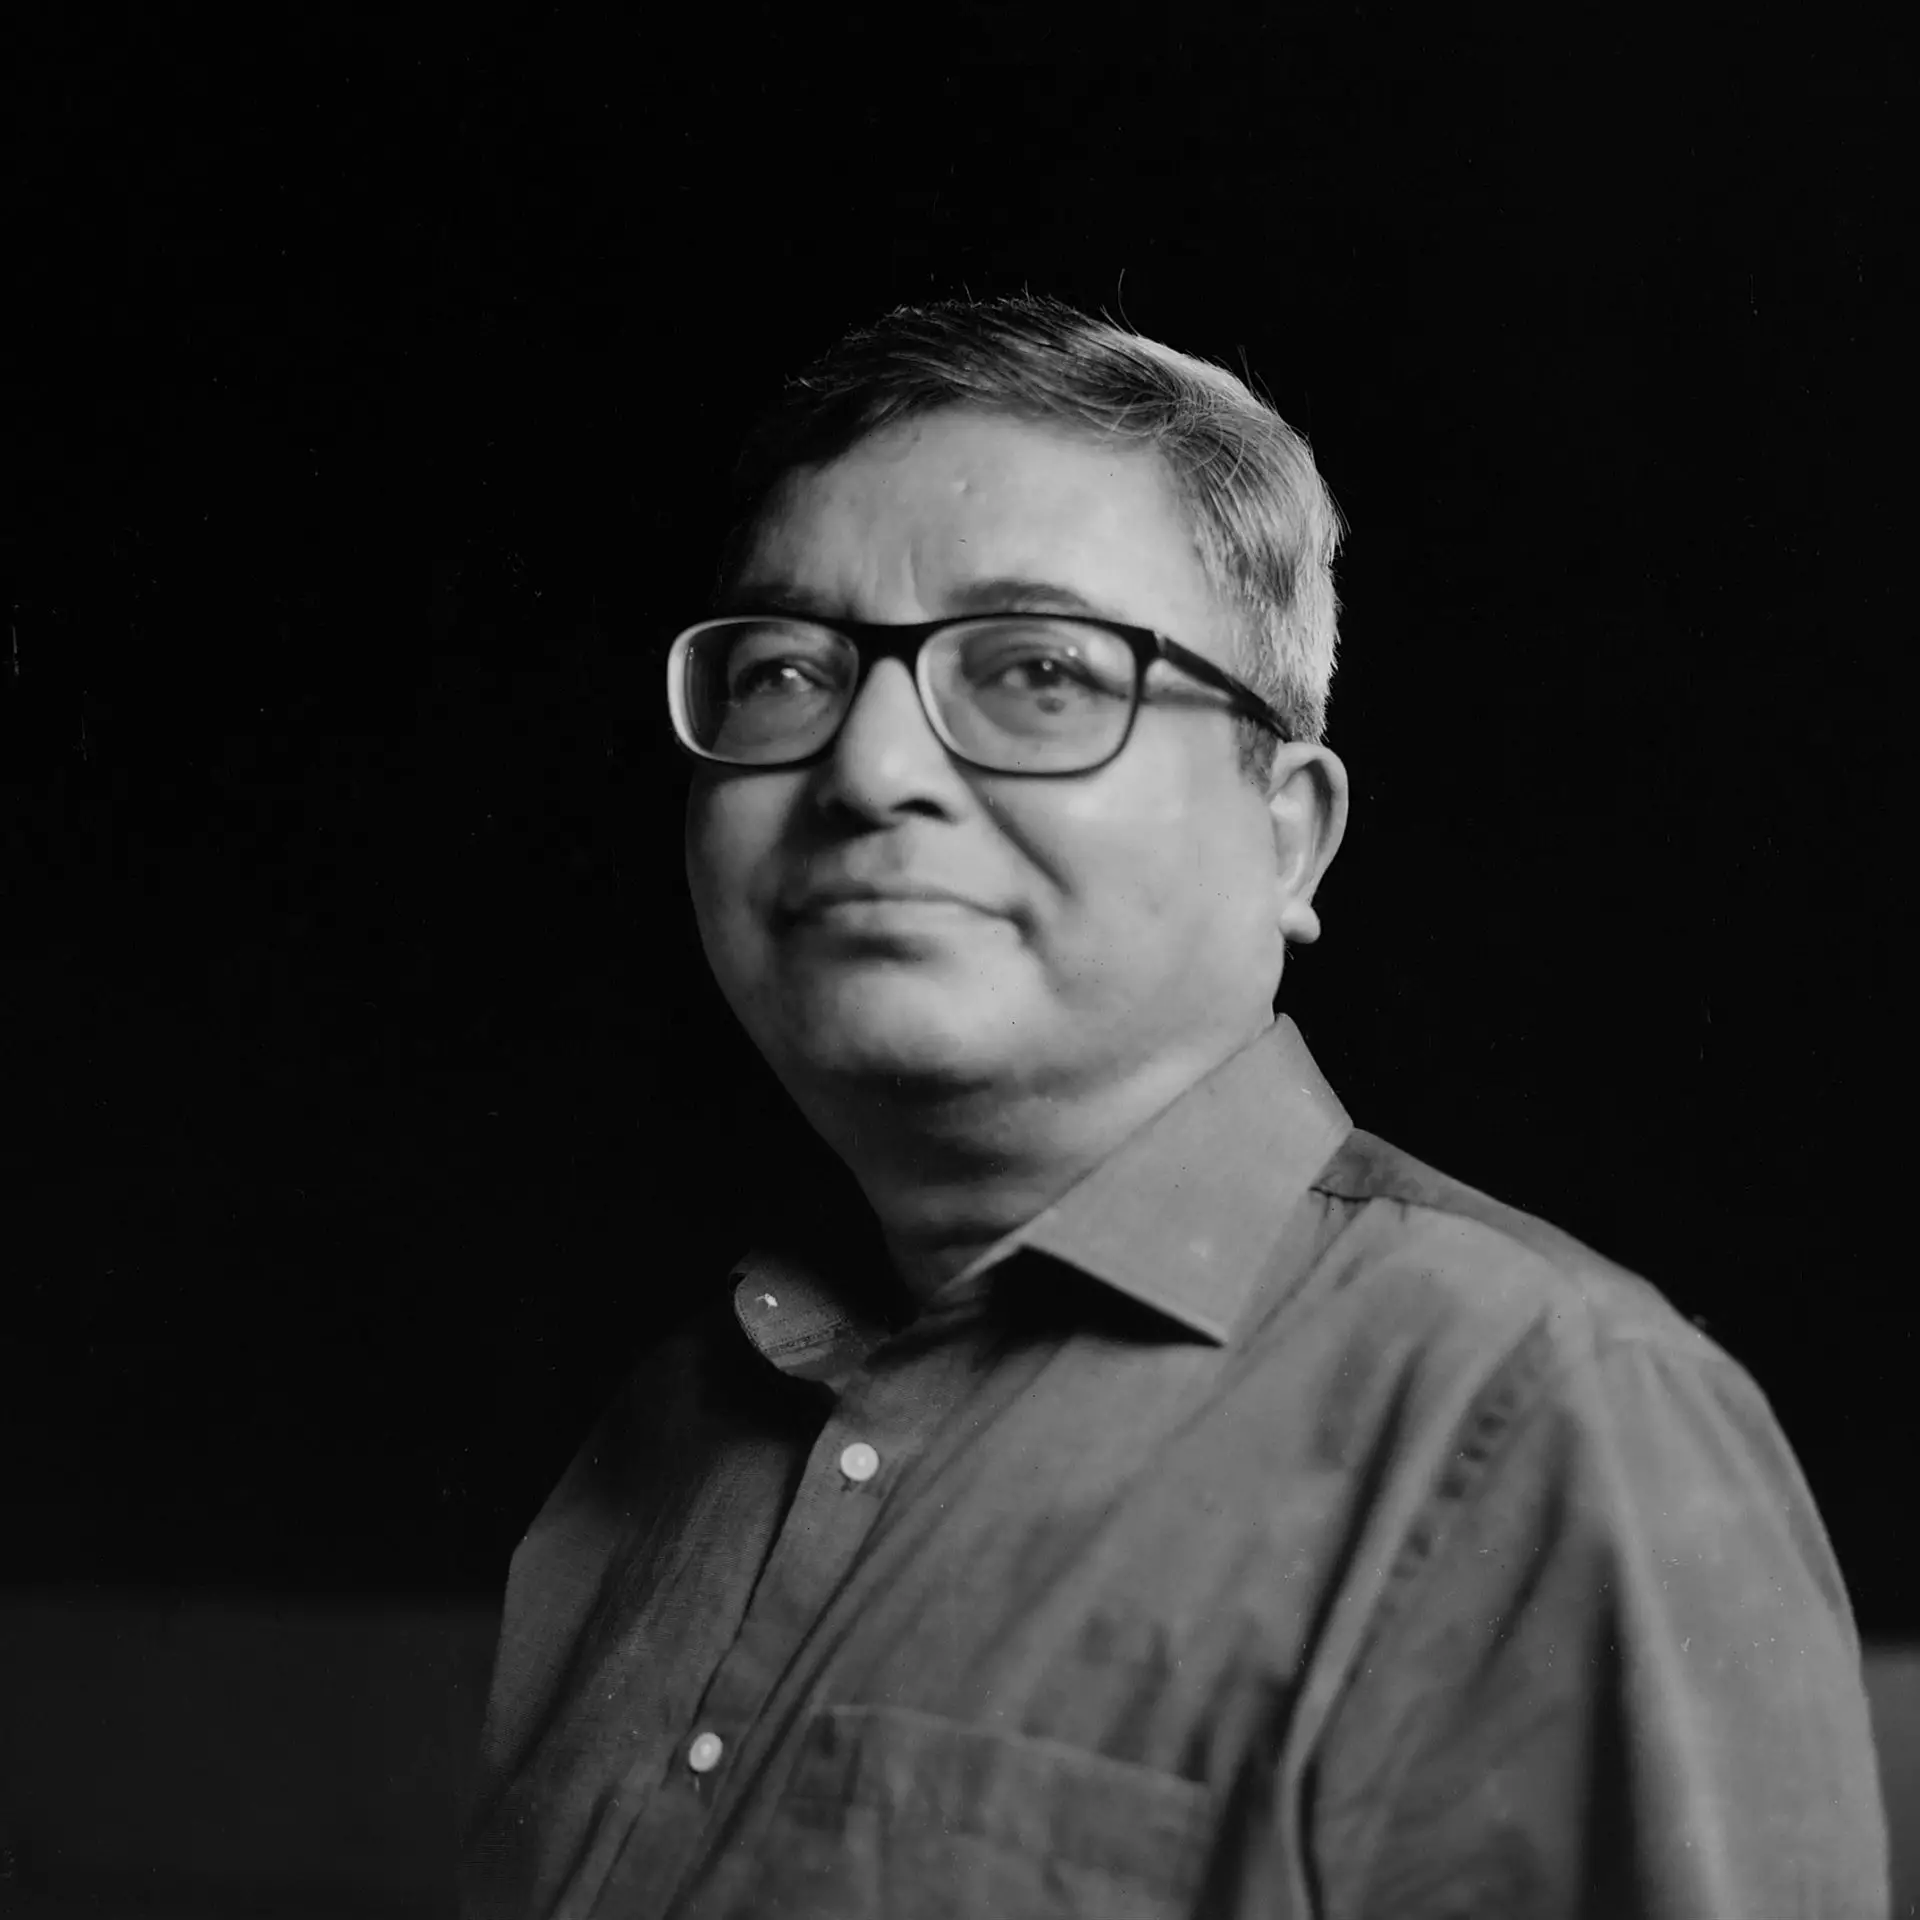
Photo 2
Verdict 1: Successful experiment?
No. I need a new brain.
Verdict 2: Interesting image?
No.
“Straight” photos
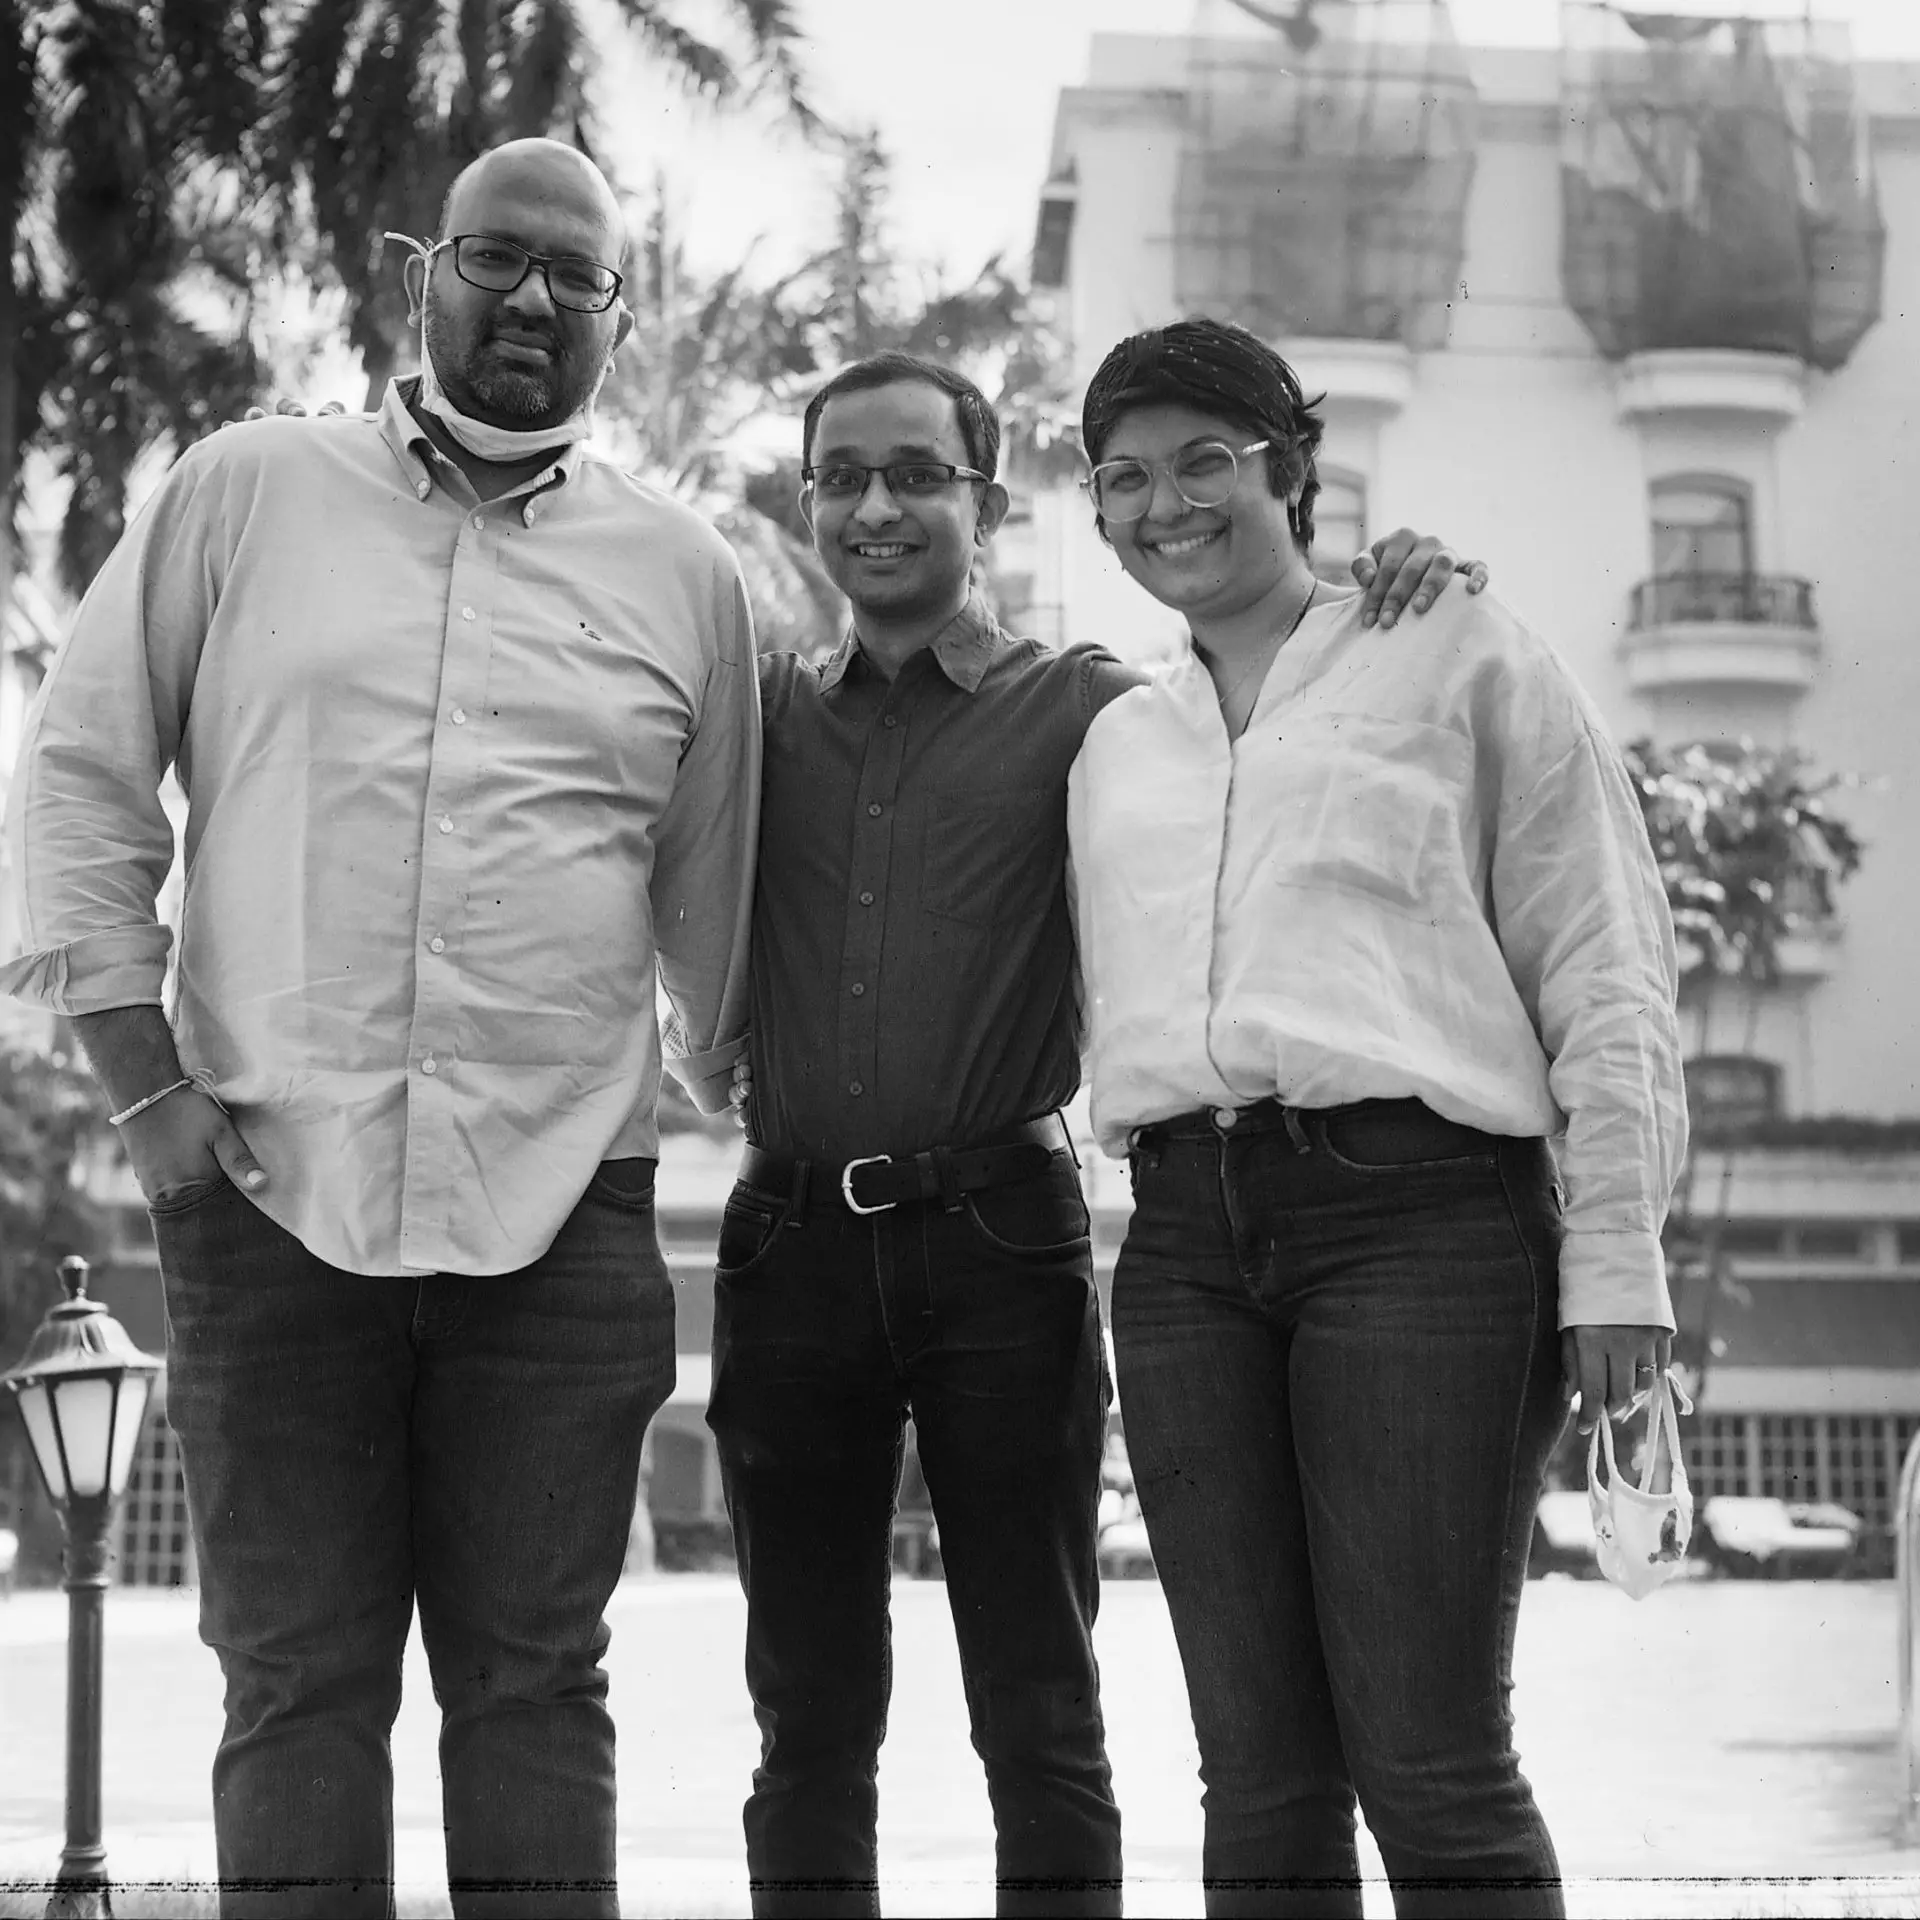
The next two photos are not experiments, just regular photos. My friend and his wife were in town, and I met them for breakfast. I’ve known him for over 17 years now, but we live far apart, so I was seeing him after a while. From a technical or artistic point of view, the photo is nothing special, but it’s a nice reminder of a happy day.

For the next photo I used the self-timer so I could join them in the frame, but that doesn’t really count as an experiment.
Photos 3 & 4
Verdicts:
Not experiments, therefore N/A.
Weird angles
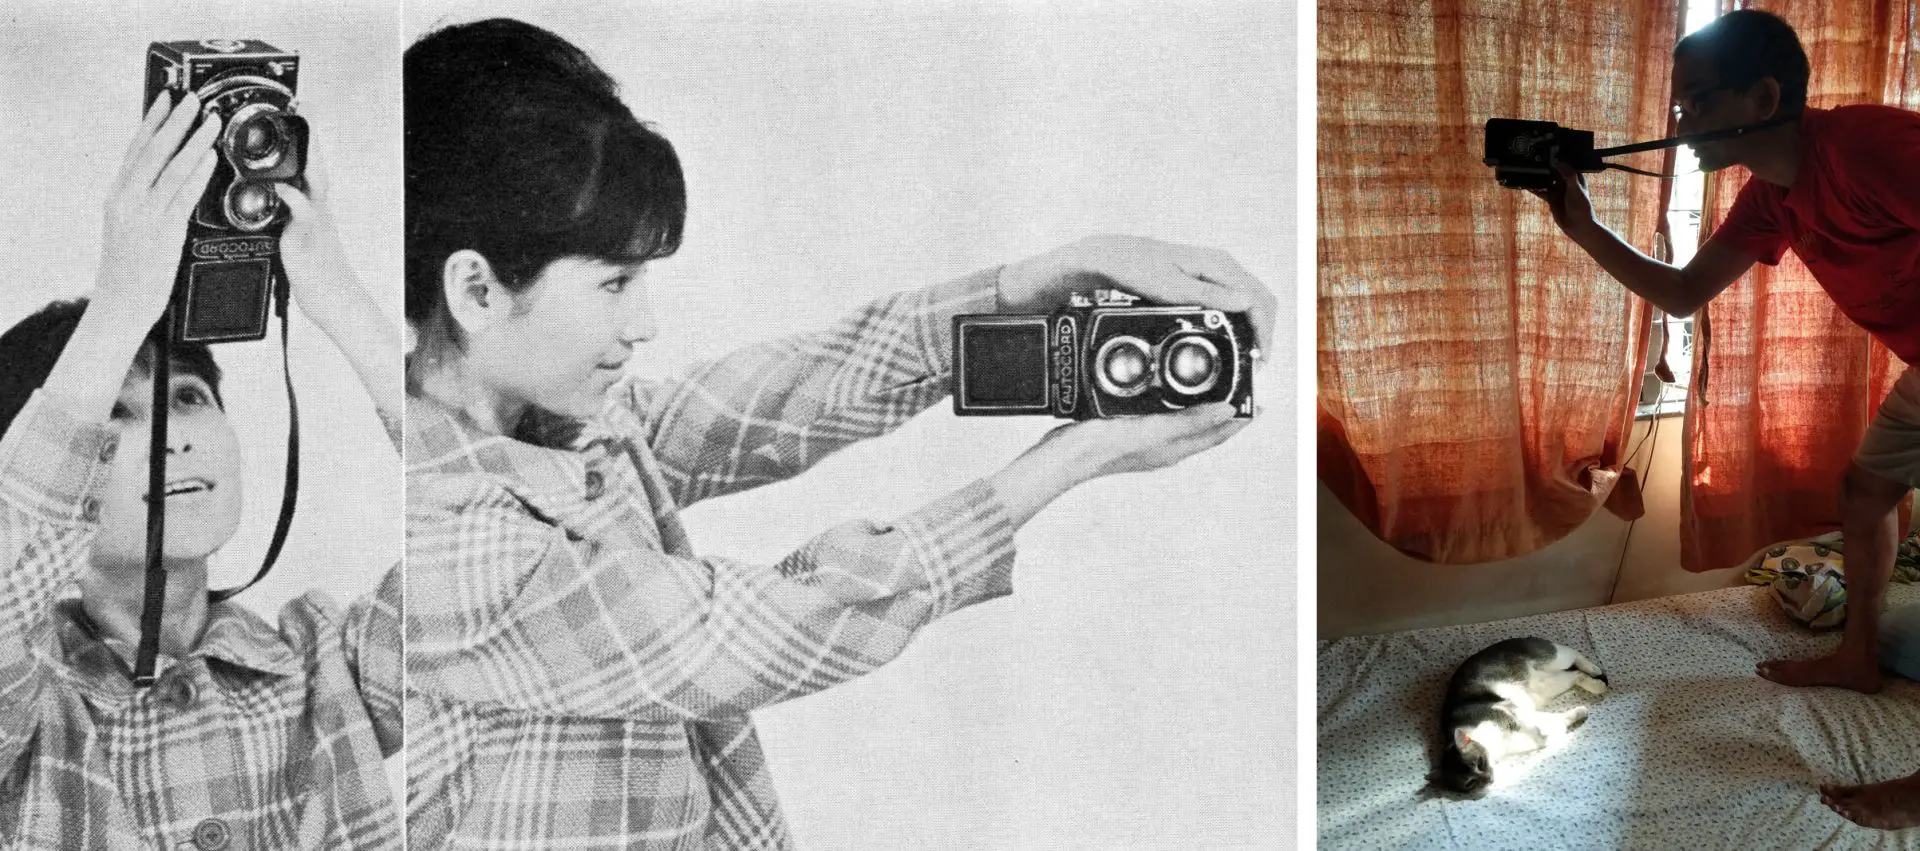
My camera manual has a very fun series of pictures showing the Autocord Lady taking photos from various unconventional angles. I wanted to try one of those, and a good opportunity presented itself when I found this stray cat sleeping on my bed. (Well I say stray cat, but she has kind of adopted us, climbing in through my bedroom window when she gets a chance.)
If you’re shooting CatLABS film, you gotta take some cat photos, right? I metered the bedsheet and underexposed by 2 stops (in Zone System parlance, placing it on Zone III: low values showing adequate texture). But on the negative the bedsheet has very little detail – more like Zone II or even Zone I – which makes me wonder if the CatLABS box speed of ISO 80 is in fact closer to 50. But to be completely sure I would have to do a proper Zone System-style film-speed test, which I don’t plan to do for this film.
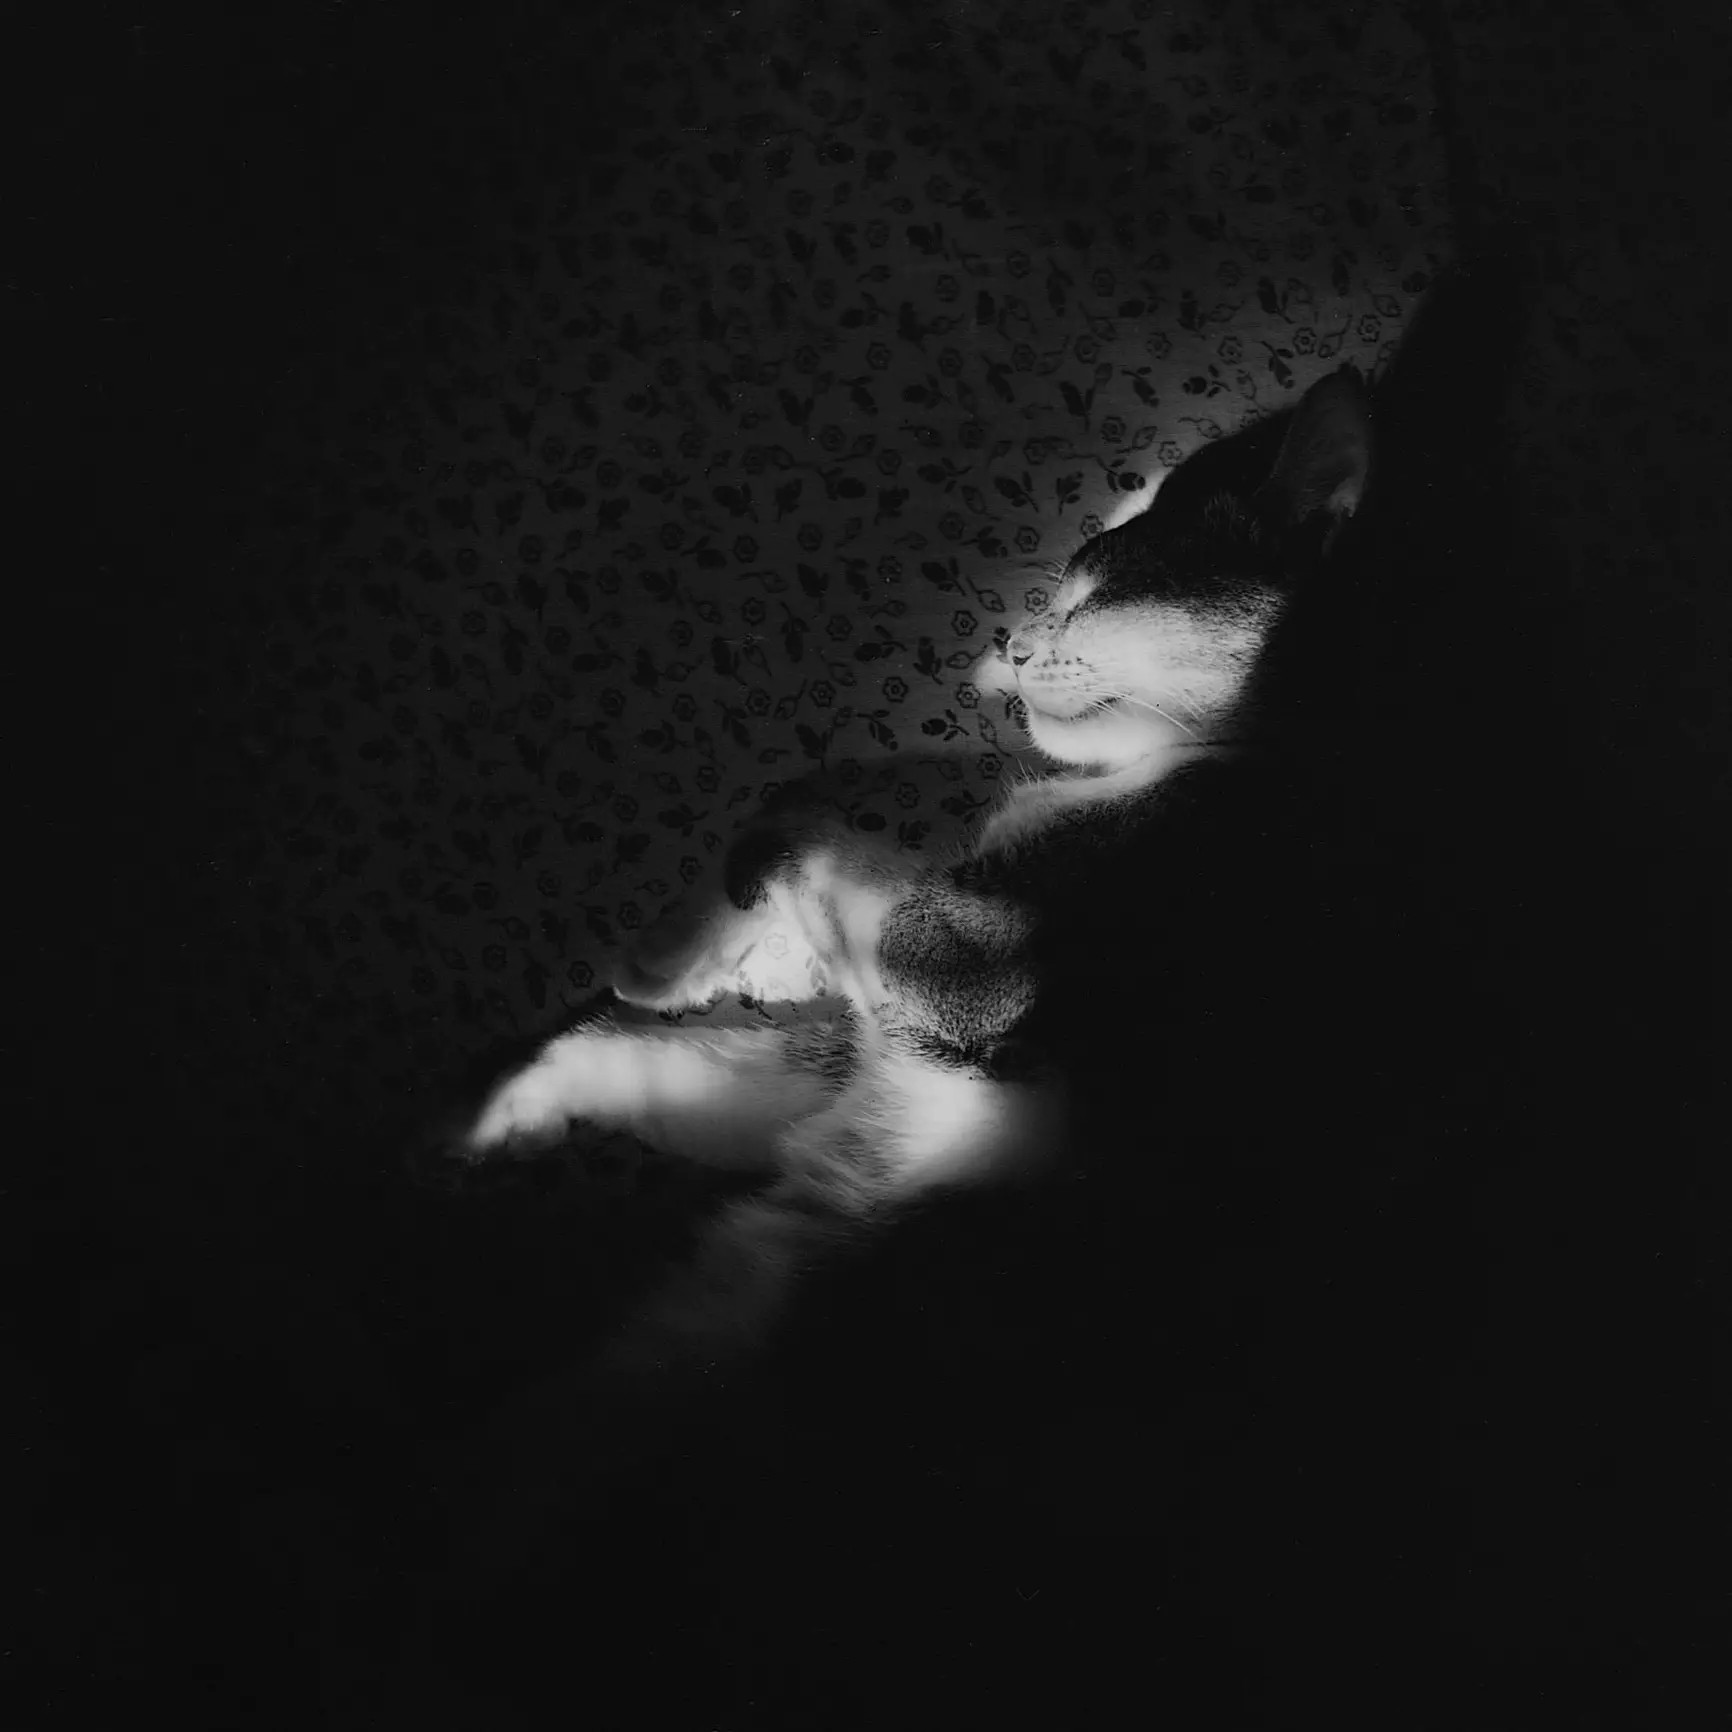
Photo 5
Verdict 1: Successful experiment?
Yes. Composition and focus are fine. Exposure is not, but I don’t think that’s on me.
Verdict 2: Interesting image?
Mildly interesting.
The next two photos are of the same cat, sitting on my floor. I wanted to try taking photos with the camera placed on the ground – one of the few things which is easier with a TLR than with most other cameras (it’s hard to get low enough to look through an eye-level finder).
For the first photo I used a smaller aperture to give myself some margin for focusing error. With slow film indoors, that meant a slow shutter speed (around 1/8 sec). The cat moved her head; you can see a bit of motion blur.
More importantly, there’s a weird mottled pattern all over the negative. It shows up in the middle frames, not at the beginning and end.
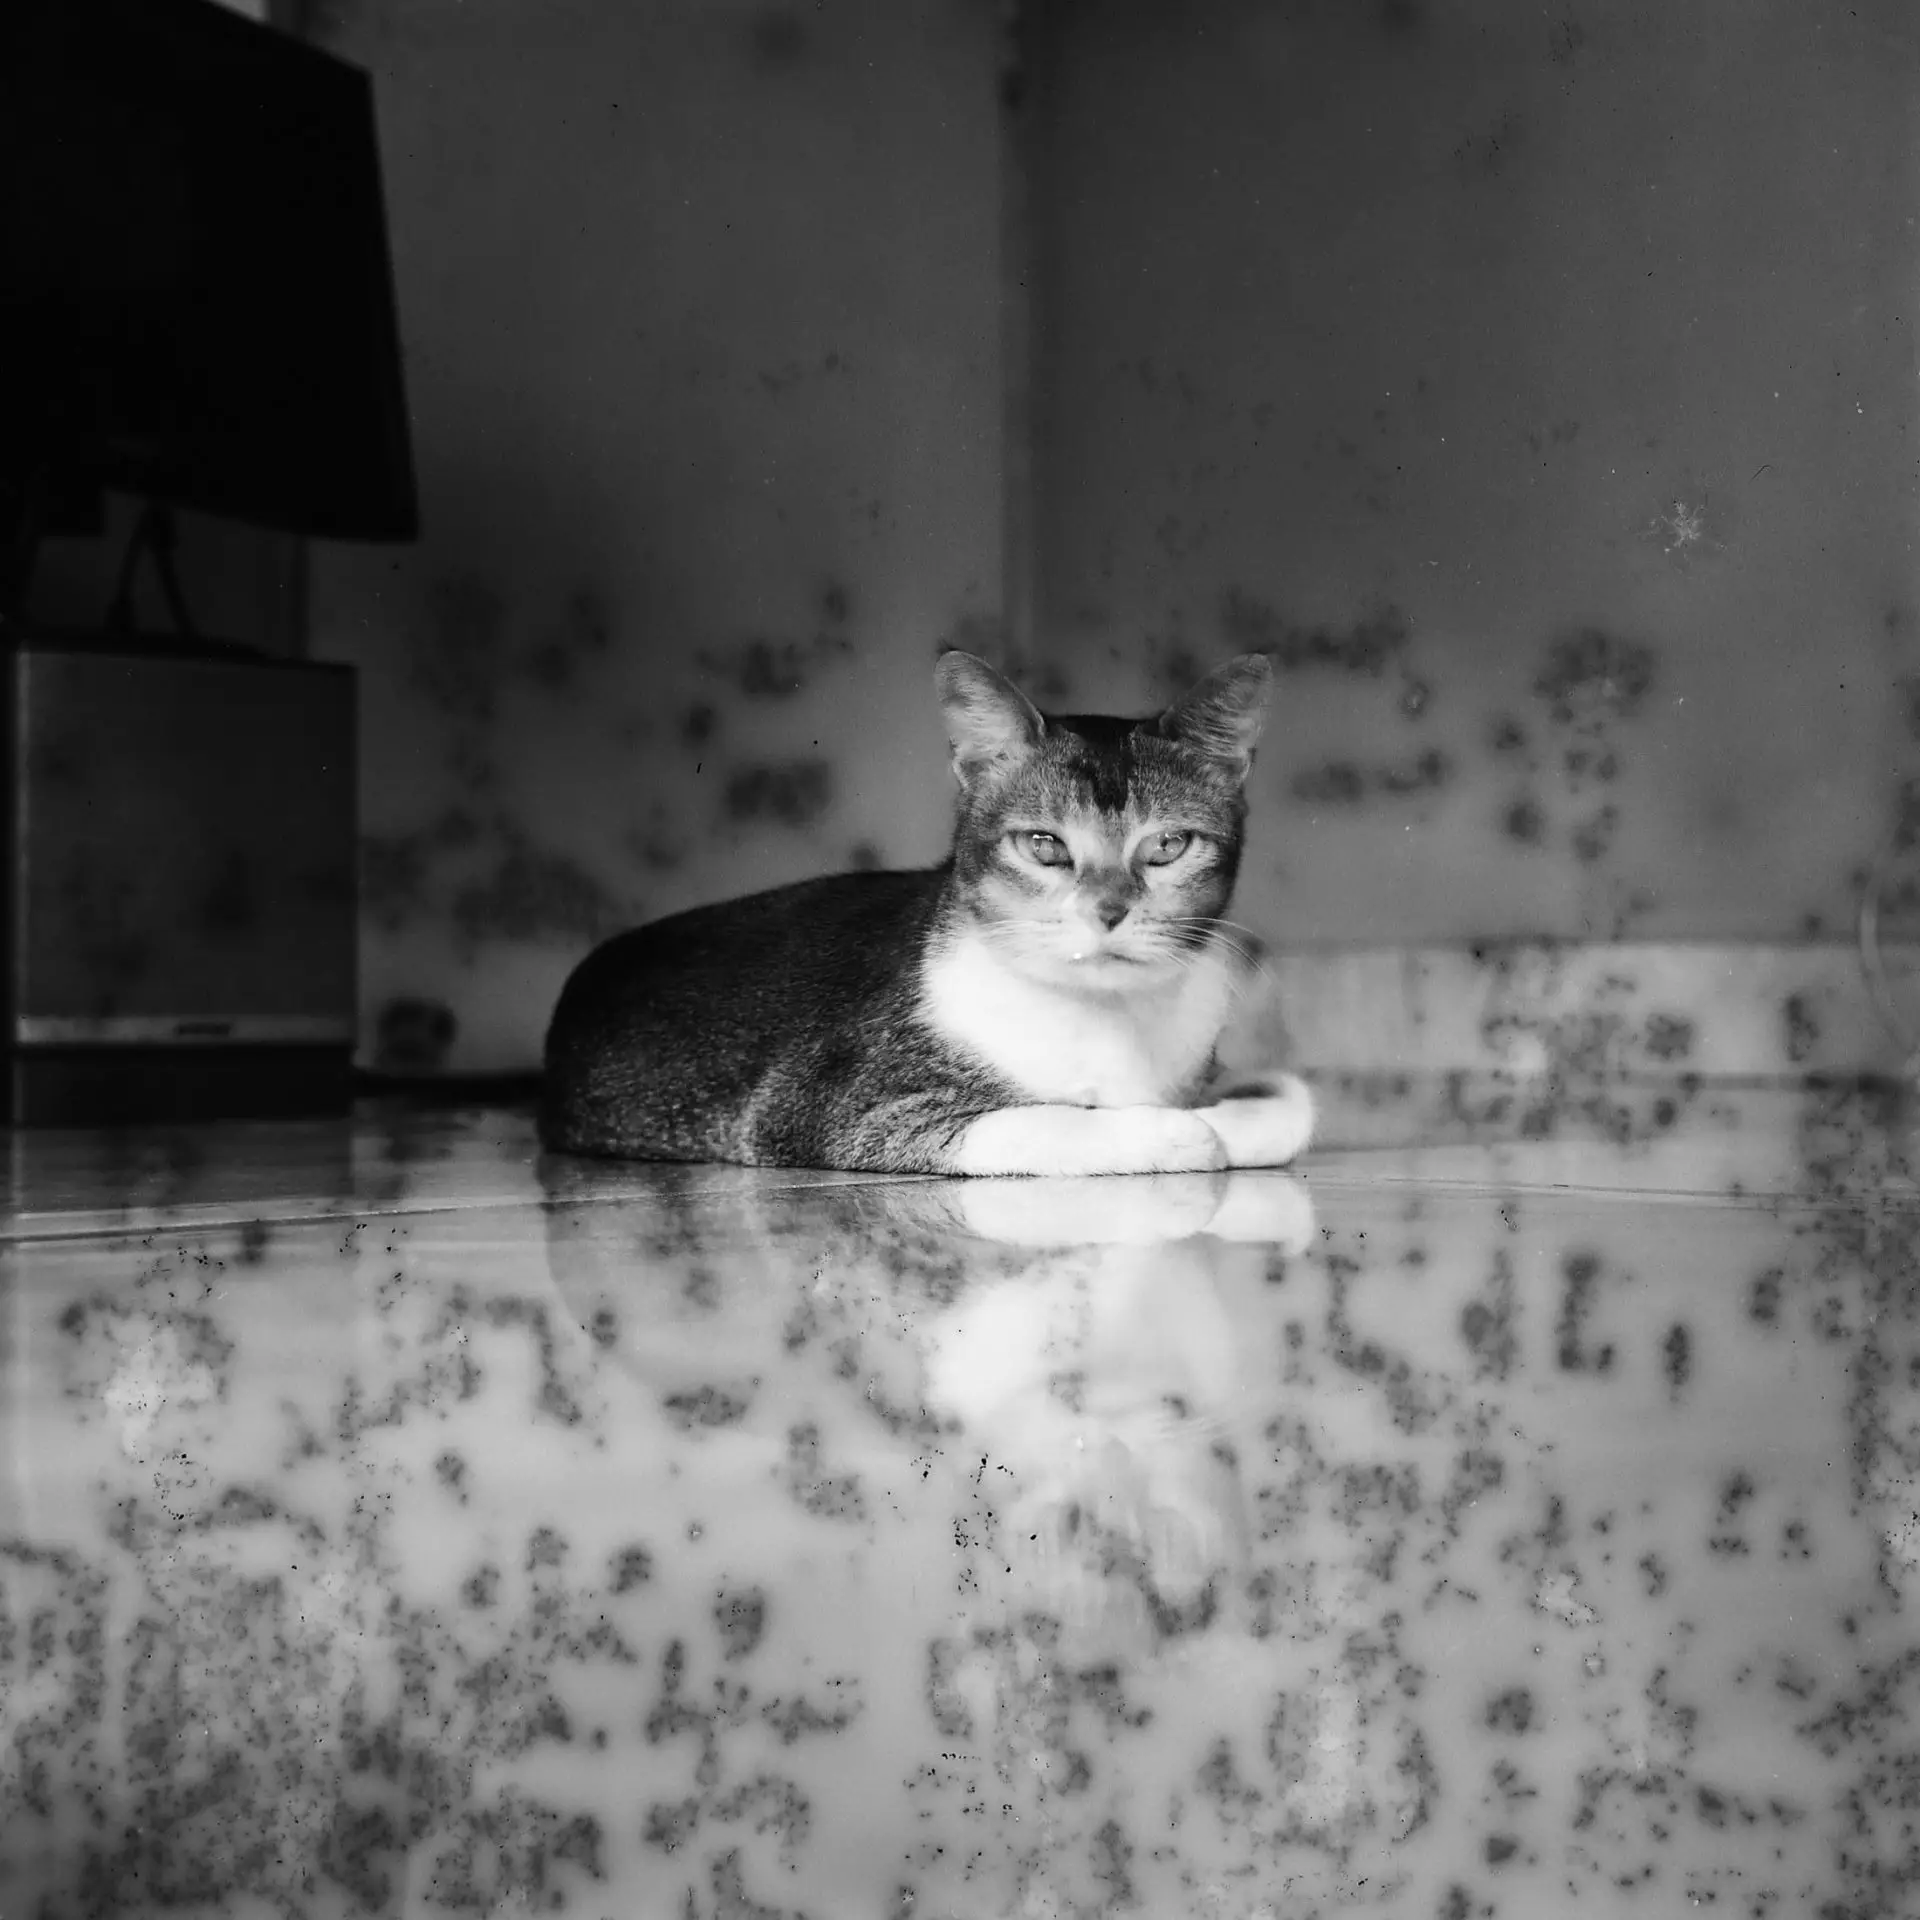
Photo 6
Verdict 1: Successful experiment?
Yes. Composition and focus are fine. The mottling is not my fault.
Verdict 2: Interesting image?
No.
The mottling might look like expired film, but I shot the roll before its expiry date. Moreover, I kept it in the fridge after purchase. To avoid condensation, I even waited a few hours after taking it out of the fridge and before opening the foil wrapper. So I was pretty sure the mottling was not user error. I wrote to CatLABS and got the following reply:
Unfortunately, we have seen some issues like this which have all been related to moisture accumulation during storage. We were not able to isolate the exact causes for this and it was quite random. Unfortunately, since then, this film stock has been discontinued while we work on improving the quality control of our films.
They also offered me a free roll of the new film once it’s released, which was nice of them.
Anyhow, back to photography. I noticed the cat had moved, so for my next attempt, I shot wide open with a faster shutter speed. This is my favourite photo of the roll. To my eyes, the mottled effect looks beautiful, even painterly. I added a slight sepia tone in Photoshop. When I print in the darkroom, I plan to tint it with black tea.
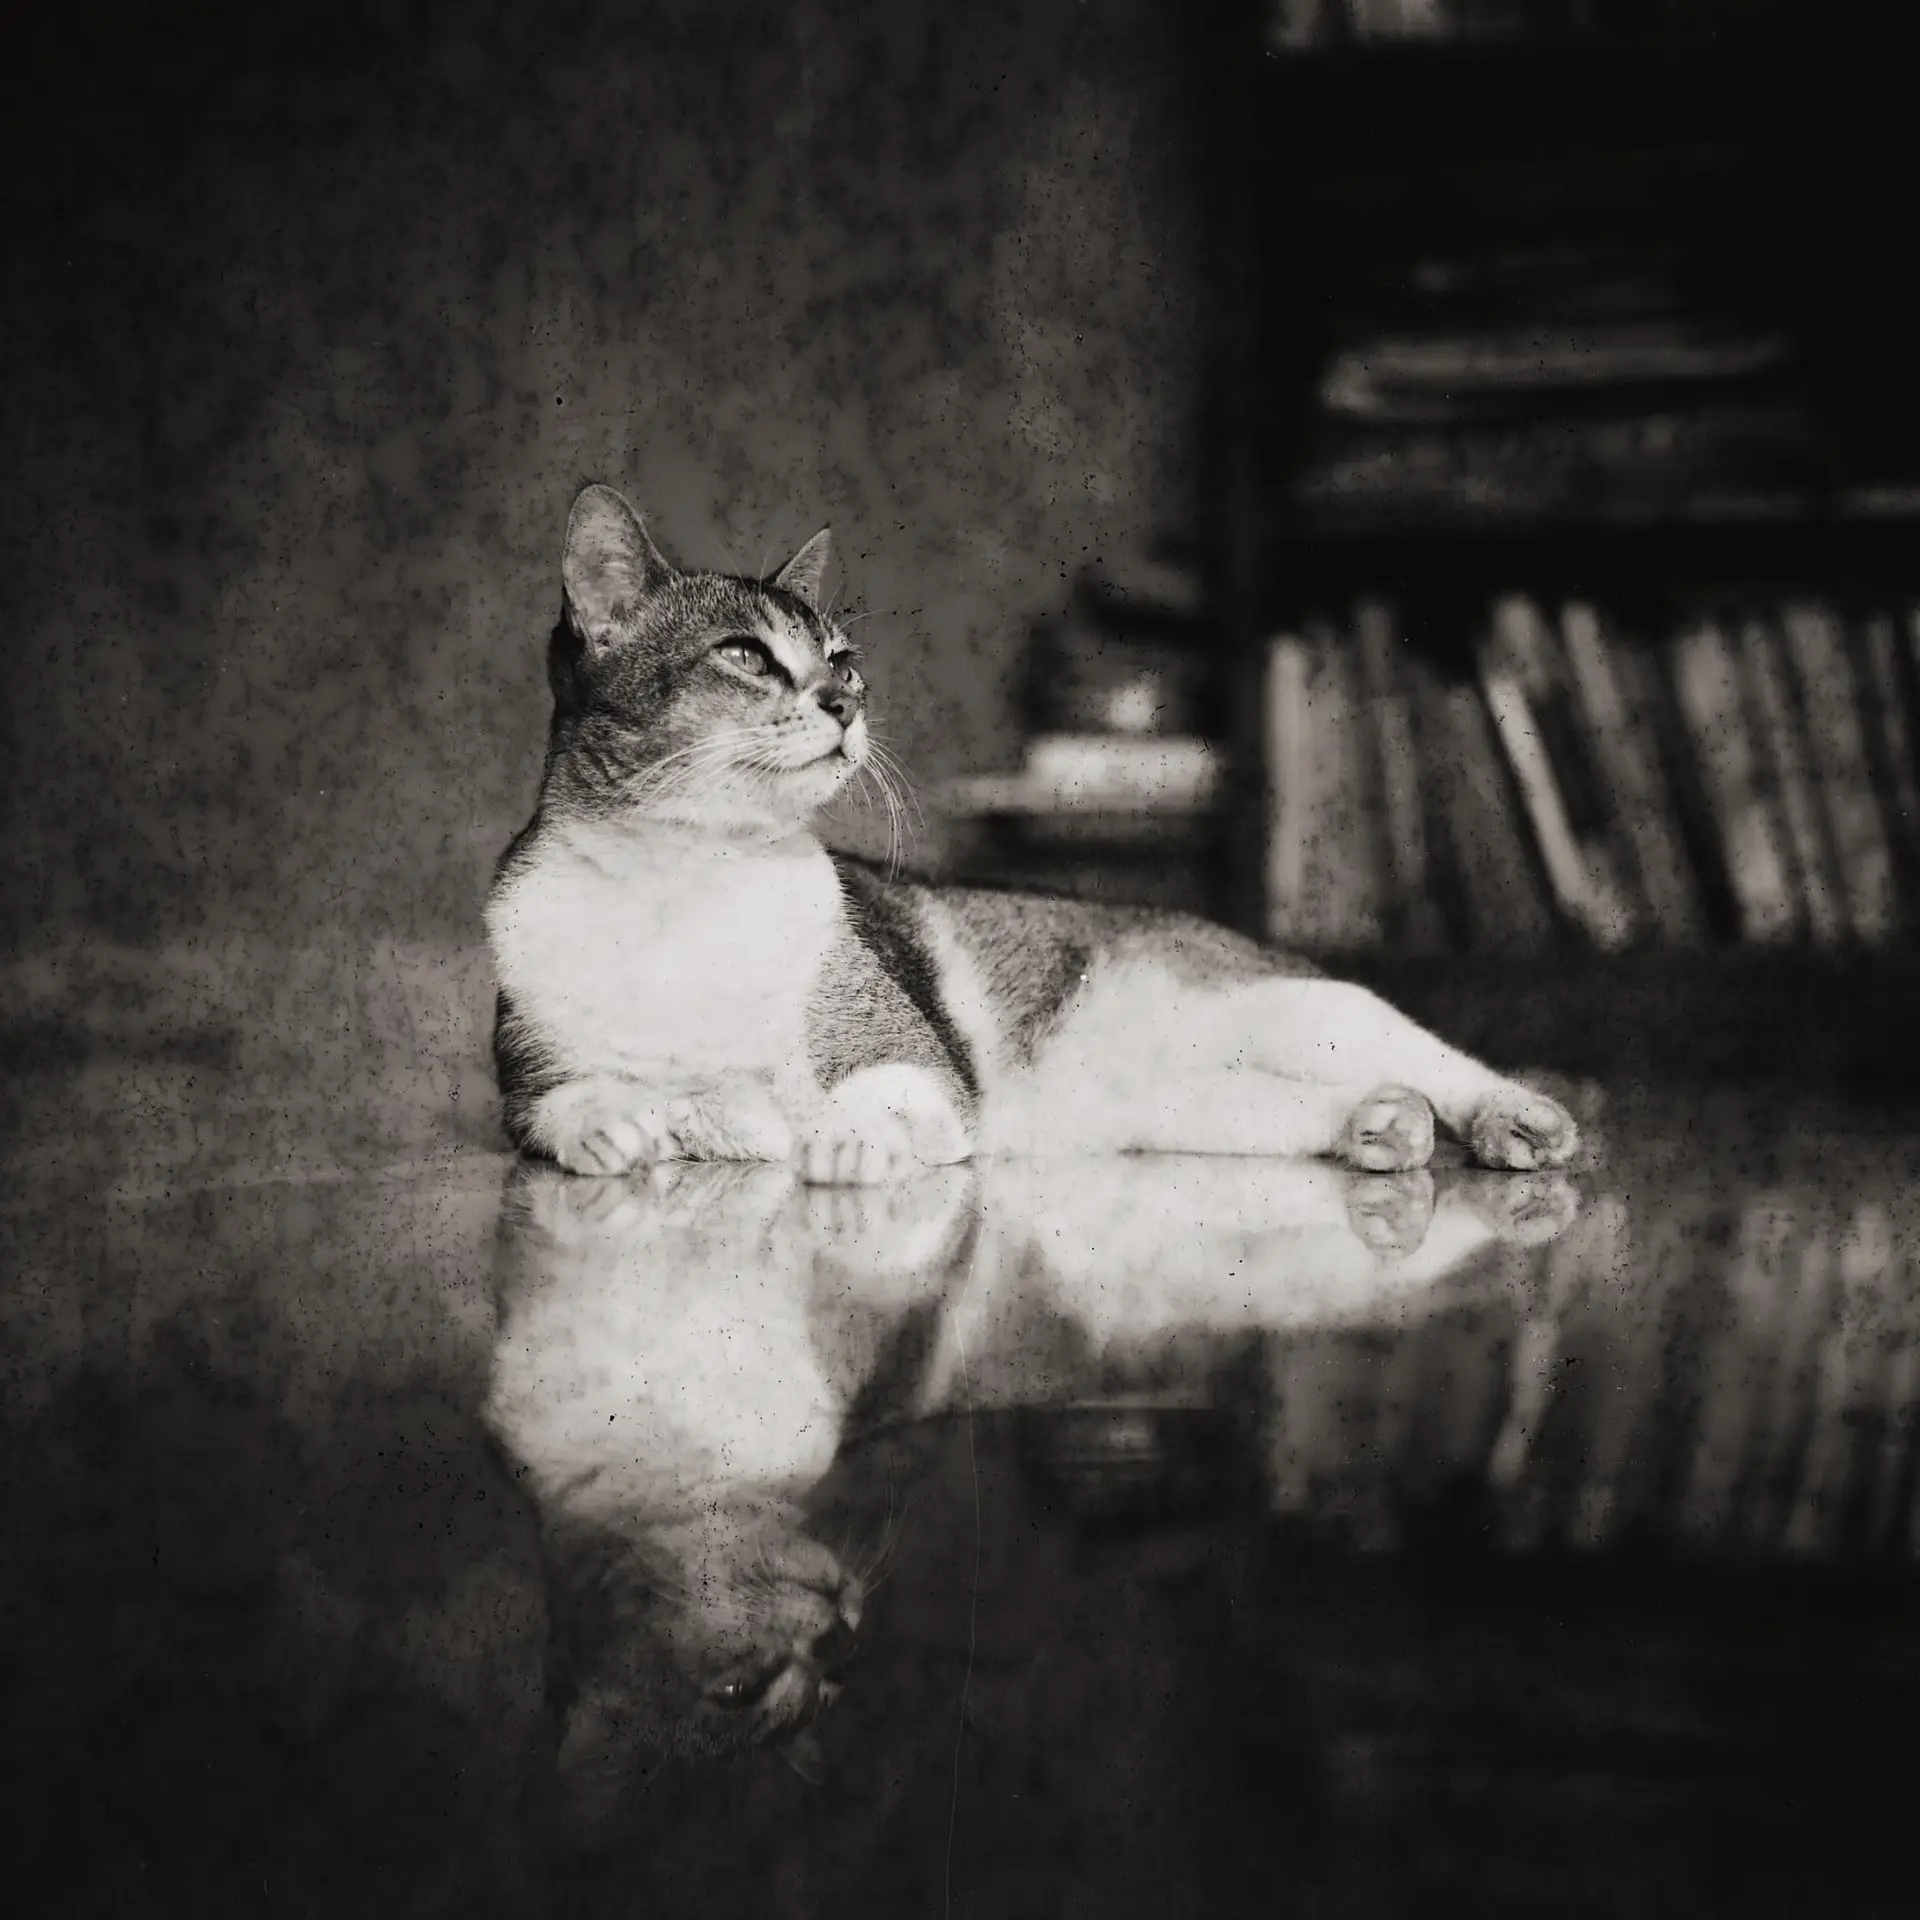
Photo 7
Verdict 1: Successful experiment?
Yes.
Verdict 2: Interesting image?
Yes!
In general I agree with Hamish: “film photography is not about serendipity (for me)!” I too like predictable results. I know a lot of people enjoy film because of “happy accidents”, but my own accidental photos, at least to my eyes, are rarely happy or interesting. This photo, though, is an exception.
Long-exposure ghost effect
For Halloween this year, my friend Maria from Argentina posted a ghostly self-portrait taken with a pinhole camera:
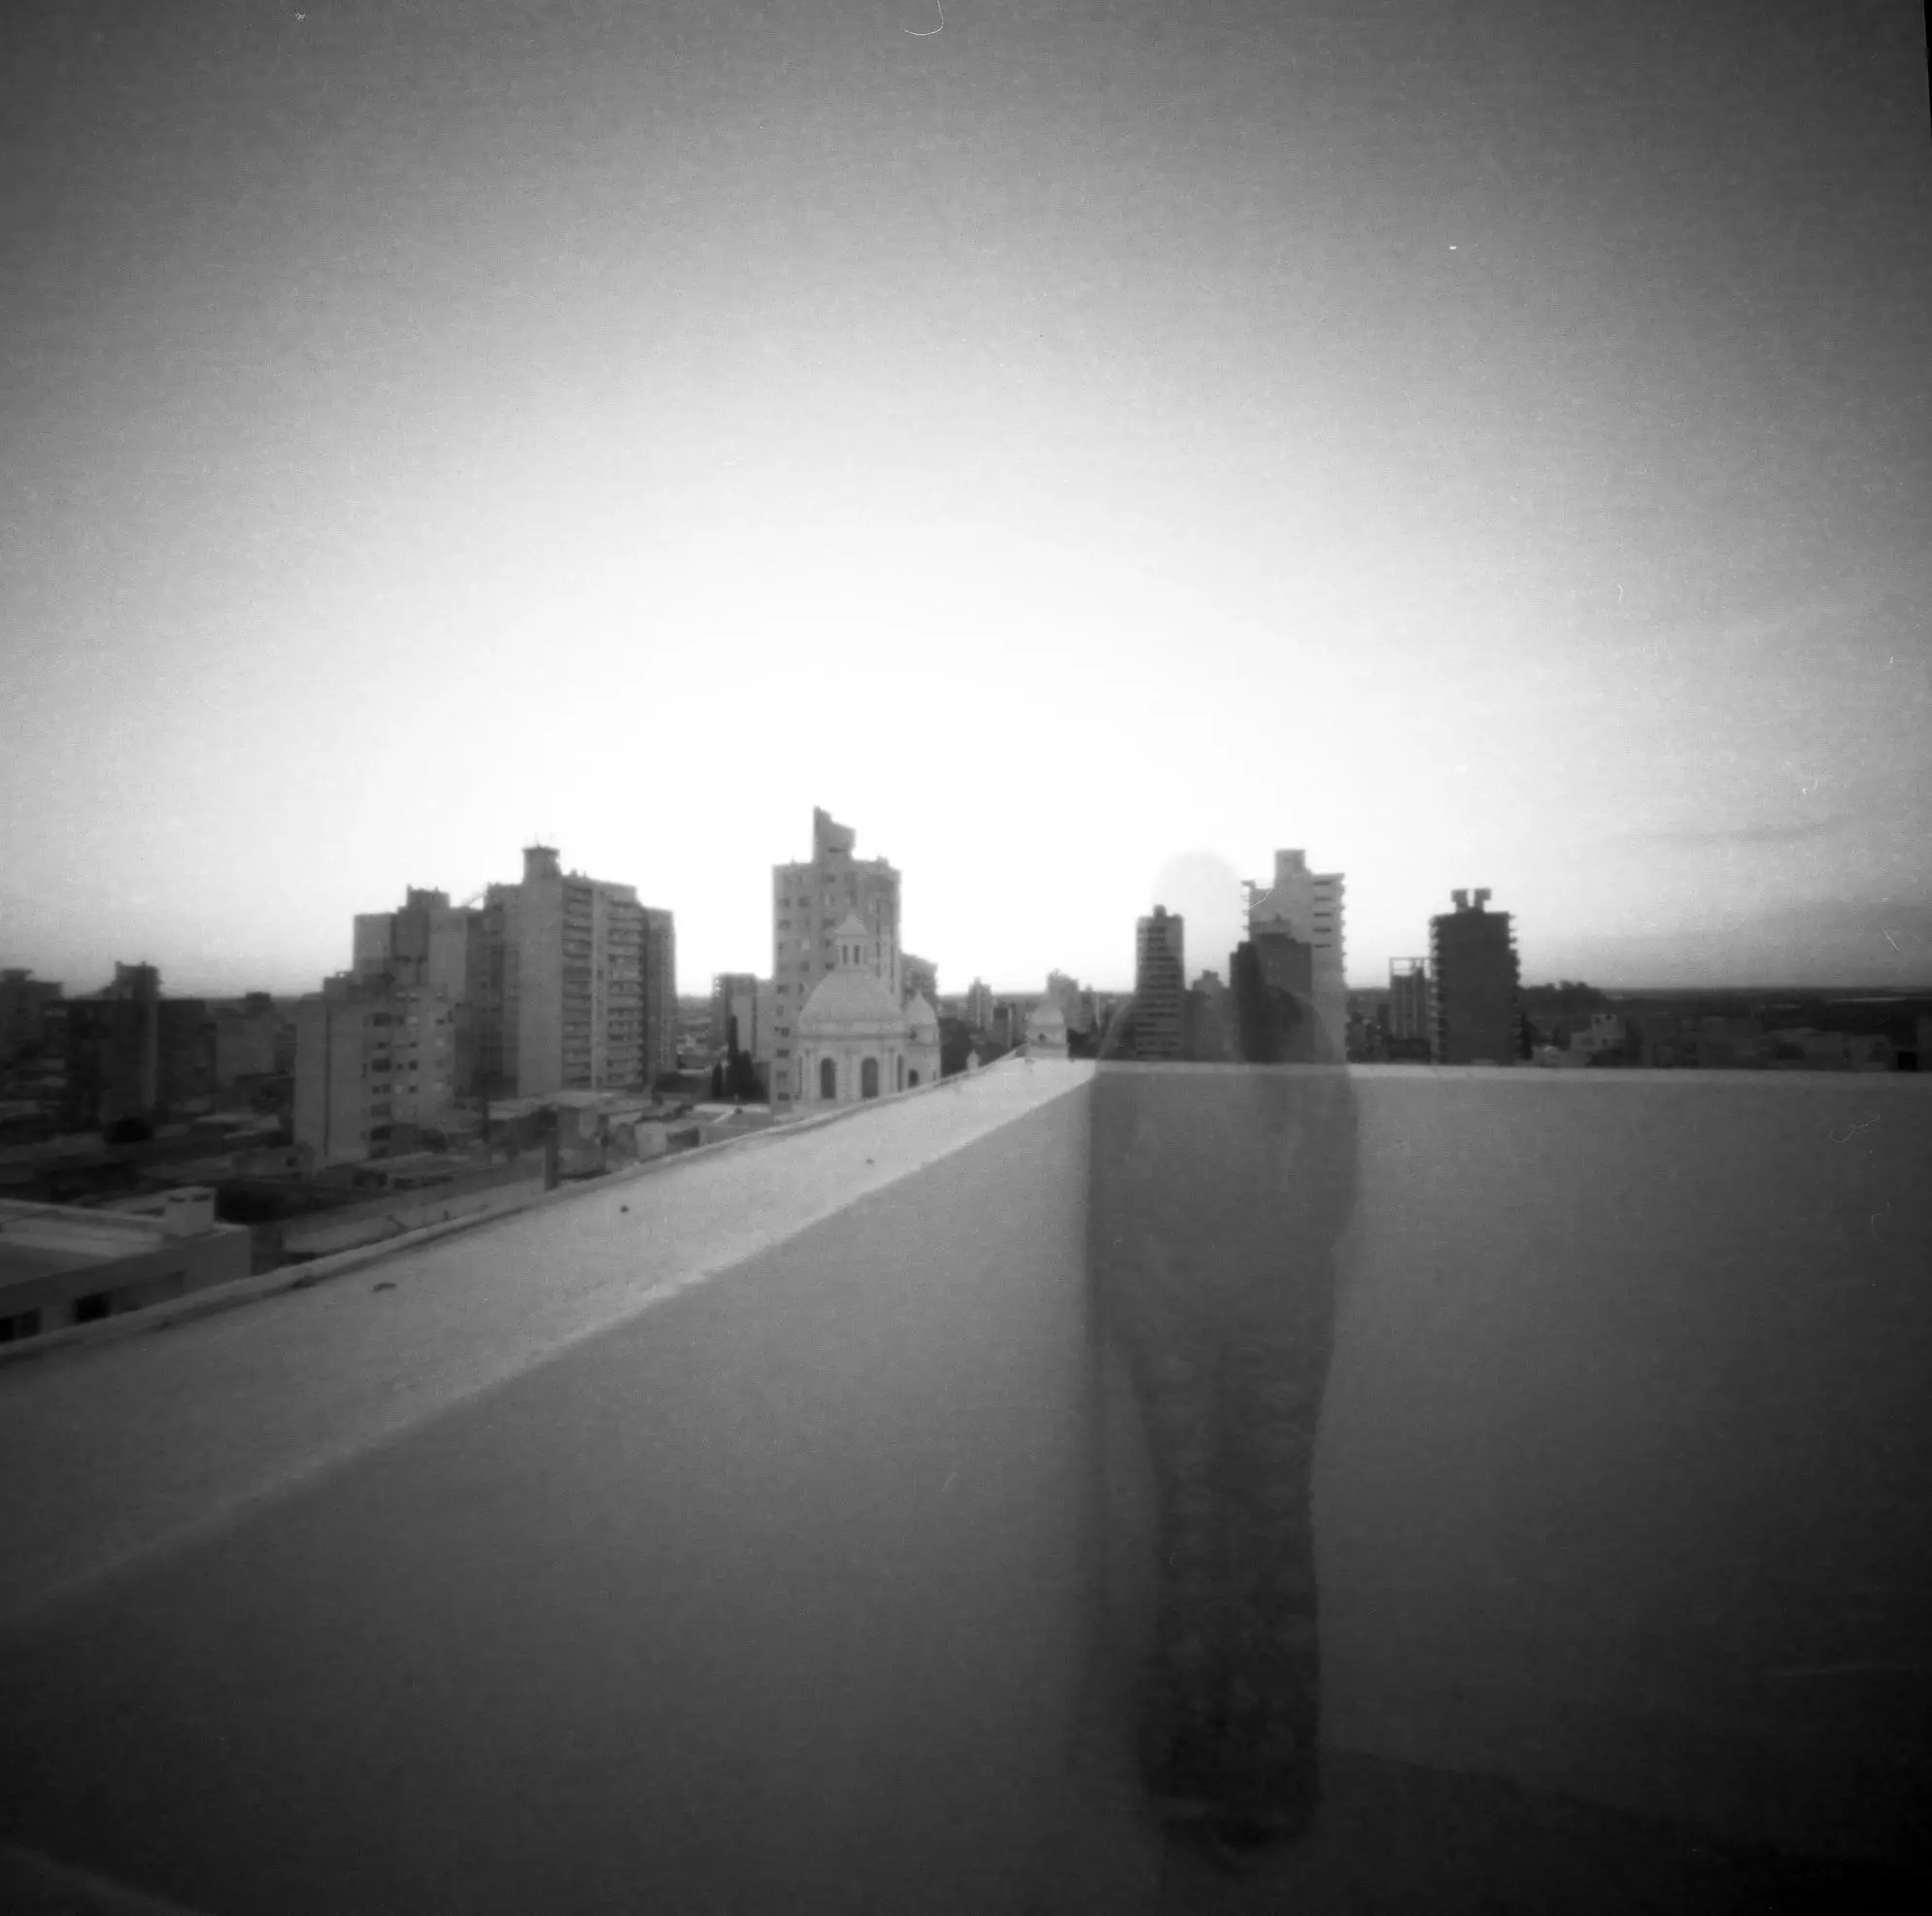
I wanted to recreate this photo on our roof terrace in Kolkata, but from a higher angle to include more of the cityscape. I ended up placing the camera on another terrace, higher up. But this meant I would have to start the long exposure (I have a cable-release with shutter-lock), run down to the lower terrace, stand at the right spot long enough for my image to be recorded, run back up to the higher terrace, end the exposure.
I timed the whole operation. Running up and down would take about 40 seconds total, so I figured I had to stand for another 40 seconds. That way, half the exposure would be with me in the frame, and half (when I was running up and down) would be without me. But that meant an exposure time of at least 80 seconds.
Pinhole cameras have a tiny aperture, so long exposures are easy even in the daytime. With the Autocord, even at f/22 and taking reciprocity failure into account, I wasn’t getting anything close to 80 seconds. Another way to prolong the exposure time is with an ND filter. But I don’t have an ND filter (or indeed, any filter) for the Autocord. I improvised, taping an ND-10 filter from another lens onto the Autocord’s lens hood.
Evidently I did not do a good enough job of taping the filter, because you can see some light leaks at the corners of the negative. The exposure is not too bad (a half-stop more would have been perfect) and in hindsight I should have worn a lighter T-shirt for better visibility. But the biggest issue is the mottling, which kind of ruins the photo for me. This is the worst-affected frame on the roll.

Photo 8
Verdict 1: Successful experiment?
Yes (extra points because this was a tricky operation).
Verdict 2: Interesting image?
No, ruined by mottling.
Macro photography
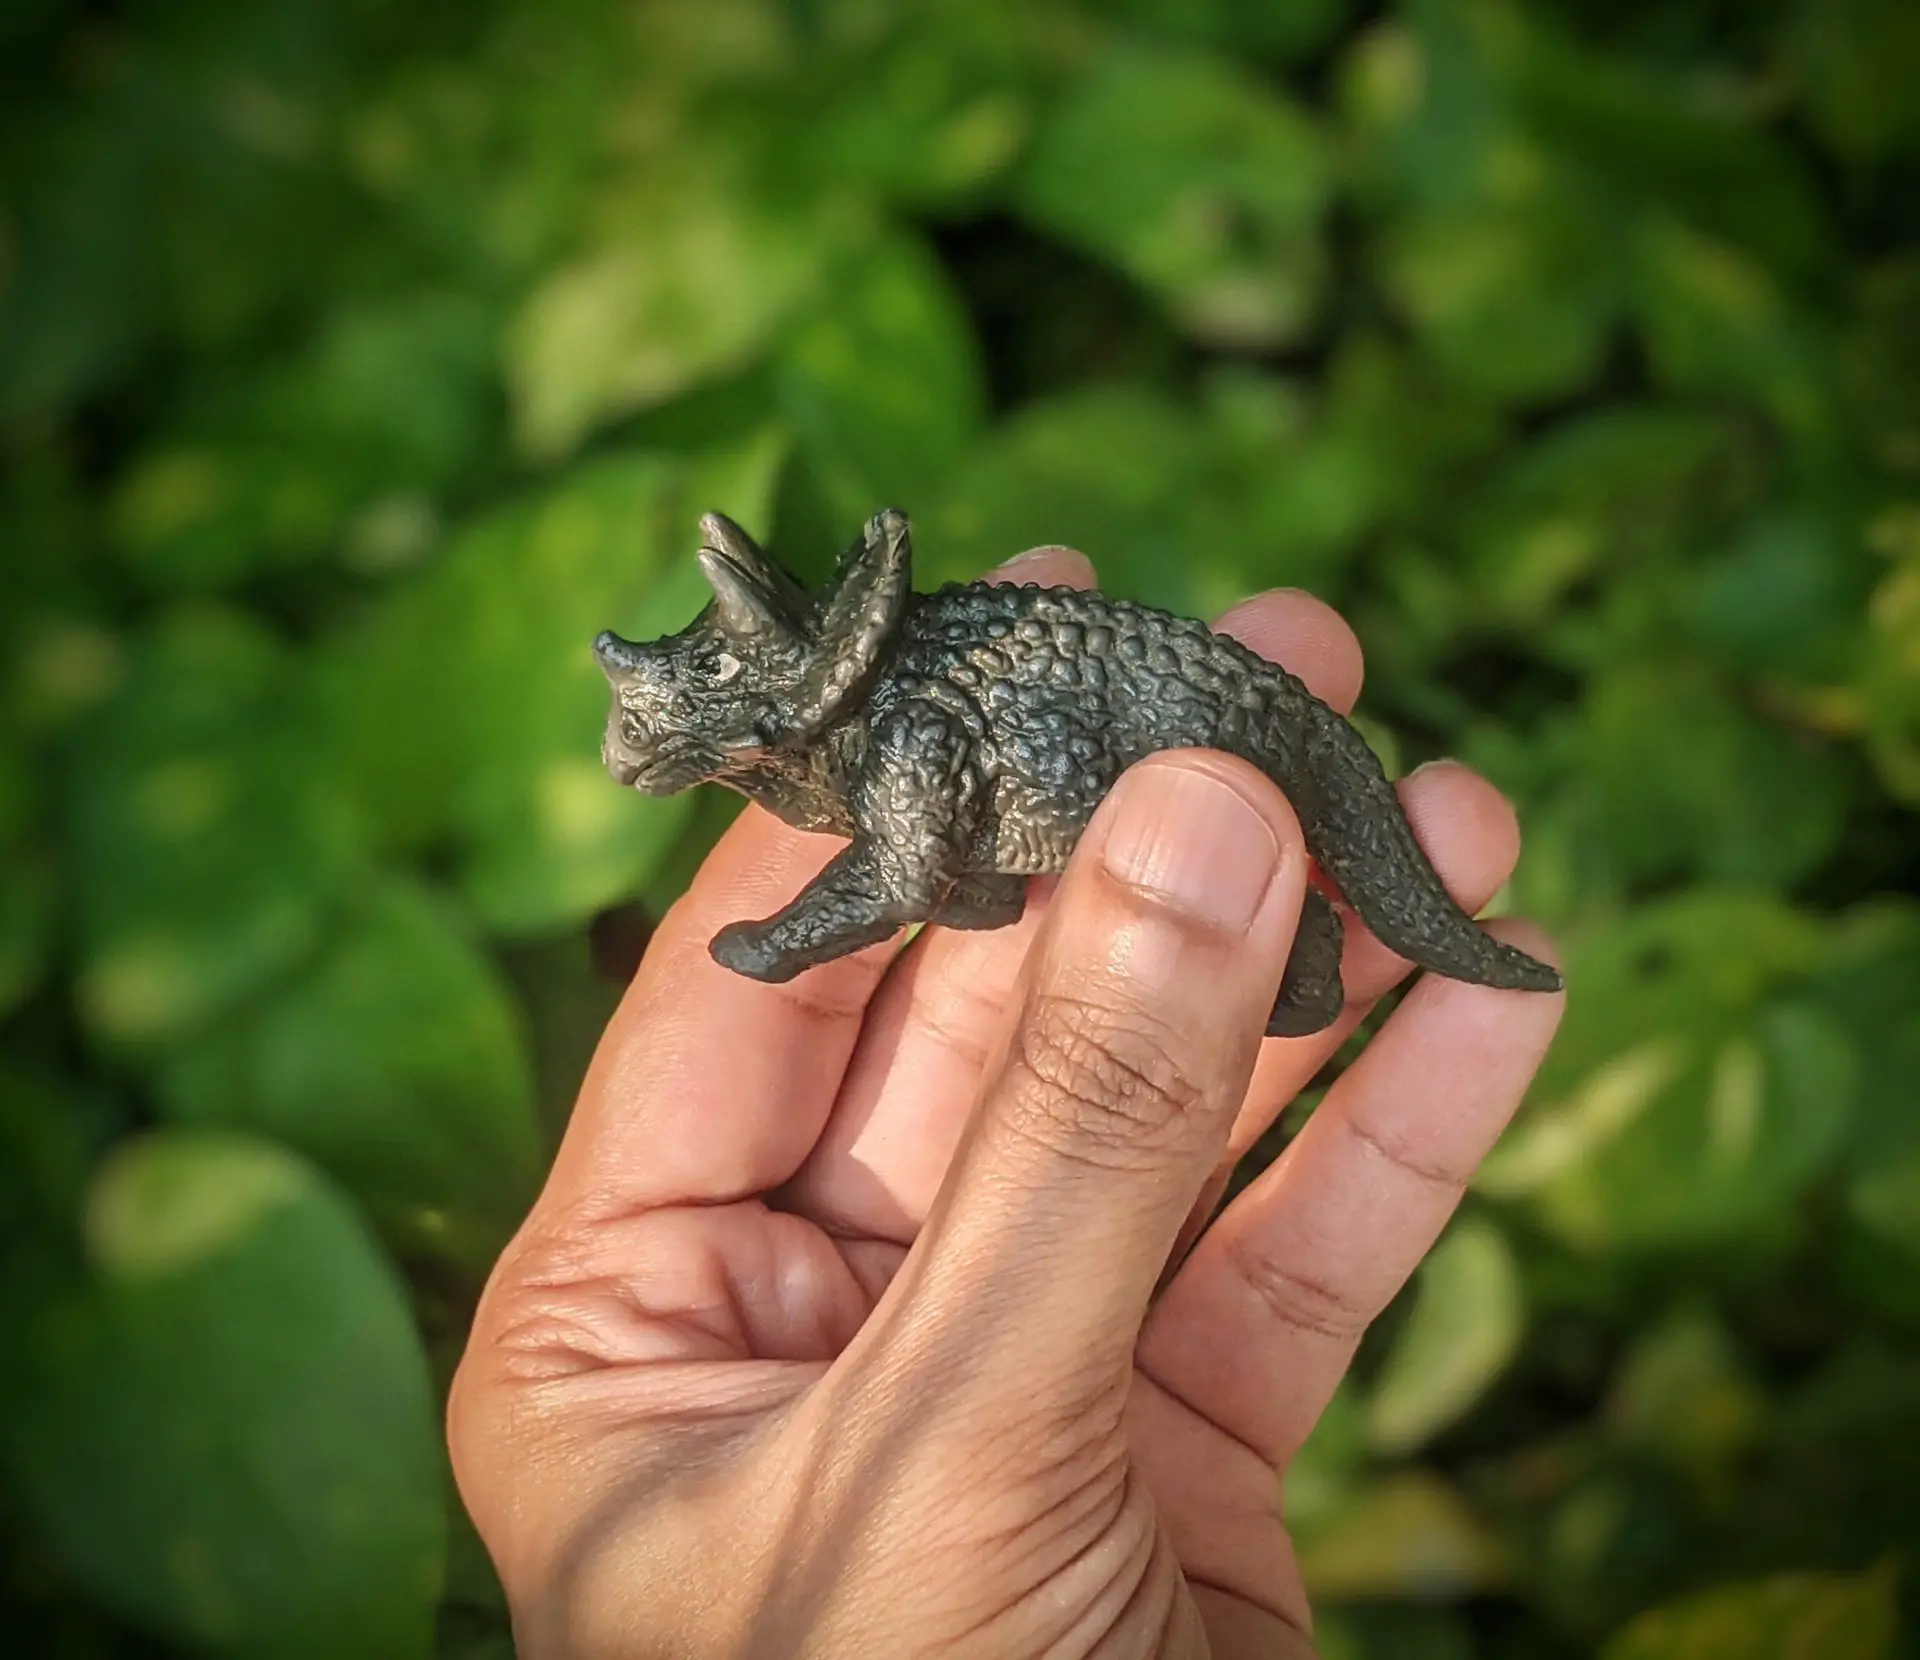
TLRs are generally a poor choice for macro photography. Naturally, macro photography was one of the things I wanted to try. My subject was this little toy triceratops:
There are two main obstacles to macro photography with TLRs: their lack of close focus, and significant parallax between viewing and taking lenses. Minolta produced accessory close-up lenses for the Autocord, and Bay I Rolleinars are also compatible. They also produced a device called the Paradjuster – a collapsible mount for parallax correction in close-up photos. But as I wrote in my earlier post, part of my thinking behind getting the Autocord was to have a simple, high-performance system with few choices. For me, that means no additional accessories, at least for now.
Improvisation time… again. For close focus, I used a Raynox DCR-250 macro attachment. The Raynox is compatible with filter sizes of 52–67mm. The Autocord’s lens is smaller, so I just held the Raynox against it. I used a small aperture (f/16, I think) for greater depth-of-field.
To compensate for parallax, I used a tripod with an adjustable vertical column. First I measured the distance between the Autocord’s viewing and taking lens (about 4.3 cm). I then composed and focused through the viewing lens with the Raynox held against it, raised the tripod by 4.3 cm, held the Raynox against the taking lens with my left hand, and released the shutter with my right.
Clearly, this method will only work if your subject is motionless. Not recommended if you want to capture dragonflies on the wing.
After all this effort, the photo itself is kind of boring. Maybe the lighting could be better, or maybe I just chose the wrong subject. I “hand-coloured” it in Photoshop, which I think is an improvement. You can compare the two versions below.
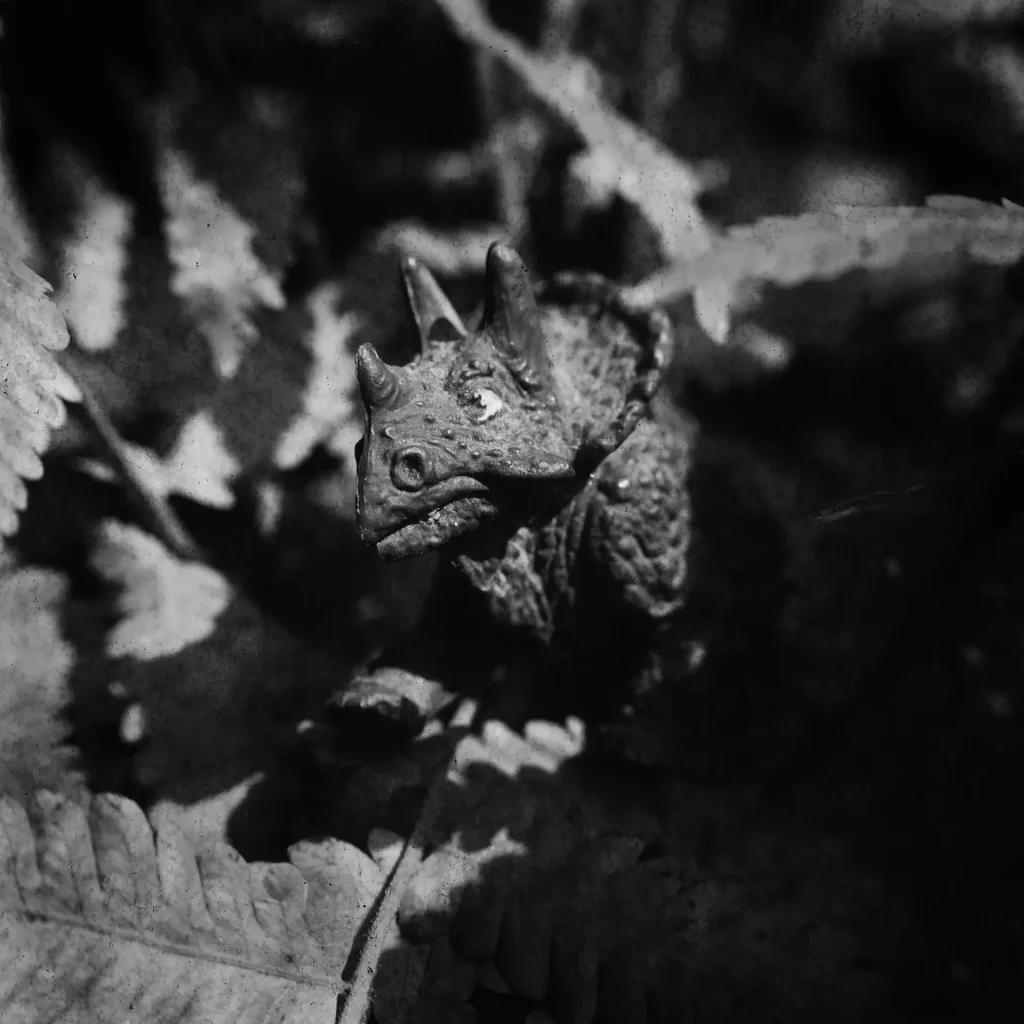
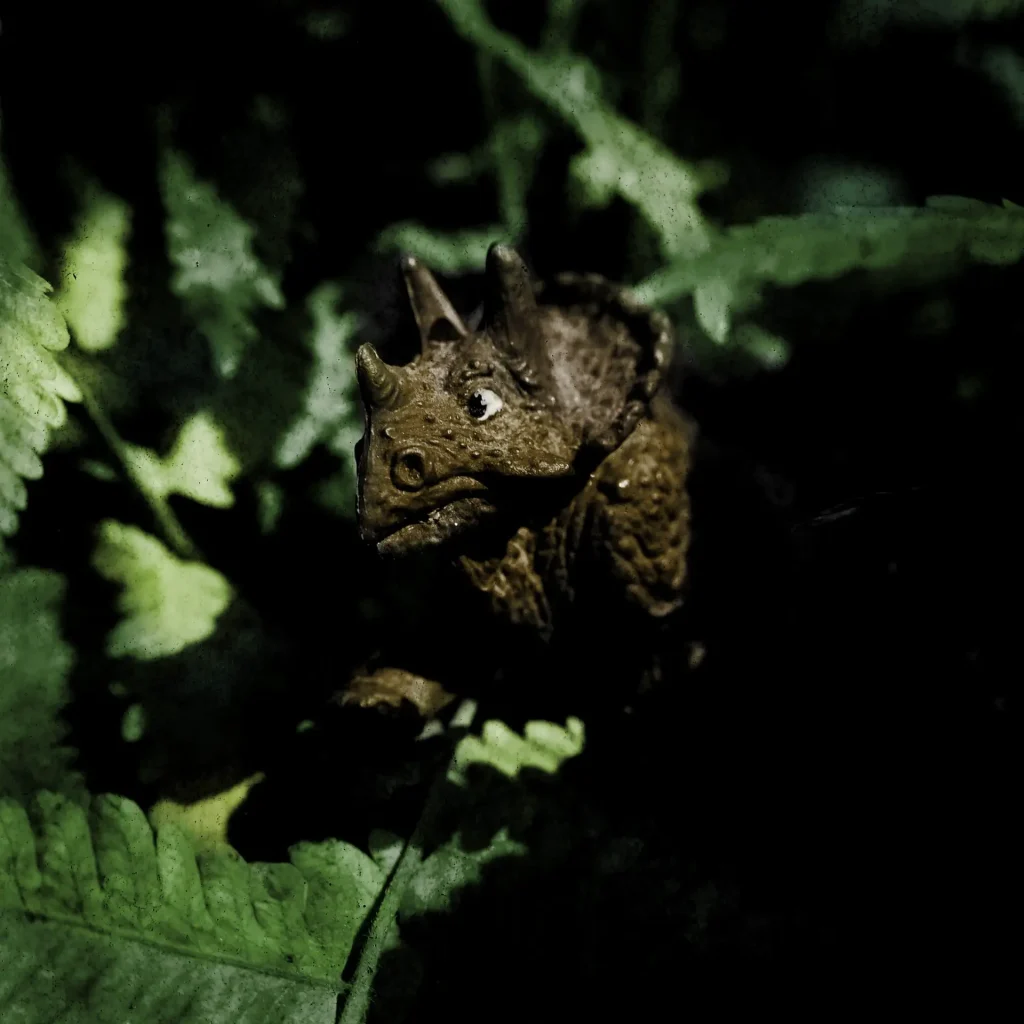
Photo 9
Verdict 1: Successful experiment?
Yes (extra points because it was super tricky).
Verdict 2: Interesting image?
So-so. More interesting when colourised.
Double exposure with DIY mask
After my failed attempt at double exposure (Photo 2), I wanted to try again. This time my plan was to take two photos of the same scene – one straight and one with the camera held upside-down. Each time, I would mask one half of the lens for a vertical mirror effect.
Obviously if you hold a TLR upside-down at waist-level, you can’t see the finder at all. I had to hold it above my head, like the Autocord Lady is doing in the manual (see above). This is a tricky operation, made even trickier because the TLR finder is laterally inverted. But I’m not complaining; I enjoy this stuff.
Now for the mask. Mihály Alagi has a good article about a DIY image-splitter, which involves gluing an opaque material over one half of a UV filter. Since I don’t have any filters for the Autocord, I covered half of the lens hood with black card and tape.
When I tested it on the viewing lens, it seemed like in order to block half the image as seen on the ground-glass screen, I needed to cover a bit more than half of the hood. And as you can see from the photo above, that’s what I did. But in the resulting image (below), there’s an unexposed band in the middle, so clearly I covered too much. I probably should have covered half after all. If it worked out as planned, the tops of the trees would not be cut off, and the skies would merge into one.
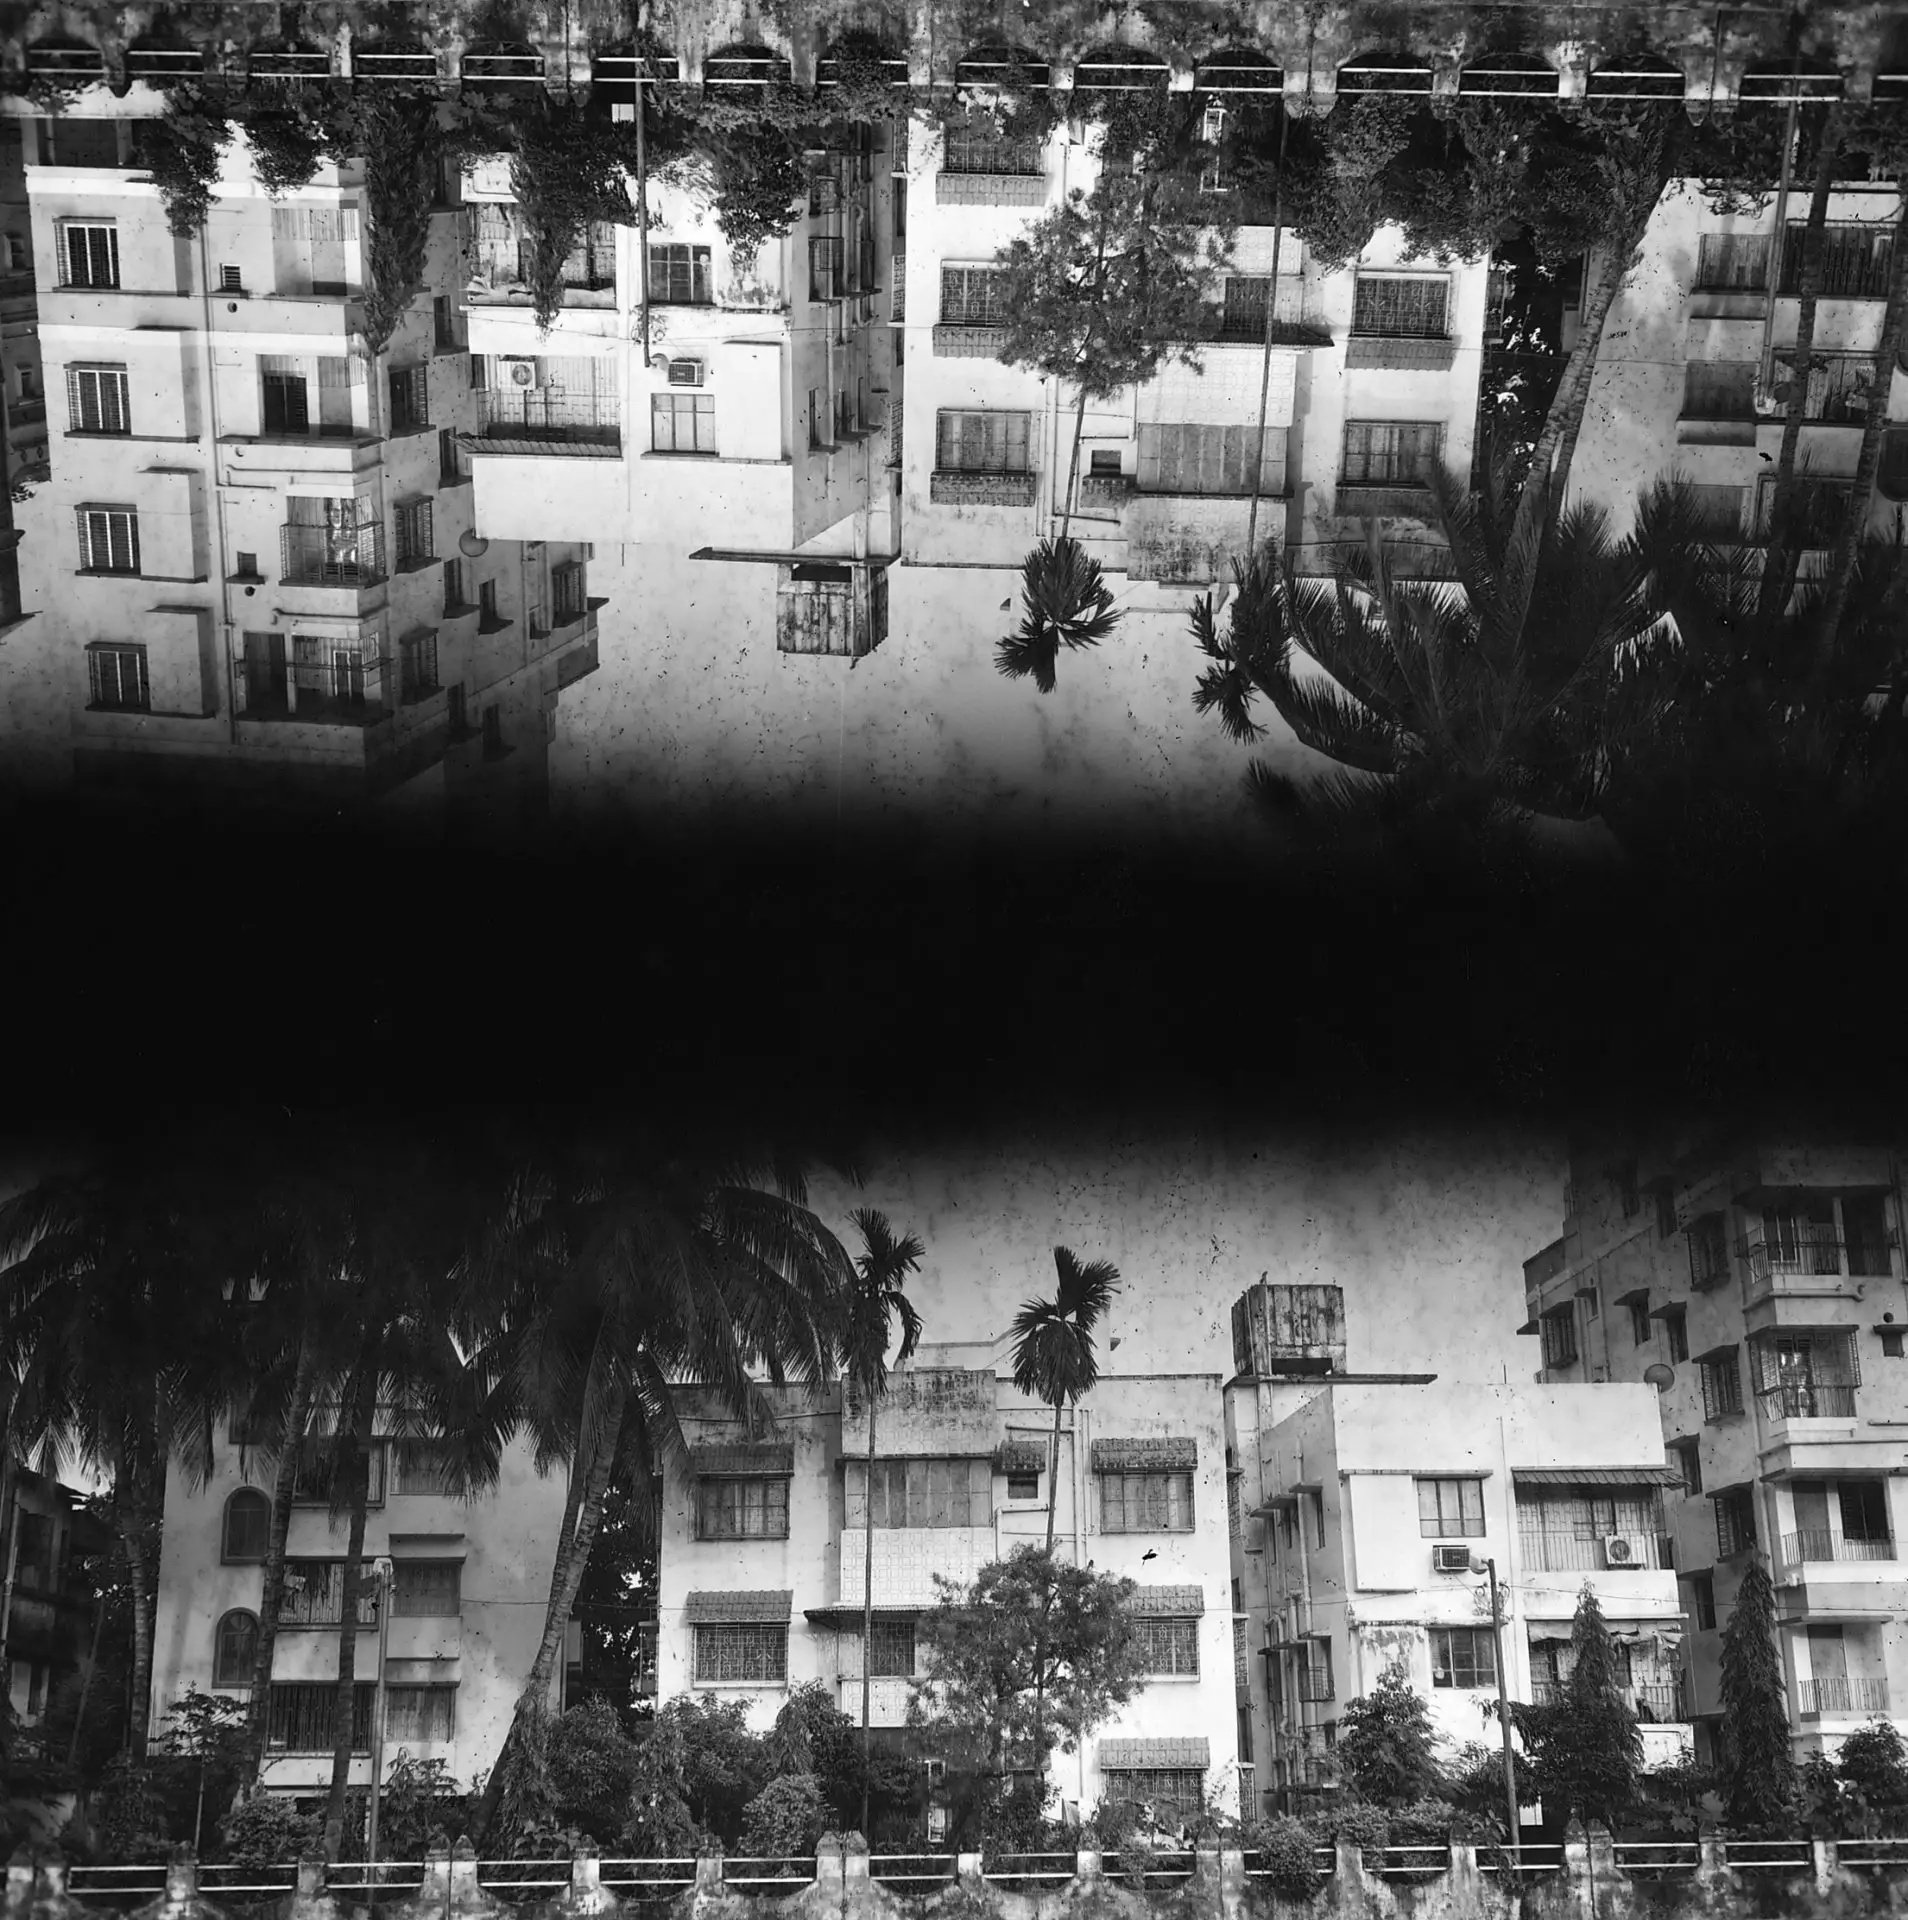
Photo 10
Verdict 1: Successful experiment?
No.
Verdict 2: Interesting image?
No.
Long exposures at night
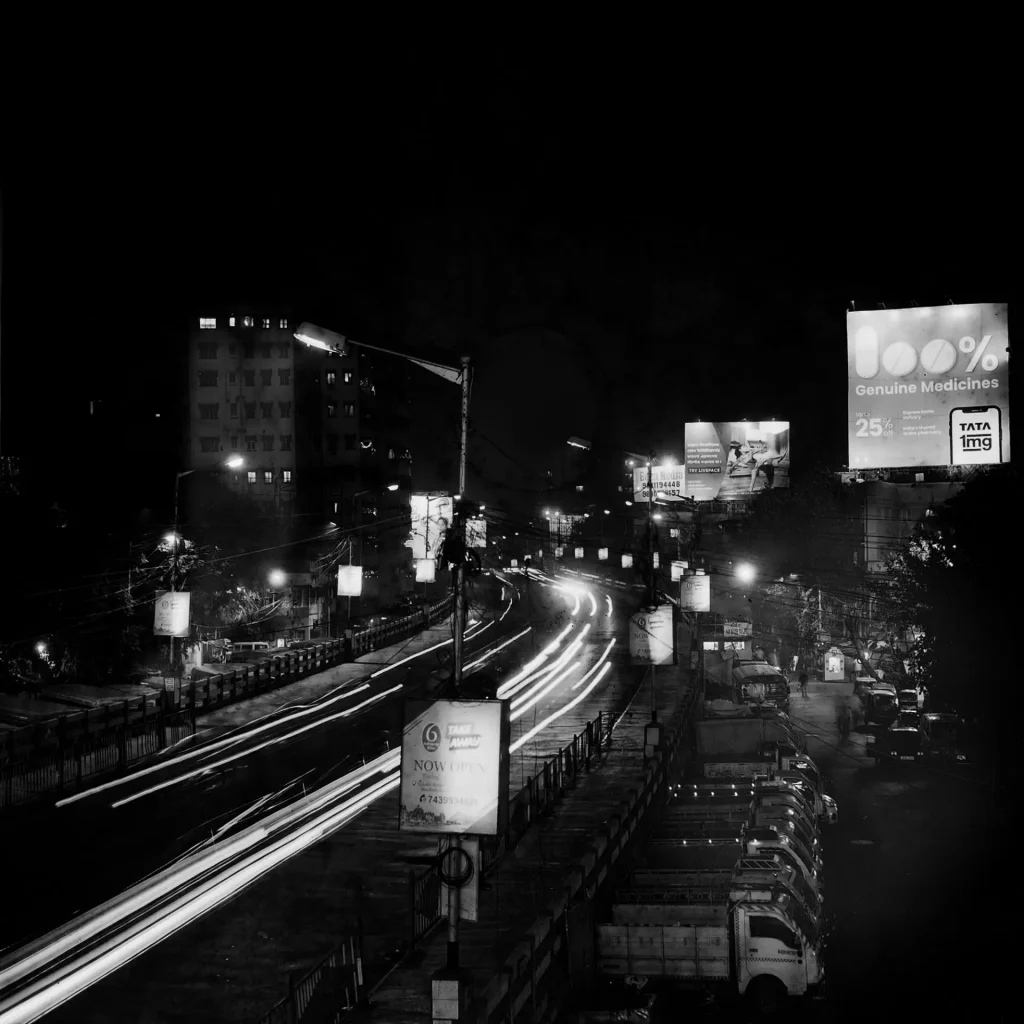
My last two photos were long exposures at night. These are not that experimental, practically cliché – but I like them. There’s an element of uncertainty with light trails, especially on film, because you don’t know what they will look like. And judging exposures at night can be a bit tricky. I generally meter the ground, then add a stop to compensate for reciprocity failure, which is what I did on the first photo below. This was a two-second exposure (“one elephant two elephant”).
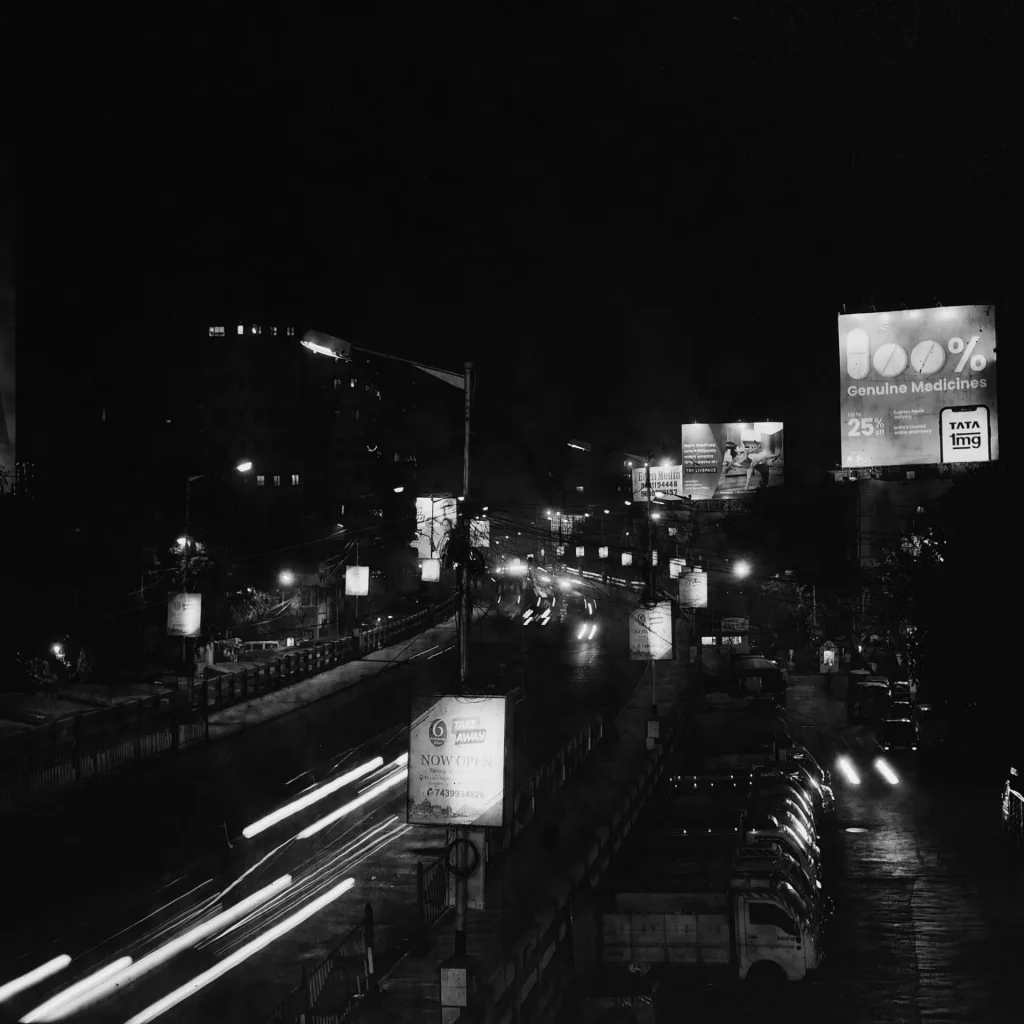
On the next photo – the last one of the roll – I added another stop (four-second exposure). As you can see, the light trails are longer, and there’s a bit more detail overall. I also like the frame-within-a-frame at bottom right: the row of parked vehicles and the shadowy figure in the distance.
Photos 11 & 12
Verdict 1: Successful experiment?
Yes, but it was a tame experiment.
Verdict 2: Interesting image?
Yes.
Final thoughts
I think I’ll try some straight photography for a change. When taking “regular photos” – that is, when I’m not making life needlessly hard for myself – I find the Autocord really easy and fun to use. I like the images too, like some of the photos from my first roll, or the pics of my friends on this roll. But sooner or later, I will want to try some of these experiments again – hopefully avoiding the mistakes I made, and probably making new mistakes in the process.
Thanks for reading. You can see more of my work on Instagram.
Share this post:


Comments
thorsten on A Whole Roll of (Mostly Failed) Experiments with a Minolta Autocord TLR – by Sroyon
Comment posted: 24/12/2021
Comment posted: 24/12/2021
Tim Bradshaw on A Whole Roll of (Mostly Failed) Experiments with a Minolta Autocord TLR – by Sroyon
Comment posted: 24/12/2021
Comment posted: 24/12/2021
Comment posted: 24/12/2021
Comment posted: 24/12/2021
Marco Andrés on A Whole Roll of (Mostly Failed) Experiments with a Minolta Autocord TLR – by Sroyon
Comment posted: 24/12/2021
Comment posted: 24/12/2021
Billy Sanford on A Whole Roll of (Mostly Failed) Experiments with a Minolta Autocord TLR – by Sroyon
Comment posted: 24/12/2021
Comment posted: 24/12/2021
tjen dezutter on A Whole Roll of (Mostly Failed) Experiments with a Minolta Autocord TLR – by Sroyon
Comment posted: 24/12/2021
Comment posted: 24/12/2021
petergreyphotography on A Whole Roll of (Mostly Failed) Experiments with a Minolta Autocord TLR – by Sroyon
Comment posted: 24/12/2021
Comment posted: 24/12/2021
Rich on A Whole Roll of (Mostly Failed) Experiments with a Minolta Autocord TLR – by Sroyon
Comment posted: 26/12/2021
--Rich
Comment posted: 26/12/2021
dkiechle on A Whole Roll of (Mostly Failed) Experiments with a Minolta Autocord TLR – by Sroyon
Comment posted: 27/12/2021
Keep up the good work!
Daniel
Comment posted: 27/12/2021
Rasmus on A Whole Roll of (Mostly Failed) Experiments with a Minolta Autocord TLR – by Sroyon
Comment posted: 01/01/2022
Comment posted: 01/01/2022
MarcusGunaratnam on A Whole Roll of (Mostly Failed) Experiments with a Minolta Autocord TLR – by Sroyon
Comment posted: 02/03/2023
I used to process the B&W films (mainly Ilford FP4) in a Paterson tank and printed the negs using a 70mm enlarger lens on a Durst 6x6 enlarger.
I was always in the habit of setting the shutter release guardon to prevent accidental tripping of the release as the Autocord took only 12shots in one roll,but I was careful to unlock before winding.
It has in my opinion a better focussing system than the RolleiTLRs,in that you need to support the camerafrom below to focus and this provides a more stable posture.
I remember reading somewhere that they used "Elrin"for the gears and they are a synthetic self lubricating machinable plastic.
Thus there is no grinding noise as you focus or advance the film even after nearly 50 years.(except when you use the self timer)
You will get much pleasure using the camera..I used a clip on meter made by Yashica but it has since given up the ghost.I am awaiting a Gossen light meter.
Thank you for an evocative article.