I backed the Reveni Labs Light Meter pretty much the moment I saw it had gone live – I had a small advantage as I knew it was happening before, but I was still a little disappointed to only be backer 44 out of 876. It went on to smash its goal by 777% raising CA$124,342 for Matt Bechberger allowing him to start making these light meters as his full time job. Exciting times for Matt, and great for the community/industry – but is it any good?
I must admit, these days I mostly use the Lumu meter app in my iPhone. It has become a thing of habit as much as anything else, but actually for the most part – even without the Lumu device itself – I find it’s all I need. It’s always in my pocket (I never forget my phone), and find it as reliable as I need for the most part.
That said, I do sometimes find the process of getting my phone out, unlocking it, opening the app and fiddling away with the settings a little annoying. On the rare occasion I’m able to predict this frustration before I leave the house, I usually pick up my Voigtlander VCii meter or a recently acquired Gossen Digisix, depending on my mood. Both can be mounted to my camera, though I rarely do mount the Voigtlander, and I don’t have the foot add on for the Gossen.
Recently, I’ve been taking out the Reveni Labs Light Meter instead. Again, mostly carrying it in my pocket rather on the camera. Though since I have mostly been shooting cameras with a built-in meter, I haven’t found myself using it all that much. I had promised Matt a review though, so for a little while now I have been tinkering with it and comparing it to other meters to put it to the test…
The Reveni Labs Light Meter
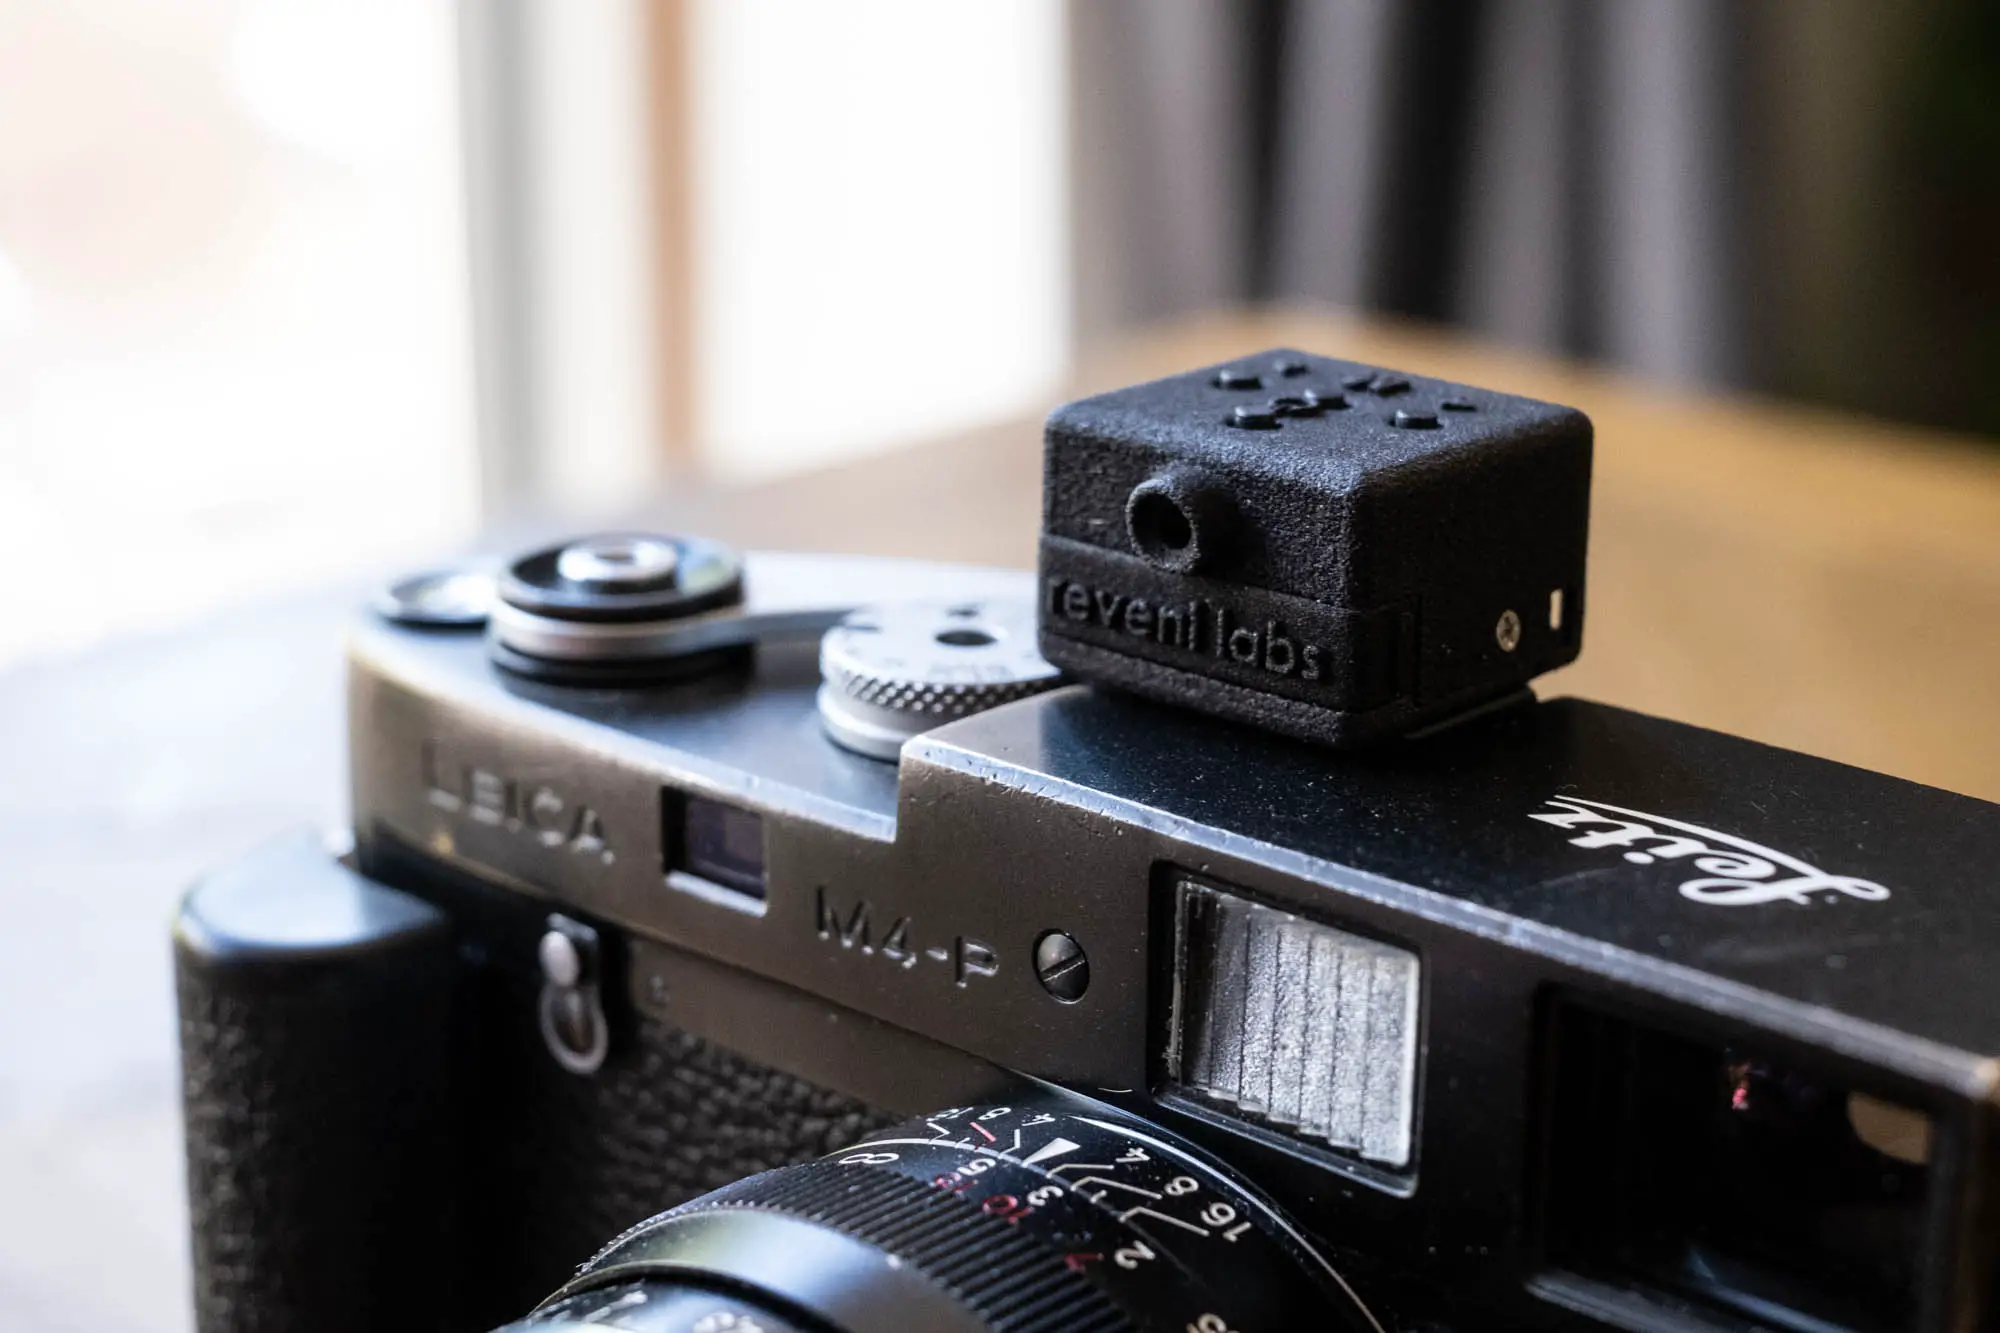
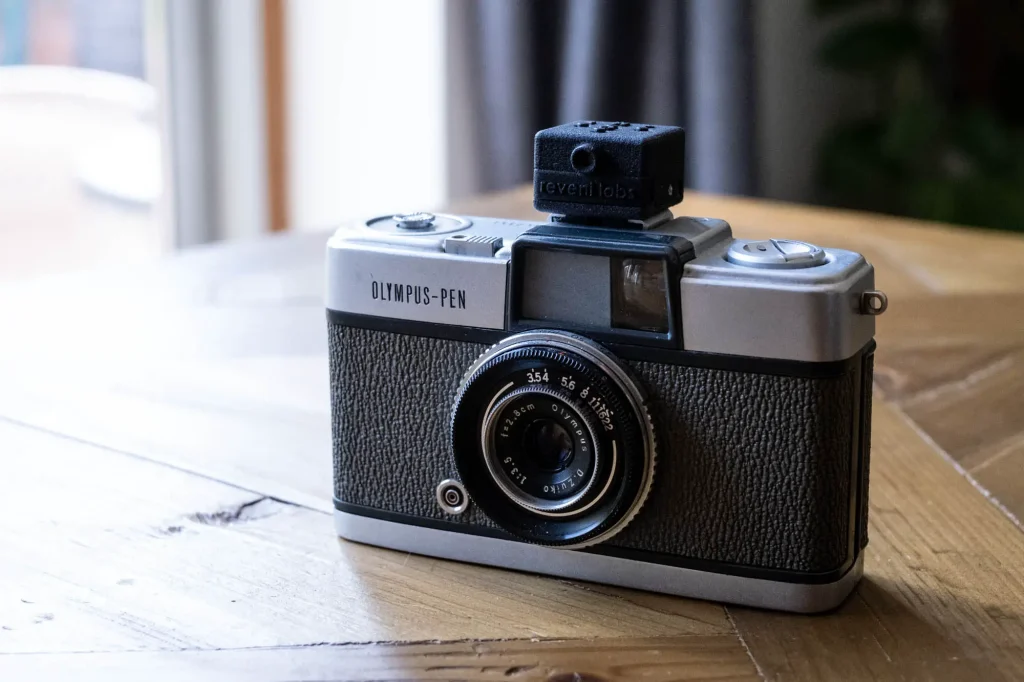
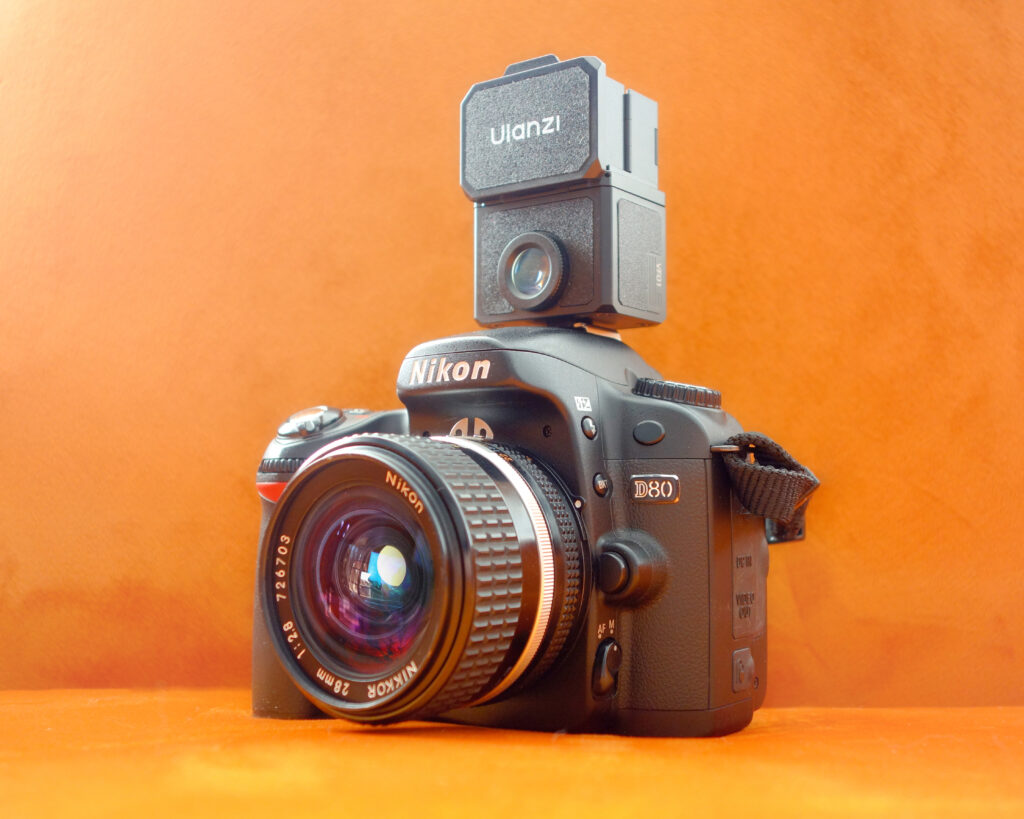
The Reveni Labs Light Meter sells itself primarily on being “the smallest light meter ever”. I think that’s possibly a fair statement too – I certainly can’t think of a smaller meter – this thing really is very small. Its footprint is barely bigger than the hot/cold shoes it’s designed to slot into.
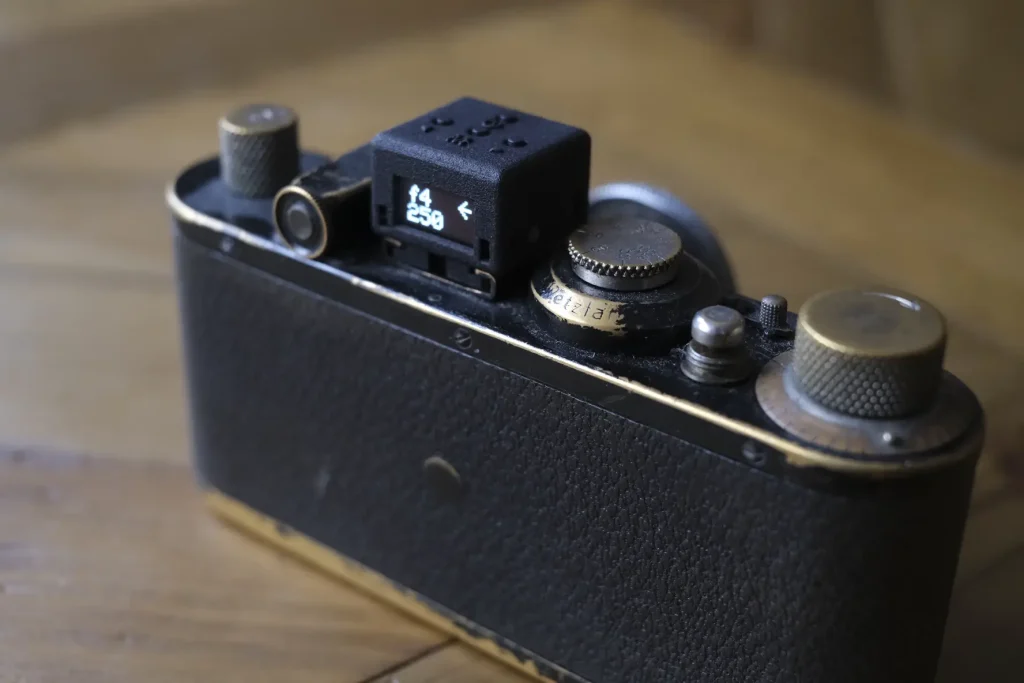
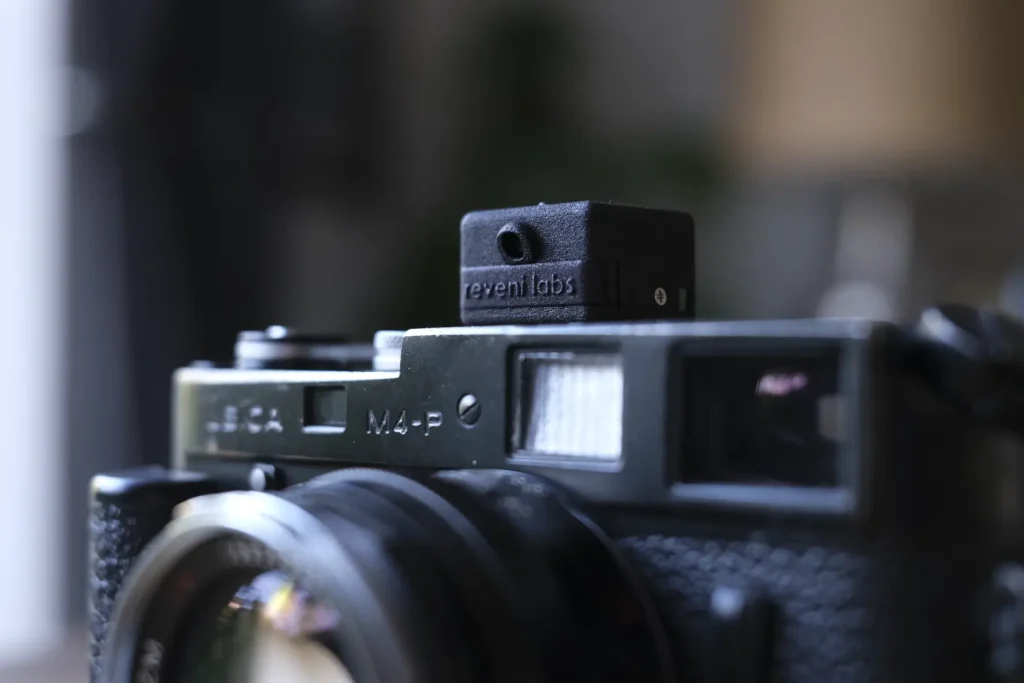
This is a fact that actually brings it some considerable advantage over almost all of its competitors. Because of the tiny size, it is almost universally mountable. It even fit on the shoe of my (now sold) Leica Standard (above), and would fit alongside a viewfinder on top of my Leica ic should I choose. I know of no other light meter that would be usable in such a way and take up so little space.
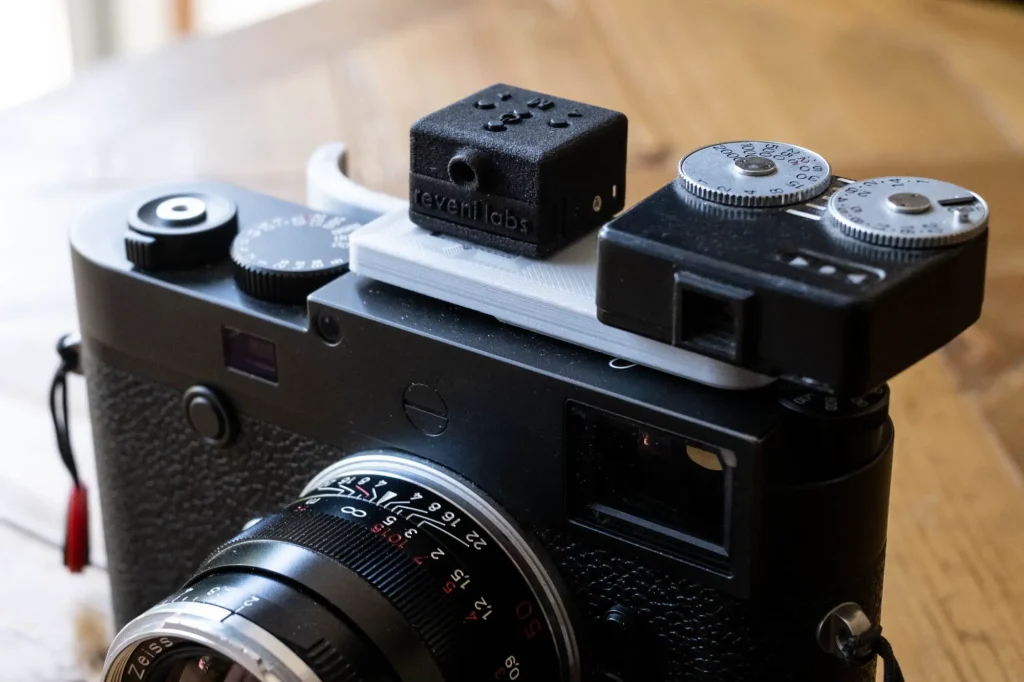
Matt also makes and sells a wide range of mounting accessories including risers, stick-on mounts, neck straps, angle mounts and even finger ring and bracelet mounts so it can be carried in all sorts of weird and wonderful ways.
It’s also quite a nice looking thing – or at least, it’s a very unassuming thing. It’s made out of 3D printed nylon which in this case is matte black with a slight texture to the surface. As such, thanks both to its size and finish, it doesn’t look particularly out of place on most cameras – or at least most of the cameras I have put it on. It’s also extremely light weight.
Metering with the Reveni Labs Light Meter
Similar to the Voigtlander, but different to my Gossen which can be switched to incident meter, the Reveni Labs Light Meter is a reflective-metering-only meter. It’s referred to on the spec sheet as a “centre-weighted” meter with a 45 degree angle of view. I asked Matt about this and he told me that it has just a slight falloff in the reading off the centre toward the edges of the metering angle.
Being an external meter that has no clue about the lens mounted on the camera, how this plays out in use will of course vary depending on the lens. So if you mount a 50mm lens (~45 degree field of view on the diagonal) on a 35mm format camera you get a pretty good slightly-centre-weighted average of your whole frame. With a wider lens you’ll get a reading off just the centre of your frame, and with a tele lens, you’ll something more of an average of the whole frame depending on how narrow the field of view the lens is.
In reality, in practice, those who are new to light metering or those who just want to shoot with little thought should get a reading that will work pretty well for most non-critical shooting situations. Those with more experience or want to use it for more critical metering will likely find this perfectly adequate for taking readings off subject like the palm of a hand or patch of grass to get something they can rely on a little more.
Read out and controls
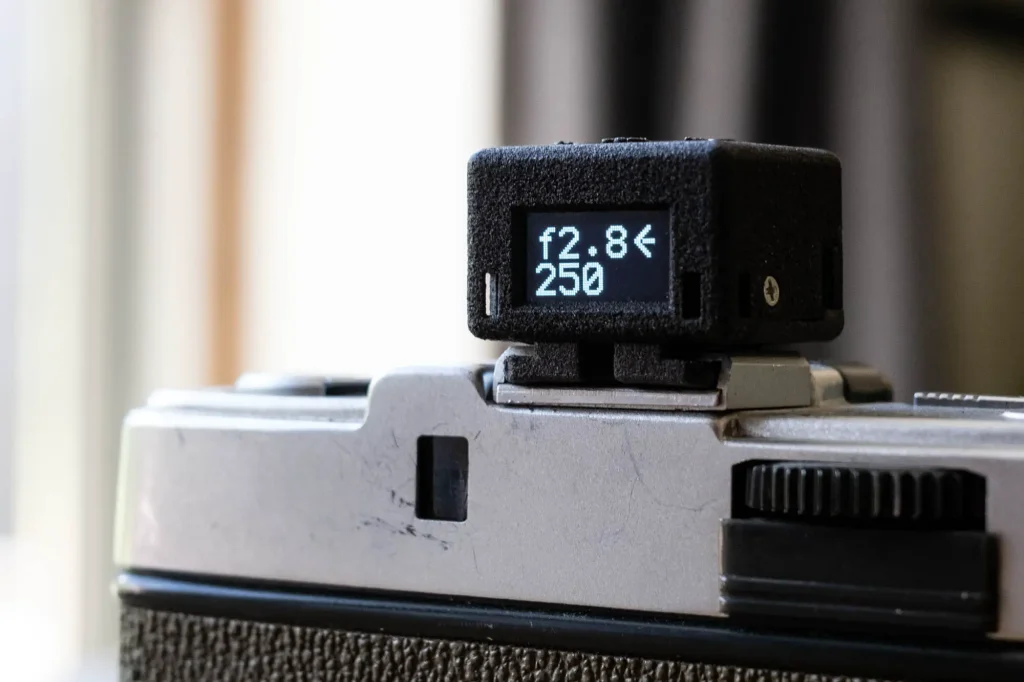
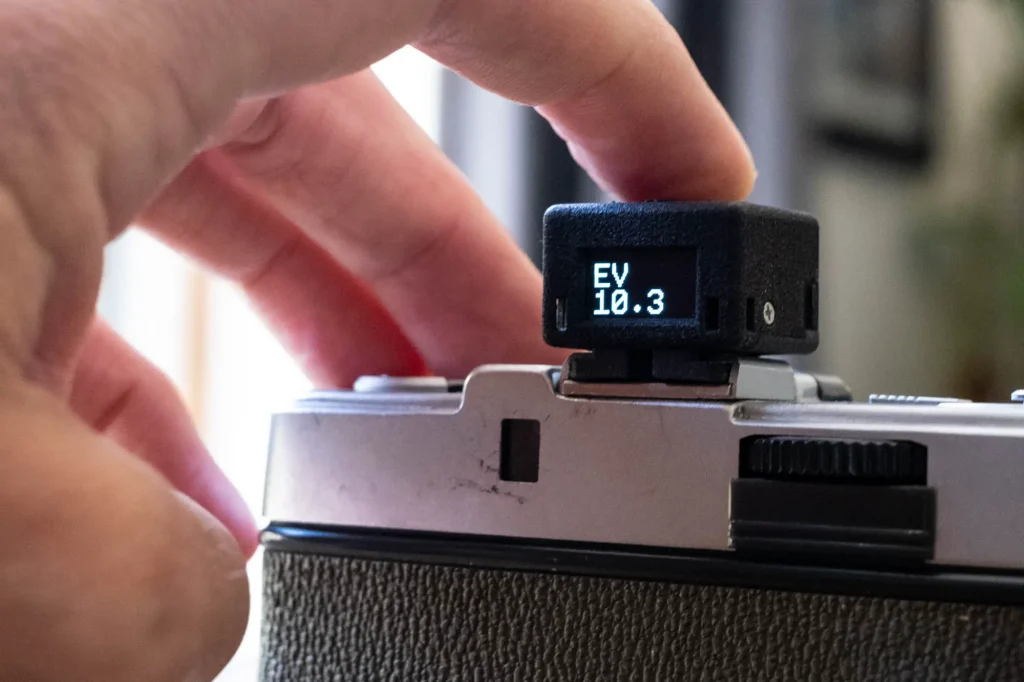
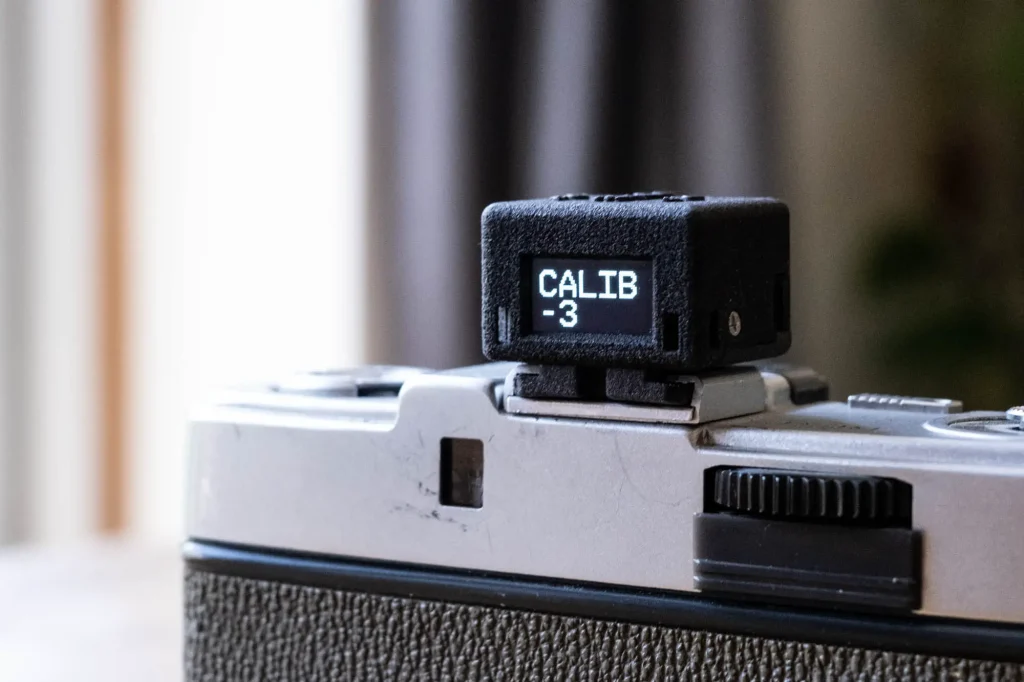
The Reveni Labs Light Meter displays its readings on a tiny but actually very readable white on black OLED display on the back. It’s controlled by 4 even more tiny buttons on the top. Having designed a product myself, I can tell you that if there is one thing I know about product design, the process is often about picking your compromises. No product is perfect, all are compromised, and so it then comes to the end user to decide if the compromises the designer has picked are right for them.
The Reveni Labs Light Meter was designed to be small – it succeeds fantastically at that goal, but of course with that comes compromise. One of those compromises is in the fiddly nature of the buttons. It’s not that they are hard to press, or even that they are difficult to differentiate from each other with the tip of a finger, they just feel and look a little rudimentary somehow. Though yeah, for as much as this sounds like a criticism, it it said with acknowledgment of the fact that they were of course designed to allow the thing to be tiny.
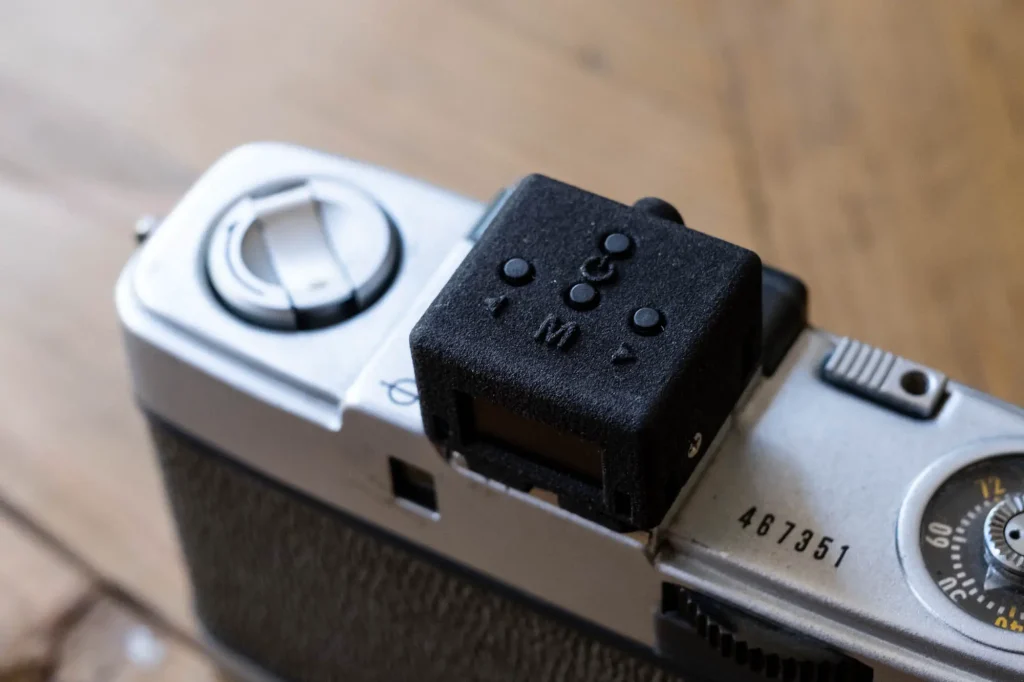
The 4 buttons functions are the power button which triggers the meter, the menu button, and two arrow buttons to cycle through the menu and light meter settings once activated.
Reveni Labs Light Meter Features
In terms of features, the Reveni Labs Light Meter is quite stripped back. Again it needs to be for the sake of its size and limited control options. That said it does as much as I could hope for from such a tiny thing.
It can be set to meter in shutter or aperture priority mode. In shutter priority when you press the power button it lets you scroll through shutter speeds using the arrow buttons giving you an appropriate aperture of the selected shutter speed and ISO. In aperture priority it allows you to scroll through aperture settings. It also has an exposure compensation range of -/+ 2 EV.
If you use a camera/lens with an exposure value system, or just like to know your the exposure value of your combined settings, it can also be set to briefly display the EV before showing the aperture/shutter speed. I have this switched on personally, as I like to think in EV sometimes – likely as a product of having a fascination with Fred Parkers ultimate exposure calculator web page. The EV readout is also precise to 1/10th of an EV whereas the shutter aperture readout is rounded.
It can also be user calibrated – something I will come to in a second.
Range
EV
The Reveni Labs Light Meter has a range of EV 0.5 to EV 20 (have a look at Fred Parkers page if you want to see how wide that is.
ISO
It has an ISO range of 1 ISO to 12800 ISO with all the most frequently used ISOs, and none of the hardly used ones. So for eg it has 80 and 125 ISO, but doesn’t have some of the higher intermediate settings such as 640 and 2500. I thought this a pretty good choice by Matt as it saves clicking through loads of speeds that really most people who are using such a simple meter as this one won’t use.
Shutter & Aperture Range
The shutter speed range goes from 1 hour to 1/8000th and the aperture settings range from f/0.7 (incase you have one of those lenses Kubrick had Zeiss make him), all the way to f/1024. Both of these ranges are pretty extreme, especially given the 0.5 EV lower limit, but I’m not complaining. Though I am not a regular pinhole photographer, for eg, if I was I think I might appreciate those tiny aperture setting options.
Speed of use
Something that can’t be derived from either looking at pictures of the Reveni Labs Light Meter, or looking at the spec sheet is how fast it is to use. In short, it’s not the fastest light meter I have ever used. When pressing the button, it takes a split second to take the reading, then if like me you have the EV displayed, it takes a moment to show you that. It’s not catastrophically slow, and of course I could speed it up if I turned off the EV display. But combine this slight slowness with the fact that if you want to change settings from one extreme to another, there is a lot of clicking of the little tiny buttons, it can feel a little obstructive in use some how. That said, this is perhaps not a problem for a large majority of film photographers who buy into the pastime because it “slows them down”…
Battery
The Reveni Labs Light Meter has some interesting specifications too. To begin with it runs on one LR44 battery – which is one less than is found in the Voigtlander. I’m sure I read somewhere that Matt claims this battery will last thousands of readings. It did come with a couple of batteries – one of which was dead out of the packet and one that has since run low then gone flat. I guess they are cheap batteries which are probably best replaced with higher quality ones asap, but the one that worked did at least give me a chance to use the meter straight away.
It also gave me a chance to see what happens when the battery started to run out of power. I thought to begin with that something was wrong with the my Reveni Light meter as when I was pressing the power button from the off state, it was taking ages to power up, then eventually it didn’t power up at all. It was only at this stage that I thought to try another battery which of course brought it back to life again. I suppose it would have seemed more obvious that the battery was failing if it had just not worked all of a sudden, though at least this way the slower functionality gives a clue that it is going to run out soon and should be replaced.
The battery is held in a tray which slots into the front of the meter – unlike the Voigtlander which has a battery compartment that has a propensity to pop open, it seems a good fit too.
Meter Accuracy
As mentioned, the Reveni Labs Light Meter can be user calibrated. Matt calibrates them before he ships them, and if you buy one today you can be sure to receive one that is accurate – he also includes the factory calibration number in the manual for reference. I have asked around quite a few people who I know Matt sent one to in the early days, as well as a few people who have bought one since and the consensus is that they are all accurate. Unfortunately – or perhaps fortunately for the sake of this review – mine wasn’t. I’ve asked Matt about this – he was a little confused but did point out that mine was an early pre-production model from the days before he had developed his calibration process to the extent that he has now. He also highlighted that should anyone have similar issues, it is very easy to calibrate and if they struggle it can be sent back to him for adjustment.
Regardless, the inaccuracy in my Reveni Labs Light Meter gave me the chance to investigate the process of user calibration. To calibrate it, you just need to go into the calibration ‘CALIB’ menu and adjust the number. The adjustment is very precise too – it can be adjusted in 1/10th EV by -/+ 2EV. To set mine how I wanted it, I made a bit of a rig of meters attached to my Leica M10 and in combination with my iPhone and the Lumu meter used a white wall, the wooden wall of my shed, the grass in my garden and my garden as a scene to set it. In the end, unsurprisingly, I found the meter pattern of the Voigtlander the most similar, so set it to match that. It now works a treat.
As I’ve said though, it sounds from the people I have spoken to that my experience is quite unusual – everyone else I’ve spoken to has had an accurate one out of the box, so me having to go through this arguably very easy process is the exception rather than the rule. And as alluded to above, as long as a meter like this is basically accurate beginners and more advanced users will find ways to make it work for them.
Reveni Labs Light Meter – Final thoughts
The Reveni Labs Light Meter is a simple meter with a metering pattern that will work well for the majority of people who would be attracted to a meter of this type. As a basic meter with a metering pattern that matches the field of view of a normal lens it will be fairly universally useful with a very wide range of non-metered film camera. Once calibrated (which you can safely assume it will be out of the box) it is going to be plenty accurate and reliable enough to act as a basic meter for beginners, and as I’ve said, more advanced users will also be able to find ways to make it work better for them too.
It’s fair to say, it’s not the fastest meter to use, but where the Reveni Labs Light Meter really shines is in its miniscule size. This thing is tiny, and as such can be mounted to practically any camera I can think of, including all manner of cameras with awkwardly positioned shoe mounts. It is true that this size comes with compromises in use, but actually, I don’t suppose any reasonable person why buy this meter and expect anything else. For its tiny size, it’s actually pretty damned versatile too – especially given all the accessories Matt makes that allow it to be carries and mounted in all sorts of weird and wonderful ways.
All in all, I quite like the Reveni Labs Light Meter. I have a little collection of small meters now – 4 including this meter, the Voigtlander, Gossen and my iPhone, all of which have their advantages and disadvantages/pros and cons. The Reveni Labs Light Meter provides a set of compromises that will definitely work for me on occasion – as such, I’m really glad I backed the Kickstarter and offer Matt my congratulations on a successful product launch!
You can buy yourself a Reveni Labs Light Meter (and all of the different mounting accessories) here
Share this post:


Comments
Huss on The Reveni Labs Light Meter Review – (Small) Size is Everything
Comment posted: 28/09/2020
The KEKS meter can only read down to ISO 50 - I shoot lots of film under that including the 'new' Lomo Fantome 8 film, as well as Babylon 13.
The Reveni reads down to ISO 1 so all good!
Gra Morris on The Reveni Labs Light Meter Review – (Small) Size is Everything
Comment posted: 28/09/2020