I love creativity of all kinds. But it has taken me down some strange rabbit holes (like here, here, here and here). This article is another. I hope you find it interesting and possibly even useful!
Cons and Pros
The half-frame technique described here will NEVER replace cameras designed for half-frame photography! Diptychs will remain simpler to shoot with dedicated hardware. Also, this technique’s spacing gap between diptych pairs has soft edges. Which may or may not bother you.
But this technique can do a few things that dedicated H-F cameras can’t:
- One can use almost any existing film camera that supports double exposures. Large-, medium-, and 35mm-format cameras are all fair game. As are– with a little more effort perhaps– even fully electronic point-and-shoots like the Pentax/Espio/IQZoom 120/140/735/928 or Rollei Prego 90 AF!
- People who don’t shoot enough half-frame to justify dedicated H-F equipment can still “shoot half” with their existing gear when an idea strikes their fancy.
- Both half- and full-frame images are easily intermixed on the same roll (without modifying the camera’s internals or reloading film).
- A diptych’s half frames can have shapes that dedicated H-F cameras don’t do.
- This technique is easily extended to shooting triptychs and quadtychs.
- And all without modifying the camera itself.
Into the Rabbit Hole
The idea came as I rummaged through a box of old filters, adapters, step-rings and other doodads. This weird little disk caught my attention:
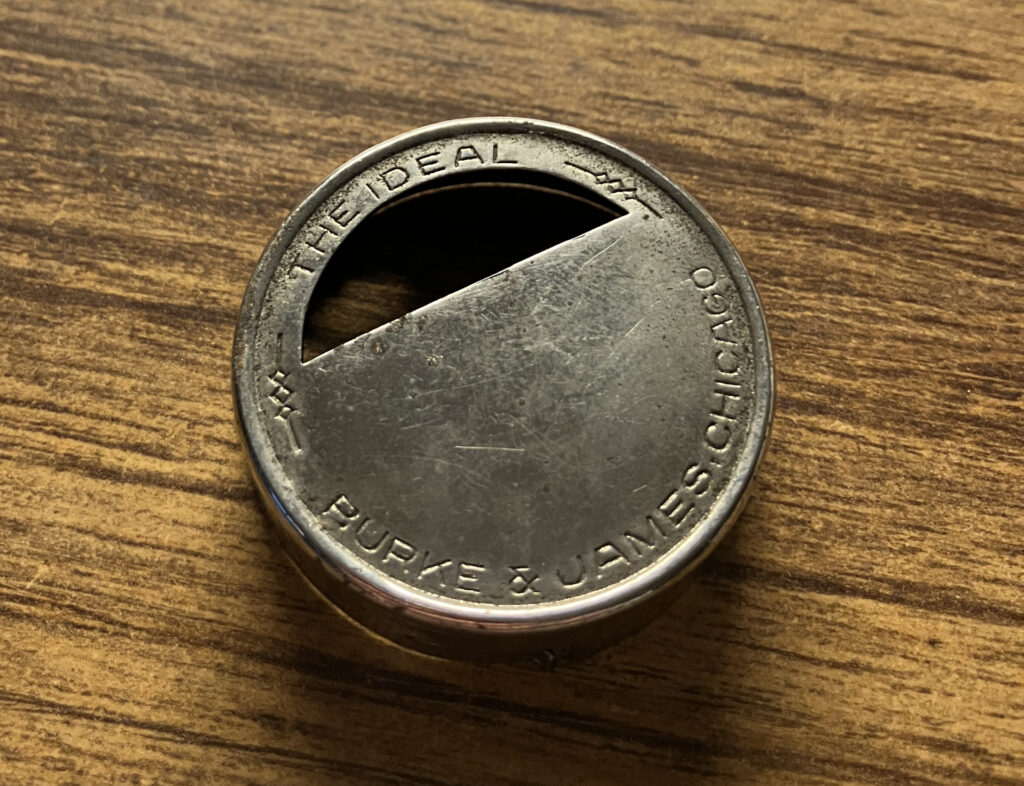 As you see, it’s Burke & James’s “The Ideal.” Which told me nothing. So I looked it up. The company will be fairly familiar to users of vintage cameras and accessories. According to the “Made in Chicago Museum,” the firm opened shop in 1897, and initially specialized in wide- and large-format equipment. Other searches told me that they stamped “The Ideal” on a variety of gadgets until 1907. Searching eBay, I learned that the device’s longer name is “Burke & James ‘The Ideal’ Camera Duplicator.”
“Duplicator” of What?
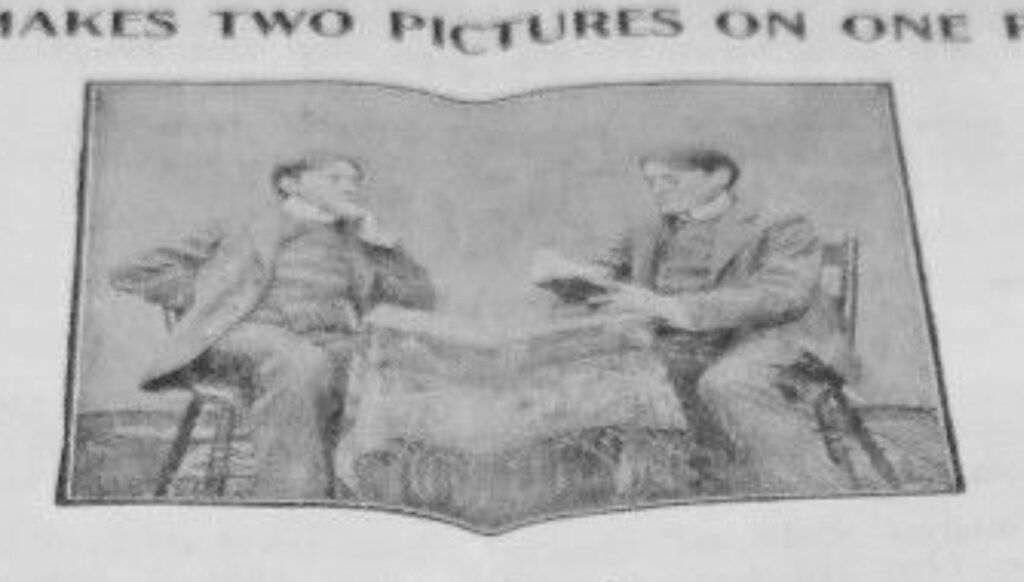
A few more searches revealed that it was a trick-photography lens attachment that “Makes Two Pictures On One Plate.” Of course! Back at the beginning of the 20th century, itinerant circus and carnival photographers could make extra coin by double-exposing portraits of people sitting beside, playing cards with, and even dancing with themselves. How quaint!
Mounted on the lens front, the Duplicator effectively masked off, say, the right half a light-sensitive plate and imprinted the subject on the left half. Then, the photographer rotated the Duplicator 180 degrees, the subject moved to predefined second position, and the photographer captured them again… on the other side of the plate. Here’s a humorous example from the Duplicator instructions:
And then I realized this old trick might let me shoot half-frame diptychs with any (or nearly any) camera that permits double exposures. Including SLRs whose film-advance levers can be disengaged and advanced without also moving the film. For instance, a button in my Nikon FE SLR baseplate disengages its film transport to permit multiple exposures.
A First (Digital) Test
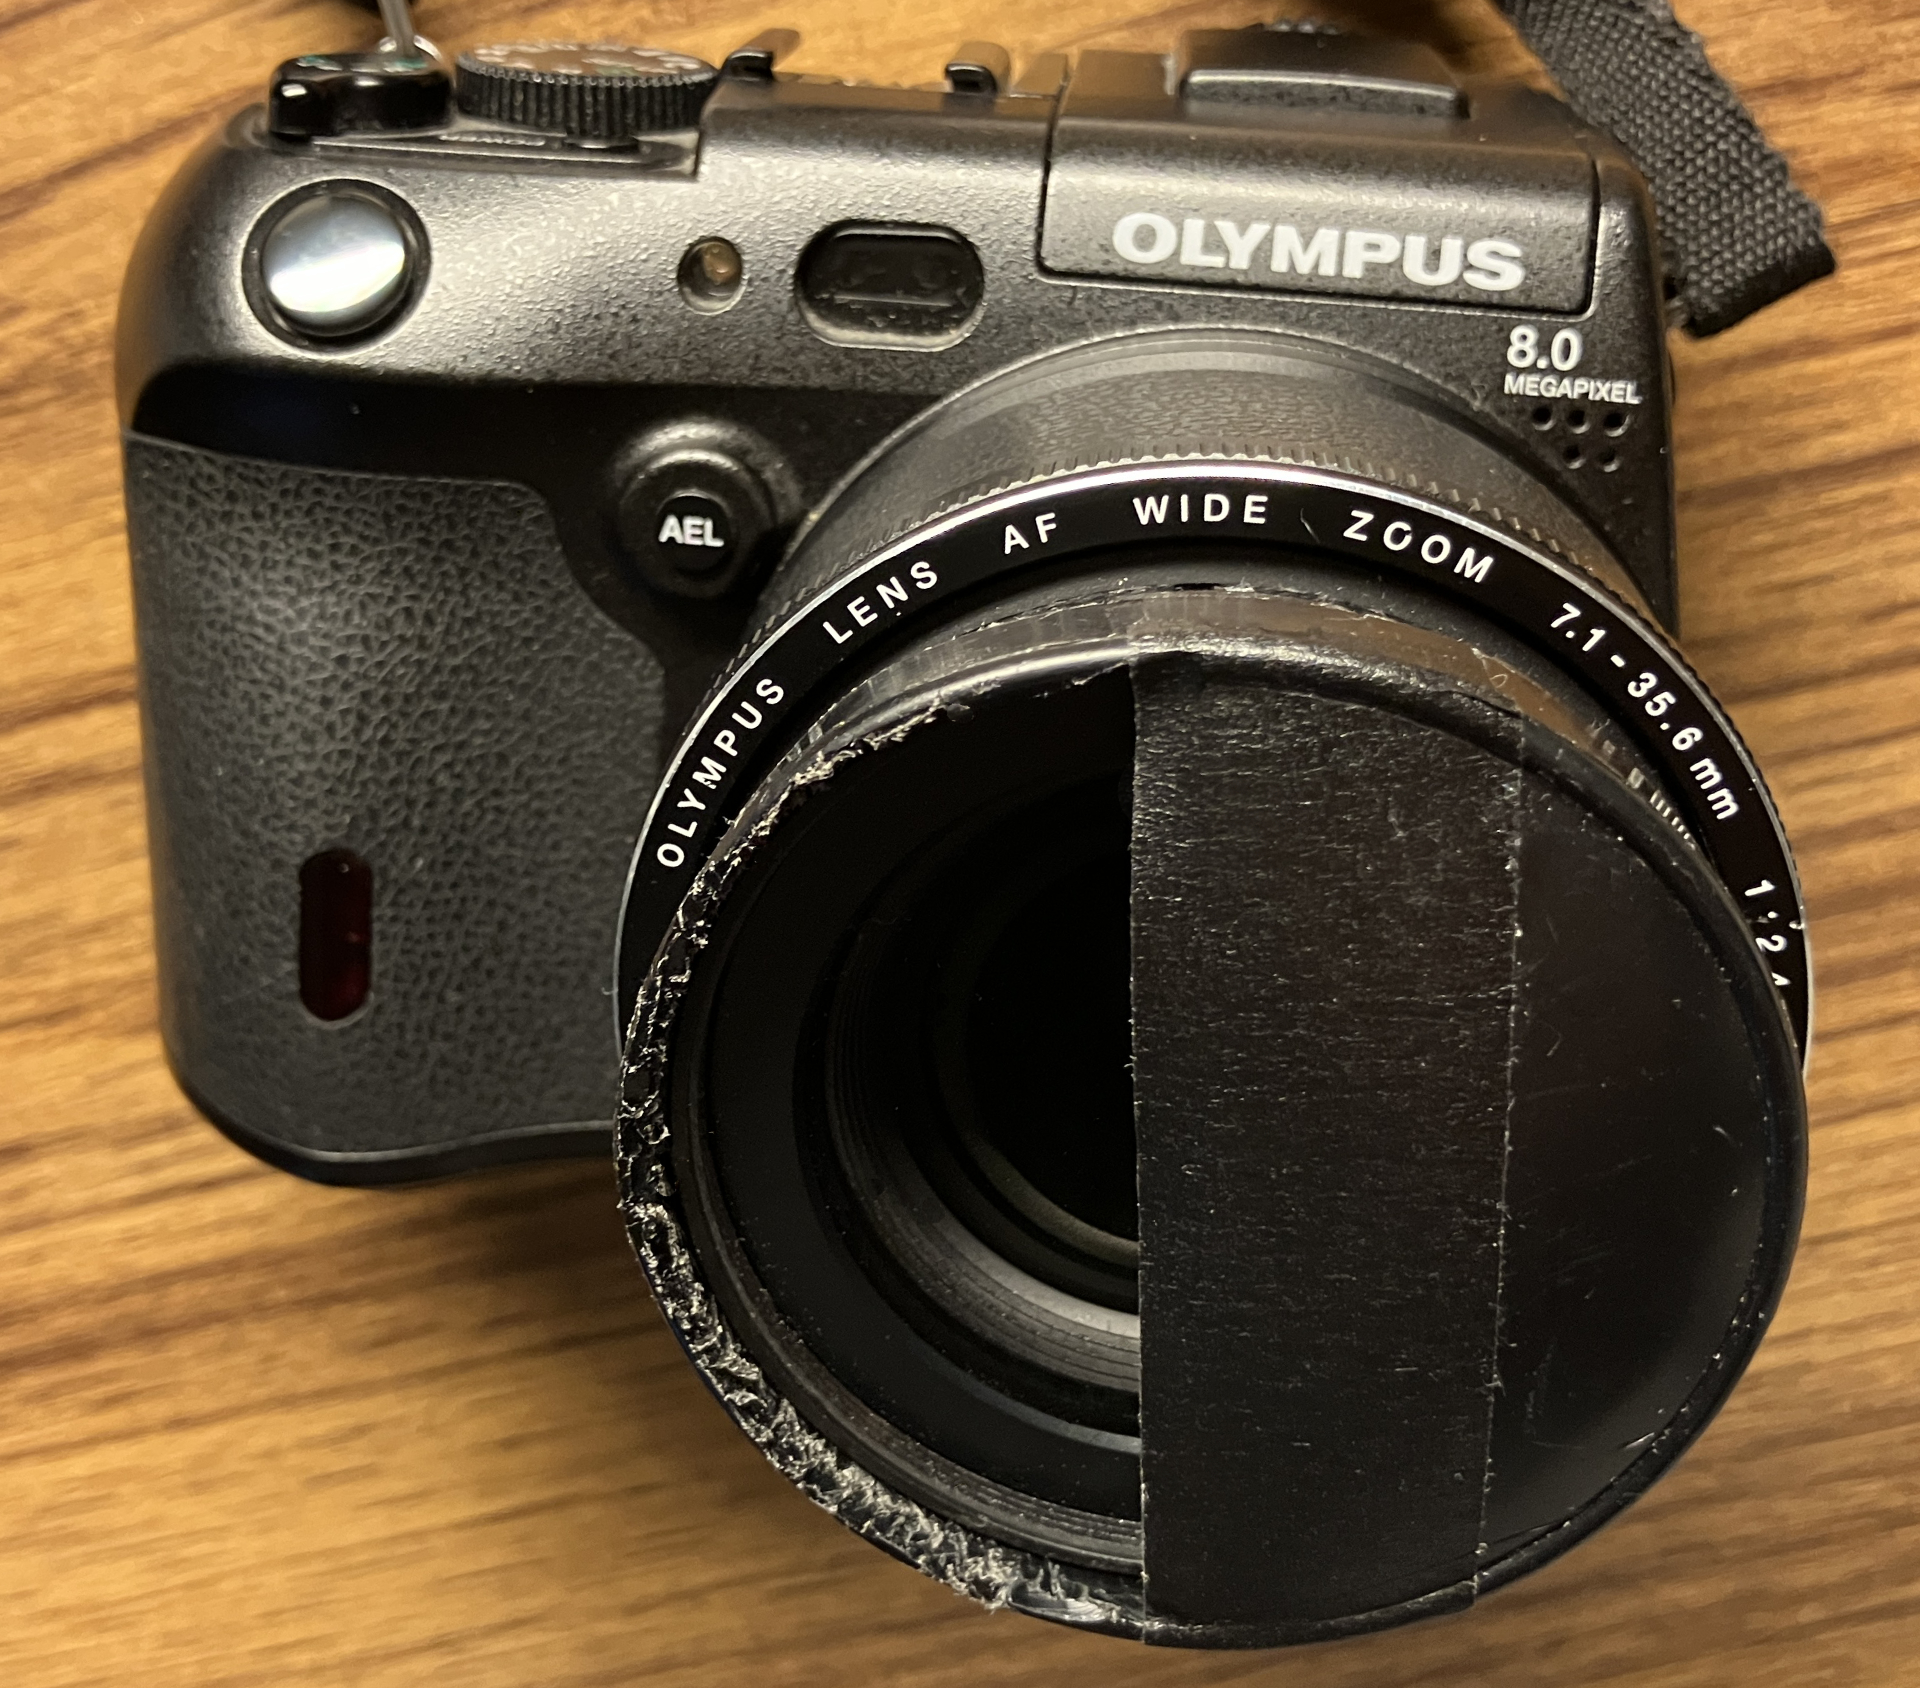
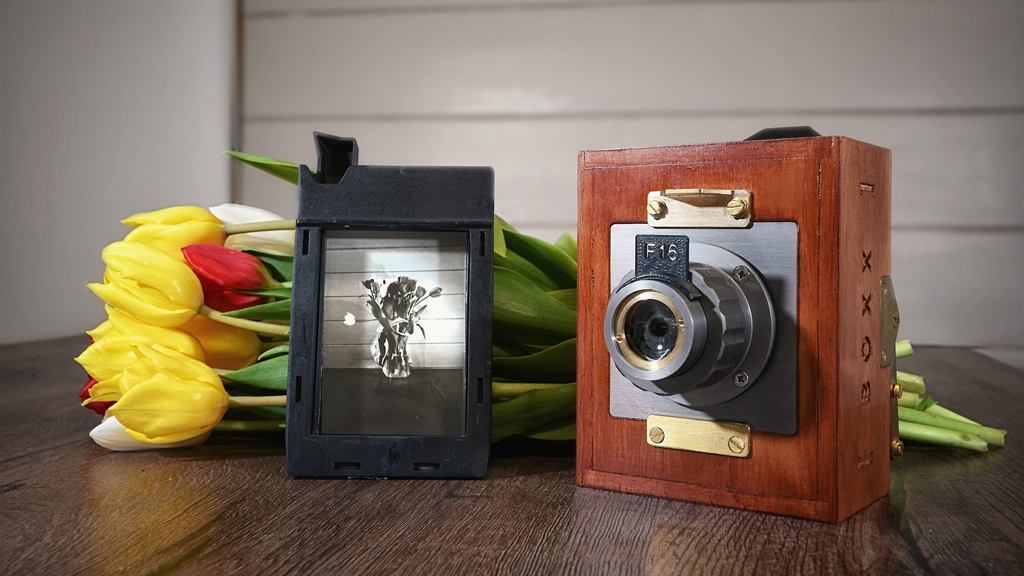
But before going to the trouble of loading, shooting and developing film, I wanted to test this harebrained notion with a digital camera. Specifically, with my 8MP Olympus C-8080 WZ (pictured in the opening image).
I planned to shoot separate images (containing left and right half-frames) and merge them in my photo editor. Again… just to see how the idea might work on full-frame film.
But first, I had to make a Duplicator that covered the C-8080 lens housing. I found a soft plastic lens cap that did. Looking again at the original Duplicator, its hole seemed to span only about one-third of the full disk’s diameter. So I did the same with my C-8080 cap.
I slipped it onto the lens, made a couple test shots, and noticed that I was getting no images at all. Looking into the lens front and zooming it in and out, I realized that its optical working diameter is much smaller than the housing. So I progressively widened my Duplicator’s opening until it spanned just over half of the disk. Here’s what it looked like:

Initial Results
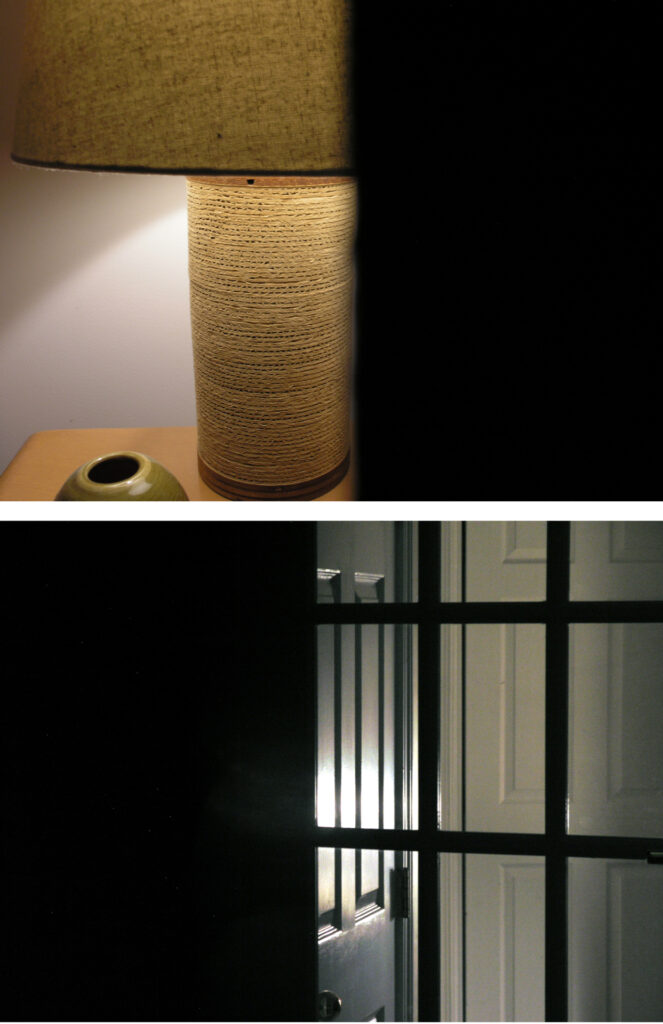
That night, I grabbed the following left and right half-frames in two hand-held shots:
In the photo editor, I stacked them in two layers, reduced the opacity of the top layer until both sides of the image looked equal in general tone, “flattened” them into a single layer, and adjusted Brightness/Contrast to taste:
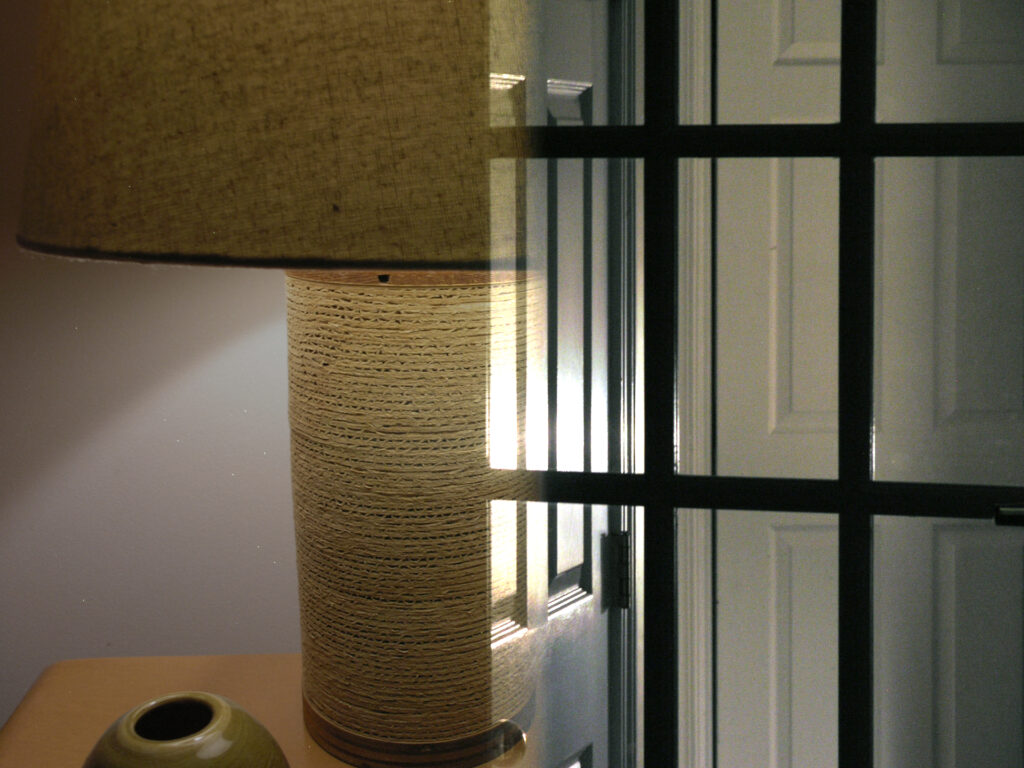 Interesting effect! The source images overlapped in the middle. I had apparently widened the Duplicator hole just a tad too much… and captured too much of each half-frame. So I reduced the hole’s width a little with black gaffer’s tape (as shown in the opening image) and tried again with a different subject. One that I had in mind from the start. It’s this still life, seen in several of my other 35mmc articles:
 Making Abstract Art
But this time, I wanted to split the lamp right down the middle and flip the right half of the image vertically. That would be easy in Photoshop, but I wanted to do it “in camera” as much as possible. And since this would be a portrait-mode image, I turned the camera vertically and positioned my Duplicator disk’s opening to block out the left and right halves of the vertical frame. This produced the following tall skinny half-shots (something hard for most dedicated H-F cameras to pull off):
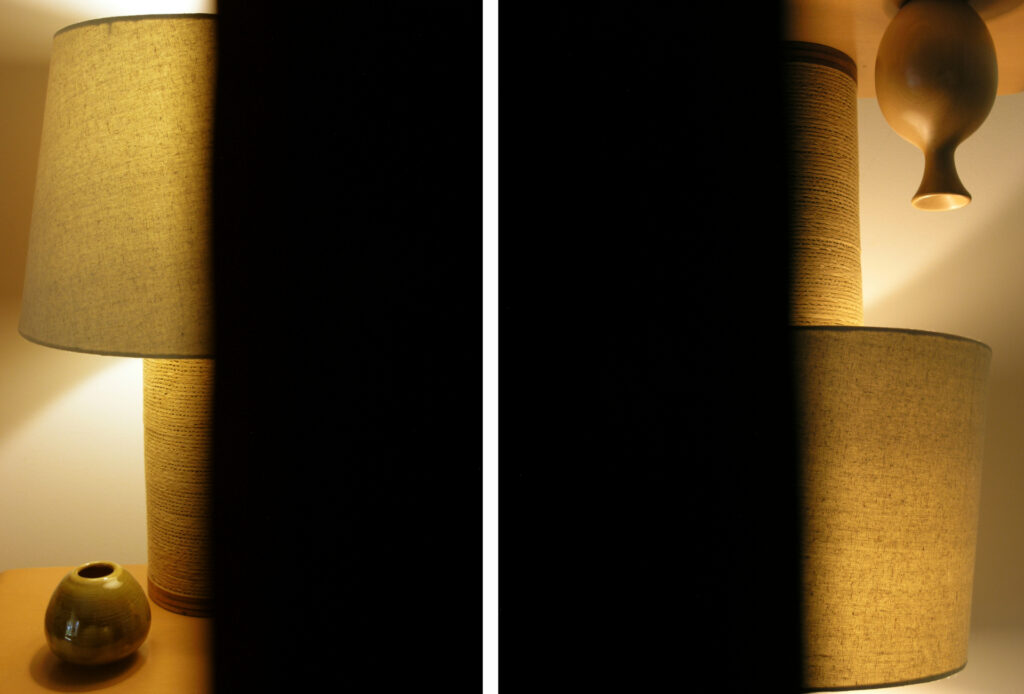
Stacking them in layers, adjusting the halves for equal tonality, and flattening produced this:
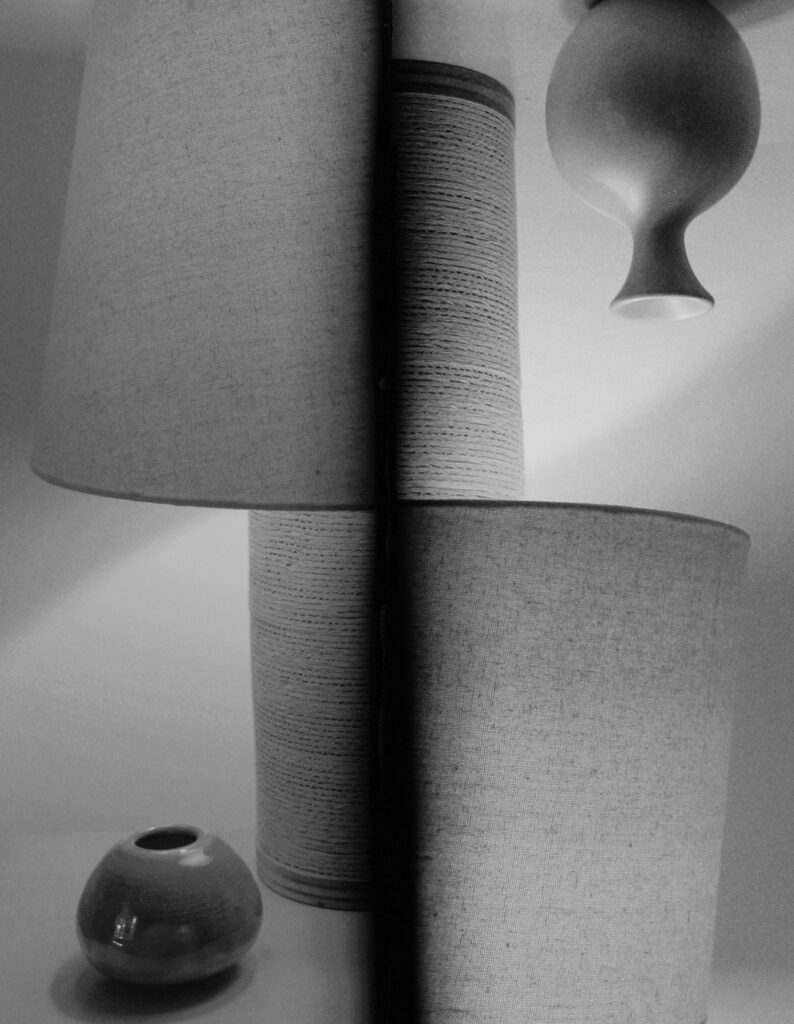
 The images no longer overlapped, and one can see the soft-edged separation gap I mentioned earlier. At this point, I considered the proof-of-concept successful. But now that I saw the result, I wanted to digitally manipulate it into a final work of “abstract art.”
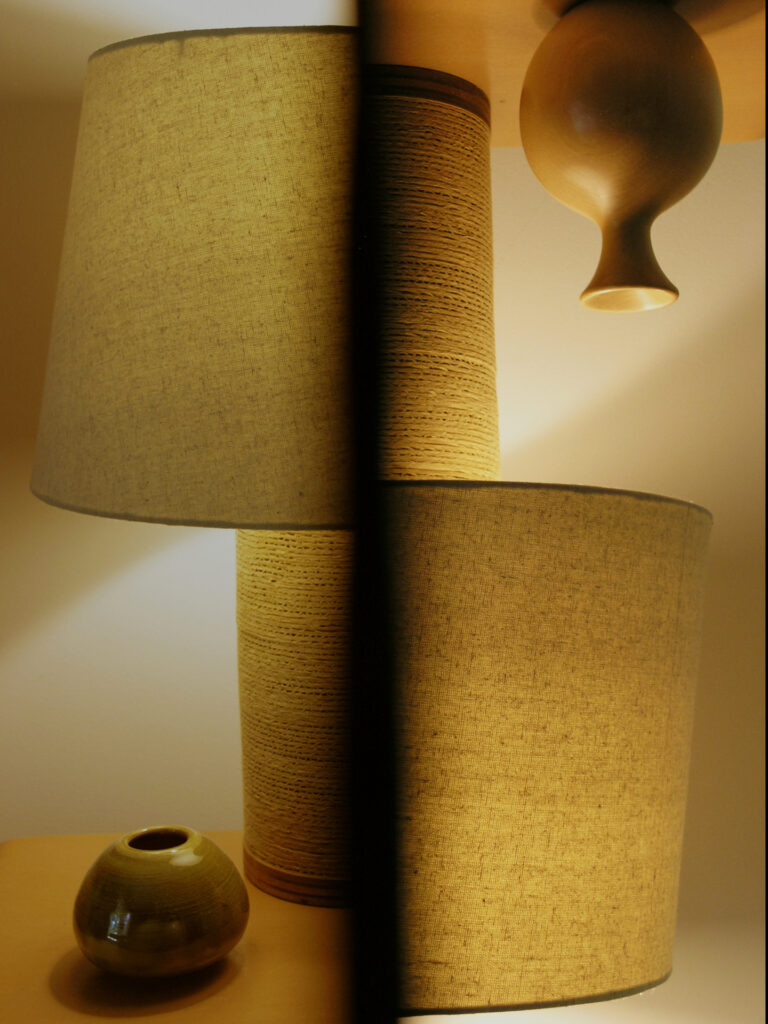
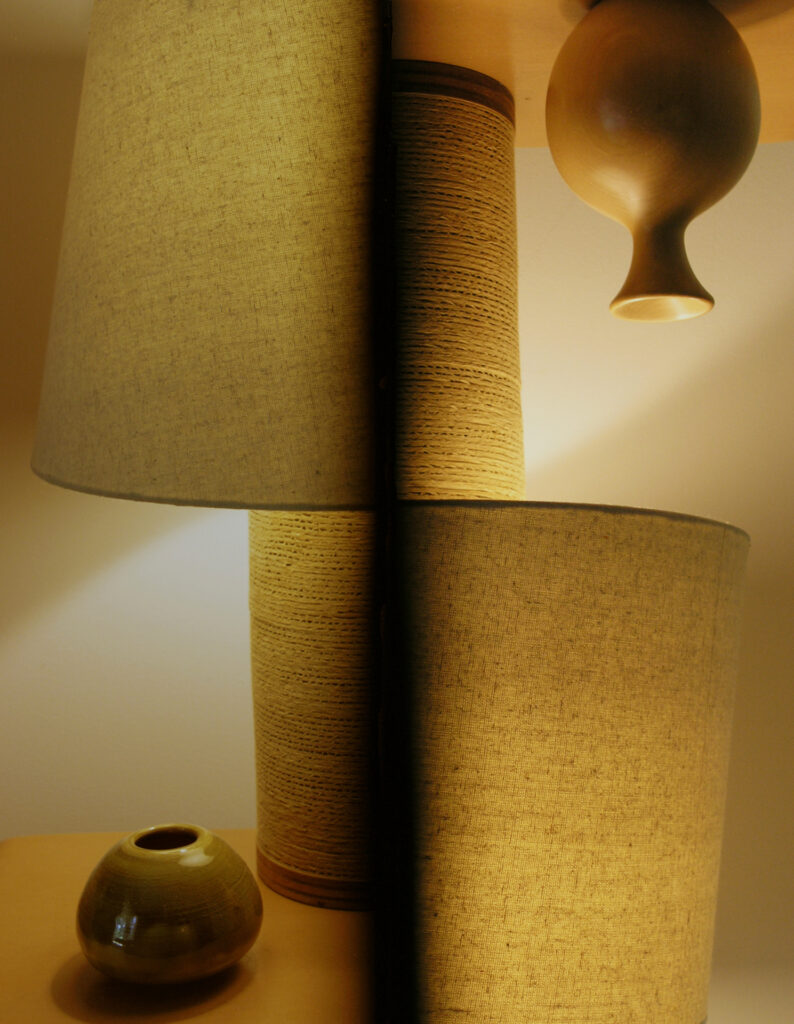
First, I shifted the two halves vertically just enough to align the bottom edges of the lamp shade across the middle of the frame:
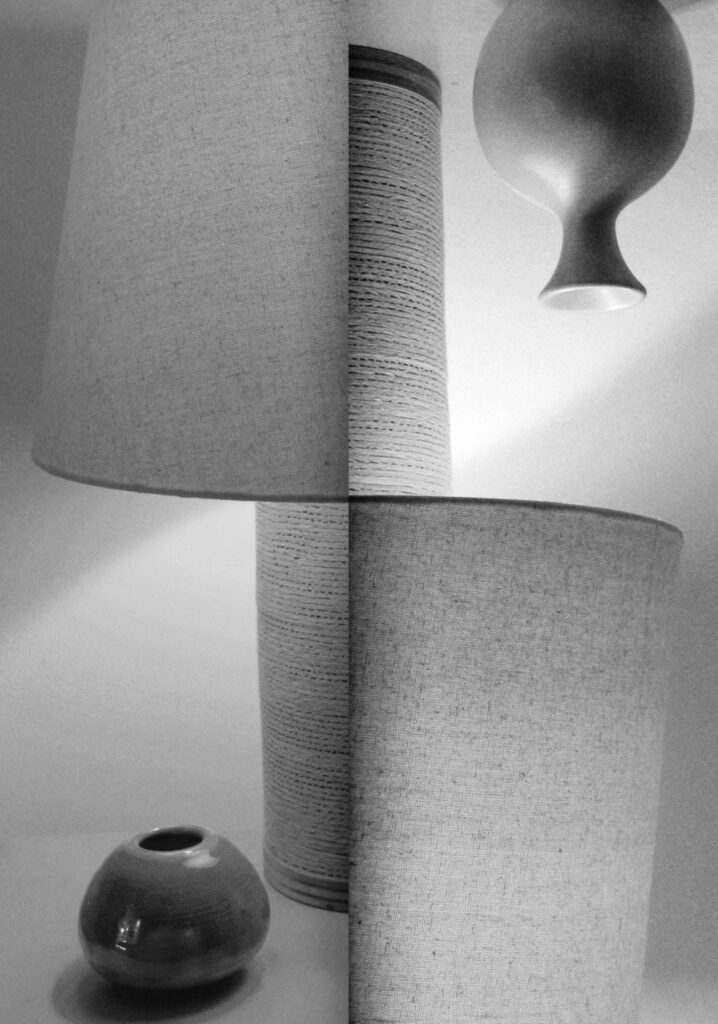
 Then I monochromed the result:
 Finally, I cut out the black separation gap.
And now… WELCOME to “Escher’s Bedside Table”!:
 Next…Film
Time to try film! Probably in my Nikon FE SLR with Nikkor 50mm f/1.4 or 24mm f/2.8 lens. But that could change. I’ll also try to make its Duplicator disk in a different and much better way.
Part 2 will take a while to finish though!
–Dave Powell is a Westford, Mass., writer and avid amateur photographer.
Share this post:


Comments
Gary Smith on “Half Framing” Practically Any Film Camera (Part 1 of 2)
Comment posted: 03/10/2025
Comment posted: 03/10/2025
Comment posted: 03/10/2025
Comment posted: 03/10/2025
Walter Reumkens on “Half Framing” Practically Any Film Camera (Part 1 of 2)
Comment posted: 03/10/2025
Comment posted: 03/10/2025
David Hume on “Half Framing” Practically Any Film Camera (Part 1 of 2)
Comment posted: 04/10/2025
Comment posted: 04/10/2025
Jim Palmer on “Half Framing” Practically Any Film Camera (Part 1 of 2)
Comment posted: 04/10/2025
Comment posted: 04/10/2025
Geoff Chaplin on “Half Framing” Practically Any Film Camera (Part 1 of 2)
Comment posted: 04/10/2025
Comment posted: 04/10/2025
Jeffery Luhn on “Half Framing” Practically Any Film Camera (Part 1 of 2)
Comment posted: 04/10/2025
You continue to entertain! Many of your previous articles have been 'off-beat' but the one on 'A Fun, Funky Filter for Shooting Infrared' really grabbed me. Now this cockamamie technique on shooting two half frame shots with a odd lens cap. Here I am, sitting at my computer reading it. Honestly, some of your projects remind me of a car spinning out of control on an icy road. Will it crash into another car? Will it come to rest? It's a spectacle that I cannot turn away from. Keep writing and I'll keep reading! Insert happy face imogee here.
Jeffery
Comment posted: 04/10/2025
Richard Watson on “Half Framing” Practically Any Film Camera (Part 1 of 2)
Comment posted: 05/10/2025
Comment posted: 05/10/2025
Paul Quellin on “Half Framing” Practically Any Film Camera (Part 1 of 2)
Comment posted: 06/10/2025
Comment posted: 06/10/2025