The Olympus 35 SPn is a relatively large and quite impressive-looking rangefinder camera. It is about 5 inches/13 cm long, 3 inches/7.5 cm high. At the time it was originally released in 1969 it was probably regarded as compact. When the 35 SPn went out of production in 1976 it was notably bigger than rivals like the Konica Auto S3/35 FE, the Minolta Hi-matic 7sii (and variants) and the Olympus 35 RD, all of which had similar specs.
Fit and finish
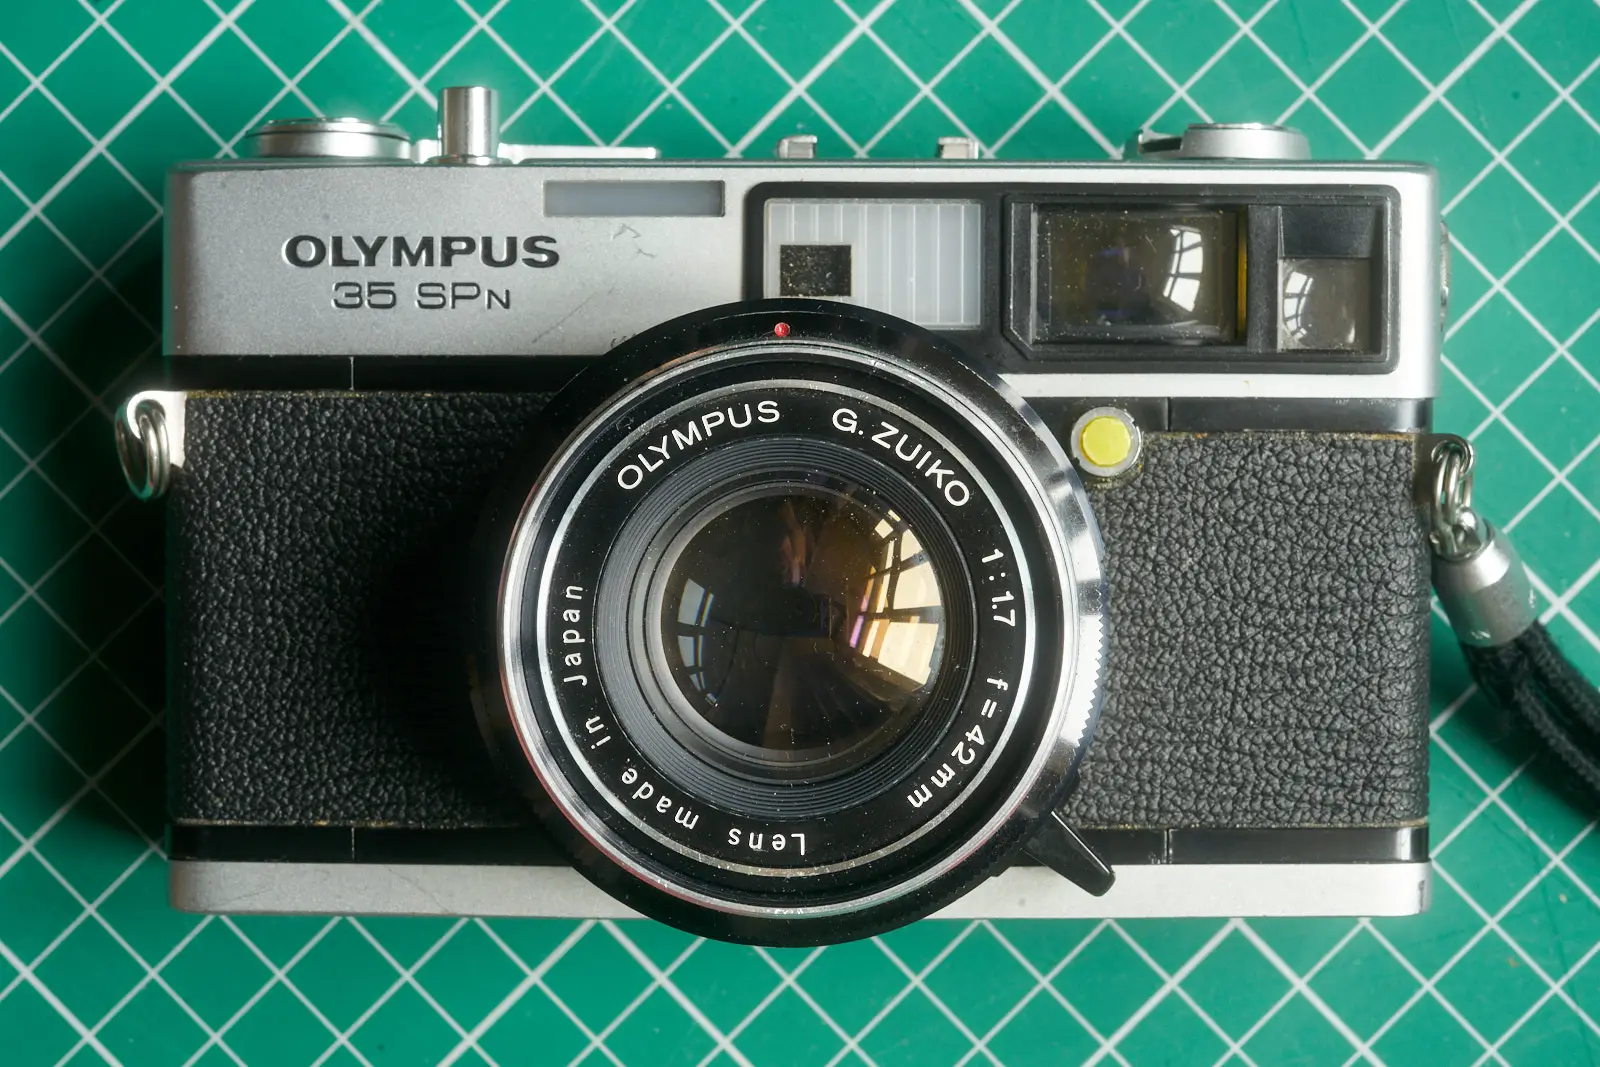
The styling of the Olympus 35 SPn is distinctively Olympus in its use of satin and mirrored chrome trim. The grooves in the top plate edges are particularly distinctive, used on many Olympus cameras of the period. The angular wind-on lever is similar to those used later on the OM series, while the long arrow pointing to the frame number on the top plate harks back to the ubiquitous Olympus Trip and was still being used on the XA, released over 10 years later. Quality of fit and finish are second to none, with crisp engravings and smooth uncluttered lines.
The Olympus 35 SPn spec sheet
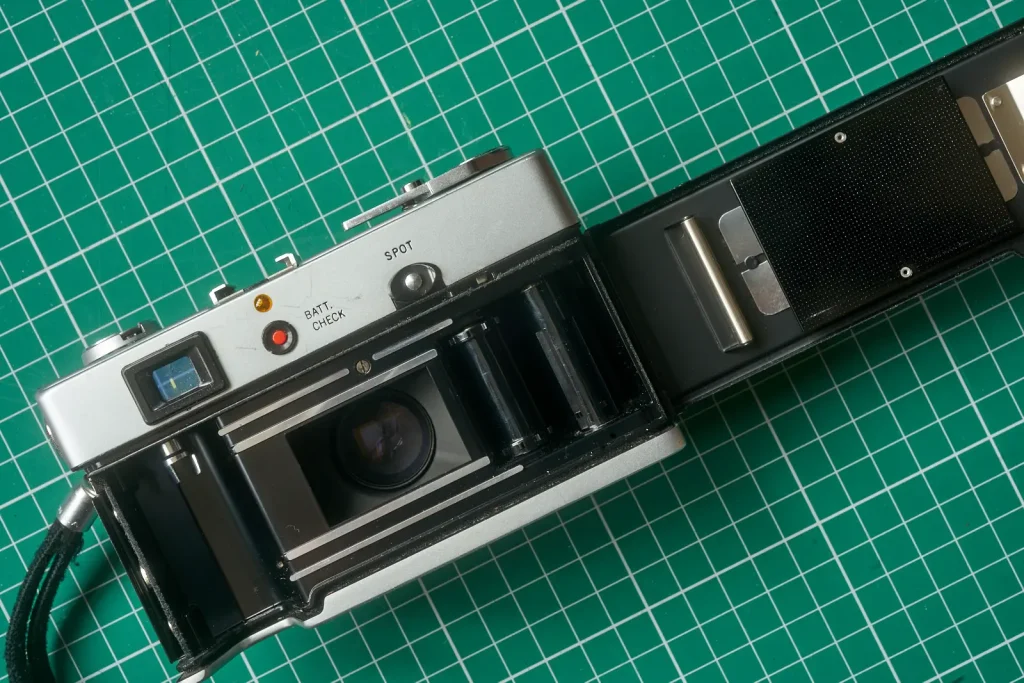
The highly regarded f/1.7 42mm lens is housed in a barrel with high quality plastic control dials controlling shutter speeds from 1 second to 1/500 plus B, apertures from f/1.7 to f/16 and guide numbers which can be set. Once a guide number is set, the camera will adjust aperture automatically to cater for correct exposure of whatever you are focused on. The meter deals with film speeds from 25 to 800 ISO. The little ‘SPOT’ button on the back meters from just the part of the viewfinder where the rangefinder patch is. It is a little wide to be called ‘spot’, but is a useful feature in any case. Also featured on the back of the later SPn models, is a battery check button and indicator light.
Design from a time just before
35mm rangefinder cameras tended to settle down in the 70s to share certain common bits of design that just work very well. They tend to have a CdS sensor within the filter ring near the lens, show aperture values and/or speeds in the viewfinder, have a self-timer lever on the front to the right of the lens and open the back by lifting the rewind crank (an action which also aids inserting a cassette).
There are a few design choices that betray that the Olympus 35 SPn was designed just a little before that, featuring some design cues that fell out of use.
The self-timer is controlled by a little metal tab that pokes through the plastic rings on the lens barrel, while the back is opened by a tab on the left side near the base and, because the rewind lever is fixed, the camera features a large cut-out in the base for insertion of the film cassette. The feeling of a time passed is added to by the wonderfully retro ‘Olympus Tokyo’ oval badge embossed into the leatherette on the rear door.
Setting exposure
Setting exposure manually on the Olympus 35 SPn also reminds of a time gone by. First you note the EV value shown in the viewfinder and set the shutter speed and aperture rings so that that EV value shows in the little window in the shutter speed ring – any combination of shutter speed and aperture you set with that value in the window will give you the correct exposure for those conditions. It is great for learning exposure, the SP is probably popular with photographic instructors.
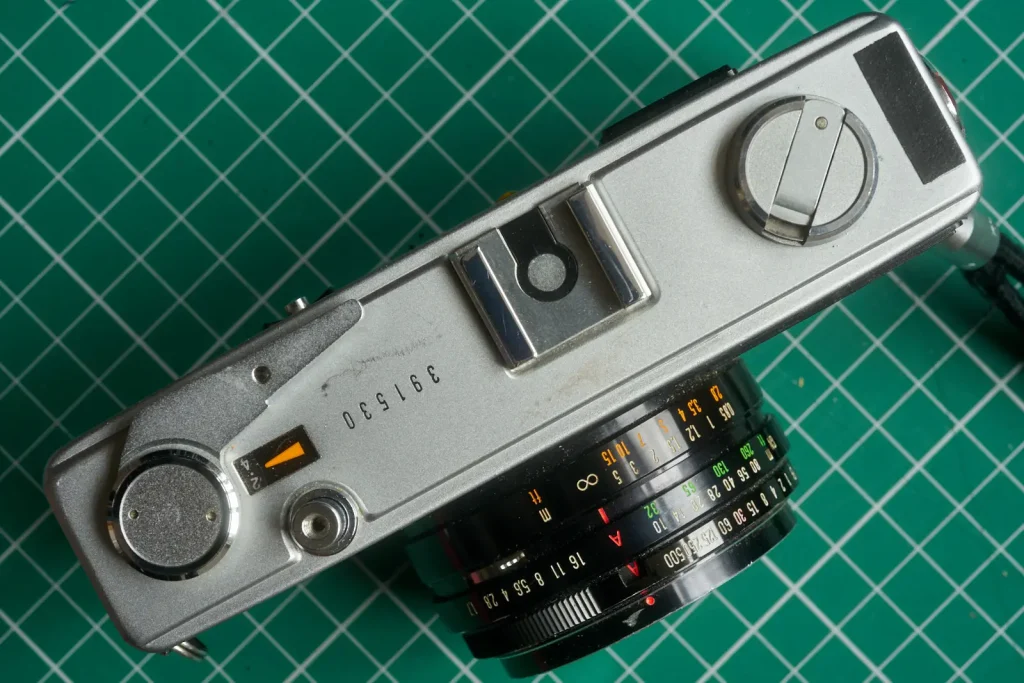
To use with automatic exposure on the Olympus 35 SPn, you set the aperture ring to ‘A’ and shift the shutter speed ring so that the window lines up with it, at which point the camera will display another A in the window. Any exposure will now be regulated automatically by the camera’s programmed exposure.
Now, programmed exposure is often unfairly maligned. Generally, unless you are wanting a particular effect that requires a particular shutter speed and/or aperture, programmed exposure will choose sensible values for lighting conditions and leave you to just worry about composition and focus. If you do need to dictate aperture or shutter speed, this camera does give you full manual control.
Olympus 35 SPn Downsides
Programme exposure limitations
There are however, some downsides to the way programmed exposure is implemented in this camera. For one thing, in programmed auto the camera will not select the highest 1/500 sec speed. It selects combinations between f/1.7 at 1/15 and f/22 at 1/250. The trap-needle system which sets an aperture and mechanically driven shutter speed gives a long and quite heavy shutter release travel.
Meter window
Other slight problems with the Olympus 35 SPn include the positioning of the meter window. ISO is set on the far left of the camera with a range from 25 to 800 ISO. The CdS metering window is right beside it. Unfortunately this has two disadvantages. It is possible to hold the camera so that the fingers of your left hand block the metering window. This is mitigated by the fact that the camera will not take a shot in auto mode if the shutter speed would be too low – so it is likely that the camera will let you know your fingers are in the way.
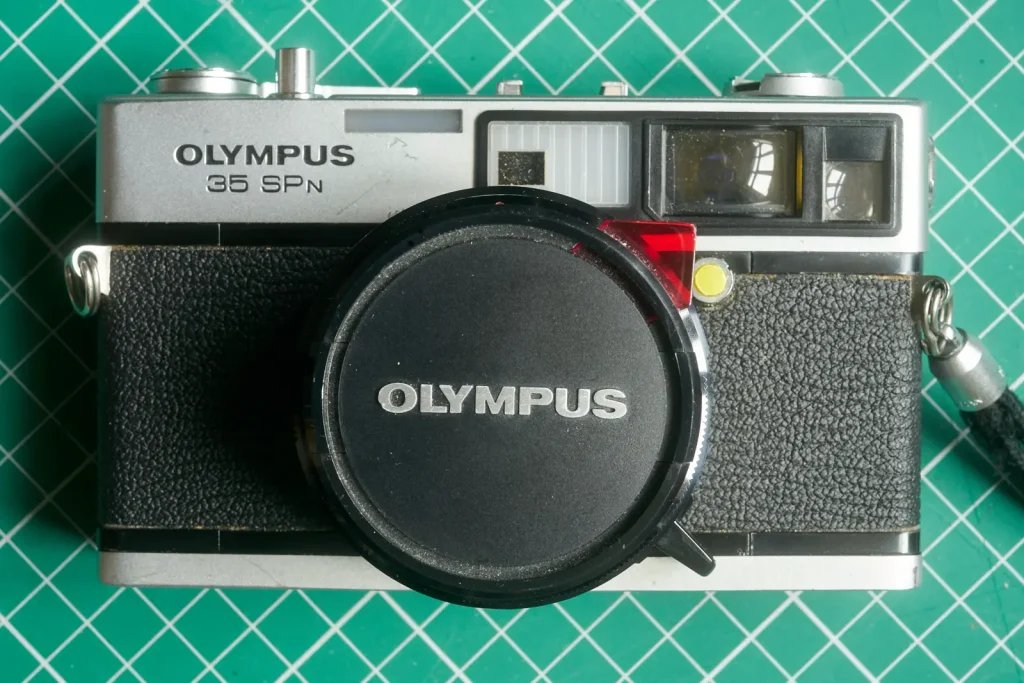
The positioning also means that the effect of filters is not automatically catered for. Because the camera has no meter switch, current is being constantly drawn while light hits the meter sensor. It also means that it is easy to shoot with the lens cap on – a problem that led the owner of this particular SPn, to add a little red flag to his lens cap that would show up in the viewfinder if the cap was left on.

Plastic rot
Another slight downer is deterioration of some plastics used on Olympus cameras from the late 60s and early 70s. I’d been aware that the plastic used in the upper parts of black ever-ready cases can go white and flaky. It affected early OM cases and also can be seen on the 35 SPn case. In the case of the Olympus 35 SPn though, I was also surprised to find a white coating on the plastic tip for the wind-on lever. This was unsightly, but didn’t seem to affect usage, or so I thought at first. Later however, the plastic tip fell apart, suggesting that the deterioration went deeper than just the white deposits on the surface.
On the up
The Olympus 35 SPn needs to be put in context. This was an advanced rangefinder for the late 1960s. It was so good that it survived well into the next decade against competition from more modern cameras.
The Olympus 35 SPn is, above all else a very good-looking camera. The viewfinder is very nice, with a clear rangefinder patch and bright lines for framing with parallax correction marks visible. The metering scale is across the top of the finder. The scale shows EV values, with no direct information on shutter speed and aperture available. However, different coloured ‘zones’ which give you some indication. A red area on the left shows that the light is too bright for the 1/250 – f/22 combination. An orange area on the left shows that there is not enough light for a 1/15 – f/1.7 combination.
The focusing action is lovely, with a buttery smoothness I’d normally associate with m42 Takumars. Its auto mode allows you to get on with the subject while the camera takes care of the exposure. The Olympus 35 SPn backs this up with the option of full manual control.
Olympus 35 SPn Pictures
The follow-up
Olympus’ next fast rangefinder, the 35 RD was smaller and moved the CdS sensor to the inside of the filter ring. The RD also opted for shutter priority auto and showed the automatically selected aperture in the viewfinder. The lens on the RD was of similar spec to the Olympus 35 SPn, but had one less element.
Conclusion
The Olympus 35 SPn is a pleasure to use. Highlights are the quality of the lens and the focusing action. These more than compensate for the slightly heavy shutter release. While not as compact as some of its rivals, it does just about everything you could want from a fixed lens camera. Anyone using one will surely forgive its meter placement.
Share this post:


Comments
Terry B on Olympus 35 SPn – A Review of a Quality Compact – By Bob Janes
Comment posted: 01/06/2021
What a neat modification by a previous owner to warn of the lens cap! I suppose you know that having the cds sensor incorporated into the lens body does introduce a potential problem with exposure that having it positioned elsewhere on the body doesn't. However, it's a bit like swings and roundabouts, and having it in the lens body is at least the lesser problem with using filters.
Cds meters are more sensitive to red light than selenium meters and which more accurately work within the range of human vision.
Thus placing a red filter in front of a cds meter will inflate the reading and can lead to under-exposure. This was something I came across and was a little perplexed by the camera exposure indiction as opposed to the manufacturer's exposure factor for the filter. I was getting underexposed negs, but assumed that the camera meter must be correct, as generally it was. That is until I came across an article about the colour sensitivity range of cds. This confirmed my suspicions, especially as the most seriously underexposed negs were taken in late afternoon/early evening, with some sun, when the colour temperature dropped more into the red zone. Once I was aware of this, I simply manually adjusted the exposure.
Comment posted: 01/06/2021
Comment posted: 01/06/2021
Charlie Bierwirth on Olympus 35 SPn – A Review of a Quality Compact – By Bob Janes
Comment posted: 01/06/2021
bp_reid on Olympus 35 SPn – A Review of a Quality Compact – By Bob Janes
Comment posted: 07/06/2021
Jesper Reiche on Olympus 35 SPn – A Review of a Quality Compact – By Bob Janes
Comment posted: 27/02/2022
Comment posted: 27/02/2022