

I have roughly fifteen packs of Fujifilm FP-100C instant film in my fridge. I know I should use them. I’ve been telling myself that for years. They’re discontinued, precious, and sitting there at 4°C while I shoot digital 95% of the time. I keep them because they remind me of something I love about photography that has nothing to do with megapixels: the physical object, the border, the frame, the artefact.
I’m a photographer based in Stuttgart, Germany — official Fujifilm X-Photographer, running my own business since 2007, shooting events, corporate portraits, and advertising work. I run photography workshops in Stuttgart and have a German photography podcast called Coffee and Cameras.
I also, on the side, write code.
This article is about two Mac apps I built — BorderTool Pro and BatchMark Pro — the specific frustrations that led to them, and what happened when a community of real photographers started using them and telling me what didn’t work.
The Backstory: A Photographer Who Codes
I didn’t start out as a developer. I got into coding gradually — first out of necessity, then out of genuine interest. At some point the two things fused. I started seeing workflow problems not just as annoyances, but as puzzles worth solving.
Both apps came from the same place: a repetitive task in my own workflow, no tool that handled it the way I wanted, and eventually enough frustration to build it myself. No grand strategy — just a photographer who got tired of doing the same thing the slow way. What I didn’t expect was how much both apps would evolve once other photographers started using them.
BorderTool Pro: Finishing a Photo the Way It Should Look
If you shoot film and scan it — or simply care about how your images look online — you’ve thought about borders. That thin white margin. The passepartout mat that makes an image feel framed and considered. The Polaroid asymmetry of a real print.
The Photoshop route: resize canvas, fill layer, flatten, export — repeated for every image. Lightroom’s print module is clunky and not built for batch JPEG export. Actions and scripts work until they don’t. I wanted something that sat in the corner of my screen, accepted images when I dropped them on it, and gave them back framed — or kicked in automatically on export from Capture One or Lightroom. No extra steps. No thinking.
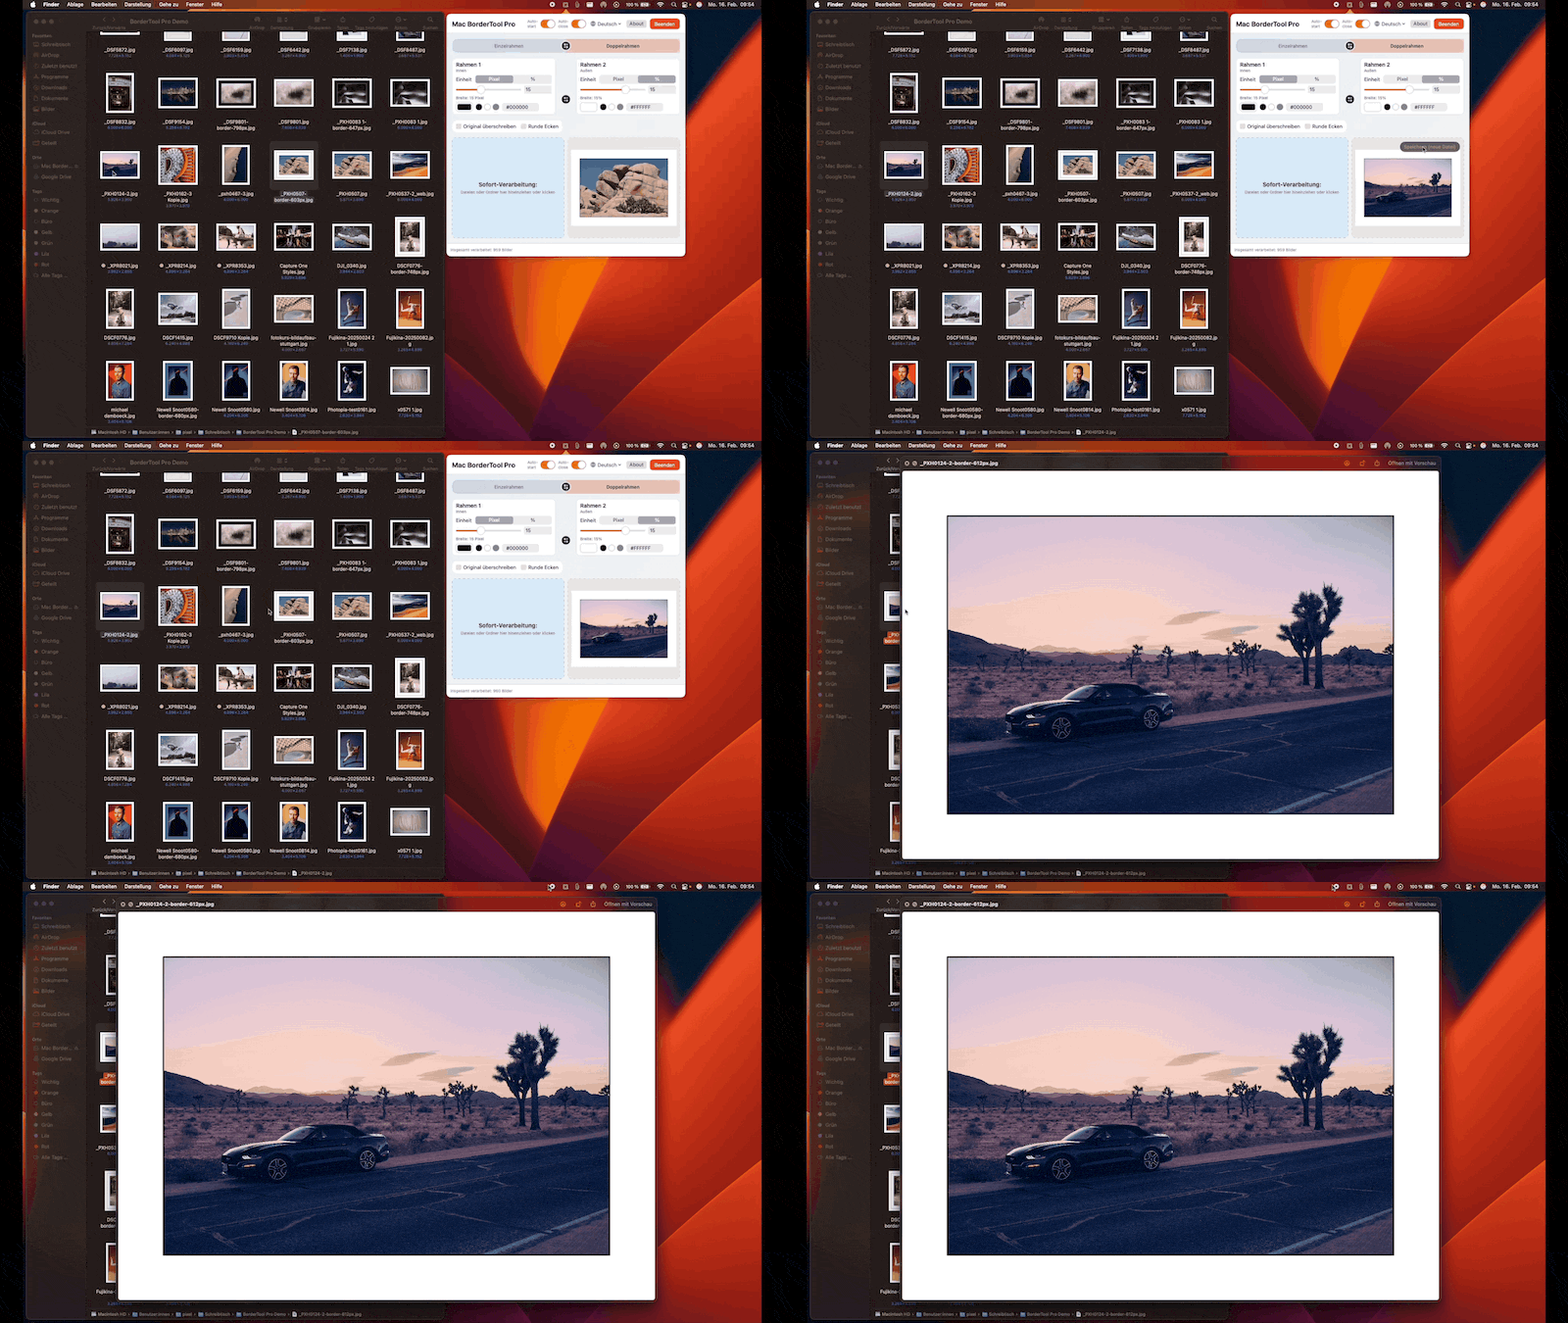
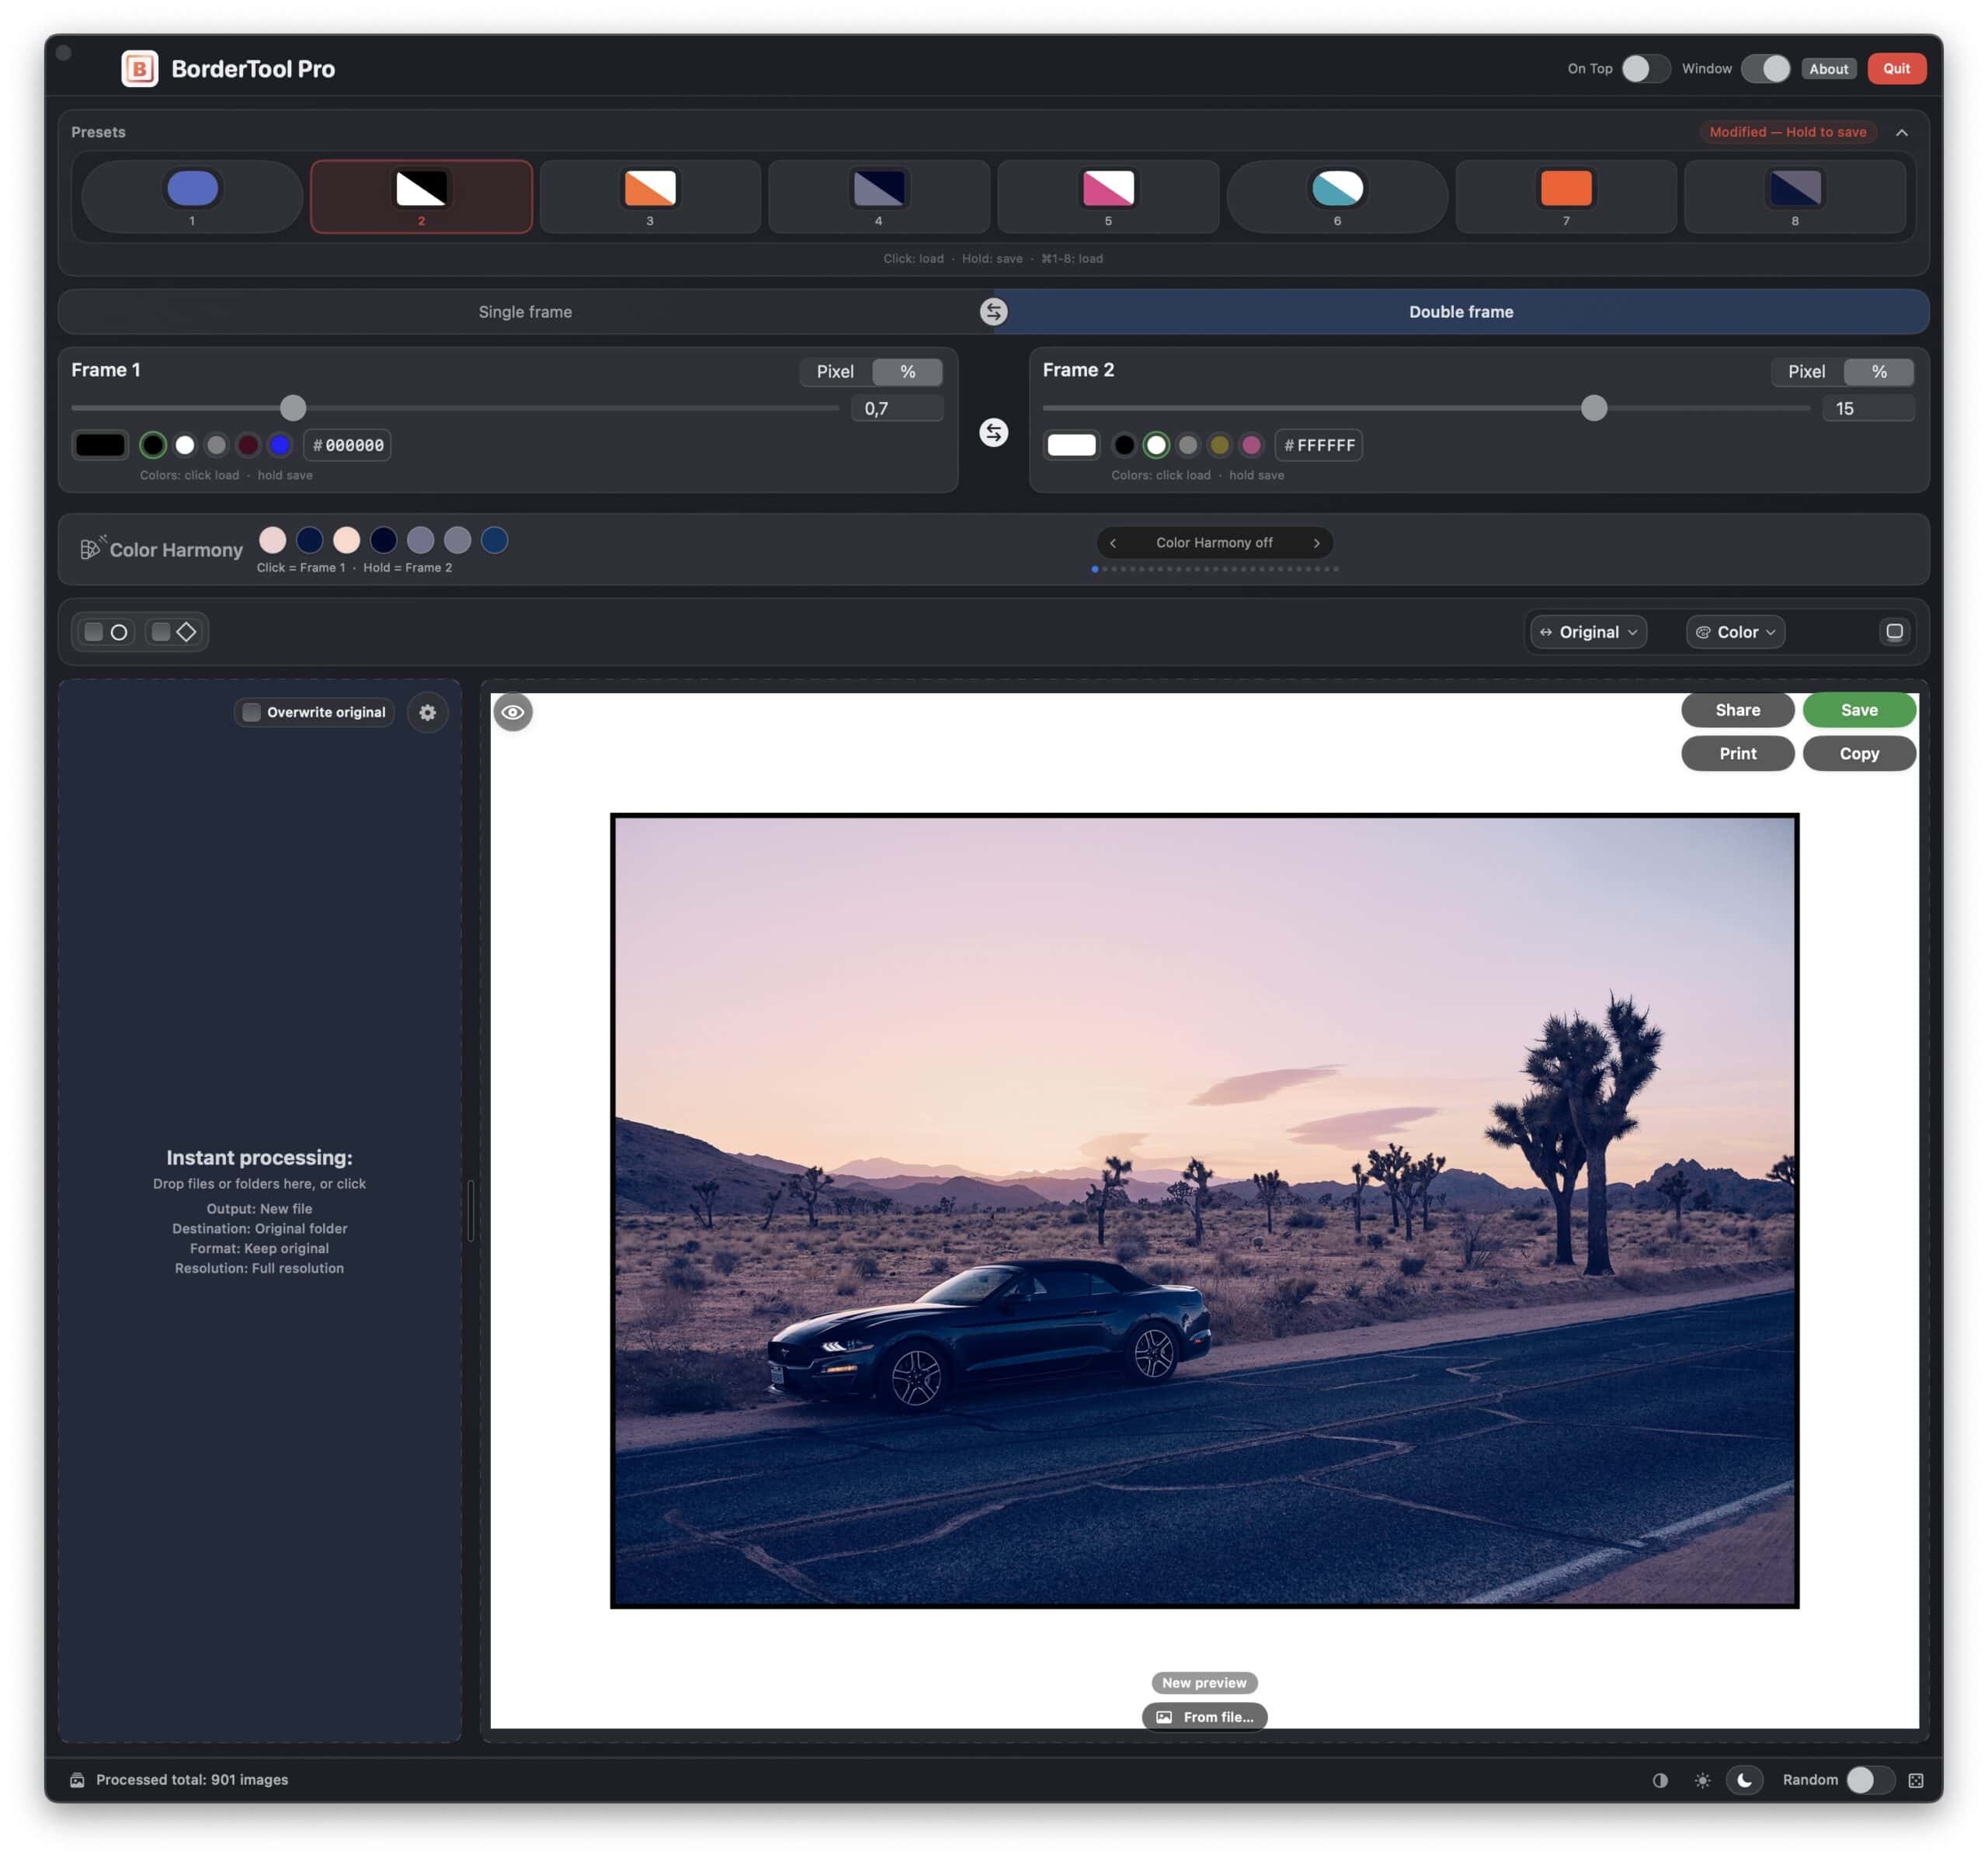
BorderTool Pro lives in the Mac menu bar. Drag images onto it — single files or entire folders — and they come back framed. It’s also callable directly via “Open With” in the Capture One and Lightroom export dialogs, so the border gets added automatically as part of your normal export, and it runs as a standalone window too if you’d rather work that way.
It does single and double borders, a passepartout mat effect for that mounted-for-exhibition look, and a Polaroid mode with the characteristic wider base for anyone recreating that expired-instant-print feel. Corners can be square, rounded, or chamfered. There’s a batch engine that chews through entire folders — including subfolders — in parallel, which matters once you’re past a handful of images, and an Apple Photos Extension if you’d rather add borders non-destructively right inside Photos. I added HEIC support after a user mentioned dragging in iPhone photos directly without converting them first; it shipped four days later.
Why the border colour matters more than I expected
One thing I’ve always cared about, going back to printing in a darkroom, is when the frame around a photo doesn’t fight the photo. A plain white or black border works for most things, but sometimes you want the border to feel like it belongs to the image — pulling a tone out of the sky, or the warm light on someone’s skin, rather than sitting there as a neutral rectangle.
That instinct turned into Color Harmony. The app analyses each photo and offers a huge variety of ways of deriving a border colour directly from the image itself — its dominant tone, a more vibrant accent pulled from somewhere in the frame, the lightest or darkest area, an average, or a colour sampled from the edges. You cycle through them with one key, and every image in a batch gets analysed on its own, so a mixed folder doesn’t end up with the same colour stamped across everything.
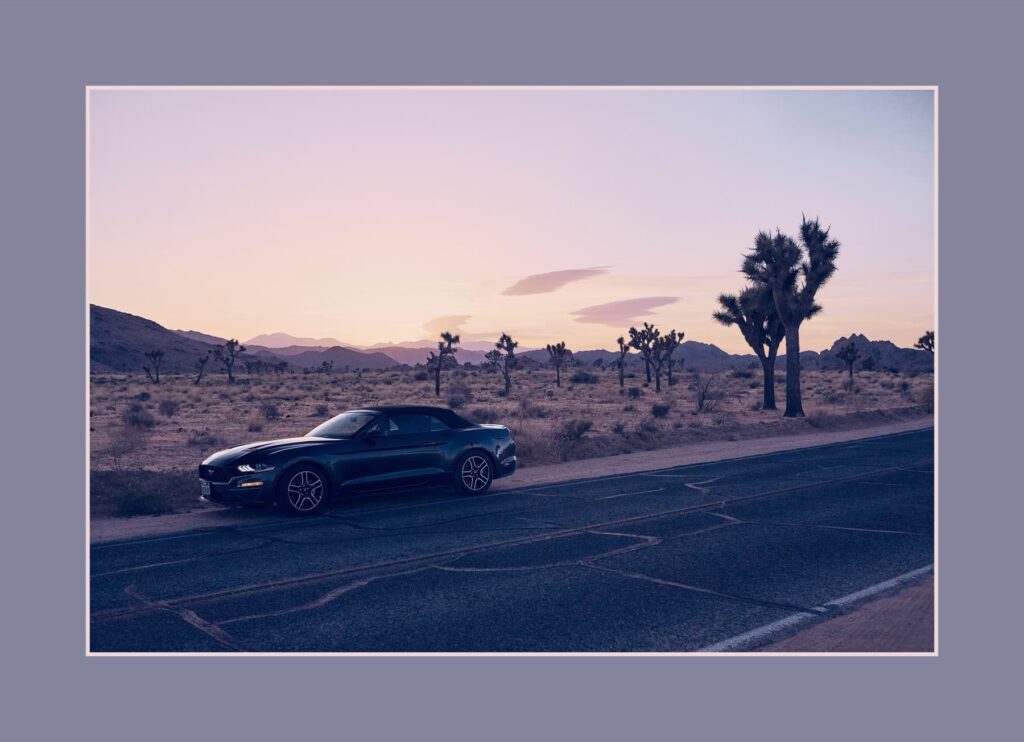
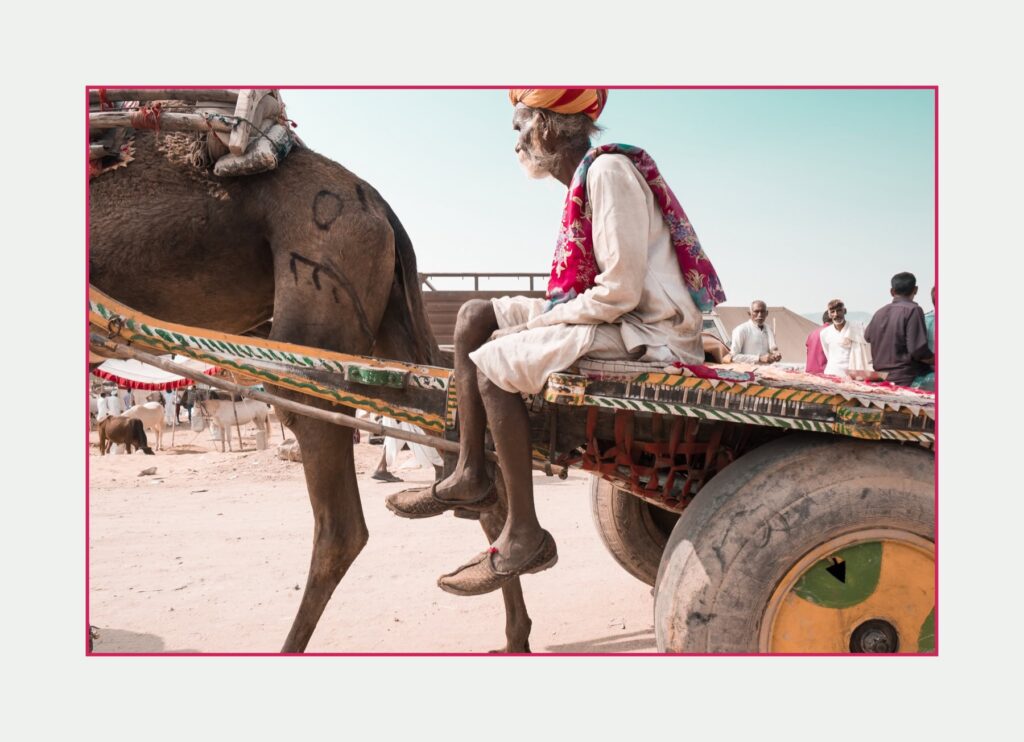
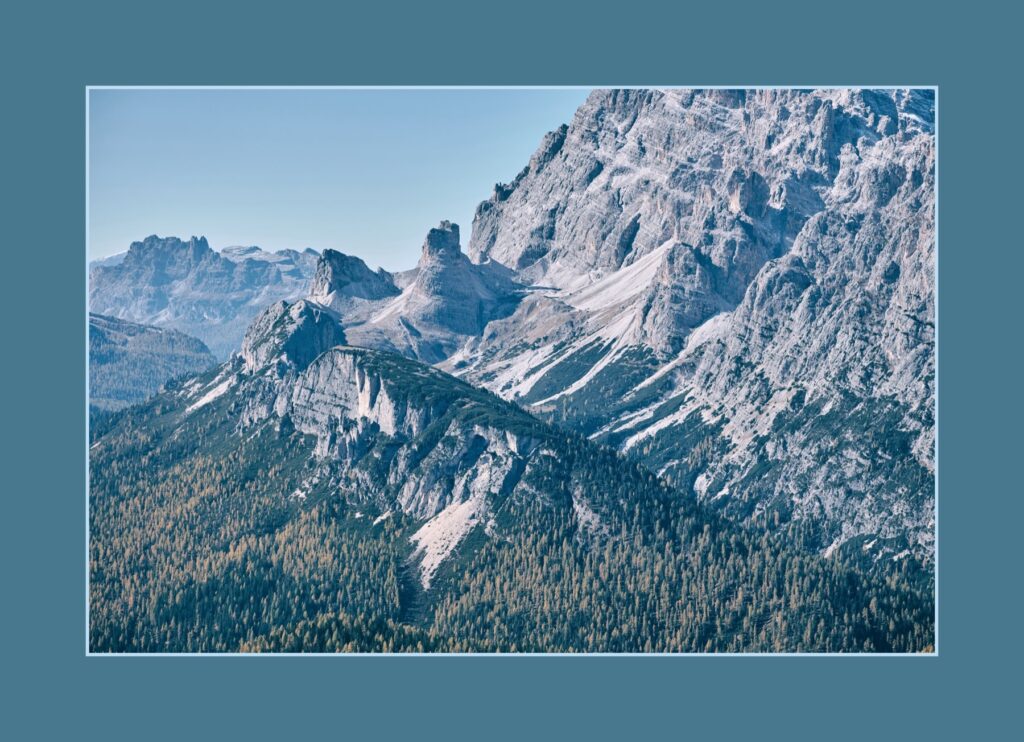
It’s a small thing in some ways — colors, sliders, keyboard shortcuts — but it changed how I personally finish my own photos, which is usually the best sign that something is worth shipping rather than just leaving as an idea.
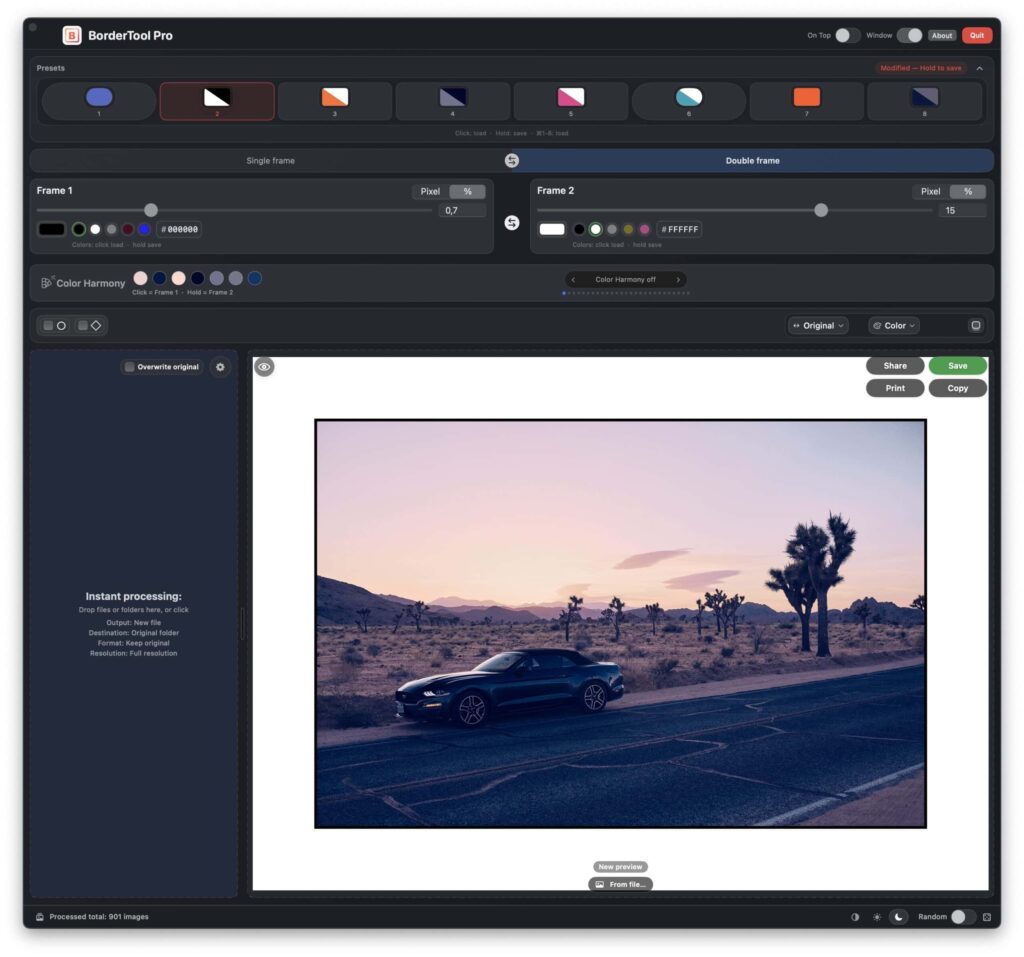
I didn’t expect anyone outside my own circle to notice the app, so I was genuinely caught off guard when I came across a piece on PetaPixel describing it as “high-end digital framing” — I’d pitched it to them on a whim months earlier and more or less forgotten about it, so finding the article was one of those moments where you just sit there for a second before it sinks in. Appgefahren, a German tech site, wrote that it “could become a standard tool for many photographers,” which is the kind of sentence I’ve reread more than once.
The reviews that mean the most to me, though, are the ones from people actually using it day to day. One photographer in Ontario wrote that the ability to layer two separate borders, corner styles and colours into saved presets was, in his words, a genuine workflow change — and added that the support he’d gotten from me personally made the difference between a four- and five-star review:
“The support from Michael is second to none. I’d give it more stars if I could.”— Mike Guilbault, commercial photographer, Ontario, Canada
Other reviewers have compared it favourably to every other framing app they’d tried on macOS, and one mentioned that as someone coming from a different creative field — music production — he was used to paying for plugins that did far less; that one stuck with me, since it’s exactly the comparison I think about when I’m deciding what’s worth charging for and what isn’t.
BatchMark Pro: The Watermark That Just Happens
Watermarking sounds simple but turns into a headache at scale. The naive approach — open each image, add your logo, save — is fine for three photos and tedious for three hundred. Lightroom’s watermark tool does the basics: one text field, one position, no logo layers, no per-image EXIF variables, no saved configurations. Capture One is even more restricted. I wanted something that would hook into my export and handle it automatically — export from Capture One, images land in the output folder already watermarked, no extra step, no script to remember.
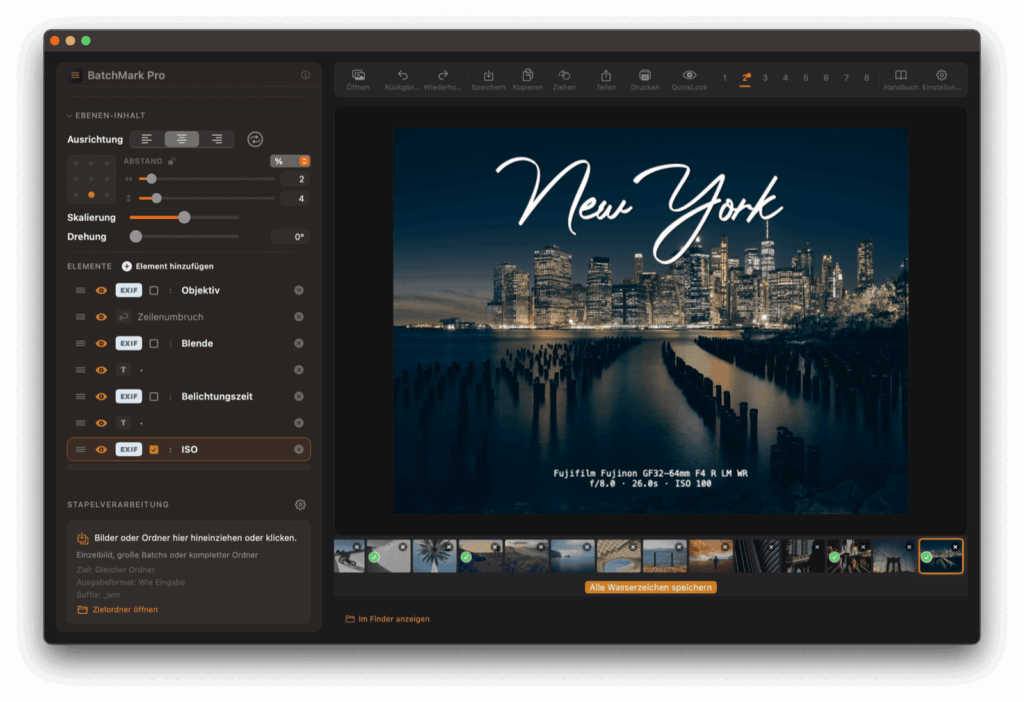
BatchMark Pro is, like BorderTool Pro, called via “Open With” in the Lightroom Classic or Capture One export dialog — watermarked automatically as part of the export with no extra step — and it also runs standalone, so you can just open it and drag images or folders straight onto it. You can stack as many layers as you need in a single configuration: logo, copyright text, EXIF data, all combined, rather than being limited to one element like in Lightroom’s built-in tool. Logos support both SVG and PNG with full transparency. Positioning uses nine anchor points plus a free offset, so you’re never stuck in a corner if that’s not where you want it.
Why the EXIF text feature matters for film photographers
This is the feature I think about most in the context of this community specifically. If you shoot film and digitise your work, your EXIF data is wrong by definition — it reflects the scanner or digital camera used for capture, not the actual camera and film stock. BatchMark Pro reads 40 different EXIF placeholders from the file metadata, and you can combine them with any custom text you like. So if you want a scan to carry Leica M6 · Summicron 35mm · Kodak Portra 400, you set that up once as a text layer in a configuration — and from then on it’s applied to every image in every batch automatically.
Here are two examples straight off the product page — the same underlying system, two very different results depending on the configuration:
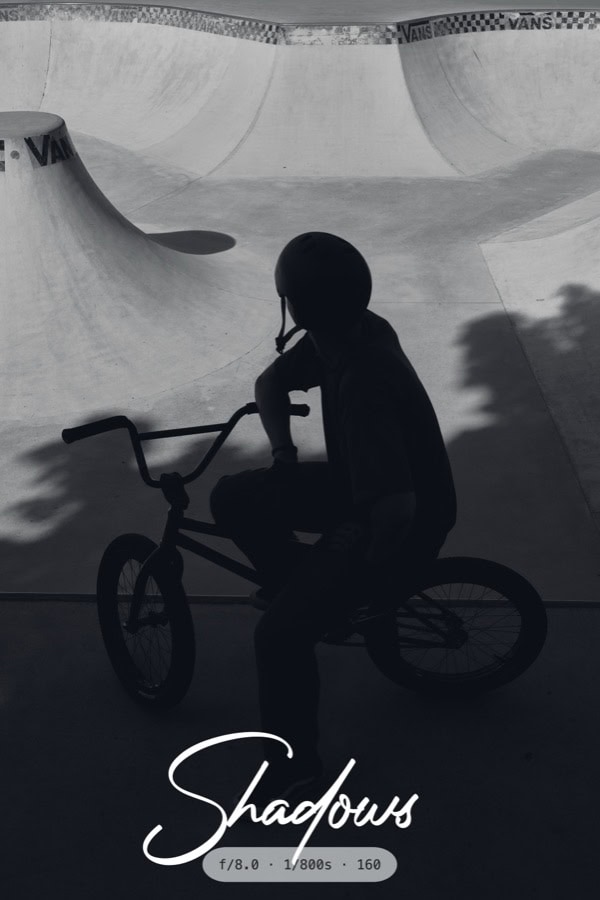
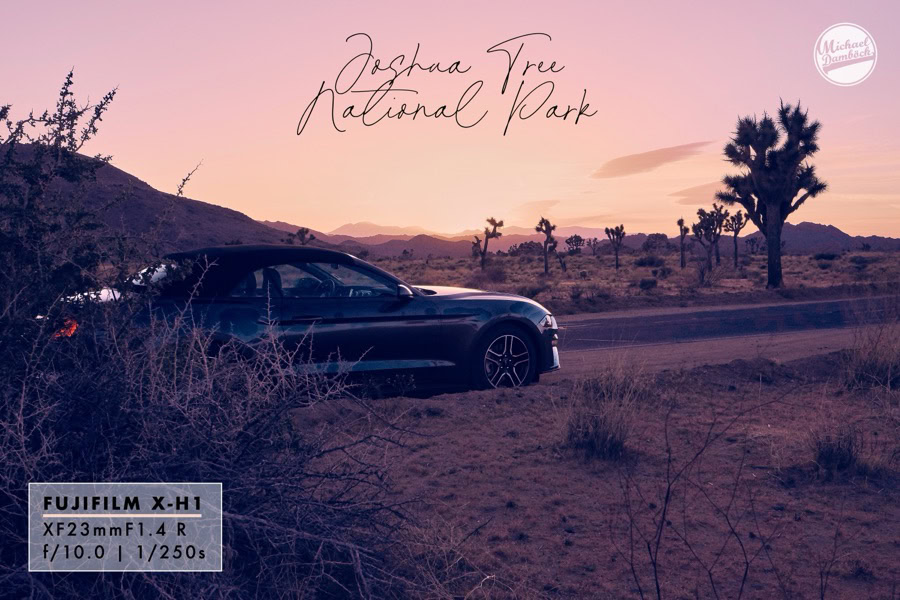
The app also supports multiple sharing options including AirDrop, iMessage, email, and comes in nine languages, just — like BorderTool Pro — it runs entirely offline, unless you want reverse-lookup GPS address information, which needs to be enabled separately in preferences.
There are eight save slots for full multi-layer configurations, switchable instantly via keyboard shortcut. They were there from fairly early on, but the thing that actually changed how much I use them myself came from a user request: thumbnail previews on each slot, so you can see at a glance what’s saved under, say, slot three or seven without having to load it first and check. Small change, but it’s the kind of thing that turns a feature from “technically there” into something you reach for without thinking.
On Building Tools for a Community You’re Part Of
The first version of both apps was good enough for my own use. It wasn’t great for everyone else’s.
The feedback I got in the first months changed how I think about building software for photographers — specific, practical things that real people were running into in real workflows. One person asked if the live preview could be larger because they were working on a 5K display — an easy fix once someone pointed it out. Another user wrote a second review only four days after the first, purely because that many new features had landed in the meantime.
I respond to every message personally — no ticket system, no automated replies. When I ship an update that includes something someone asked for, I write back and tell them it’s in there. That feedback loop is the part of all this I’m most proud of, more than any individual feature.
If I’m honest about the one thing I’d change if I could, it would be nice if these tools were free for the community. But photography is how I make my living, not something I do on the side, so charging for the software is what makes it sustainable for me to keep building and supporting it. €39 once, no subscription, felt like the fairest way to do that.
Share this post:


Comments
Zack on I’m a Photographer Who Builds Tools — How Two Mac Apps Grew Out of My Own Workflow
Comment posted: 17/07/2026