
Conclusion: easy to set up, easy to use, superb results. If you have a digital camera and macro lens then for 35mm film scanning forget the flatbed scanner. Their website is blackscalelab.com. If you need to know more read on.
Anyone who has worked with computers for a while knows that the first thing you should do when you get new equipment is chuck the manuals in the bin. And so I assembled the items in the box. Note that the BlackBox manual is sensibly given as a link to the manual online.

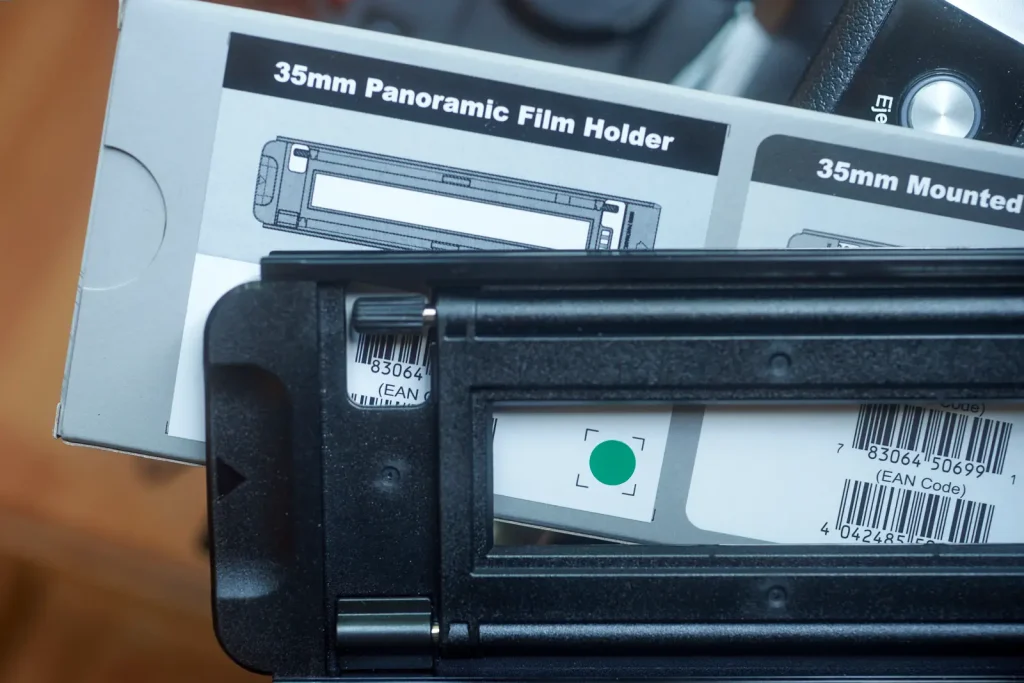
Most items in the image are self explanatory. The group of four in the top right need a little explanation. The two in the upper row are extension tubes. Lower left are lens rings. From the latter set I chose a ring to screw into the front of my lens. From the former set I chose extension tubes to enable my lens to focus on the screen. Which tubes you need will depend on your lens and is a matter of trial and error to (a) get the lens to focus and (b) to fill as much of the sensor as possible.
During assembly I noticed a couple of threads of plastic inside the tube from manufacture – just pull these off if you have any. Also doing things quickly just to see if it worked I did not choose an optimal set of rings so my illustrated scan comparison below was based on using only 60% of the sensor.
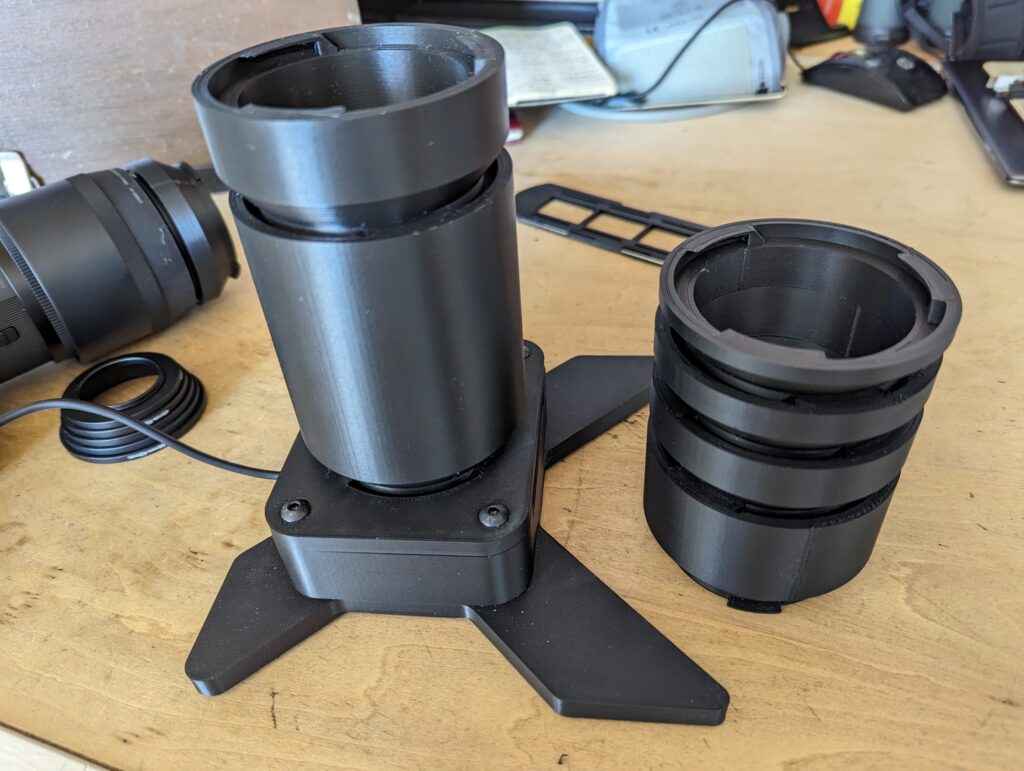
The other piece (lower right in the first image – I’ll call the “Connector”) clicks into the extension tubes and enables the camera lens to sit on top making a complete tower, light bed at the base, camera at the top. NOTE: this is just a gravity lock between lens and tubes – don’t tilt the set-up but keep it in a vertical position. This means of attachment allows the camera to be rotated freely to line up with the film.
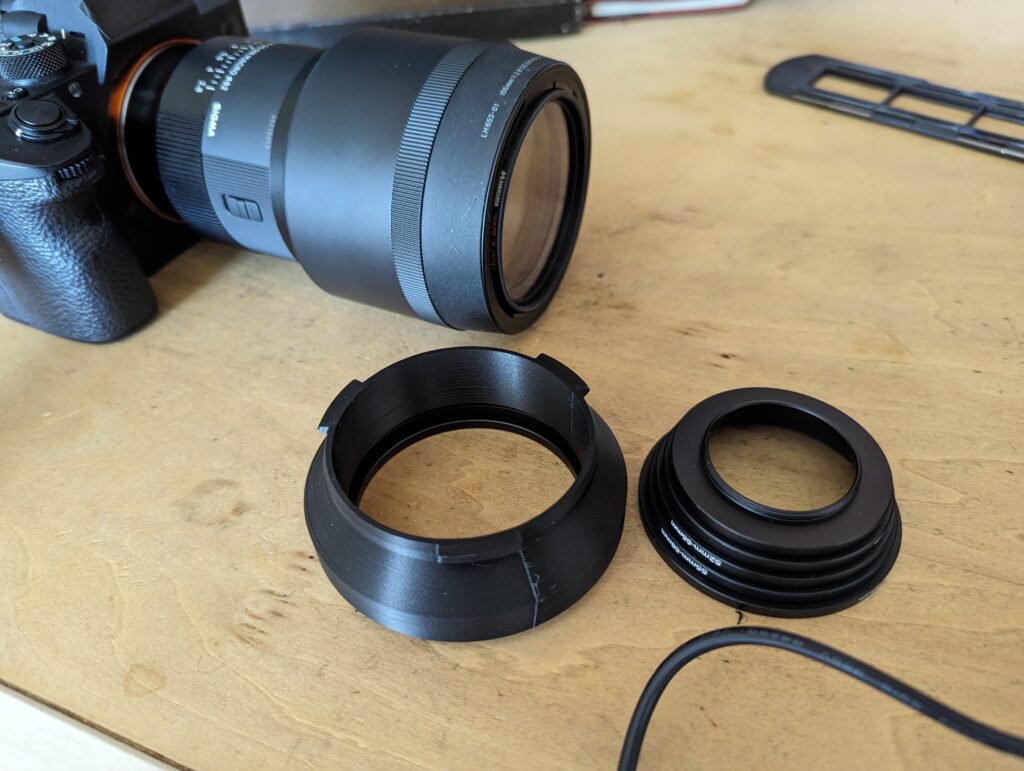
The Connector is pictured with the side attaching to the extension tubes uppermost, the lens slotting into the other side.
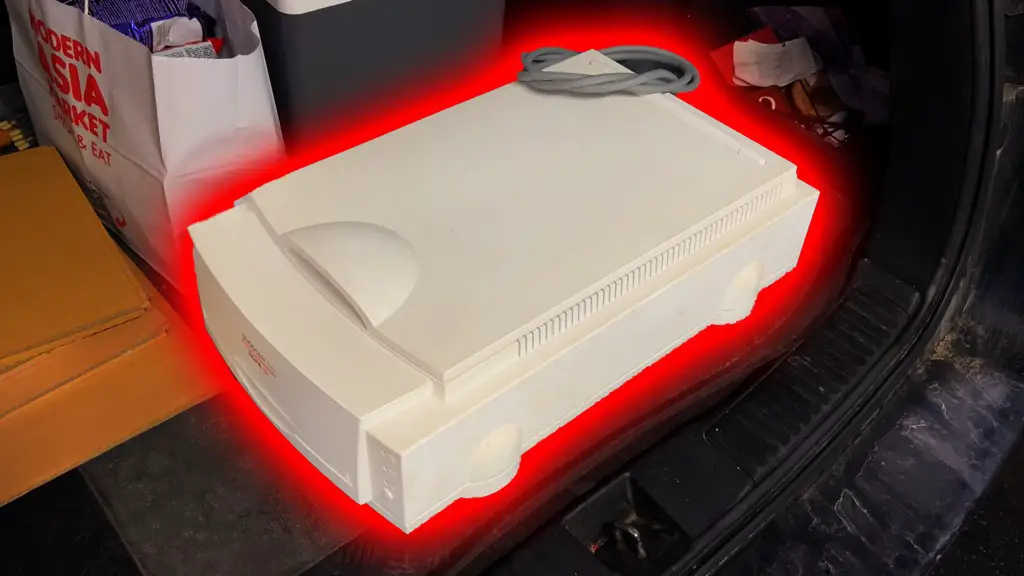
Film sits on the film holder and slides into the base with click stops for each of the six frames. You need to plug the cable and switch one end into the base, the other into a 5 volt charger. At first I tried a low power charger – this doesn’t work, the light will just flash on then off.
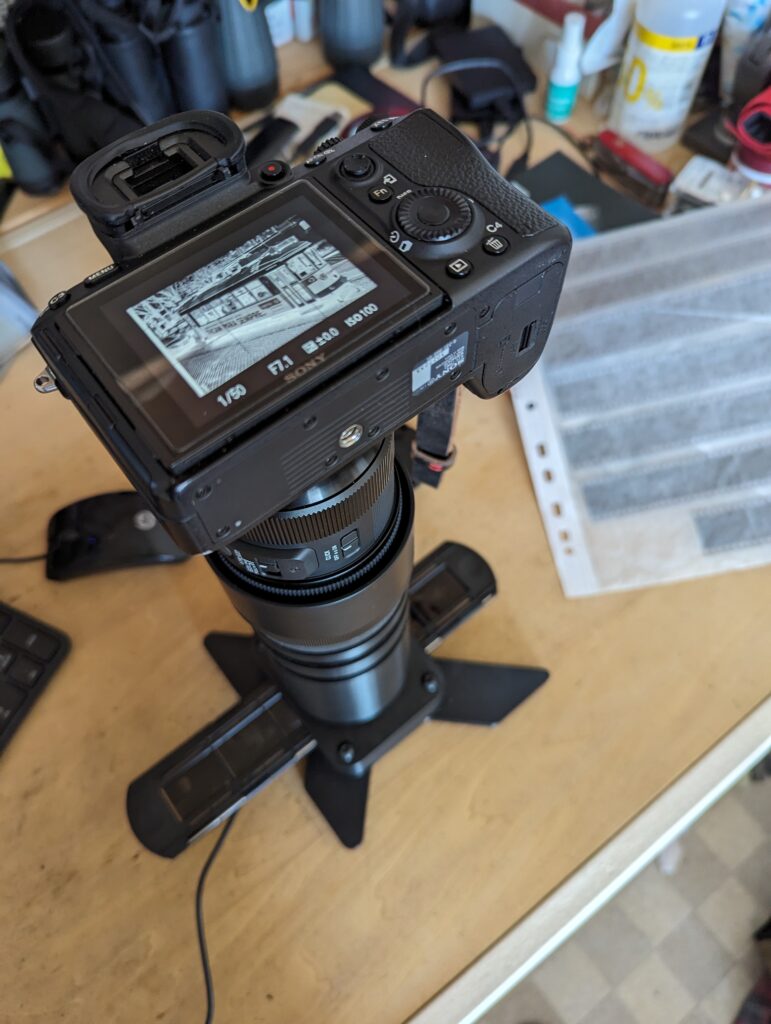
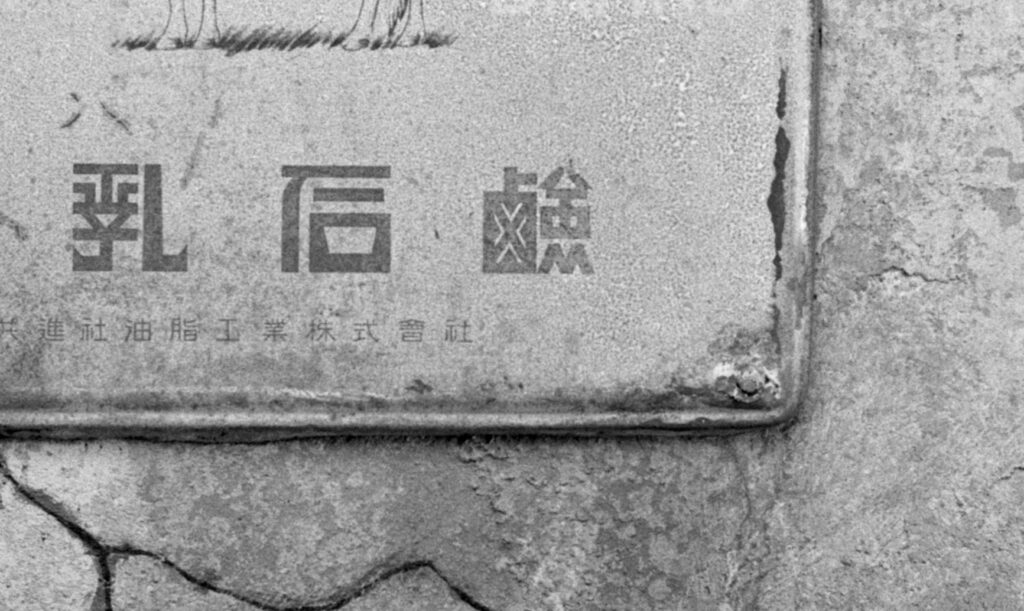
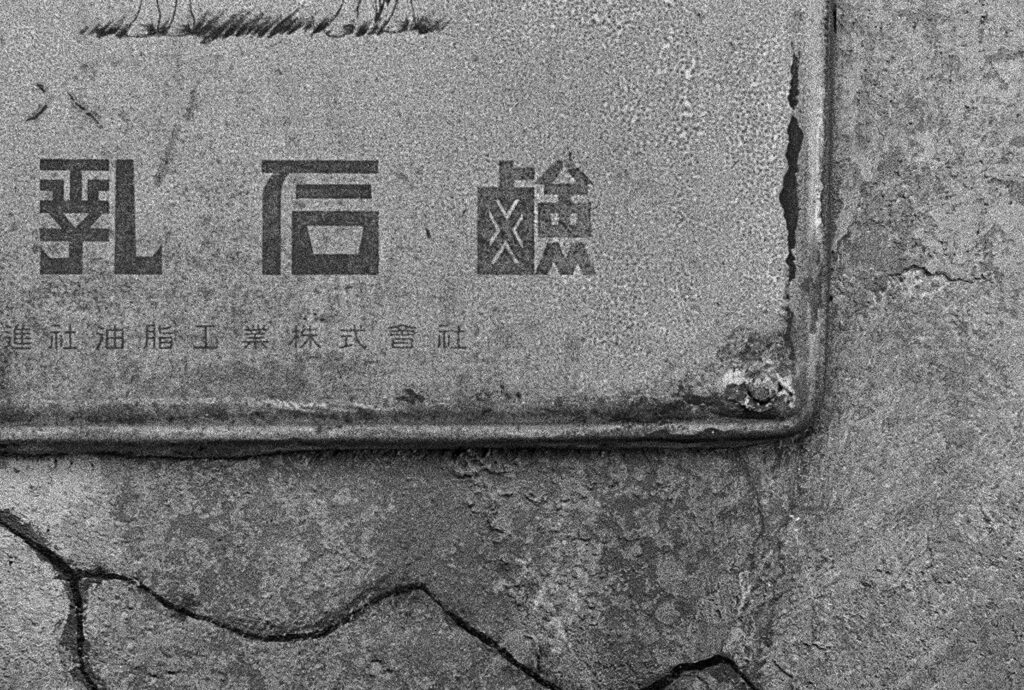
I used my Sigma 105mm macro lens on a Sony A7Riii body. For my first shot I chose an image which is featured in my article “Drinking Districts in Japan VII: Obihiro” the image of Cow Brand soap advertising sign on a crumbling wall. I scanned using a 10s shutter delay, stabilisation off, aperture mode, AF, and (accidentally) at f13. I show below crops from about 10% by area of the entire image, the original Epson GT-X900 scan from a 30mb tif file (3200 dpi scanning), and the 12mb jpg scan from BlackBox. The latter is strikingly better.
I scanned one entire film (40 frames) and it took under 10 minutes (much less with a 5s delay) – about an hour and a half less than my flatbed scanner. So at this point I decided to look at the manual to see what I might have messed up. I shot jpg since I was scanning B&W – for colour I’d use RAW but I also realised later my workflow using RawTherapee would be simplified if I’d shot B&W as RAW – tone inversion could be performed with one click at the start. F5.6 would probably be the best choice for this lens. Exposure compensation was set at zero – BlackBox suggests checking the histogram and adjusting exposure appropriately. I scanned the film with the negative side down. Talking to Dmitry it seems negative side up is theoretically better though in practice it doesn’t seem to matter.
I have since scanned about 20 B&W films at f8 or f5.6 often without exposure compensation. As before everything worked quickly and efficiently with consistently exceptionally good results. A tip if you shoot more than 36 frames: it’s difficult to scan short pieces of film. Cut your film 6 frames at a time starting from the end. When you get to the start leave an amount of the over-exposed leader simply to enable easy loading into the film holder. Also after scanning I suggest you convert from film negative (to positive), make B&W (it seems always to have a colour cast), straighten and crop, set the contrast curve to a straight line (not an auto-matched tone curve or other adjustment at this stage), and save as a jpg. Subsequent adjustments if desired are best made on the jpg file.
I have no connection with blackscalelabs other than having bought this product.
Share this post:


Comments
Gary Smith on BlackBox 135 Digitisation Tool Review
Comment posted: 23/05/2024
Comment posted: 23/05/2024
Ibraar Hussain on BlackBox 135 Digitisation Tool Review
Comment posted: 26/05/2024
It lacks the detail and resolution but its smooth, softer and pleasing to the eye.
Comment posted: 26/05/2024
Comment posted: 26/05/2024
Jay Dann Walker on BlackBox 135 Digitisation Tool Review
Comment posted: 22/06/2025
Briefly told (ha!), during the Covid lockdown in Australia I filled in time at home by scanning about 20,000 (yep) BW and color slides to what 'I hoped would be portable/usable/saleable results. And was mostly disappointed.
I used a Plustek 7600i with the then current (now sadly outdated) software for the 35mm, and an Epson VXXX for the 120. The MF results were passably good, at least sharp, tho' the post processing for color shifts and contrast adjustments will more than amply fill up what remains of the rest of my life which given my age now (77 and a half years, still going strong but feeling the passing of time) may not be as long as I need to get through my film archives.
The Plustek was the biggest disappointment of all. Even at 3200 dpi the results were, to put it in one word, blah. More so the contrast than the sharpness, tho' both let me down about equally in the summing up.
Anyway, other than feeling sorry for myself, I've tried to move on. Just now came to this article you wrote a year ago, and as aways with your posts, I was greatly impressed. If I can get results like yours, I will be more than satisfied, and I hope my few remaining stock image clients, mostly book publishers looking for older images but with color and other technical requirements still on the high side, will be happy to buy and use in their books, Not a great market nowadays and hardly enough to pay for my travels let alone live on, but it's reward for effort and I still enjoy the challenges of competing in the ever-declining market of stock photo sales. For however long it lasts...
Technical questions now. A year later would you still consider the Blackbox as being worth investing in? Here in Australia where our kangaroo kopek barely fetches 65 US cents to the dollar, it's an investment, and as a retiree I have to watch how the bucks are spent.
My clients mostly insist on scans of a size around 3500 dpi, if this makes sense to you. Is this possible with a Blackbox?
I would be using it with either a Nikon D800 (36 MP) or my newly acquired Nikon Z6 (24 dpi).
I apologise in advance for bombarding you with these questions at such a late date, but your answers will be valued and they will save me a lot of time surfing the 'net for useful information and weeding out the meh sites.
I'm now in Asia, but in return for your valued and certainly valuable assistance on these matters, if ever you turn up in Oz I will be honoured to take you on a gala tour of my favourite wineries in Victoria state. Or our better craft breweries of ales are more your tipple.
With my very best wishes to you as always,
DANN hailing from near Melbourne but now in Indonesia
Nadine on BlackBox 135 Digitisation Tool Review
Comment posted: 15/09/2025
Comment posted: 15/09/2025