New Year comes and goes. By February, I’m feeling the creative doldrums—that post-holiday flatness where nothing seems to spark. So I decide to shake things up and try something I’ve never done before.
I load my Rollei 35B with a roll of Kodak Vision 3 500T, but with a twist. My plan is to shoot all 36 frames, rewind the film, reload the same roll, and shoot over it again. Same camera, different day, different location, different light. Photographic roulette.
Double exposure photography has always felt like a kind of magic to me—that beautiful unpredictability, the way two unrelated moments conspire to create something neither could have achieved alone. I’ve done the occasional film swap with other photographers (check out this with Peggy), and I’ve taken plenty of intentional double exposures with my Holga, Bronica, and various old box cameras where you can easily cock the shutter without advancing the film. But this? Running an entire roll through a compact 35mm and overlaying it weeks later under completely different conditions? This was new territory.
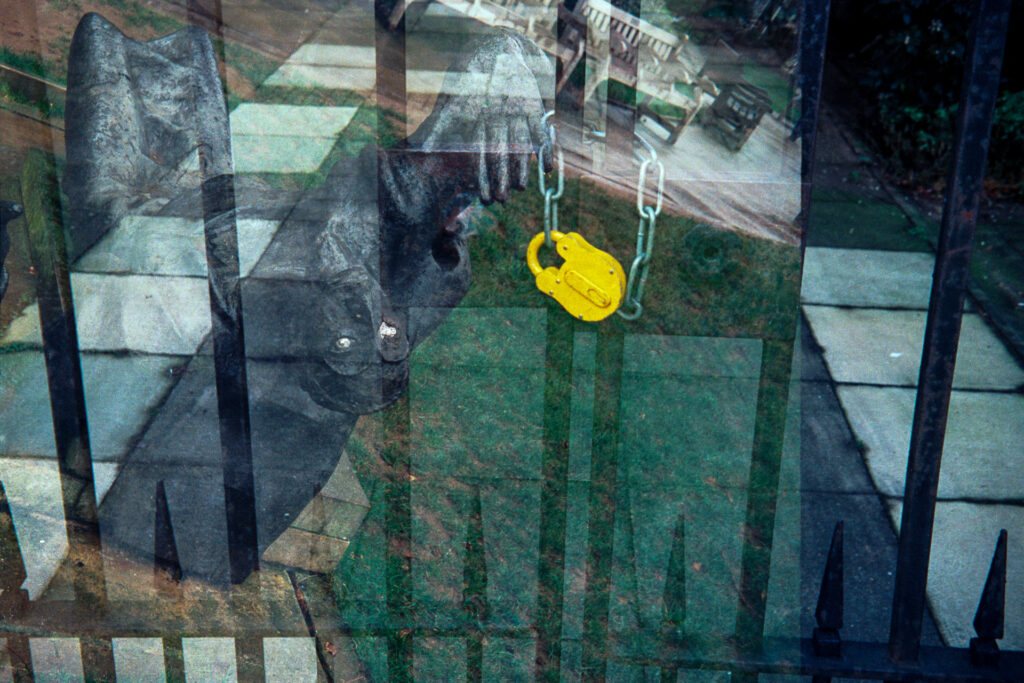
The results surprised me. Despite carefully noting where I loaded the leader, the frames didn’t line up perfectly—the registration was off just enough to make things interesting. Sometimes frustrating, but other times exactly what made these images sing.
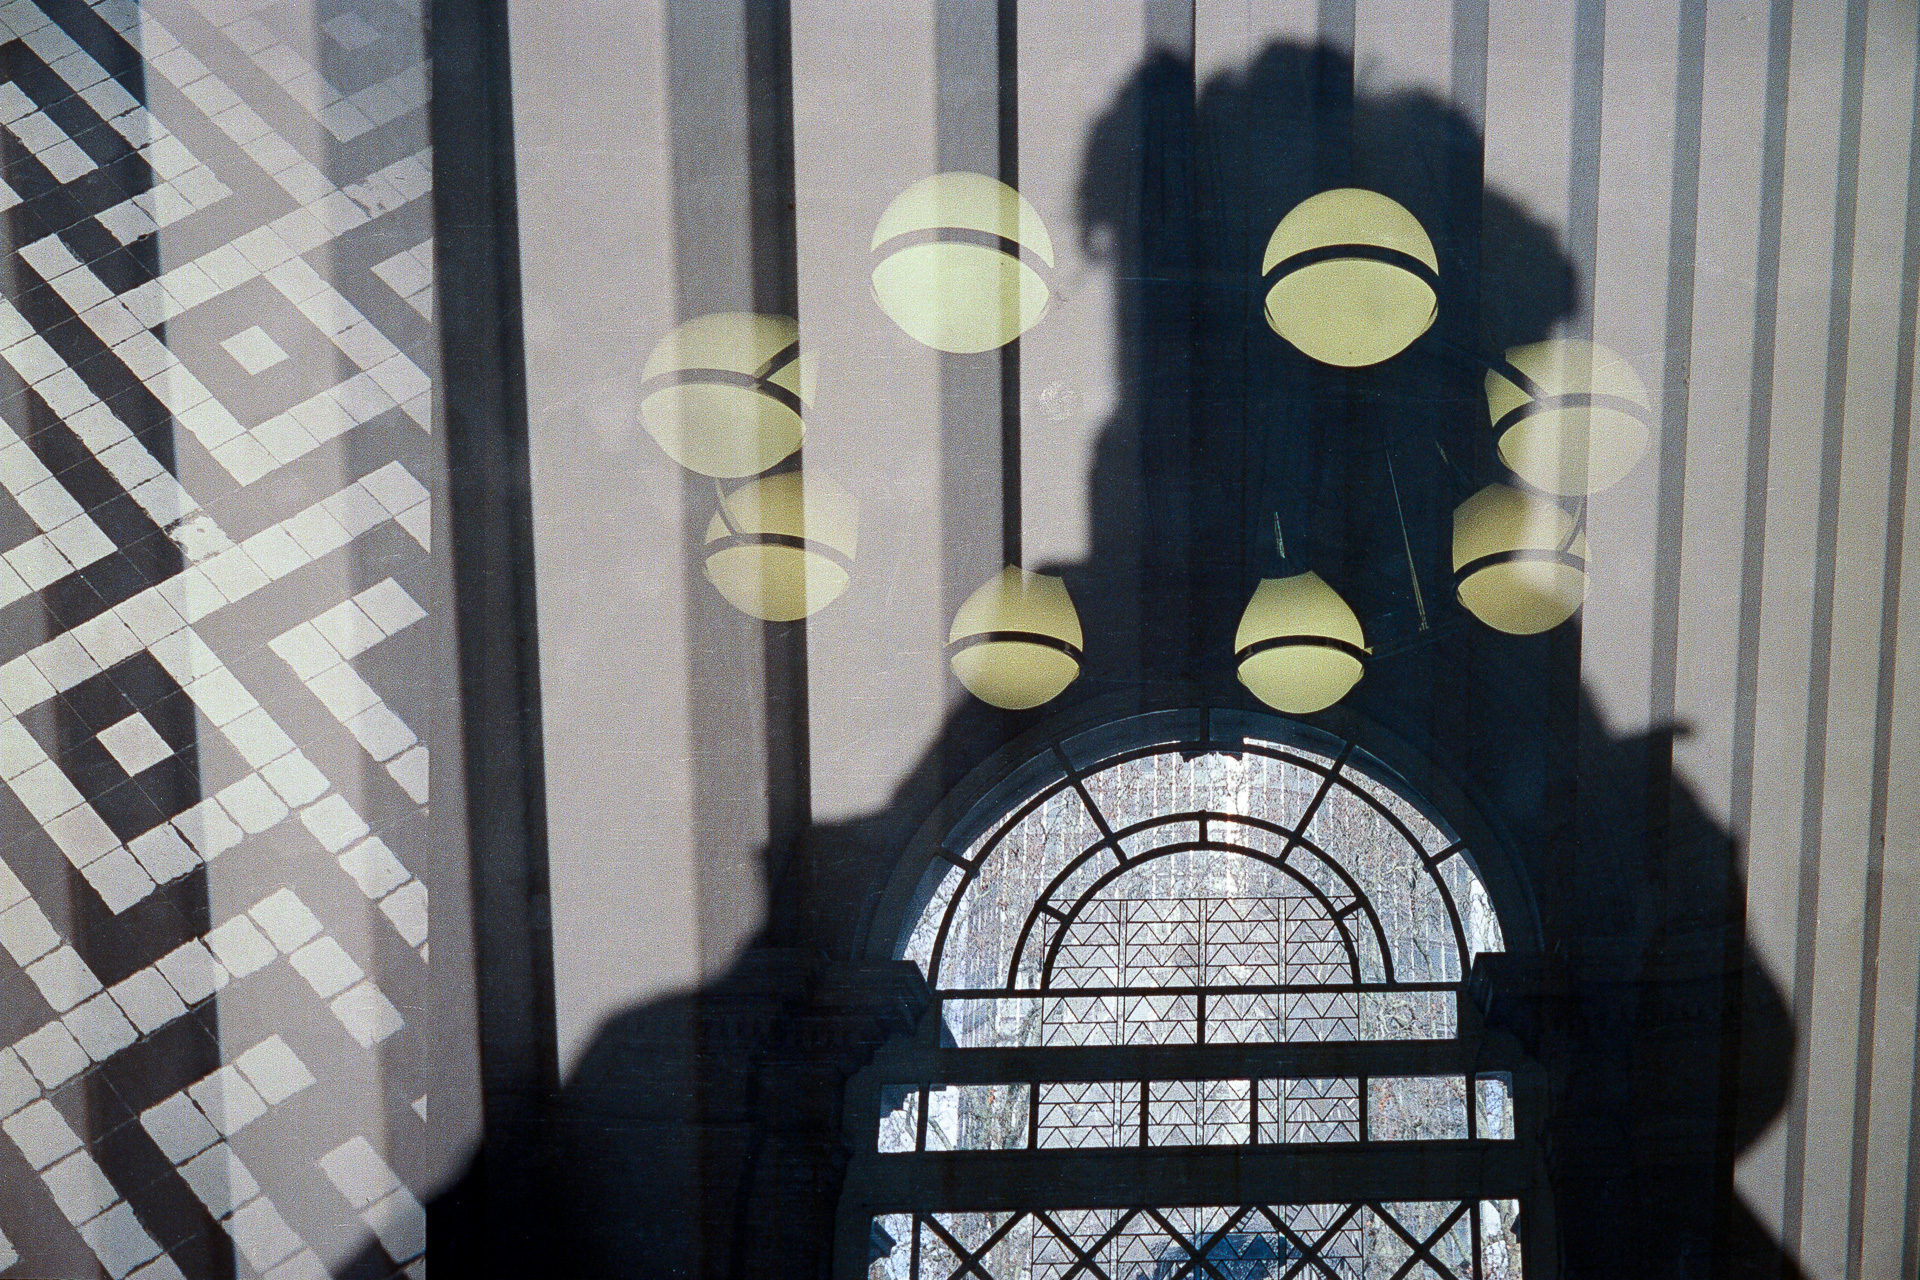
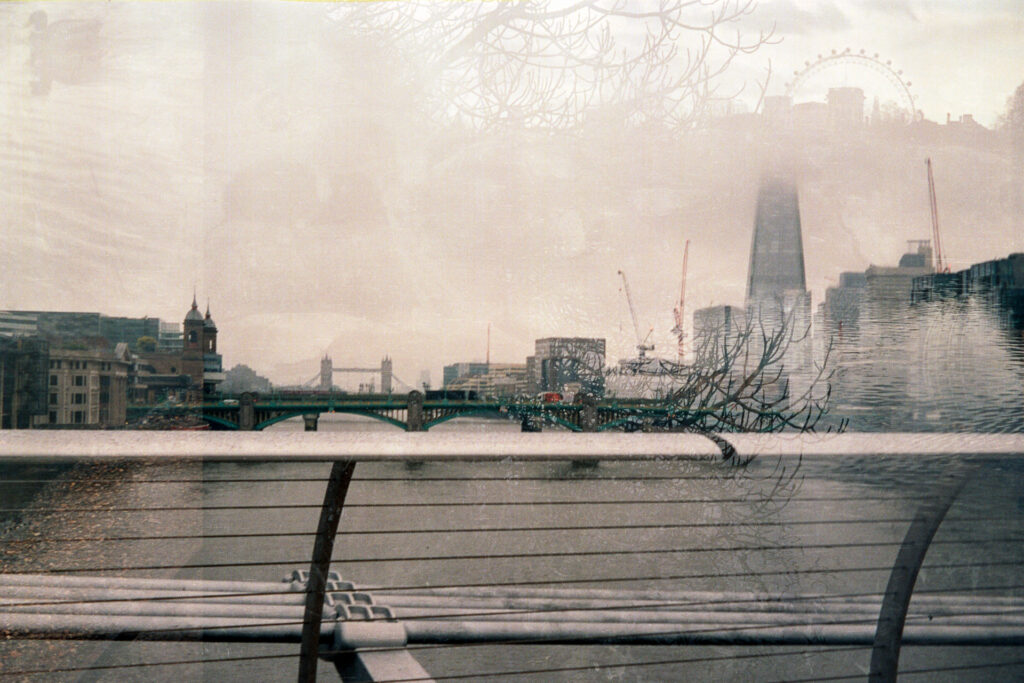
Take this shadow selfie: there’s no universe where I could have planned for that massive Art Deco light fixture in the Tate Britain lobby to crown my shadow like a halo. The first exposure captured my silhouette on a sunny afternoon. The second, shot days later in that grand museum entrance, dropped the chandelier and window right into place. Pure serendipity.

The Process
Here’s what I learned: most compact cameras auto-rewind completely, pulling the leader back into the canister. The Rollei 35B, being fully manual, lets me rewind the film and stop just before the leader disappears—which makes reloading far easier. That was one of the reasons I chose this camera; no faffing around fishing the leader back out with a retriever tool.
Reloading, I tried to position the film back exactly where it started. You can mark the film advance position with a Sharpie in advance, or line up the first sprocket hole with the first tooth on the advance winder. In retrospect, I think this is where I went wrong not noting the position of the take-up spool before winding film on.
But that misalignment became a feature rather than a bug—it created interesting overlaps where one image bleeds into the next.
Exposure Considerations
Double exposures mean double the light hitting the film, so technically you should underexpose each pass by one stop to compensate. Did I do this? Not really. My first pass was shot either inside a dimly lit gallery or outside on a grey, dank February day. I set the camera to ISO 400 and aimed for the fastest shutter speed and aperture combination I could manage—in a couple of cases that meant shooting wide open at 1/30th and f3.5, where camera shake was a bigger concern than exposure.
When the light did improve—yes, I actually caught some sun—I leaned on Vision 3 500T’s generous latitude and didn’t worry too much about my sloppy technique. It rewarded me with rich, saturated colours even when I overexposed by two or three stops.
What I Learned
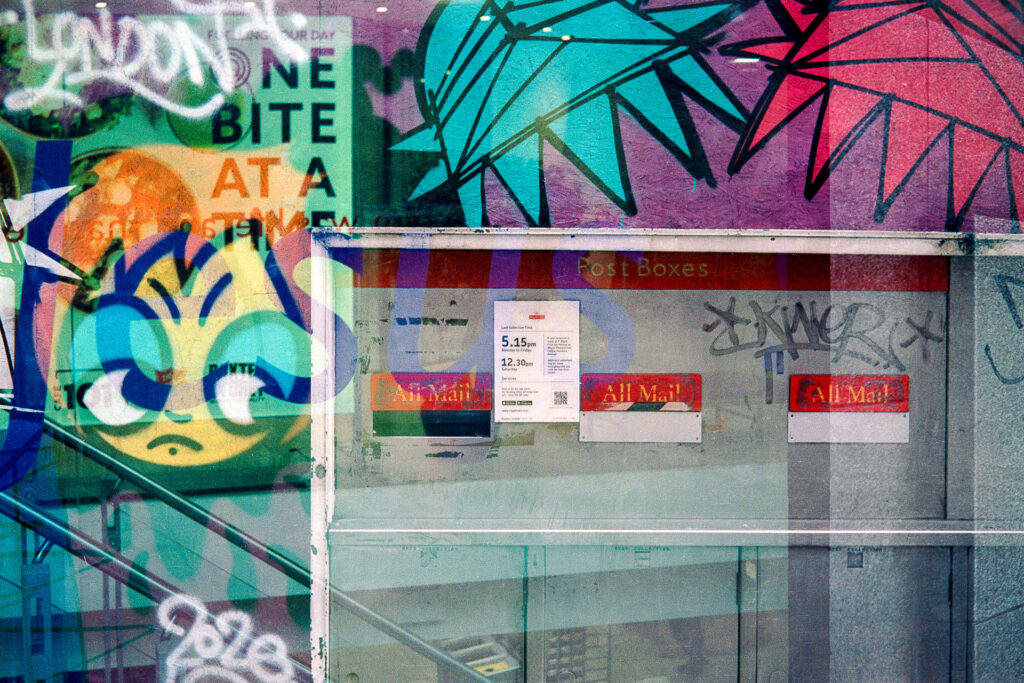
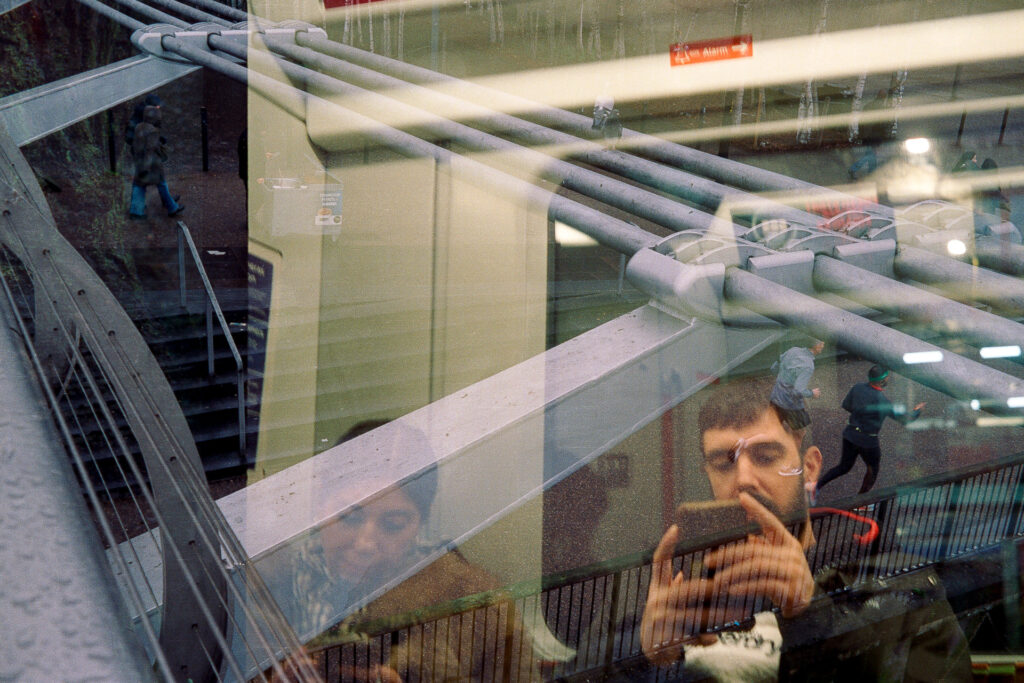
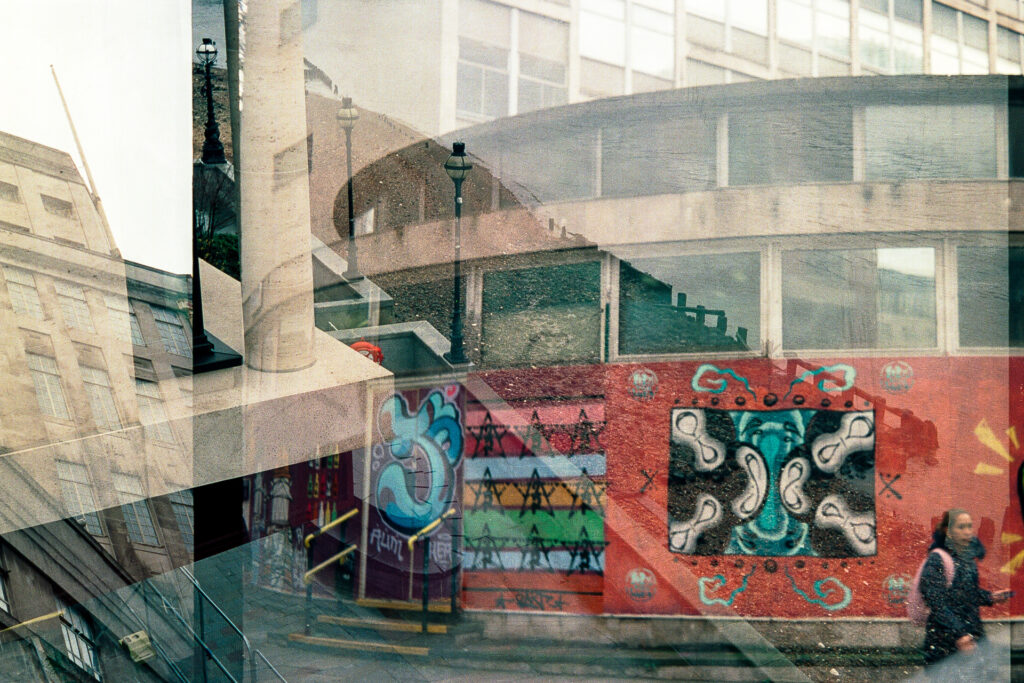
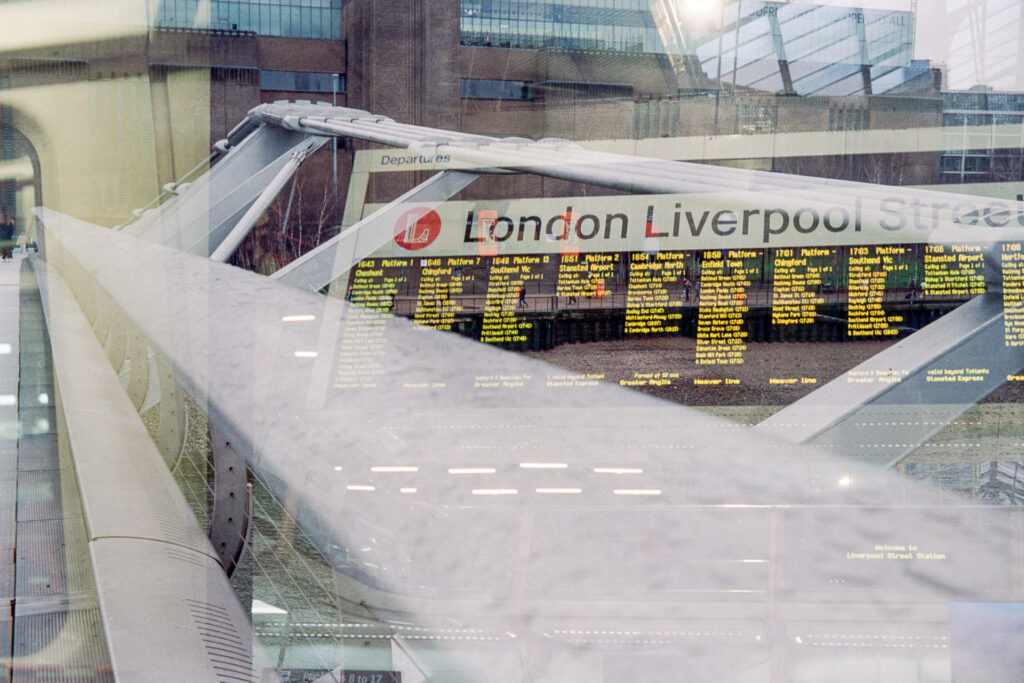
The misaligned frames created something I never anticipated: continuity across the roll. Because each exposure bled slightly into the next, the entire roll became one long, interconnected visual story rather than 36 discrete double exposures. This made deciding where to cut the negatives genuinely challenging. A portion of a building from one part of London reaches into a walkway beside the Thames in another part of the city. Two people on the tube, heads down in their phones, merge with joggers running along Bankside under the Millennium Bridge.
This taught me something about control—or rather, about letting go of it. We spend so much time in photography trying to nail the perfect exposure, the perfect composition, the decisive moment. Double exposures on a compact camera strip all that away. You shoot the first roll with only a vague memory of what you captured weeks ago, with no way to see through the viewfinder how the images will layer. You’re flying blind, trusting the process. And yet some of my favourite images of the year so far have come from this roll.
Practical Tips
If you want to try this:
Choose contrasting light conditions for each pass. Bold shapes and silhouettes layer beautifully over soft, diffused backgrounds, so consider pairing a high-contrast pass with a softer one.
Keep notes—or don’t. I didn’t, and it worked out fine, but if you want to be more deliberate, jot down what you shot on each frame. “Frame 8: bare tree branches against sky.” That way, on the second pass, you’ll have some idea of what you’re layering over.
Embrace failure. About a third of this roll isn’t great—muddy, soft, or compositionally messy. That’s the deal. The wins more than make up for the losses.
Try themed passes. One pass could be all nature, the second all urban architecture. Portraits over landscapes. Give yourself a conceptual thread to follow, even a loose one.

Closing Reflection
That February creative slump? Completely cured. There’s something about a genuine photographic experiment that wakes the eyes and resets everything.
I’m already planning my next double exposure roll—maybe with faster film, maybe with a camera that has even less precise film registration, maybe shooting the same locations on both passes to see how the frames overlap with themselves.
The Rollei 35B, that perfect little pocket camera designed for precise, considered single exposures, became a chaos engine. And I couldn’t be happier about it.
Share this post:


Comments
David Pauley on Double Exposures with a Rollei 35B
Comment posted: 28/03/2026
Brashtown Czar on Double Exposures with a Rollei 35B
Comment posted: 28/03/2026
Walter Reumkens on Double Exposures with a Rollei 35B
Comment posted: 28/03/2026